2013 MERCEDES-BENZ GLA SUV ignition
[x] Cancel search: ignitionPage 241 of 401
The values in the
From start
From startsubmenu are
calculated from the start of a journey whilst
the values in the From reset
From resetsubmenu are
calculated from the last time the submenu
was reset (Y page 238).
The From start
From start trip computer is automati-
cally reset when:
R the ignition has been switched off for more
than four hours.
R 999 hours have been exceeded.
R 9,999 kilometres have been exceeded.
The From reset
From reset trip computer is automati-
cally reset if the value exceeds 9,999 hours or 99,999 kilometres.
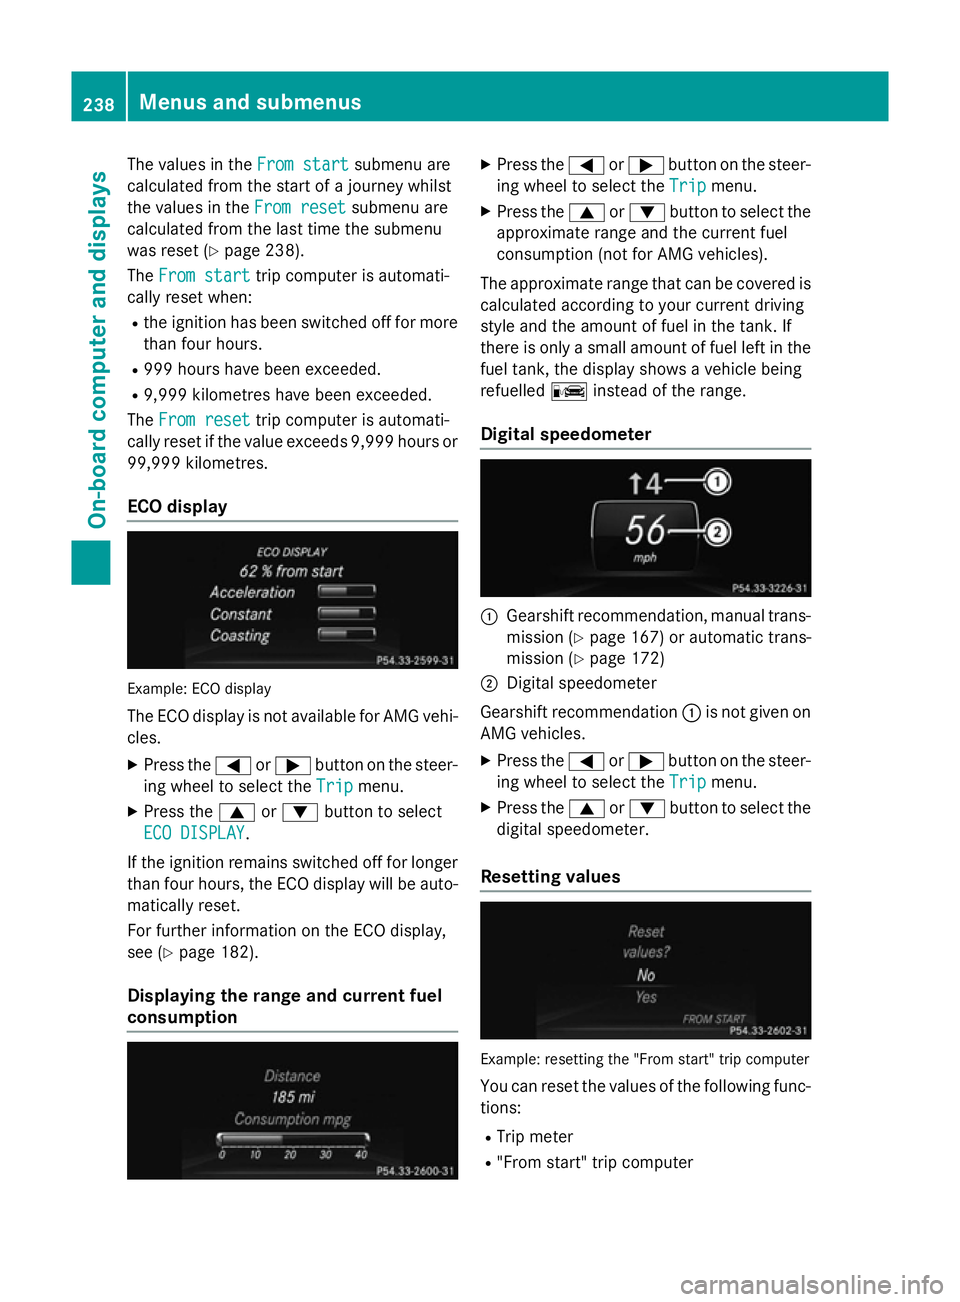
ECO display Example: ECO display
The ECO display is not available for AMG vehi-
cles.
X Press the =or; button on the steer-
ing wheel to select the Trip
Trip menu.
X Press the 9or: button to select
ECO DISPLAY
ECO DISPLAY.
If the ignition remains switched off for longer
than four hours, the ECO display will be auto- matically reset.
For further information on the ECO display,
see (Y page 182).
Displaying the range and current fuel
consumption X
Press the =or; button on the steer-
ing wheel to select the Trip Tripmenu.
X Press the 9or: button to select the
approximate range and the current fuel
consumption (not for AMG vehicles).
The approximate range that can be covered is
calculated according to your current driving
style and the amount of fuel in the tank. If
there is only a small amount of fuel left in the
fuel tank, the display shows a vehicle being
refuelled Cinstead of the range.
Digital speedometer :
Gearshift recommendation, manual trans-
mission (Y page 167) or automatic trans-
mission (Y page 172)
; Digital speedometer
Gearshift recommendation :is not given on
AMG vehicles.
X Press the =or; button on the steer-
ing wheel to select the Trip
Tripmenu.
X Press the 9or: button to select the
digital speedometer.
Resetting values Example: resetting the "From start" trip computer
You can reset the values of the following func-
tions:
R Trip meter
R "From start" trip computer 238
Menus and submenusOn-board computer and displays
Page 251 of 401
R
surround lighting: the exterior lighting
remains lit for 40 seconds after unlocking
with the key. If you start the engine, the
surround lighting is switched off and auto-
matic headlamp mode is activated
(Y page 121).
R exterior lighting delayed switch-off: the
exterior lighting remains lit for 60 seconds
after the engine is switched off. If you close all the doors and the tailgate, the exterior
lighting goes off after 15 seconds.
X Press the =or; button on the steer-
ing wheel to select the Settings
Settings menu.
X Press the :or9 button to select the
Lights Lights submenu.
X Press ato confirm.
X Press the :or9 button to select the
Surround lighting
Surround lighting function.
When the Surround lighting
Surround lighting function is
activated, the light cone and the area
around the vehicle are displayed in orange
in the multifunction display.
X Press the abutton to save the setting.
Deactivating delayed switch-off of the exte-
rior lighting temporarily:
X Before leaving the vehicle, turn the key to
position 0in the ignition lock.
X Turn the key to position 2in the ignition
lock.
The exterior lighting delayed switch-off is
deactivated.
Delayed switch-off of the exterior lighting is
reactivated the next time you start the
engine.
i Depending on your vehicle's equipment,
when the surround lighting and delayed
switch-off exterior lighting are on, the fol-
lowing light up:
R side lamps
R foglamps
R dipped-beam headlamps
R daytime driving lights
R surround lighting in the exterior mirrors Activating/deactivating the interior light-
ing delayed switch-off
If you activate the Lighting delayed sw.-
Lighting delayed sw.-
off off function, the interior lighting remains on
for 20 seconds after you remove the key from
the ignition lock.
X Press the =or; button on the steer-
ing wheel to select the Settings
Settings menu.
X Press the :or9 button to select the
Lights
Lights submenu.
X Press ato confirm.
X Press the :or9 button to select the
Lighting delayed sw.-off
Lighting delayed sw.-off function.
If the Lighting delayed sw.-off
Lighting delayed sw.-off func-
tion has been switched on, the vehicle inte-
rior is displayed in orange in the multifunc-
tion display.
X Press the abutton to save the setting.
Vehicle Setting permanent SPEEDTRONIC
You can set permanent SPEEDTRONIC using
the
Limit Limit speed
speed(winter
(winter tyres)
tyres) function.
X Press the =or; button on the steer-
ing wheel to select the Settings
Settingsmenu.
X Press the :or9 button to select the
Vehicle
Vehicle submenu.
X Press ato confirm.
X Press :or9 to select the Limit
Limit
speed (winter tyres)
speed (winter tyres) function.
You will see the current setting.
X Press ato confirm.
X Press the :or9 button to adjust
permanent SPEEDTRONIC in increments of
ten (240 km/h 240 km/h to160 km/h
160 km/h). The Off
Offset-
ting switches permanent SPEEDTRONIC
off.
X Press the abutton to store the entry.
For further information on permanent SPEED- TRONIC (Y page 193).248
Menus and submenusOn-board computer and displays
Page 254 of 401
Resetting to factory settings
X
Press the =or; button on the steer-
ing wheel to select the Settings
Settings menu.
X Press the :or9 button to select the
Factory setting
Factory setting submenu.
X Press ato confirm.
The Reset all settings?
Reset all settings? message
appears.
X Press the :or9 button to select No
No
or Yes
Yes.
X Press the abutton to confirm the selec-
tion.
If you have selected Yes Yes, the multifunction
display shows a confirmation message.
For safety reasons, not all functions are reset: the Limit
Limit speed
speed(winter
(winter tyres)
tyres)function
in permanent SPEEDTRONIC can only be set
in the Vehicle
Vehicle submenu. If you want to reset
the Daytime
Daytime driving
drivinglights
lightsin theLights
Lights
submenu, you must turn the key to position 1
in the ignition lock. AMG menu in AMG vehicles
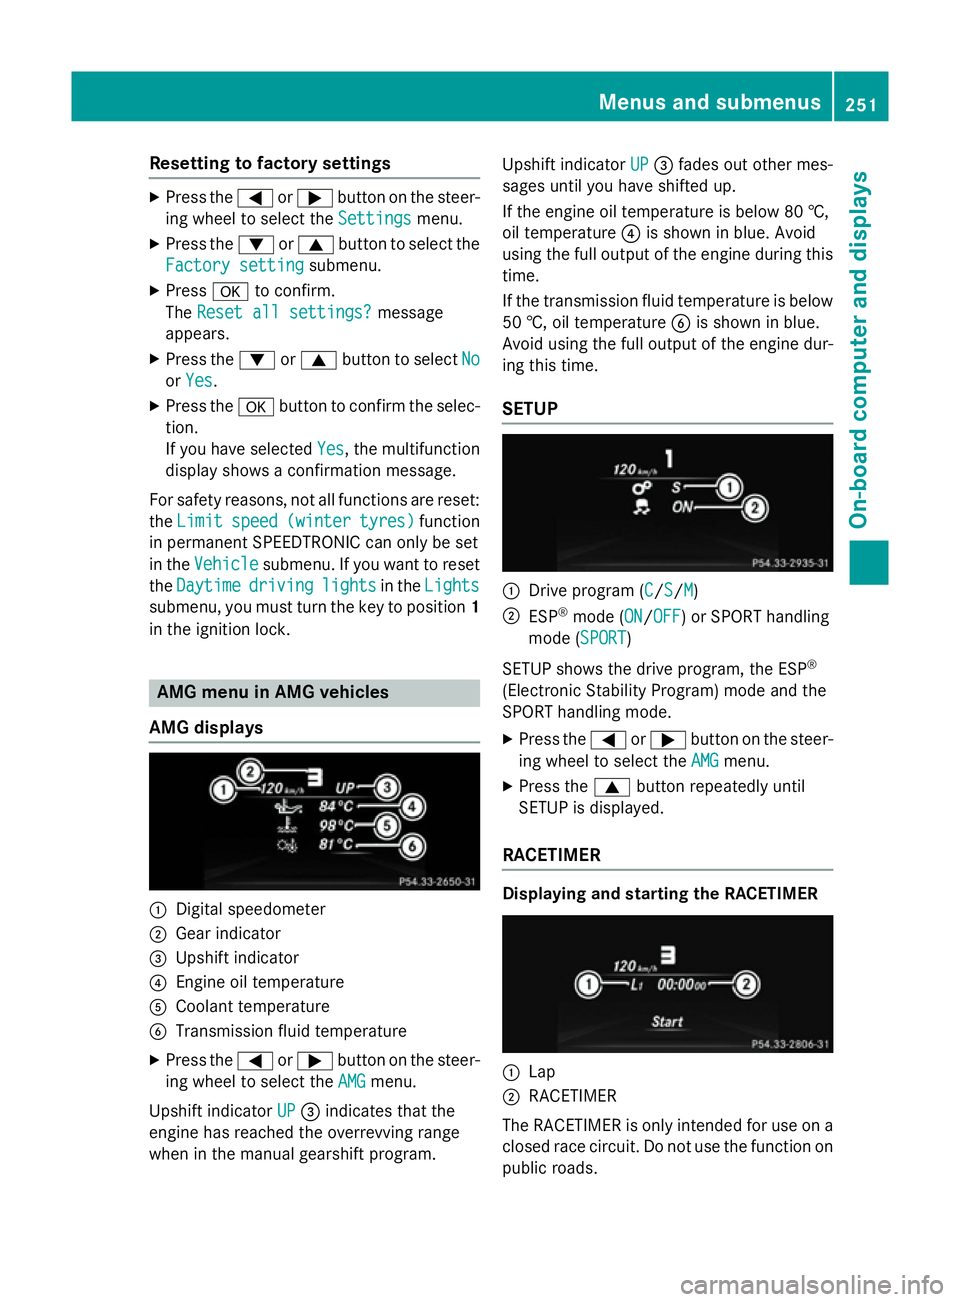
AMG displays :
Digital speedometer
; Gear indicator
= Upshift indicator
? Engine oil temperature
A Coolant temperature
B Transmission fluid temperature
X Press the =or; button on the steer-
ing wheel to select the AMG
AMG menu.
Upshift indicator UP
UP = indicates that the
engine has reached the overrevving range
when in the manual gearshift program. Upshift indicator
UP UP= fades out other mes-
sages until you have shifted up.
If the engine oil temperature is below 80 †,
oil temperature ?is shown in blue. Avoid
using the full output of the engine during this time.
If the transmission fluid temperature is below
50 †, oil temperature Bis shown in blue.
Avoid using the full output of the engine dur-
ing this time.
SETUP :
Drive program (C C/SS/MM)
; ESP ®
mode (ON ON/OFFOFF) or SPORT handling
mode (SPORT SPORT)
SETUP shows the drive program, the ESP ®
(Electronic Stability Program) mode and the
SPORT handling mode. X Press the =or; button on the steer-
ing wheel to select the AMG AMGmenu.
X Press the 9button repeatedly until
SETUP is displayed.
RACETIMER Displaying and starting the RACETIMER
:
Lap
; RACETIMER
The RACETIMER is only intended for use on a closed race circuit. Do not use the function on
public roads. Menus and submenus
251On-board computer and displays Z
Page 255 of 401
You can start the RACETIMER when the
engine is running or if the key is in position 2
in the ignition lock.
X Press the =or; button on the steer-
ing wheel to select the AMG
AMGmenu.
X Press the 9button repeatedly until the
RACETIMER is shown.
X To start: press the abutton to start the
RACETIMER.
Displaying the intermediate time X
Press the =or; button to select
Interm. Time
Interm. Time .
X Press ato confirm.
The intermediate time is displayed for five
seconds.
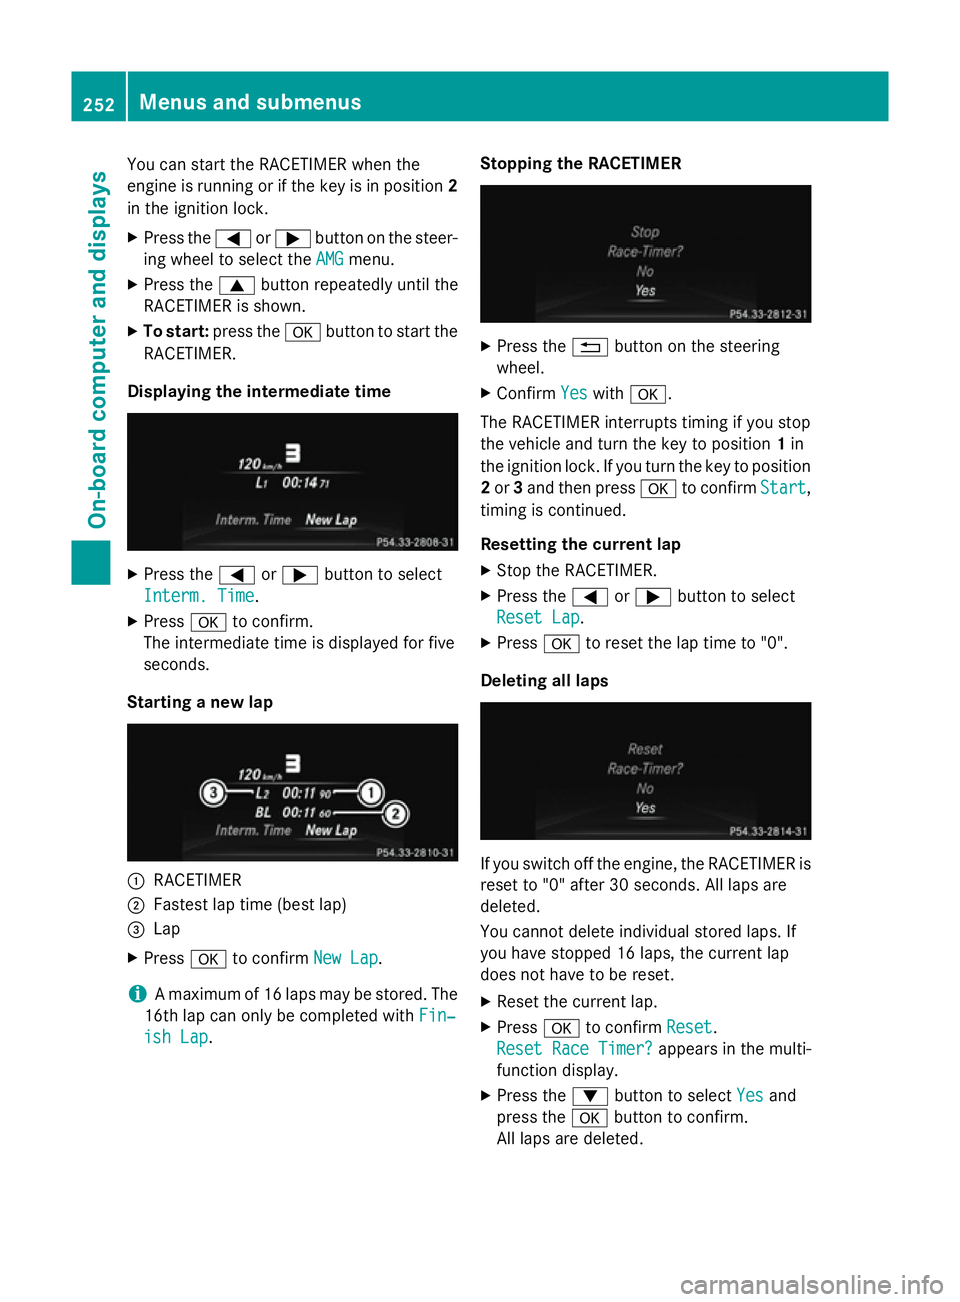
Starting a new lap :
RACETIMER
; Fastest lap time (best lap)
= Lap
X Press ato confirm New Lap New Lap.
i A maximum of 16 laps may be stored. The
16th lap can only be completed with Fin‐
Fin‐
ish Lap
ish Lap. Stopping the RACETIMER X
Press the %button on the steering
wheel.
X Confirm Yes
Yeswith a.
The RACETIMER interrupts timing if you stop
the vehicle and turn the key to position 1in
the ignition lock. If you turn the key to position
2 or 3and then press ato confirm Start Start,
timing is continued.
Resetting the current lap
X Stop the RACETIMER.
X Press the =or; button to select
Reset Lap Reset Lap.
X Press ato reset the lap time to "0".
Deleting all laps If you switch off the engine, the RACETIMER is
reset to "0" after 30 seconds. All laps are
deleted.
You cannot delete individual stored laps. If
you have stopped 16 laps, the current lap
does not have to be reset.
X Reset the current lap.
X Press ato confirm Reset
Reset.
Reset Race Timer? Reset Race Timer? appears in the multi-
function display.
X Press the :button to select Yes
Yes and
press the abutton to confirm.
All laps are deleted. 252
Menus and submenusOn-board computer and displays
Page 257 of 401
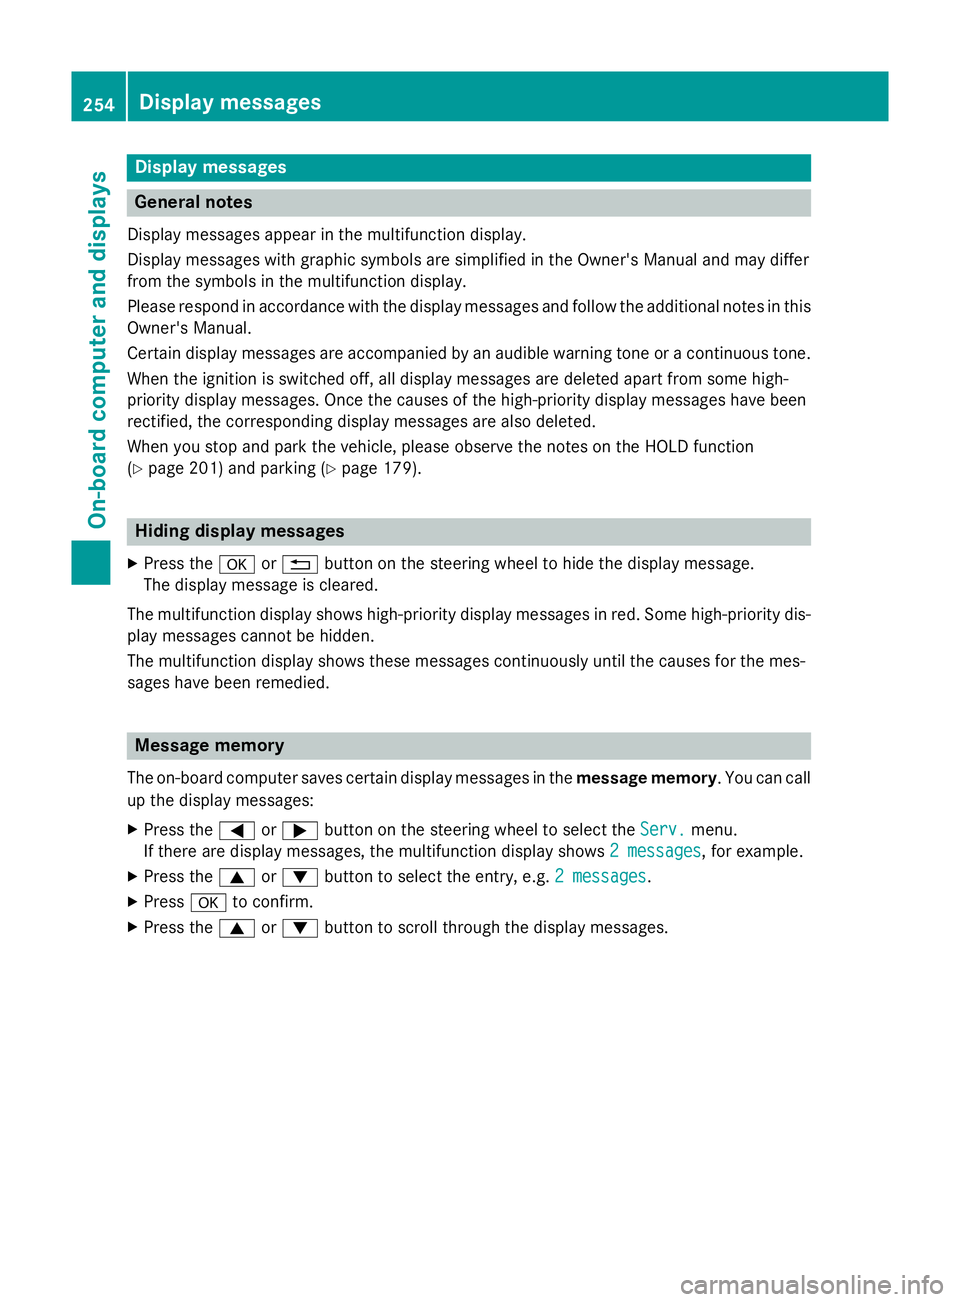
Display messages
General notes
Display messages appear in the multifunction display.
Display messages with graphic symbols are simplified in the Owner's Manual and may differ
from the symbols in the multifunction display.
Please respond in accordance with the display messages and follow the additional notes in this Owner's Manual.
Certain display messages are accompanied by an audible warning tone or a continuous tone.
When the ignition is switched off, all display messages are deleted apart from some high-
priority display messages. Once the causes of the high-priority display messages have been
rectified, the corresponding display messages are also deleted.
When you stop and park the vehicle, please observe the notes on the HOLD function
(Y page 201) and parking (Y page 179).Hiding display messages
X Press the aor% button on the steering wheel to hide the display message.
The display message is cleared.
The multifunction display shows high-priority display messages in red. Some high-priority dis- play messages cannot be hidden.
The multifunction display shows these messages continuously until the causes for the mes-
sages have been remedied. Message memory
The on-board computer saves certain display messages in the message memory. You can call
up the display messages:
X Press the =or; button on the steering wheel to select the Serv.
Serv. menu.
If there are display messages, the multifunction display shows 2 messages
2 messages, for example.
X Press the 9or: button to select the entry, e.g. 2 messages
2 messages.
X Press ato confirm.
X Press the 9or: button to scroll through the display messages. 254
Display
messagesOn-board computer and displays
Page 261 of 401

Display messages
Possible causes/consequences and
M
MSolutions !
Release parking Release parking
brake brake The red
!indicator lamp flashes and a warning tone sounds. A
condition for automatic release of the electric parking brake is not
fulfilled (Y page 180).
You are driving with the electric parking brake applied.
X Release the electric parking brake manually. The red
!indicator lamp flashes and a warning tone sounds.
You are making an emergency stop using the electric parking
brake (Y page 180). !
Parking brake See Parking brake See
Owner's Manual Owner's Manual The yellow
!warning lamp lights up.
The electric parking brake is malfunctioning.
To apply:
X Switch the ignition off.
X Press the electric parking brake handle for at least ten seconds.
X Vehicles with manual transmission: engage first gear.
X Vehicles with automatic transmission: shift the transmission
to P.
X Consult a qualified specialist workshop. The yellow
!warning lamp and the red !indicator lamp are
lit.
The electric parking brake is malfunctioning.
To release:
X Switch off the ignition and turn it back on.
X Release the electric parking brake manually.
or X Vehicles with manual transmission (automatic emergency
release): insert the seat belt in the belt buckle and accelerate
slightly more when pulling away.
X Vehicles with automatic transmission: release the electric
parking brake automatically (Y page 180).
If the electric parking brake still cannot be released: X Do not drive on.
X Consult a qualified specialist workshop. 258
Display
messagesOn-board computer and displays
Page 262 of 401
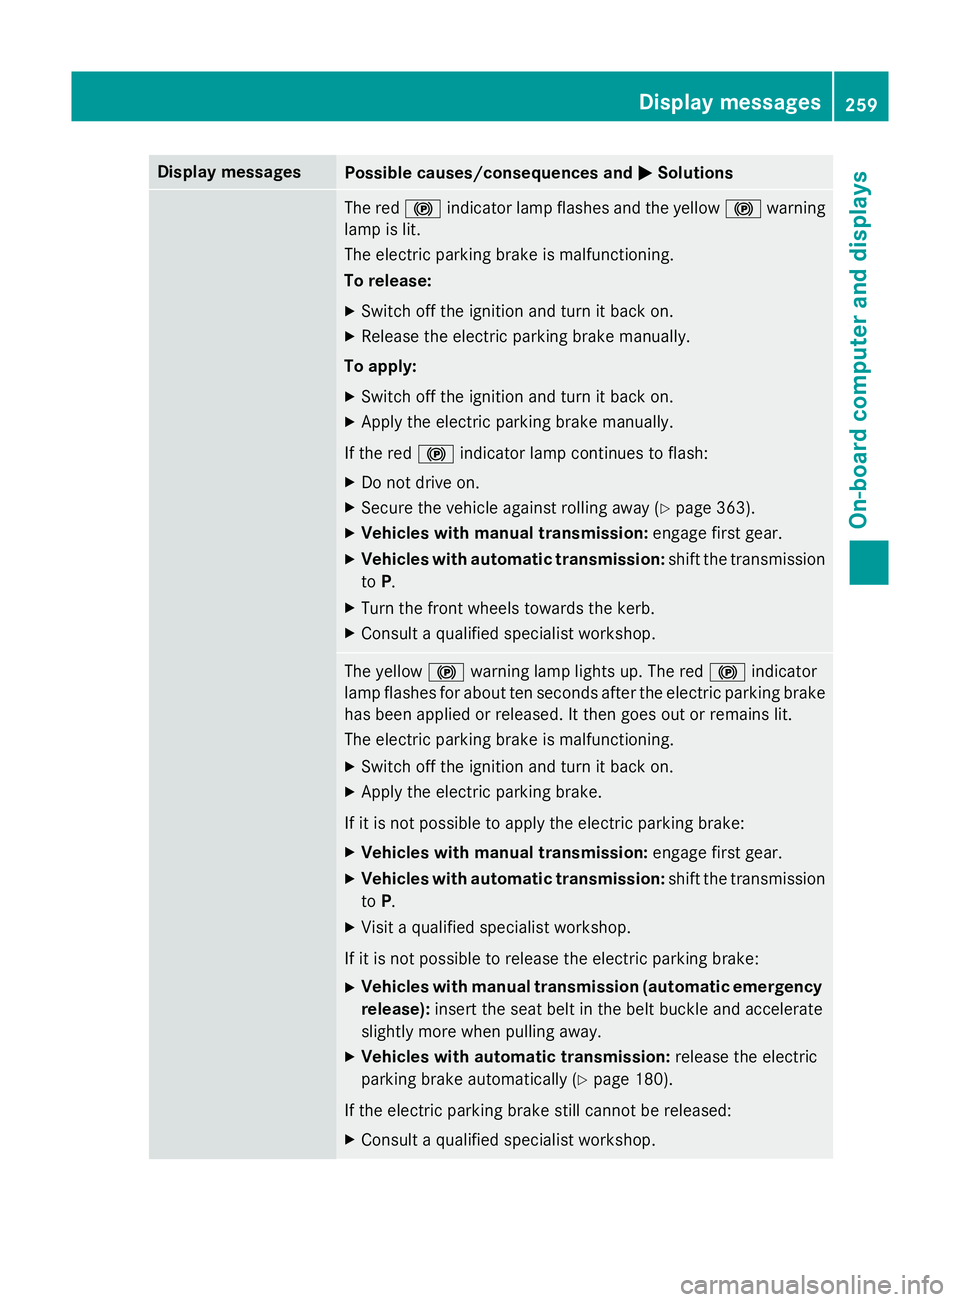
Display messages
Possible causes/consequences and
M
MSolutions The red
!indicator lamp flashes and the yellow !warning
lamp is lit.
The electric parking brake is malfunctioning.
To release:
X Switch off the ignition and turn it back on.
X Release the electric parking brake manually.
To apply:
X Switch off the ignition and turn it back on.
X Apply the electric parking brake manually.
If the red !indicator lamp continues to flash:
X Do not drive on.
X Secure the vehicle against rolling away (Y page 363).
X Vehicles with manual transmission: engage first gear.
X Vehicles with automatic transmission: shift the transmission
to P.
X Turn the front wheels towards the kerb.
X Consult a qualified specialist workshop. The yellow
!warning lamp lights up. The red !indicator
lamp flashes for about ten seconds after the electric parking brake
has been applied or released. It then goes out or remains lit.
The electric parking brake is malfunctioning.
X Switch off the ignition and turn it back on.
X Apply the electric parking brake.
If it is not possible to apply the electric parking brake:
X Vehicles with manual transmission: engage first gear.
X Vehicles with automatic transmission: shift the transmission
to P.
X Visit a qualified specialist workshop.
If it is not possible to release the electric parking brake:
X Vehicles with manual transmission (automatic emergency
release): insert the seat belt in the belt buckle and accelerate
slightly more when pulling away.
X Vehicles with automatic transmission: release the electric
parking brake automatically (Y page 180).
If the electric parking brake still cannot be released:
X Consult a qualified specialist workshop. Display
messages
259On-board computer and displays Z
Page 263 of 401

Display messages
Possible causes/consequences and
M
MSolutions The yellow
!warning lamp lights up. If you manually apply or
release the electric parking brake, the red !indicator lamp
flashes.
The electric parking brake is malfunctioning. It is not possible to
apply the electric parking brake manually.
X Vehicles with manual transmission: engage first gear.
X Vehicles with automatic transmission: shift the transmission
to P.
X Visit a qualified specialist workshop. !
Parking Parking
brake
brakeinop‐
inop‐
erative
erative The yellow
!warning lamp lights up. The red !indicator
lamp flashes for about ten seconds after the electric parking brake
has been applied or released. It then goes out or remains lit.
The electric parking brake is malfunctioning, e.g. because of over- voltage or undervoltage.
X Rectify the cause of the overvoltage or undervoltage, e.g. by
charging the battery or restarting the engine.
X Apply or release the electric parking brake.
If the electric parking brake still cannot be applied or released: X Switch off the ignition and turn it back on.
X Apply or release the electric parking brake.
If the electric parking brake still cannot be released: X Consult a qualified specialist workshop. The red
!indicator lamp flashes and the yellow !warning
lamp is lit.
It is not possible to apply the electric parking brake manually.
X Vehicles with manual transmission: engage first gear.
X Vehicles with automatic transmission: shift the transmission
to P.
X Visit a qualified specialist workshop. !
Turn on the igni‐ Turn on the igni‐
tion to release tion to release
the parking brake the parking brake The red
!indicator lamp lights up.
You attempted to release the electric parking brake while the igni-
tion was switched off.
X Turn the key to position 1in the ignition lock. 260
Display
messagesOn-board computer and displays