Page 14 of 373

Fitting a wheel
Fitting a wheel .............................. .339
Lowering the vehicle ..................... .339
Preparing the vehicle ..................... 336
Raising the vehicle ......................... 337
Removing a wheel .......................... 339
Securing the vehicle against roll-
ing away ........................................ 336
Flat tyre
MOExtended tyres ......................... 308
Preparing the vehicle ..................... 308
TIREFIT kit ...................................... 309
see Emergency spare wheel
Floormat ............................................. 287
Foglamps
Extended range .............................. 115
Switching on/off ........................... 111
Frequencies
Mobile phone ................................. 352
Two-way radio ................................ 352
Front foglamps
Display message ............................ 247
Fuel
Additives ........................................ 357
Consumption information .............. 358
Consumption statistics .................. 217
Displaying the current consump-
tion ................................................ 218
Displaying the range ..................... .218
E10 ................................................ 356
Fuel gauge ....................................... 30
Grade (petrol) ................................ 356
Important safety notes .................. 355
Low outside temperatures ............. 358
Notes for AMG vehicles ................. 357
Problem (malfunction) ................... 166
Quality (diesel )............................... 357
Refuelling ....................................... 163
Tank content/reserve fue l............. 355
Fuel filler flap
Opening ......................................... 164
Fuel filter (white display message) .. 251
Fuel level
Calling up the range (on-board
computer) ...................................... 218
Gaug e.............................................. 30
Fuel reserve
see Fuel Fuel tank
Capacity ........................................ 355
Problem (malfunction) ................... 166
Fuses
Allocation chart ............................. 323
Before changing ............................. 323
Fuse box in the engine compart-
ment .............................................. 323
Fuse box in the front-passenger
footwell .......................................... 323
Important safety notes .................. 322 G
Gear indicator (on-board com-
puter) .................................................. 231
Gear or selector lever (cleaning
instructions) ...................................... 302
Gearshift program
SETUP (on-board computer) .......... 231
Genuine Mercedes-Benz parts ........... 21
Glove compartment .......................... 277 H
Handbrake see Parking brake
Hazard warning lamps ...................... 113
Display message ............................ 262
Head restraints
Adjusting ....................................... 101
Adjusting (electrically) ................... 101
Adjusting (manually) ...................... 101
Adjusting (rear) .............................. 102
Fitting/removing (rear) .................. 102
Headlamp
Cleaning system (function) ............ 114
Cleaning system (notes) ................ 361
Headlamps
Misting up ...................................... 116
Topping up the cleaning system .... 295
see Automatic headlamp mode
Heating
see Climate control
High-pressure cleaners .................... 298
Hill start assist .................................. 149
HOLD function
Activating ....................................... 186 Index
11
Page 326 of 373

Before replacing a fuse
X Secure the vehicle against rolling away
(Y page 167).
X Switch off all electrical consumers.
X Turn the key to position 0in the ignition
lock and remove it (Y page 147). All indi-
cator lamps in the instrument cluster must be off.
The fuses are located in various fuse boxes:
R fuse box in the engine compartment on the
left-hand side of the vehicle, when viewed
in the direction of travel
R fuse box in the front-passenger footwell
The fuse allocation chart is on the fuse box in
the front-passenger footwell (Y page 323).Fuse box in the engine compartment
G
WARNING
When the bonnet is open, and the windscreen wipers are set in motion, you can be injured by
the wiper linkage. There is a risk of injury.
Always switch off the windscreen wipers and
the ignition before opening the bonnet.
! Make sure that no moisture can enter the
fuse box when the cover is open.
! When closing the cover, make sure that it
is lying correctly on the fuse box. Moisture
seeping in or dirt could otherwise impair
the operation of the fuses. X
Open the bonnet.
X Remove any existing moisture from the
fuse box using a dry cloth.
X To open: open clamps ;.
X Fold cover :up in the direction of the
arrow and remove it. X
To close: check whether the seal is lying
correctly in cover :.
X Insert cover :at the back into openings
= on the fuse box.
X Fold down cover :.
X Hook clamps ;into the fuse box and
close.
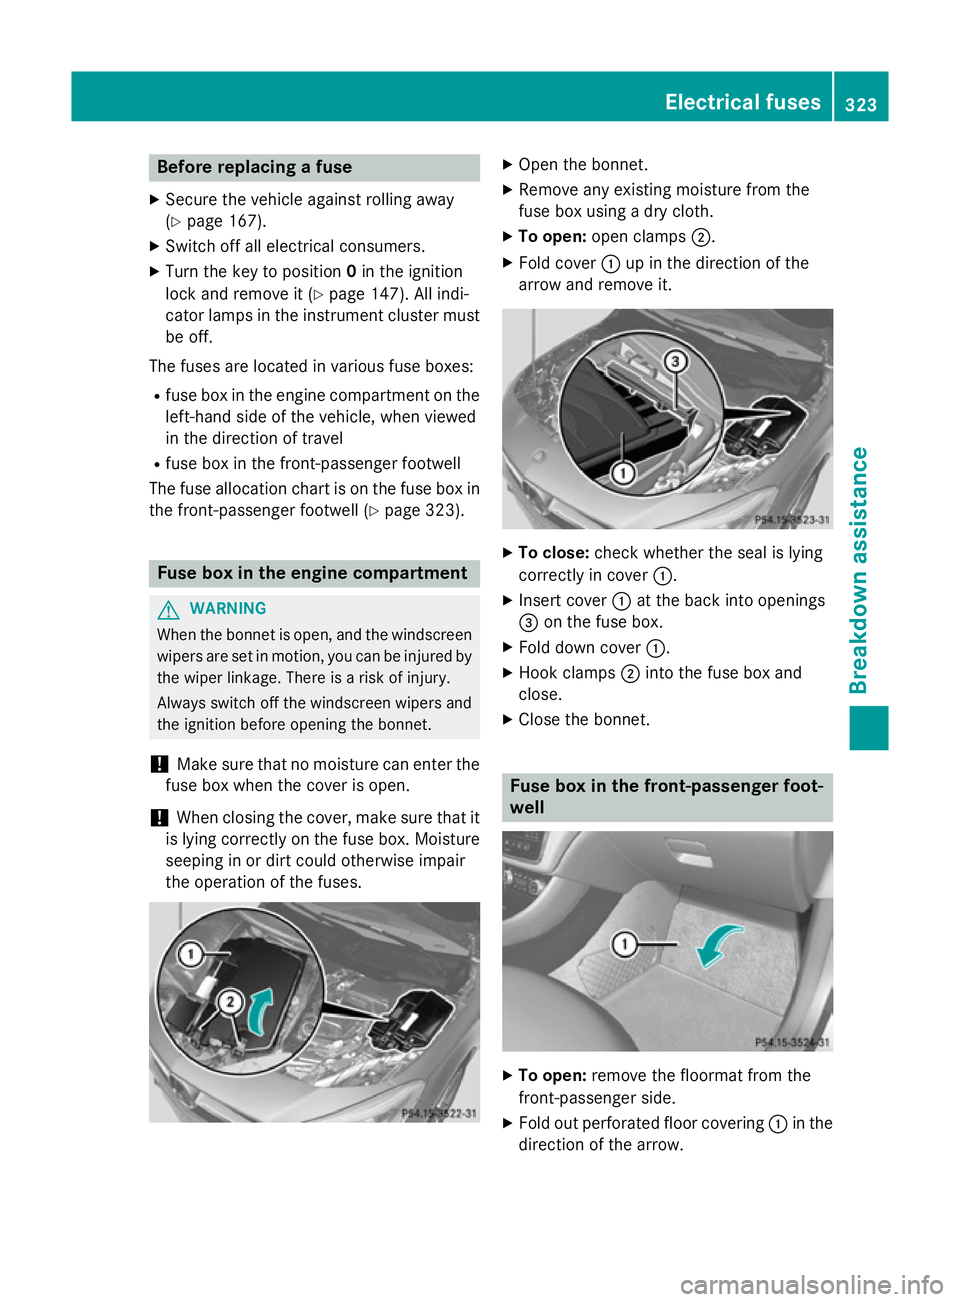
X Close the bonnet. Fuse box in the front-passenger foot-
well
X
To open: remove the floormat from the
front-passenger side.
X Fold out perforated floor covering :in the
direction of the arrow. Electrical fuses
323Breakdown assis tance Z
Page 327 of 373
X
To release cover =, press retaining
clamp ;.
X Fold out cover =in the direction of the
arrow to the catch.
X Remove cover =forwards.
i Fuse allocation chart
?is located on the
lower right-hand side of cover =.
X To close: insert cover =on the left-hand
side of the fuse box into the retainer.
Cover =engages in the retainers.
X Fold down cover =until clamps ;lock
audibly.
X Fold back perforated floor covering :.324
Electrical fusesBreakdown assistance