2013 MERCEDES-BENZ CLA COUPE oil pressure
[x] Cancel search: oil pressurePage 7 of 373

1, 2, 3 ...
4ETS see ETS/4ETS (Electronic Trac-
tion System)
4ETS (Electronic Traction System) .... 68
4MATIC (permanent all-wheel
drive)
Display message ............................ 260
4MATIC (permanent four-wheel
drive) .................................................. 188
12 V socket
see Sockets A
ABS (Anti-lock Braking System) Display message ............................ 235
Function/notes ................................ 64
Important safety notes .................... 64
Warning lamp .................................2 65
Activating/deactivating air-recir-
culation mode ................................... .136
Activating/deactivating cooling
with air dehumidification ................. 130
Active light function ......................... 114
Active Parking Assist
Cancelling ...................................... 196
Detecting parking spaces .............. 193
Display message ............................ 253
Exiting a parking space .................. 195
Function/notes ............................ .192
Important safety notes .................. 192
Parking .......................................... 194
Towing a trailer .............................. 197
ADAPTIVE BRAKE ................................. 72
Adaptive Brake Assist
Display message ............................ 243
Function/notes ................................ 66
Adaptive brake lights .......................... 68
Adaptive Highbeam Assist
Display message ............................ 248
Function/notes ............................ .115
Switching on/off ........................... 116
Additional speedometer ................... 226
Additives (engine oil) ........................ 360
Adjusting the headlamp range ......... 112
Air filter (white display message) .... 251Air pressure
see Tyre pressure
Air vents
Important safety notes .................. 143
Rear ............................................... 144
Setting .......................................... .143
Setting the centre air vents ........... 143
Setting the side air vents .............. .144
Air-conditioning system
see Climate control
Airbags
Front airbag (driver, front
passenger) ....................................... 43
Important safety guidelines ............. 42
Kneebag .......................................... .44
Sidebag ............................................ 44
Triggering ......................................... 41
Windowba g...................................... 45
Alarm
ATA (Anti-Theft Alarm system )......... 73
Switching off (ATA) .......................... 73
Switching the function on/off
(ATA) ................................................ 73
Alarm system
see ATA (Anti-Theft Alarm system)
Ambient lighting
Setting the brightness (on-board
computer) ...................................... 227
AMG
Performance Seat .......................... 103
AMG menu (on-board computer) ..... 231
Anti-glare film .................................... 287
Anti-lock braking system
see ABS (Anti-lock Braking System)
Anti-Theft Alarm system
see ATA (Anti-Theft Alarm system)
Aquaplaning ....................................... 172
Ashtray ............................................... 284
Assistance display (on-board com-
puter) .................................................. 223
Assistance menu (on-board com-
puter) .................................................. 223
ASSYST PLUS
Displaying a service message ........ 296
Hiding a service message .............. 296
Notes ............................................. 295 4
Index
Page 161 of 373
A Neutral
No power is transmitted from the
engine to the drive wheels.
Releasing the brakes will allow you
to move the vehicle freely, e.g. to
push it or tow it.
If ESP ®
is deactivated or faulty:
only shift the transmission to posi-
tion Nif the vehicle is in danger of
skidding, e.g. on icy roads.
When you switch off the engine, the automatic transmission automati-
cally shifts into neutral N.7 Drive
The automatic transmission
changes gear automatically. All
forward gears are available.
Driving tips
Changing gear The automatic transmission shifts to the indi-
vidual gears automatically when it is in trans-
mission position D. Gearshifting is deter-
mined by:
R the selected drive program (Y page 159)
R the position of the accelerator pedal
(Y page 158)
R the road speed
Accelerator pedal position Your style of driving influences how the auto-
matic transmission shifts gear:
R little throttle: early upshifts
R more throttle: late upshifts
Holding the vehicle stationary on uphill gradients G
WARNING
If the clutch overheats, the electronic man-
agement system is automatically deactivated. This interrupts the power transmission. The
vehicle may, for example, roll backwards on
gradients. There is a risk of an accident.
Never hold the vehicle stationary on uphill
gradients by depressing the accelerator.
The clutch may overheat if you hold the vehi- cle stationary on uphill gradients by depress-
ing the accelerator pedal. If the clutch over-
heats, a warning tone sounds.
All vehicles (except AMG vehicles): the
Stop
Stop vehicle vehicle Shift
Shiftto
toP
PLeave
Leave engine
engine
running
running display message appears in the mul-
tifunction display. You will only be able to
continue your journey once the clutch has
cooled down and the display message in the
multifunction display has disappeared.
AMG vehicles: theTrans. oil overhea‐ Trans. oil overhea‐
ted Drive on with care
ted Drive on with care display message
appears in the multifunction display.
Never hold the vehicle stationary on uphill
gradients by depressing the accelerator.
Instead, only ever hold the vehicle stationary on uphill gradients by:
R depressing the brake pedal
R activating the HOLD function
R engaging the electric parking brake
Kickdown AMG vehicles:
it is only possible to use kick-
down in temporary manual drive program M.
For further information on manual drive pro-
gram M(Y page 160).
Use kickdown for maximum acceleration.
X Depress the accelerator pedal beyond the
pressure point.
The transmission shifts to a lower gear
depending on the engine speed.
X Ease off the accelerator pedal once the
desired speed is reached.
The automatic transmission shifts back up. 158
Automatic transmissionDriving an
d parking
Page 297 of 373
Damage to the engine or exhaust system is
caused by the following:
R using engine oils and oil filters that have
not been specifically approved for the
service system
R changing the engine oil and oil filter after
missing the change interval required by
the service system
R using engine oil additives
! Do not add too much oil. Topping up with
too much engine oil can result in damage to
the engine or to the catalytic converter.
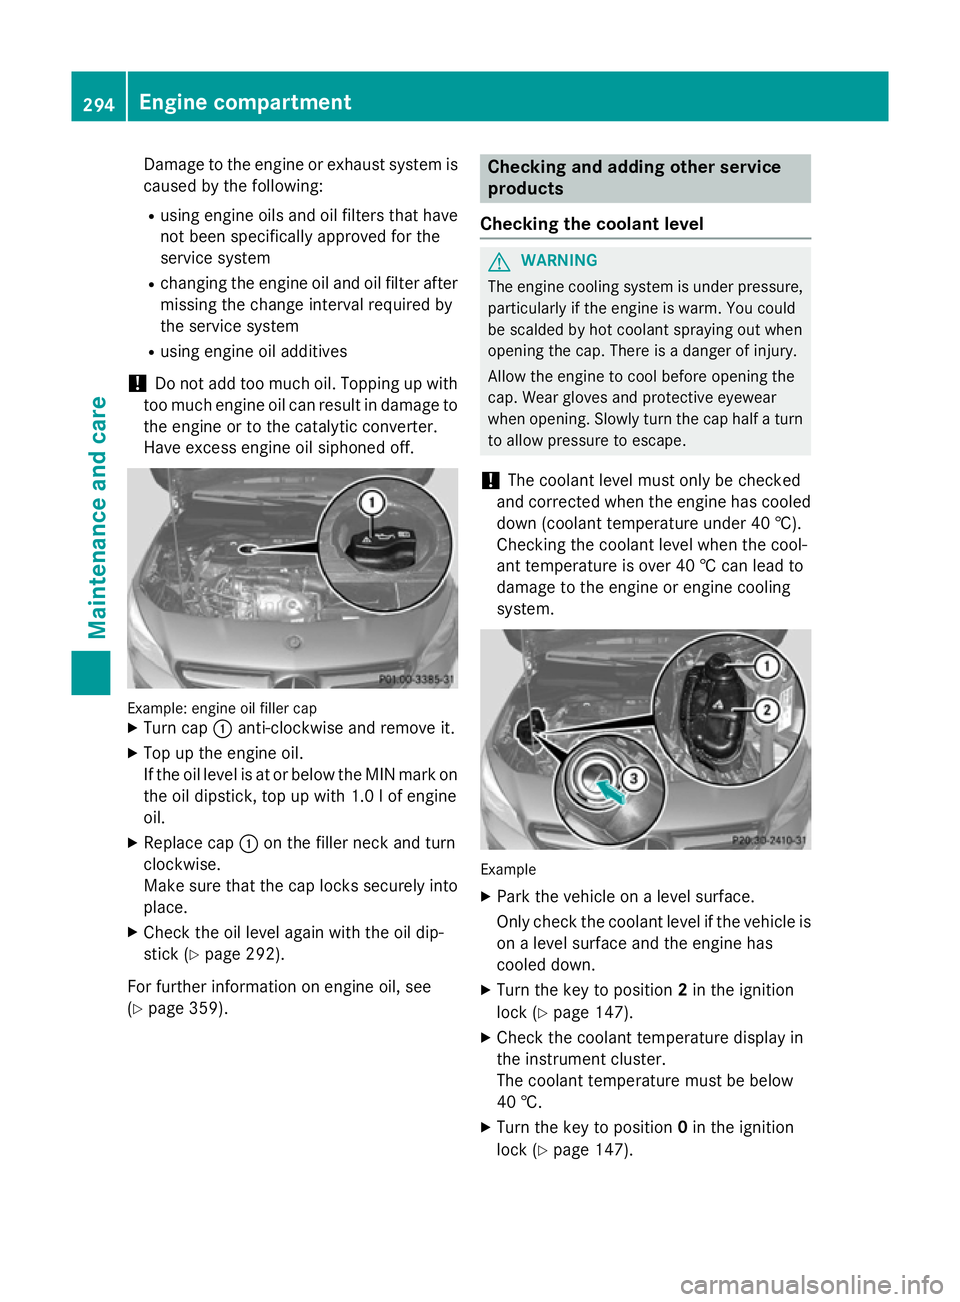
Have excess engine oil siphoned off. Example: engine oil filler cap
X Turn cap :anti-clockwise and remove it.
X Top up the engine oil.
If the oil level is at or below the MIN mark on
the oil dipstick, top up with 1.0 lof engine
oil.
X Replace cap :on the filler neck and turn
clockwise.
Make sure that the cap locks securely into place.
X Check the oil level again with the oil dip-
stick (Y page 292).
For further information on engine oil, see
(Y page 359). Checking and adding other service
products
Checking the coolant level G
WARNING
The engine cooling system is under pressure, particularly if the engine is warm. You could
be scalded by hot coolant spraying out when
opening the cap. There is a danger of injury.
Allow the engine to cool before opening the
cap. Wear gloves and protective eyewear
when opening. Slowly turn the cap half a turn
to allow pressure to escape.
! The coolant level must only be checked
and corrected when the engine has cooled
down (coolant temperature under 40 †).
Checking the coolant level when the cool-
ant temperature is over 40 † can lead to
damage to the engine or engine cooling
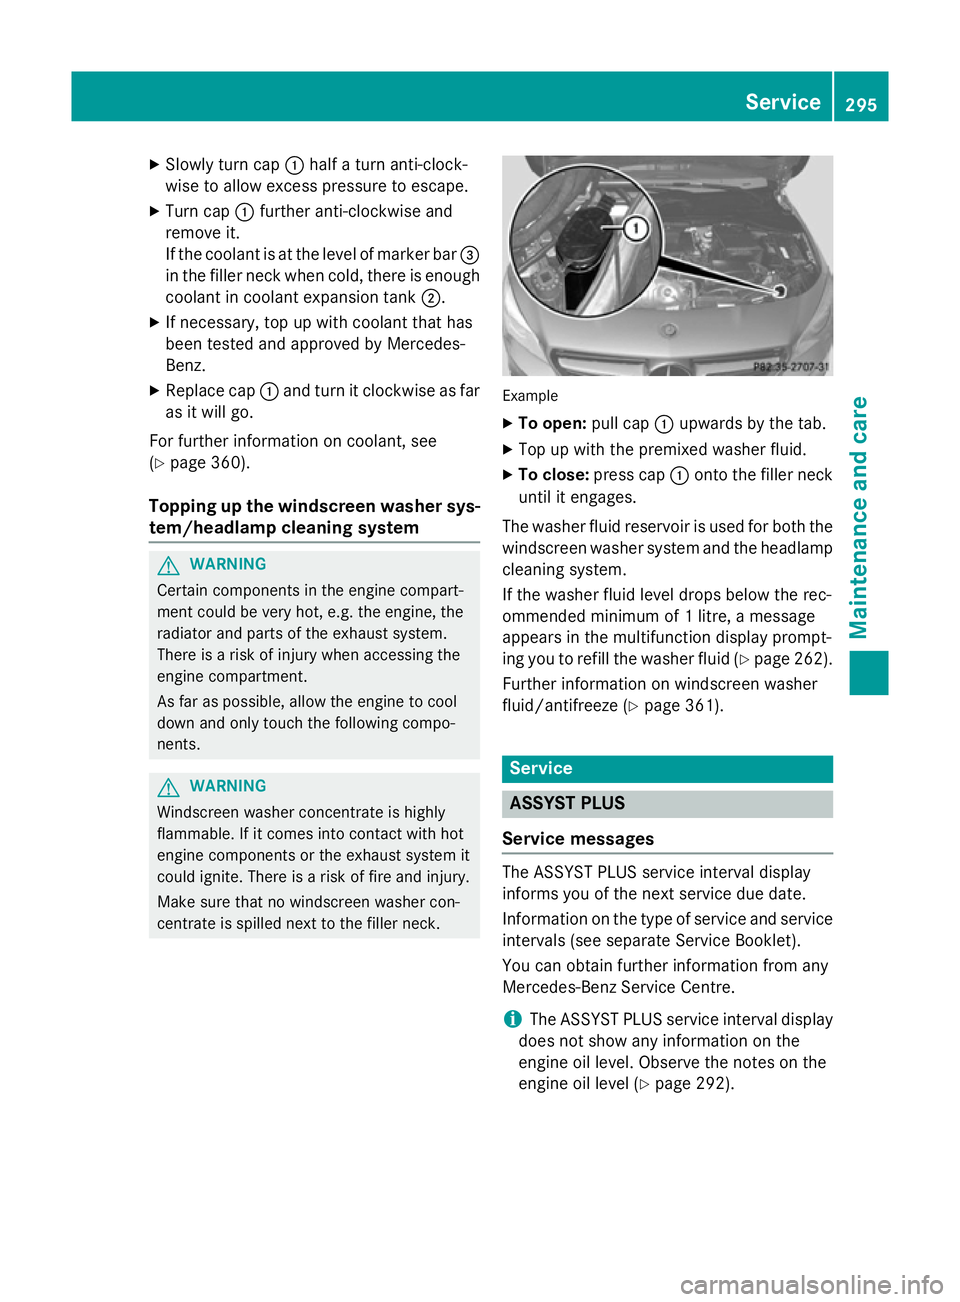
system. Example
X Park the vehicle on a level surface.
Only check the coolant level if the vehicle is
on a level surface and the engine has
cooled down.
X Turn the key to position 2in the ignition
lock (Y page 147).
X Check the coolant temperature display in
the instrument cluster.
The coolant temperature must be below
40 †.
X Turn the key to position 0in the ignition
lock (Y page 147). 294
Engine compartmentMaintenance and care
Page 298 of 373
X
Slowly turn cap :half a turn anti-clock-
wise to allow excess pressure to escape.
X Turn cap :further anti-clockwise and
remove it.
If the coolant is at the level of marker bar =
in the filler neck when cold, there is enough
coolant in coolant expansion tank ;.
X If necessary, top up with coolant that has
been tested and approved by Mercedes-
Benz.
X Replace cap :and turn it clockwise as far
as it will go.
For further information on coolant, see
(Y page 360).
Topping up the windscreen washer sys-
tem/headlamp cleaning system G
WARNING
Certain components in the engine compart-
ment could be very hot, e.g. the engine, the
radiator and parts of the exhaust system.
There is a risk of injury when accessing the
engine compartment.
As far as possible, allow the engine to cool
down and only touch the following compo-
nents. G
WARNING
Windscreen washer concentrate is highly
flammable. If it comes into contact with hot
engine components or the exhaust system it
could ignite. There is a risk of fire and injury.
Make sure that no windscreen washer con-
centrate is spilled next to the filler neck. Example
X To open: pull cap:upwards by the tab.
X Top up with the premixed washer fluid.
X To close: press cap :onto the filler neck
until it engages.
The washer fluid reservoir is used for both the
windscreen washer system and the headlamp cleaning system.
If the washer fluid level drops below the rec-
ommended minimum of 1 litre, a message
appears in the multifunction display prompt-
ing you to refill the washer fluid (Y page 262).
Further information on windscreen washer
fluid/antifreeze (Y page 361). Service
ASSYST PLUS
Service messages The ASSYST PLUS service interval display
informs you of the next service due date.
Information on the type of service and service
intervals (see separate Service Booklet).
You can obtain further information from any
Mercedes-Benz Service Centre.
i The ASSYST PLUS service interval display
does not show any information on the
engine oil level. Observe the notes on the
engine oil level (Y page 292). Service
295Maintenance and care Z
Page 304 of 373
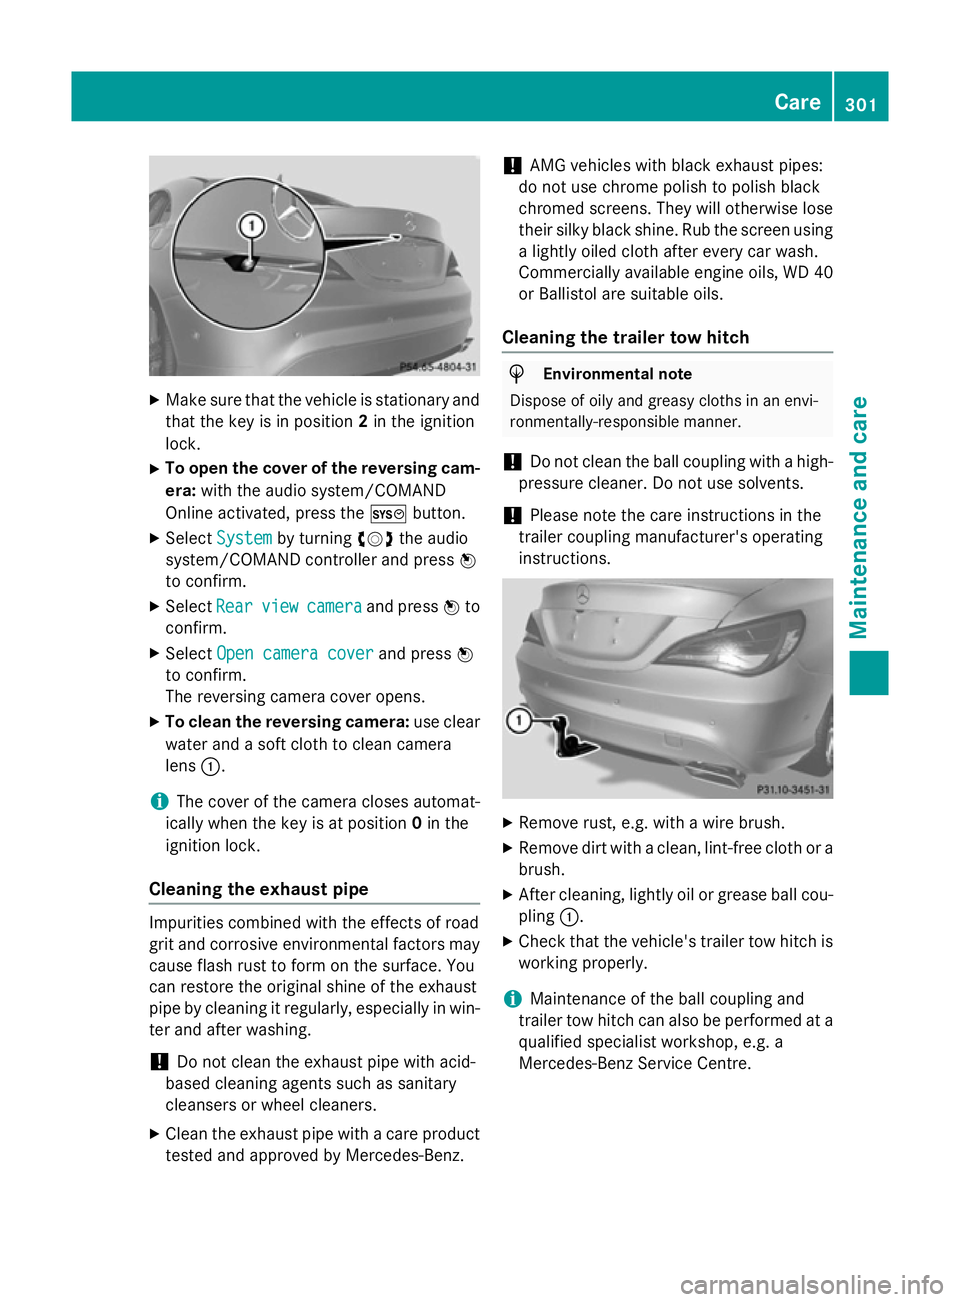
X
Make sure that the vehicle is stationary and
that the key is in position 2in the ignition
lock.
X To open the cover of the reversing cam-
era: with the audio system/COMAND
Online activated, press the Wbutton.
X Select System
System by turning cVdthe audio
system/COMAND controller and press W
to confirm.
X Select Rear
Rear view
viewcamera
camera and press Wto
confirm.
X Select Open camera cover
Open camera cover and pressW
to confirm.
The reversing camera cover opens.
X To clean the reversing camera: use clear
water and a soft cloth to clean camera
lens :.
i The cover of the camera closes automat-
ically when the key is at position 0in the
ignition lock.
Cleaning the exhaust pipe Impurities combined with the effects of road
grit and corrosive environmental factors may cause flash rust to form on the surface. You
can restore the original shine of the exhaust
pipe by cleaning it regularly, especially in win- ter and after washing.
! Do not clean the exhaust pipe with acid-
based cleaning agents such as sanitary
cleansers or wheel cleaners.
X Clean the exhaust pipe with a care product
tested and approved by Mercedes-Benz. !
AMG vehicles with black exhaust pipes:
do not use chrome polish to polish black
chromed screens. They will otherwise lose
their silky black shine. Rub the screen using
a lightly oiled cloth after every car wash.
Commercially available engine oils, WD 40
or Ballistol are suitable oils.
Cleaning the trailer tow hitch H
Environmental note
Dispose of oily and greasy cloths in an envi-
ronmentally-responsible manner.
! Do not clean the ball coupling with a high-
pressure cleaner. Do not use solvents.
! Please note the care instructions in the
trailer coupling manufacturer's operating
instructions. X
Remove rust, e.g. with a wire brush.
X Remove dirt with a clean, lint-free cloth or a
brush.
X After cleaning, lightly oil or grease ball cou-
pling :.
X Check that the vehicle's trailer tow hitch is
working properly.
i Maintenance of the ball coupling and
trailer tow hitch can also be performed at a qualified specialist workshop, e.g. a
Mercedes-Benz Service Centre. Care
301Maintenance and care Z
Page 305 of 373
Interior care
Cleaning the display !
For cleaning, do not use any of the fol-
lowing:
R alcohol-based thinner or petrol
R abrasive cleaning agents
R commercially-available household clean-
ing agents
These may damage the display surface. Do not put pressure on the display surface
when cleaning. This could lead to irrepara-
ble damage to the display.
X Before cleaning the display, make sure that
it is switched off and has cooled down.
X Clean the display surface using a commer-
cially available microfibre cloth and
TFT/LCD display cleaner.
X Dry the display surface using a dry micro-
fibre cloth.
Cleaning the plastic trim G
WARNING
Care products and cleaning agents containing solvents can cause surfaces in the cockpit to
become porous. This could result in plastic
parts breaking away when the airbags are
deployed. There is a danger of injury.
Do not use care products and cleaning agents containing solvents to clean the cockpit.
! Do not affix the following to plastic surfa-
ces:
R stickers
R films
R scented oil bottles or similar items
You could otherwise damage the plastic.
! Do not allow cosmetics, insect repellent
or sunscreen to come in contact with the
plastic trim. This maintains the high-quality look of the surfaces. X
Wipe the plastic trim with a damp, lint-free
cloth, e.g. a microfibre cloth.
X Heavy soiling: use car care and cleaning
products recommended and approved by
Mercedes-Benz.
The surface may change colour tempora-
rily. Wait until the surface is dry again.
Cleaning the steering wheel and gear or selector lever X
Thoroughly wipe with a damp cloth or use
leather care agents that have been recom-
mended and approved by Mercedes-Benz.
Cleaning wooden trim and trim ele-
ments !
Do not use solvent-based cleaning agents
such as tar remover, wheel cleaners, pol-
ishes or waxes. There is otherwise a risk of damaging the surface.
X Wipe the wooden trim and trim elements
with a damp, lint-free cloth, e.g. a microfi-
bre cloth.
X Heavy soiling: use car care and cleaning
products recommended and approved by
Mercedes-Benz.
Cleaning the seat covers General notes
! Do not use microfibre cloths to clean gen-
uine leather, artificial leather or DINAMICA
covers. If used often, these can damage the cover.
i Note that regular care is essential to
make sure that the appearance and com-
fort of the covers are retained over time.
Genuine leather seat covers
Leather is a natural product.
It has natural surface properties, e.g.: R unevenness in structure
R marks caused by growth and injury
R subtle colour differences 302
CareMaintenance and care
Page 339 of 373
Direction of rotation
Tyres with a specified direction of rotation
have additional benefits, e.g. if there is a risk of aquaplaning. You will only gain these ben-
efits if the correct direction of rotation is
observed.
An arrow on the sidewall of the tyre indicates
its correct direction of rotation. Storing wheels
Store wheels that are not being used in a cool, dry and preferably dark place. Protect the
tyres against oil, grease, petrol and diesel. Cleaning the wheels
G
WARNING
The water jet of circular-jet nozzles (dirt grind- ers) can cause damage not visible from the
outside to tyres or chassis components. Com-
ponents damaged in this way can unexpect-
edly fail. There is a risk of an accident.
Do not use high-pressure cleaners with circu-
lar-jet nozzles to clean the vehicle. Have dam- aged tyres or chassis components replaced
immediately. Fitting a wheel
Preparing the vehicle X
Stop the vehicle on solid, non-slippery and
level ground.
X Apply the electric parking brake manually
(Y page 168).
X Move the front wheels to the straight-
ahead position.
X Vehicles with manual transmission:
depress the clutch pedal fully and engage
first or reverse gear.
X Vehicles with automatic transmission:
move the DIRECT SELECT lever to P.
X Switch off the engine. X
Remove the key from the ignition lock.
X If a trailer is coupled to the vehicle, uncou-
ple it.
X If included in the vehicle equipment,
remove the tyre-change tool kit from the
vehicle.
X Secure the vehicle to prevent it from rolling
away.
i Apart from certain country-specific varia-
tions, vehicles are not equipped with a tyre-
change tool kit. For information on which
tools are required to perform a wheel
change on your vehicle, consult a
Mercedes-Benz Service Centre.
Necessary wheel-changing tools may
include, for example:
R jack
R wheel chock
R wheel wrench
Securing the vehicle against rolling
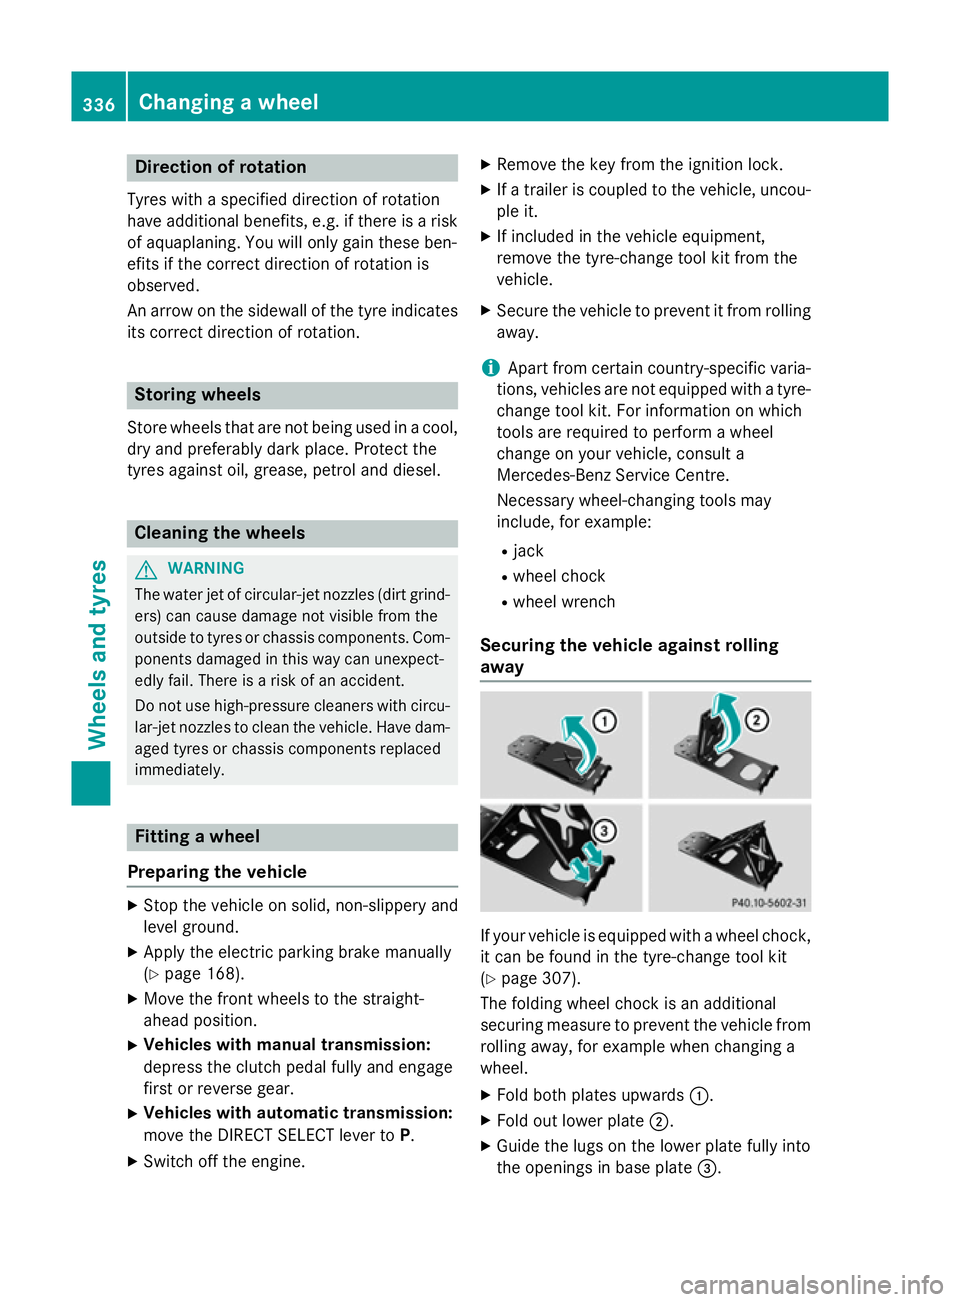
away If your vehicle is equipped with a wheel chock,
it can be found in the tyre-change tool kit
(Y page 307).
The folding wheel chock is an additional
securing measure to prevent the vehicle from
rolling away, for example when changing a
wheel.
X Fold both plates upwards :.
X Fold out lower plate ;.
X Guide the lugs on the lower plate fully into
the openings in base plate =.336
Changing a wheelWheels and
tyres