2013 LINCOLN MKZ HYBRID child seat
[x] Cancel search: child seatPage 30 of 475

The lower anchors at the center of the
second row rear seat are spaced 18
inches (46 centimeters) apart. A child
seat with rigid LATCH attachments
cannot be installed at the center
seating position. LATCH compatible
child seats (with attachments on belt
webbing) can only be used at this
seating position provided that the
child seat manufacturer's instructions
permit use with the anchor spacing
stated. Do not attach a child seat to
any lower anchor if an adjacent child
seat is attached to that anchor.
Each time you use the safety seat,
check that the seat is properly
attached to the lower anchors and
tether anchor, if applicable. Tug the
child seat from side to side and
forward and back where it is secured
to your vehicle. The seat should move
less than one inch when you do this
for a proper installation.
If the safety seat is not anchored
properly, the risk of a child being
injured in a crash greatly increases.
Combining Safety Belt and LATCH
Lower Anchors for Attaching Child
Safety Seats
When used in combination, either the
safety belt or the LATCH lower
anchors may be attached first,
provided a proper installation is
achieved. Attach the tether strap
afterward, if included with the child
seat.
Using Tether Straps Many forward-facing child
safety seats include a tether
strap which extends from the
back of the child safety seat and
hooks to an anchoring point called the
top tether anchor. Tether straps are
available as an accessory for many
older safety seats.
Contact the manufacturer of your
child seat for information about
ordering a tether strap, or to obtain a
longer tether strap if the tether strap
on your safety seat does not reach the
appropriate top tether anchor in your
vehicle.
Once the child safety seat has been
installed using either the safety belt,
the lower anchors of the LATCH
system, or both, you can attach the
top tether strap.
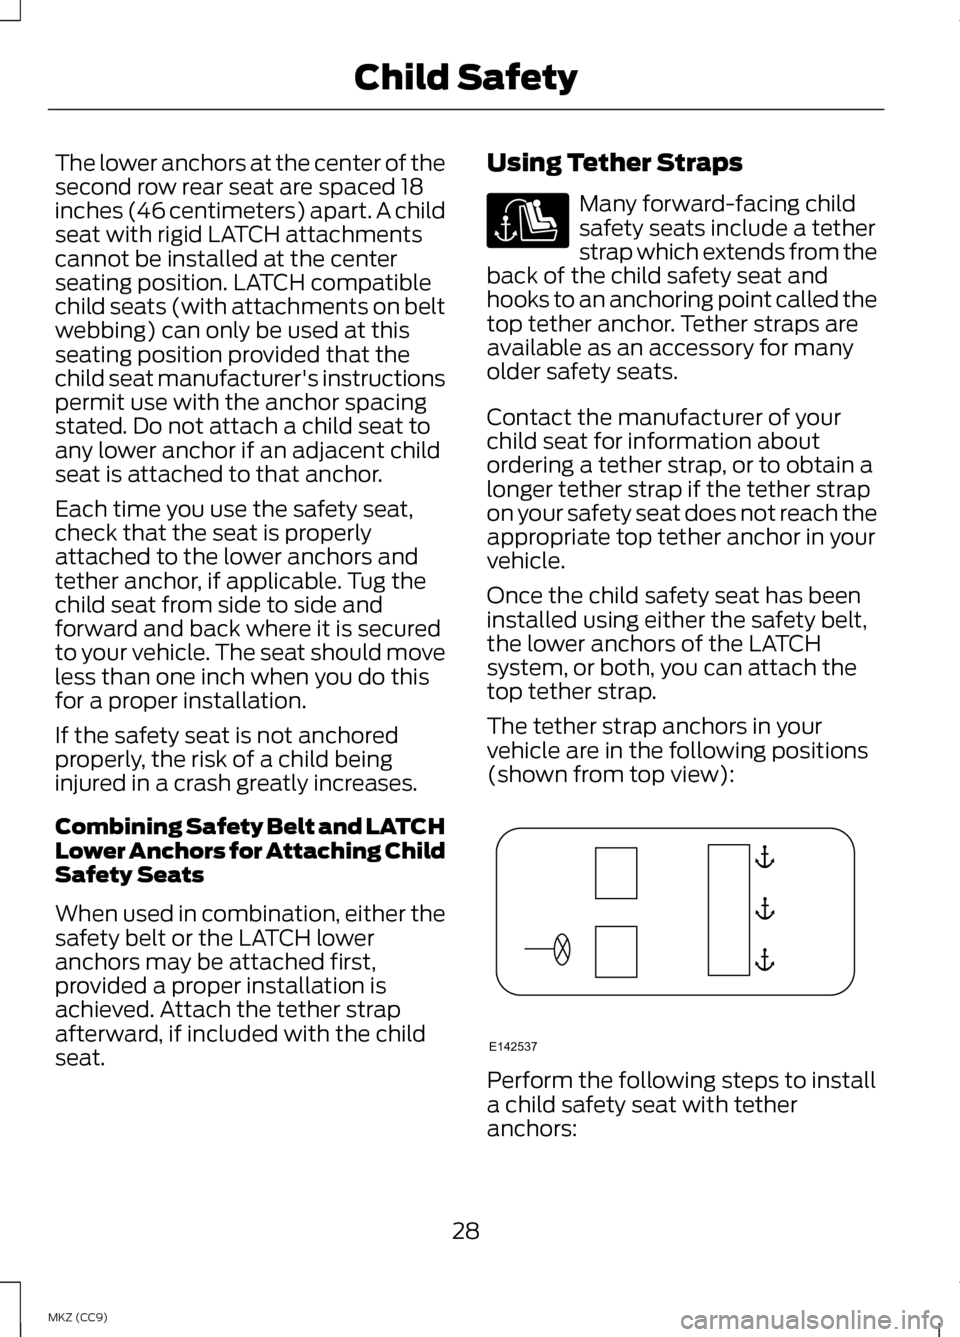
The tether strap anchors in your
vehicle are in the following positions
(shown from top view): Perform the following steps to install
a child safety seat with tether
anchors:
28
MKZ (CC9) Child Safety E142537
Page 31 of 475

Note:
If you install a child seat with
rigid LATCH attachments, do not
tighten the tether strap enough to lift
the child seat off your vehicle seat
cushion when the child is seated in it.
Keep the tether strap just snug without
lifting the front of the child seat.
Keeping the child seat just touching
your vehicle seat gives the best
protection in a severe crash.
1. Route the child safety seat tether strap over the back of the seat. For
outboard seating positions, route
the tether strap under the head
restraint and between the head
restraint posts. For the center
seating positions, route the tether
strap over the top of the head
restraint. If needed, the head
restraints can also be removed. 2. Locate the correct anchor for the
selected seating position, then
open the tether anchor cover. 3.
Clip the tether strap to the anchor
as shown.
4. Tighten the child safety seat tether
strap according to the
manufacturer's instructions.
If your child restraint system is
equipped with a tether strap, and the
child restraint manufacturer
recommends its use, Ford also
recommends its use.
CHILD SAFETY LOCKS
When these locks are set, the rear
doors cannot be opened from the
inside. The childproof locks are located on
the rear edge of each rear door and
must be set separately for each door.
Left-Hand Side
Turn counterclockwise to lock and
clockwise to unlock.
29
MKZ (CC9) Child SafetyE144274 E144275 E112197
Page 33 of 475

PRINCIPLE OF OPERATION
WARNINGS
Always drive and ride with your
seat back upright and the lap
belt snug and low across the hips. To reduce the risk of injury, make
sure children sit where they can
be properly restrained. Never let a passenger hold a
child on his or her lap while your
vehicle is moving. The passenger
cannot protect the child from injury in
a crash. All occupants of your vehicle,
including the driver, should
always properly wear their safety
belts, even when an airbag
supplemental restraint system is
provided. Failure to properly wear your
safety belt could seriously increase
the risk of injury or death. It is extremely dangerous to ride
in a cargo area, inside or outside
of a vehicle. In a crash, people riding
in these areas are more likely to be
seriously injured or killed. Do not allow
people to ride in any area of your
vehicle that is not equipped with seats
and safety belts. Be sure everyone in
your vehicle is in a seat and using a
safety belt properly. In a rollover crash, an unbelted
person is significantly more likely
to die than a person wearing a safety
belt. WARNINGS
Each seating position in your
vehicle has a specific safety belt
assembly which is made up of one
buckle and one tongue that are
designed to be used as a pair. 1) Use
the shoulder belt on the outside
shoulder only. Never wear the
shoulder belt under the arm. 2) Never
swing the safety belt around your neck
over the inside shoulder. 3) Never use
a single belt for more than one person. When possible, all children 12
years old and under should be
properly restrained in a rear seating
position. Failure to follow this could
seriously increase the risk of injury or
death. Safety belts and seats can
become hot in a vehicle that has
been closed up in sunny weather; they
could burn a small child. Check seat
covers and buckles before you place
a child anywhere near them. Front and rear seat occupants,
including pregnant women,
should wear safety belts for optimum
protection in an accident. All seating positions in your vehicle
have lap and shoulder safety belts. All
occupants of the vehicle should
always properly wear their safety
belts, even when an airbag
supplemental restraint system is
provided.
31
MKZ (CC9) Safety Belts
Page 35 of 475

Restraint of Pregnant Women
WARNING
Always ride and drive with your
seatback upright and the safety
belt properly fastened. The lap portion
of the safety belt should fit snug and
be positioned low across the hips. The
shoulder portion of the safety belt
should be positioned across the chest.
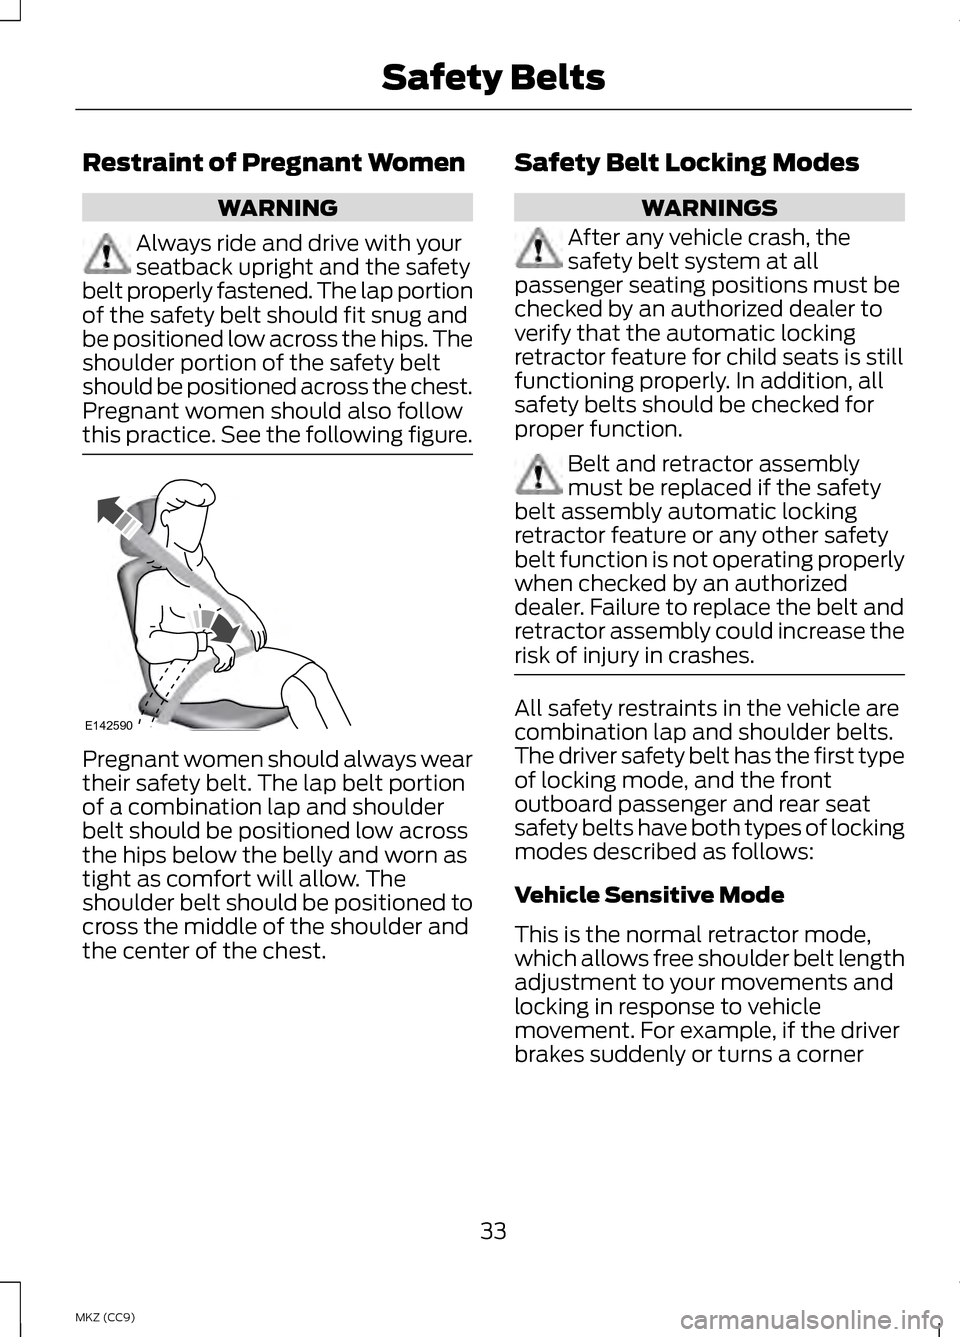
Pregnant women should also follow
this practice. See the following figure. Pregnant women should always wear
their safety belt. The lap belt portion
of a combination lap and shoulder
belt should be positioned low across
the hips below the belly and worn as
tight as comfort will allow. The
shoulder belt should be positioned to
cross the middle of the shoulder and
the center of the chest. Safety Belt Locking Modes WARNINGS
After any vehicle crash, the
safety belt system at all
passenger seating positions must be
checked by an authorized dealer to
verify that the automatic locking
retractor feature for child seats is still
functioning properly. In addition, all
safety belts should be checked for
proper function. Belt and retractor assembly
must be replaced if the safety
belt assembly automatic locking
retractor feature or any other safety
belt function is not operating properly
when checked by an authorized
dealer. Failure to replace the belt and
retractor assembly could increase the
risk of injury in crashes. All safety restraints in the vehicle are
combination lap and shoulder belts.
The driver safety belt has the first type
of locking mode, and the front
outboard passenger and rear seat
safety belts have both types of locking
modes described as follows:
Vehicle Sensitive Mode
This is the normal retractor mode,
which allows free shoulder belt length
adjustment to your movements and
locking in response to vehicle
movement. For example, if the driver
brakes suddenly or turns a corner
33
MKZ (CC9) Safety BeltsE142590
Page 36 of 475

sharply, or the vehicle receives an
impact of approximately 5 mph (8
km/h) or more, the combination
safety belts will lock to help reduce
forward movement of the driver and
passengers.
In addition, the retractor is designed
to lock if the webbing is pulled out too
quickly. If this occurs, let the belt
retract slightly and pull webbing out
again in a slow and controlled
manner.
Automatic Locking Mode
In this mode, the shoulder belt is
automatically pre-locked. The belt
will still retract to remove any slack in
the shoulder belt. The automatic
locking mode is not available on the
driver safety belt.
When to Use the Automatic
Locking Mode
This mode should be used any time a
child safety seat, except a booster, is
installed in passenger front or rear
seating positions. Children 12 years old
and under should be properly
restrained in a rear seating position
whenever possible. See Child Safety
(page 15).
How to Use the Automatic Locking
Mode
Non-inflatable safety belts 1. Buckle the combination lap and
shoulder belt.
2. Grasp the shoulder portion and pull downward until the entire belt
is pulled out. As the belt retracts,
you will hear a clicking sound. This
indicates the safety belt is now in
the automatic locking mode.
Rear outboard inflatable safety
belts (second row only –if
equipped) 1. Buckle the combination lap and
shoulder belt.
2. Grasp the lap portion of the belt and pull upward until the entire
belt is pulled out.
34
MKZ (CC9) Safety BeltsE142591 E146363
Page 37 of 475

3. Allow the belt to retract. As the
belt retracts, you will hear a
clicking sound. This indicates the
safety belt is now in the automatic
locking mode.
How to Disengage the Automatic
Locking Mode
Unbuckle the combination lap and
shoulder belt and allow it to retract
completely to disengage the
automatic locking mode and activate
the vehicle sensitive (emergency)
locking mode.
Rear Inflatable Safety Belt (If
Equipped) WARNING
Do not attempt to service, repair,
or modify the rear inflatable
safety belt. The rear inflatable safety belts are
fitted in the shoulder portion of the
safety belts of the second-row
outboard seating positions.
Note:
The rear inflatable safety belts
are compatible with most infant and
child safety car seats and belt
positioning booster seats when
properly installed. This is because they
are designed to fill with a cooled gas
at a lower pressure and at a slower rate
than traditional airbags. After inflation,
the shoulder portion of the safety belt
remains cool to the touch. The rear inflatable safety belt consists
of the following:
•
An inflatable bag located in the
shoulder safety belt webbing.
• Lap safety belt webbing with
automatic locking mode.
• The same warning light, electronic
control and diagnostic unit as used
for the front safety belts.
• Impact sensors located in various
parts of the vehicle.
How does the rear inflatable safety
belt system work?
The rear inflatable safety belts will
function like standard restraints in
everyday usage. During a crash of sufficient force, the
inflatable belt will inflate from inside
the webbing.
35
MKZ (CC9) Safety BeltsE146364
Page 41 of 475

Deactivating and Activating the
Belt-Minder Feature
WARNING
While the system allows you to
deactivate it, this system is
designed to improve your chances of
being safely belted and surviving an
accident. We recommend you leave
the system activated for yourself and
others who may use the vehicle. To
reduce the risk of injury, do not
deactivate or activate the system
while driving the vehicle. Note:
The driver and front passenger
warning are deactivated and activated
independently. When deactivating or
activating one seating position, do not
buckle the other position as this will
terminate the process.
Read Steps 1 - 4 thoroughly before
proceeding with the programming
procedure.
Before following the procedure, make
sure that:
• the parking brake is set
• the transmission selector is in
position P or N
• the ignition is off
• the driver and front passenger
safety belts are unbuckled.
1. Turn the ignition on. Do not start the vehicle. 2. Wait until the safety belt warning
light turns off (about one minute).
After Step 2, wait an additional five
seconds before proceeding with
Step 3. Once Step 3 is started, the
procedure must be completed
within 30 seconds.
3. For the seating position being disabled, buckle then unbuckle the
safety belt three times at a
moderate speed, ending in the
unbuckled state. After Step 3, the
safety belt warning light will turn
on.
4. While the safety belt warning light
is on, buckle and then unbuckle the
safety belt. After Step 4, the safety
belt warning light will flash for
confirmation.
• This will disable the feature for
that seating position if it is
currently enabled.
• This will enable the feature for that
seating position if it is currently
disabled.
CHILD RESTRAINT AND
SAFETY BELT
MAINTENANCE
Inspect the vehicle safety belts and
child safety seat systems periodically
to make sure they work properly and
are not damaged. Inspect the vehicle
and child seat safety belts to make
sure there are no nicks, tears or cuts.
Replace if necessary. All vehicle safety
belt assemblies, including retractors,
buckles, front safety belt buckle
assemblies, buckle support
39
MKZ (CC9) Safety Belts
Page 42 of 475

assemblies (slide bar-if equipped),
shoulder belt height adjusters (if
equipped), shoulder belt guide on seat
back (if equipped), rear inflatable
safety belts (if equipped), child safety
seat LATCH and tether anchors, and
attaching hardware, should be
inspected after a collision. Read the
child restraint manufacturer's
instructions for additional inspection
and maintenance information specific
to the child restraint.
Ford Motor Company recommends
that all safety belt assemblies in use
in vehicles involved in a collision be
replaced. However, if the collision was
minor and an authorized dealer finds
that the belts do not show damage
and continue to operate properly, they
do not need to be replaced. Safety
belt assemblies not in use during a
collision should also be inspected and
replaced if either damage or improper
operation is noted.
Properly care for safety belts. See
Vehicle Care (page 294).
40
MKZ (CC9) Safety Belts