Page 183 of 415

183
6. TIPS FOR THE NAVIGATION SYSTEM
3
NAVIGATION SYSTEM
IS300h/250_Navi_EE
Accurate current position may not be
shown in the following cases:
• When driving on a small angled Y-
shaped road.
• When driving on a winding road.
• When driving on a slippery road such
as in sand, gravel, snow, etc.
• When driving on a long straight road.
• When motorway and surface streets
run in parallel.
• After moving by ferry or vehicle car-
rier.
• When a long route is searched during
high speed driving.
• When driving without setting the cur-
rent position calibration correctly.
• After repeating a change of direction
by going forward and backward, or
turning on a turntable in a parking lot.
• When leaving a covered parking lot or
parking garage.
• When a roof carrier is installed.
• When driving with tyre chains
installed.
• When the tyres are worn.
• After replacing a tyre or tyres.
• When using tyres that are smaller or
larger than the factory specifications.
• When the tyre pressure in any of the 4
tyres is not correct.Inappropriate route guidance may
occur in the following cases:
• When turning at an intersection off
the designated route guidance.
• If you set more than 1 destination but
skip any of them, auto reroute will
display a route returning to the desti-
nation on the previous route.
• When turning at an intersection for
which there is no route guidance.
• When passing through an intersection
for which there is no route guidance.
• During auto reroute, the route guid-
ance may not be available for the next
turn to the right or left.
• During high speed driving, it may
take a long time for auto reroute to
operate. In auto reroute, a detour route
may be shown.
• After auto reroute, the route may not
be changed.
• If an unnecessary U-turn is shown or
announced.
• If a location has multiple names and
the system announces 1 or more of
them.
• When a route cannot be searched.
• If the route to your destination
includes gravel, unpaved roads or
alleys, the route guidance may not be
shown.
If the vehicle cannot receive GPS sig-
nals, the current position can be
adjusted manually. (P.171)
Page 185 of 415
185
6. TIPS FOR THE NAVIGATION SYSTEM
3
NAVIGATION SYSTEM
IS300h/250_Navi_EE
2. MAP DATABASE VERSION AND COVERED
AREA
1Press the “MENU” button on the
Remote Touch.
2Select “Setup”.
3Select “Navigation”.
MAP DATA
Coverage areas and legal informa-
tion can be displayed.
Page 186 of 415
186
6. TIPS FOR THE NAVIGATION SYSTEM
IS300h/250_Navi_EE
4Select “Map data”.
5Check that the map data screen is
displayed.
No
.Function
Map version
Select to display legal informa-
tion.
Select to display map data cover-
age areas.
INFORMATION
Map data updates are available for a
fee. Contact your Lexus dealer for
further information.
ABOUT THE MAP DATA
Map data for the navigation system
is contained in a SD card that is in-
serted in the SD card slot located at
the bottom of the audio control pan-
el.
Do not eject the SD card, as doing so
may deactivate the navigation sys-
tem.
NOTICE
Do not edit or delete the map data on
the SD card, as doing so may deacti-
vate the navigation system.
INFORMATION
microSDHC Logo is a trademark of
SD-3C,LLC.
Page 190 of 415
190
IS300h/250_Navi_EE
1. BASIC OPERATION
1. QUICK REFERENCE
CONTROL SCREEN Operations such as selecting a preset station and adjusting the sound balance
are carried out on the screen.
Using the instrument panel
Press the “RADIO” or “MEDIA” button to display the audio/visual screen.
Using the Remote Touch
Press the “MENU” button on the Remote Touch, then select “Audio” to display
the audio/visual screen.
Page 191 of 415
191
1. BASIC OPERATION
4
AUDIO/VIDEO SYSTEM
IS300h/250_Navi_EE
CONTROL PANEL
FunctionPage
Using the radio200
Playing an audio CD or MP3/WMA/AAC disc207
Playing a DVD213
Playing a USB memory220
Playing an iPod225
Playing a Bluetooth® device232
Using the AUX port238
Playing the VTR241
Using the steering wheel audio switches244
Audio system settings246
INFORMATION
The illustration is for left-hand drive vehicles.
The button positions and shapes will differ for right-hand drive vehicles.
Also, the display and button positions will differ depending on the type of the sys-
tem.
Page 192 of 415

192
1. BASIC OPERATION
IS300h/250_Navi_EE
2. SOME BASICS
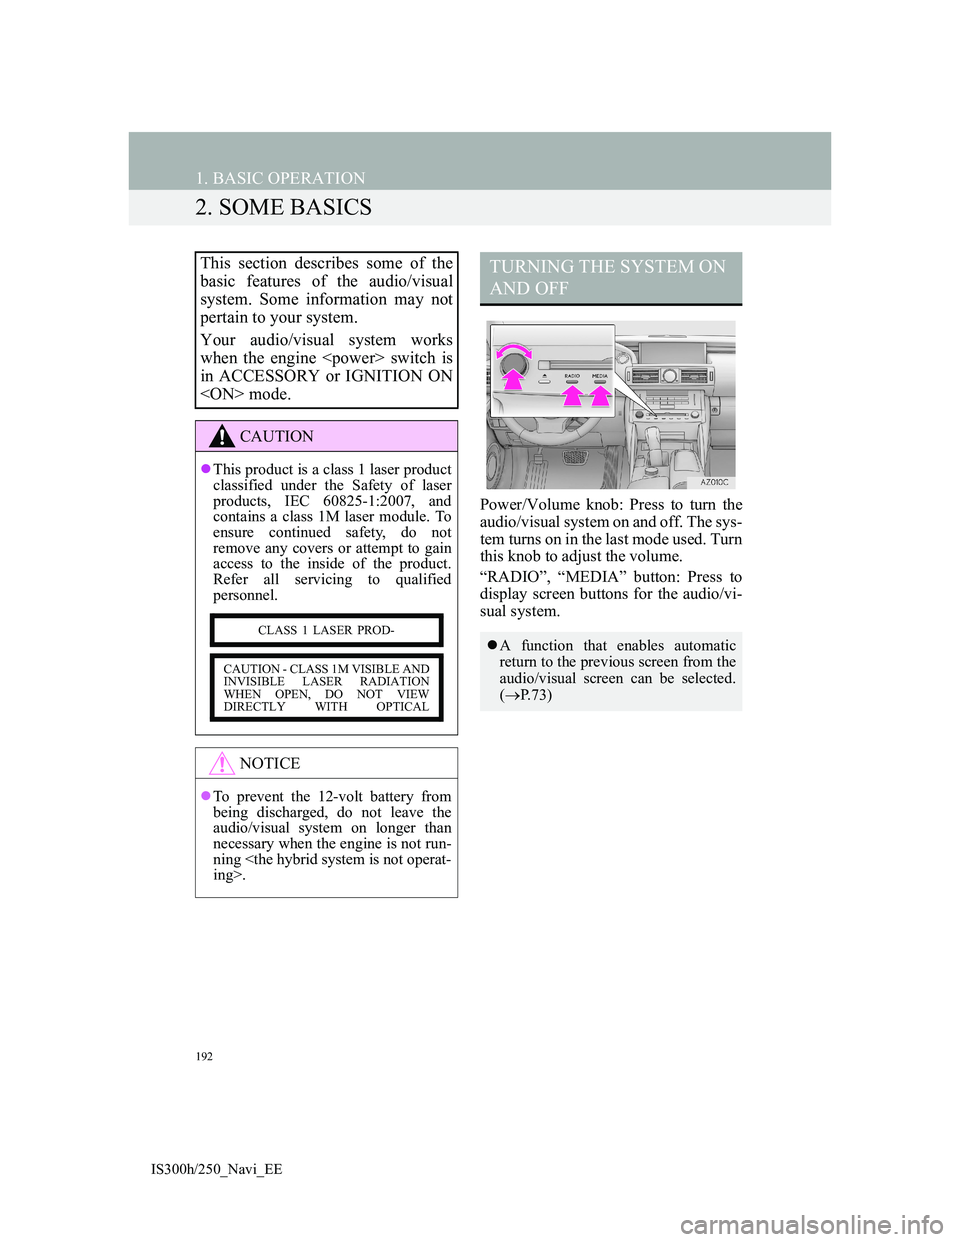
Power/Volume knob: Press to turn the
audio/visual system on and off. The sys-
tem turns on in the last mode used. Turn
this knob to adjust the volume.
“RADIO”, “MEDIA” button: Press to
display screen buttons for the audio/vi-
sual system.
This section describes some of the
basic features of the audio/visual
system. Some information may not
pertain to your system.
Your audio/visual system works
when the engine switch is
in ACCESSORY or IGNITION ON
mode.
CAUTION
This product is a class 1 laser product
classified under the Safety of laser
products, IEC 60825-1:2007, and
contains a class 1M laser module. To
ensure continued safety, do not
remove any covers or attempt to gain
access to the inside of the product.
Refer all servicing to qualified
personnel.
NOTICE
To prevent the 12-volt battery from
being discharged, do not leave the
audio/visual system on longer than
necessary when the engine is not run-
ning
ing>.
CLASS 1 LASER PROD-
CAUTION - CLASS 1M VISIBLE AND
INVISIBLE LASER RADIATION
WHEN OPEN, DO NOT VIEW
DIRECTLY WITH OPTICAL
TURNING THE SYSTEM ON
AND OFF
A function that enables automatic
return to the previous screen from the
audio/visual screen can be selected.
(P.73)
Page 193 of 415
193
1. BASIC OPERATION
4
AUDIO/VIDEO SYSTEM
IS300h/250_Navi_EE
Using the instrument panel
1Each time the “RADIO” or “ME-
DIA” button is pressed, the audio
control mode changes.
“RADIO” button: To display the radio
operation screen.
“MEDIA” button: To display the exter-
nal media operation screen.
Using the Remote Touch
1Press the “MENU” button on the
Remote Touch.
2Select “Audio”.
3Select “Source”.
4Select the desired source.
SELECTING AN AUDIO
SOURCE
INFORMATION
Dimmed screen buttons cannot be
operated.
Page 198 of 415
198
1. BASIC OPERATION
IS300h/250_Navi_EE
DVD video/iPod video/VTR
1Select “Options” on the control
screen.
2Select “Wide” on the options screen.
3Select the desired item to be adjust-
ed.DVD video/iPod video/VTR
1Select “Options” on the control
screen.
2Select “Display” on the option
screen.
AUDIO SCREEN
ADJUSTMENT
SCREEN SIZE SETTINGS
The screen size can be selected for
each
type of media.
No
.Function
Select to display a 4 : 3 screen,
with either side in black.
Select to enlarge the image hori-
zontally and vertically to full
screen.
Select to enlarge the image by the
same ratio horizontally and verti-
cally.
CONTRAST, BRIGHTNESS,
COLOUR AND TONE
ADJUSTMENT
The brightness, contrast, colour and
tone of the screen can be adjusted.