Page 154 of 410
154
4. MY MEMORY
CT200h_Navi_OM76113E_(EE)
13.12.06 15:16
1Select “Register”.
2Select the desired item to search for
the location. (P.116)
3Select a position for this quick ac-
cess.
4Select “OK” when the editing quick
access screen appears. (P.154)
1Select “Edit”.
2Select the desired quick access.
3Select the desired item to be edited.
4Select “OK”.
REGISTERING QUICK
ACCESS
INFORMATION
Up to 5 preset destinations can be reg-
istered.
EDITING QUICK ACCESS
No.FunctionPage
Select to change the icon
to be displayed on the
map screen.
157
Select to edit the quick
access name.158
Select to display the
quick access name on the
map screen.
When set to on, the indi-
cator will illuminate.
Select to edit location in-
formation.158
Select to edit the tele-
phone number.158
Page 156 of 410
156
4. MY MEMORY
CT200h_Navi_OM76113E_(EE)
13.12.06 15:16
1Select “Register”.
2Select the desired item to search for
the location. (P.116)
3Select “OK” when the editing mem-
ory point screen appears. (P.156)
1Select “Edit”.
2Select the desired memory point.
3Select the desired item to be edited.
4Select “OK”.
REGISTERING MEMORY
POINTS
INFORMATION
Up to 500 memory points can be reg-
istered.
When registering establishments that
were set as destinations using an
online search, select “Previous”.
EDITING MEMORY POINTS
The icon, name, location, telephone
number and/or group of a registered
memory point can be edited.
No.FunctionPage
Select to change the icon
to be displayed on the
map screen.
157
Select to edit the memory
point name.158
Select to display the
memory point name on
the map screen.
When set to on, the indi-
cator will illuminate.
Select to edit location in-
formation.158
Select to edit the tele-
phone number.158
Select to register group.158
Page 158 of 410
158
4. MY MEMORY
CT200h_Navi_OM76113E_(EE)
13.12.06 15:16
CHANGING THE NAME
1Select “Name”.
2Enter the desired name and select
“OK”.
CHANGING THE LOCATION
1Select “Location”.
2Scroll the map to the desired point
(P.103) and select “OK”.
CHANGING TELEPHONE NUM-
BER
1Select “Tel. no.”.
2Enter the number and select “OK”.
SETTING THE GROUP
1Select “Group”.
2Select the group the memory point is
to be registered with.
Memory point groups can be set and
changed.
Page 241 of 410
241
3. MEDIA OPERATION
4
AUDIO/VISUAL SYSTEM
CT200h_Navi_OM76113E_(EE)
13.12.06 15:16
INFORMATION
Depending on the Bluetooth® device that is connected to the system, the music may
start playing when selecting while it is paused. Conversely, the music may
pause when selecting while it is playing.
In the following conditions, the system may not function:
• The Bluetooth
® device is turned off.
• The Bluetooth
® device is not connected.
• The Bluetooth
® device has a low battery.
It may take time to connect the telephone when Bluetooth® audio is being played.
For operating the portable player, see the instruction manual that comes with it.
If the Bluetooth® device is disconnected due to poor reception from the Bluetooth®
network when the power switch is in ACCESSORY or ON mode, the system auto-
matically reconnects the portable player.
If the Bluetooth® device is disconnected on purpose, such as it was turned off, this
does not happen. Reconnect the portable player manually.
Bluetooth® device information is registered when the Bluetooth® device is con-
nected to the Bluetooth® audio system. When selling or disposing of the vehicle,
remove the Bluetooth® audio information from the system. (P. 8 2 )
Page 263 of 410
263
CT200h_Navi_OM76113E_(EE)
13.12.06 15:16
4
AUDIO/VISUAL SYSTEM
6. TIPS FOR OPERATING THE AUDIO/VISUAL SYSTEM
1. OPERATING INFORMATION
NOTICE
To avoid damage to the audio/visual
system:
• Be careful not to spill beverages
over the audio/visual system.
• Do not put anything other than an
appropriate disc into the disc slot.
INFORMATION
The use of a cellular phone inside or
near the vehicle may cause a noise
from the speakers of the audio/visual
system which you are listening to.
However, this does not indicate a
malfunction.
RADIO
Usually, a problem with radio recep-
tion does not mean there is a problem
with the radio — it is just the normal
result of conditions outside the vehi-
cle.
For example, nearby buildings and
terrain can interfere with FM recep-
tion. Power lines or telephone wires
can interfere with AM signals. And
of course, radio signals have a limit-
ed range. The farther the vehicle is
from a station, the weaker its signal
will be. In addition, reception condi-
tions change constantly as the vehi-
cle moves.
Here, some common reception prob-
lems that probably do not indicate a
problem with the radio are described.
Page 270 of 410
270
6. TIPS FOR OPERATING THE AUDIO/VISUAL SYSTEM
CT200h_Navi_OM76113E_(EE)
13.12.06 15:16
“Made for iPod”, “Made for iPhone”
and “Made for iPad” mean that an elec-
tronic accessory has been designed to
connect specifically to iPod, iPhone, or
iPad, respectively, and has been certi-
fied by the developer to meet Apple
performance standards.
Apple is not responsible for the opera-
tion of this device or its compliance
with safety and regulatory standards.
Please note that the use of this acces-
sory with iPod, iPhone, or iPad may
affect wireless performance.
iPad, iPhone, iPod, iPod classic, iPod
nano, and iPod touch are trademarks of
Apple Inc., registered in the U.S. and
other countries. Lightning is a trade-
mark of Apple Inc.
The Lightning connector works with
iPhone 5, iPod touch (5th generation),
and iPod nano (7th generation).
The 30-pin connector works with
iPhone 4S, iPhone 4, iPhone 3GS,
iPhone 3G, iPhone, iPod touch (1st
through 4th generation), iPod classic,
and iPod nano (1st through 6th genera-
tion).
USB works with iPhone 5, iPhone 4S,
iPhone 4, iPhone 3GS, iPhone 3G,
iPhone, iPod touch (1st through 5th
generation), iPod classic, and iPod
nano (1st through 7th generation).
The following iPod®, iPod nano®, iPod
classic®, iPod touch® and iPhone® de-
vices can be used with this system.
Made for
• iPod touch (5th generation)*
• iPod touch (4th generation)
• iPod touch (3rd generation)
• iPod touch (2nd generation)
• iPod touch (1st generation)
• iPod classic
• iPod with video
• iPod nano (7th generation)*
• iPod nano (6th generation)
• iPod nano (5th generation)
• iPod nano (4th generation)
• iPod nano (3rd generation)
• iPod nano (1st generation)
•iPhone 5*
•iPhone 4S
•iPhone 4
• iPhone 3GS
•iPhone 3G
•iPhone
*: iPod video not supported
iPodCOMPATIBLE MODELS
INFORMATION
Depending on differences between
models or software versions etc.,
some models might be incompatible
with this system.
Page 280 of 410
280
CT200h_Navi_OM76113E_(EE)
13.12.06 15:16
1. SPEECH COMMAND SYSTEM OPERATION
1. SPEECH COMMAND SYSTEM
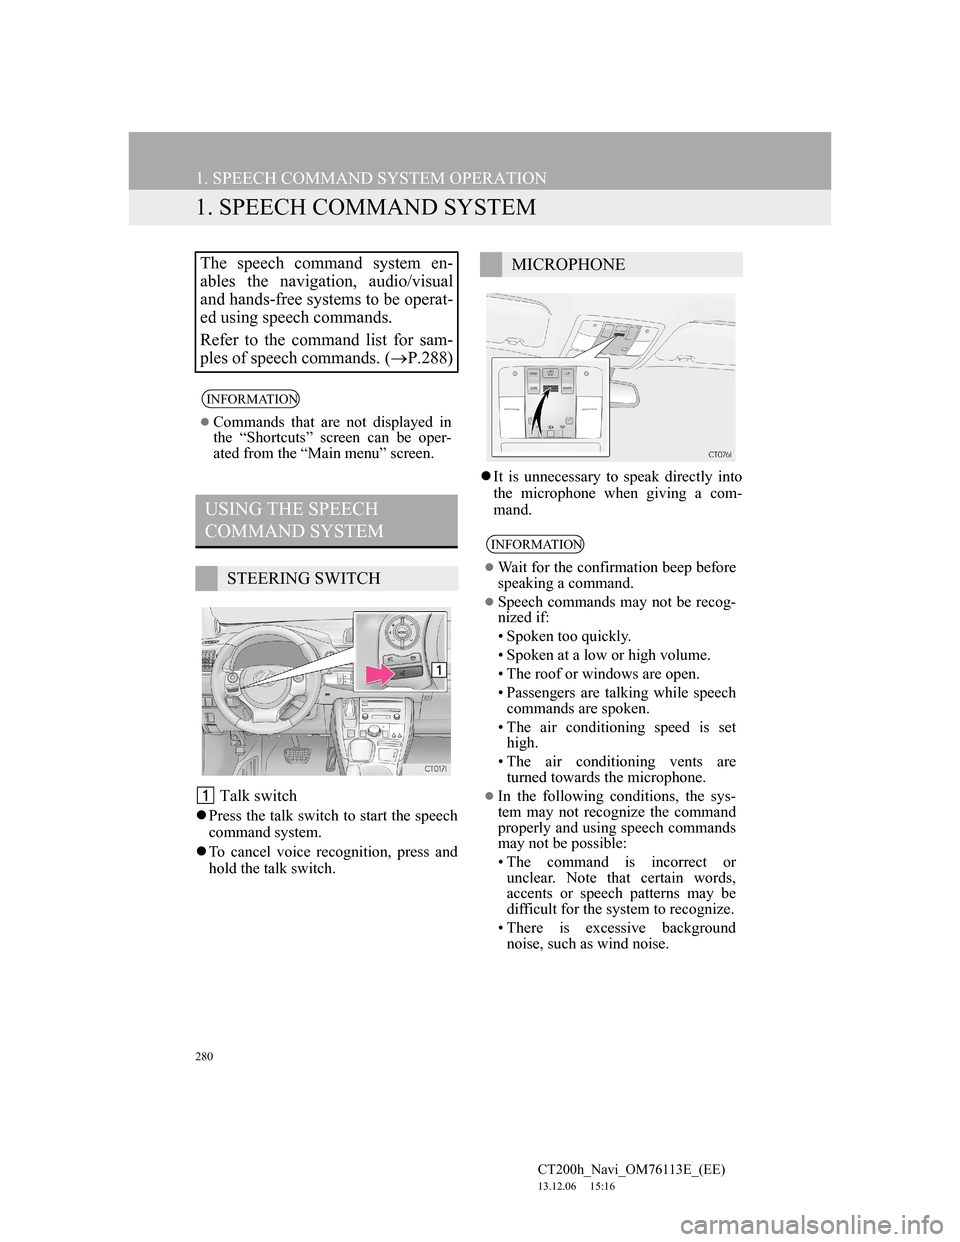
Talk switch
Press the talk switch to start the speech
command system.
To cancel voice recognition, press and
hold the talk switch.It is unnecessary to speak directly into
the microphone when giving a com-
mand.
The speech command system en-
ables the navigation, audio/visual
and hands-free systems to be operat-
ed using speech commands.
Refer to the command list for sam-
ples of speech commands. (P.288)
INFORMATION
Commands that are not displayed in
the “Shortcuts” screen can be oper-
ated from the “Main menu” screen.
USING THE SPEECH
COMMAND SYSTEM
STEERING SWITCH
MICROPHONE
INFORMATION
Wait for the confirmation beep before
speaking a command.
Speech commands may not be recog-
nized if:
• Spoken too quickly.
• Spoken at a low or high volume.
• The roof or windows are open.
• Passengers are talking while speech
commands are spoken.
• The air conditioning speed is set
high.
• The air conditioning vents are
turned towards the microphone.
In the following conditions, the sys-
tem may not recognize the command
properly and using speech commands
may not be possible:
• The command is incorrect or
unclear. Note that certain words,
accents or speech patterns may be
difficult for the system to recognize.
• There is excessive background
noise, such as wind noise.
Page 287 of 410
287
1. SPEECH COMMAND SYSTEM OPERATION
5
SPEECH COMMAND SYSTEM
CT200h_Navi_OM76113E_(EE)
13.12.06 15:16
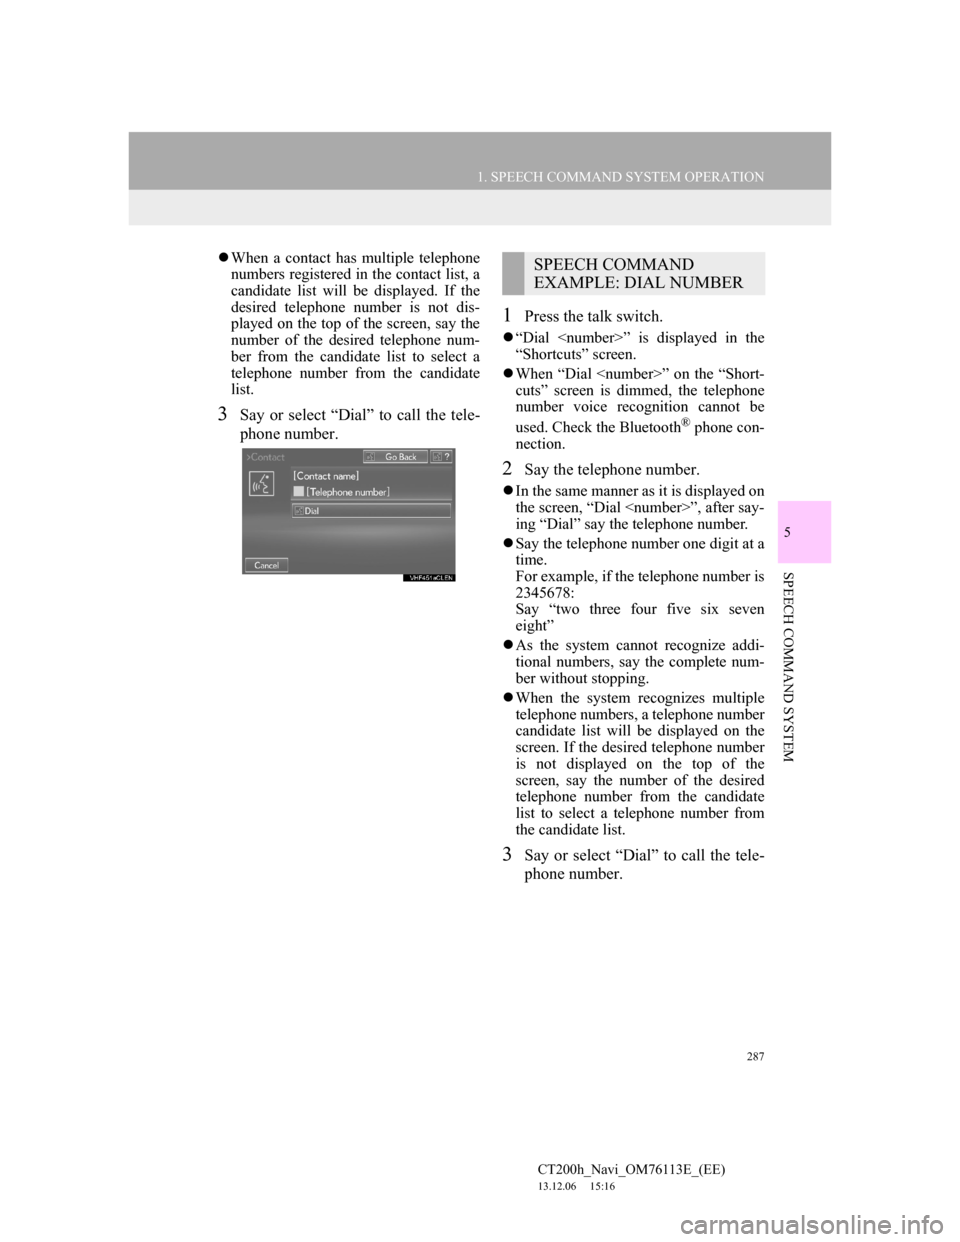
When a contact has multiple telephone
numbers registered in the contact list, a
candidate list will be displayed. If the
desired telephone number is not dis-
played on the top of the screen, say the
number of the desired telephone num-
ber from the candidate list to select a
telephone number from the candidate
list.
3Say or select “Dial” to call the tele-
phone number.
1Press the talk switch.
“Dial ” is displayed in the
“Shortcuts” screen.
When “Dial ” on the “Short-
cuts” screen is dimmed, the telephone
number voice recognition cannot be
used. Check the Bluetooth
® phone con-
nection.
2Say the telephone number.
In the same manner as it is displayed on
the screen, “Dial ”, after say-
ing “Dial” say the telephone number.
Say the telephone number one digit at a
time.
For example, if the telephone number is
2345678:
Say “two three four five six seven
eight”
As the system cannot recognize addi-
tional numbers, say the complete num-
ber without stopping.
When the system recognizes multiple
telephone numbers, a telephone number
candidate list will be displayed on the
screen. If the desired telephone number
is not displayed on the top of the
screen, say the number of the desired
telephone number from the candidate
list to select a telephone number from
the candidate list.
3Say or select “Dial” to call the tele-
phone number.
SPEECH COMMAND
EXAMPLE: DIAL NUMBER