2013 Lancia Thema ECO mode
[x] Cancel search: ECO modePage 80 of 336

Blind Spot Alert OffWhen the BSM system is turned off,
there will be no visual or audible alerts
from either the BSM or RCP systems.NOTE:
The BSM system will store
the current operating mode when
the vehicle is shut off. Each time
the vehicle is started, the previously
stored mode will be recalled and
used.
Astronomy Zone — System
Temporarily Unavailable
The astronomy zone is when the ve-
hicles sensors cannot receive the sig-
nal of another vehicle approaching
due to interference in the reception of
the wavelength signal. When the ve-
hicle enters this zone the blind spot
system will become temporarily un-
available and the EVIC will display
the message “ Blind spot system
unavailable-Astronomy zone”. The
side mirrors LED’s will be lit up and
stay lit until the vehicle exits the zone. UCONNECT™ PHONE
(8.4/8.4N)
UCONNECT TOUCH™
8.4/8.4 NAV
Uconnect™ Phone is a voice-activated,
hands-free, in-vehicle communications
system. Uconnect™ Phone allows you
to dial a phone number with your
mobile phone.
Uconnect™ Phone supports the follow-
ing features:NOTE: Your phone must be
capable of SMS messaging via
Bluetooth® for messaging features
to work properly.
Your mobile phone’s audio is trans-
mitted through your vehicle’s audio
system; the system will automatically
mute your radio when using the
Uconnect™ Phone.
Uconnect™ Phone allows you to
transfer calls between the system and
your mobile phone as you enter or exit
your vehicle and enables you to mute
the system's microphone for private
conversation.
WARNING!
Any voice commanded system
should be used only in safe driving
conditions following all applicable
laws, including laws regarding
phone use. All attention should be
kept on the roadway ahead. Failure
to do so may result in an accident
causing serious injury or death.The Uconnect™ Phone is driven
through your Bluetooth® “Hands-Free
Profile” mobile phone. Uconnect™
features Bluetooth® technology - the
global standard that enables different
electronic devices to connect to each
other without wires or a docking sta-
tion, so Uconnect™ Phone works no
matter where you stow your mobile
phone (be it your purse, pocket, or
briefcase), as long as your phone is
turned on and has been paired to
the vehicle's Uconnect™ Phone. The
Uconnect™ Phone allows up to ten
mobile phones or audio devices to be
linked to the system. Only one linked
(or paired) mobile phone and one
audio device can be used with the
system at a time.
74
Page 95 of 336

If multiple numbers are availablefor the contact select which number
you would like to have the message
sent,
Press “Send” or “Cancel”.
Send Messages Using Voice
Commands:
Press the
button,
After the “Listening” prompt and
the following beep, say “Send mes-
sage to John Smith mobile”,After the system prompts you for
what message you want to send, say
the message you wish to send or say
“List”. There are 18 preset messages.While the list of defined messages are
being read, you can interrupt the sys-
tem by pressing the
button and
saying the message you want to send.
After the system confirms that you
want to send your message to John
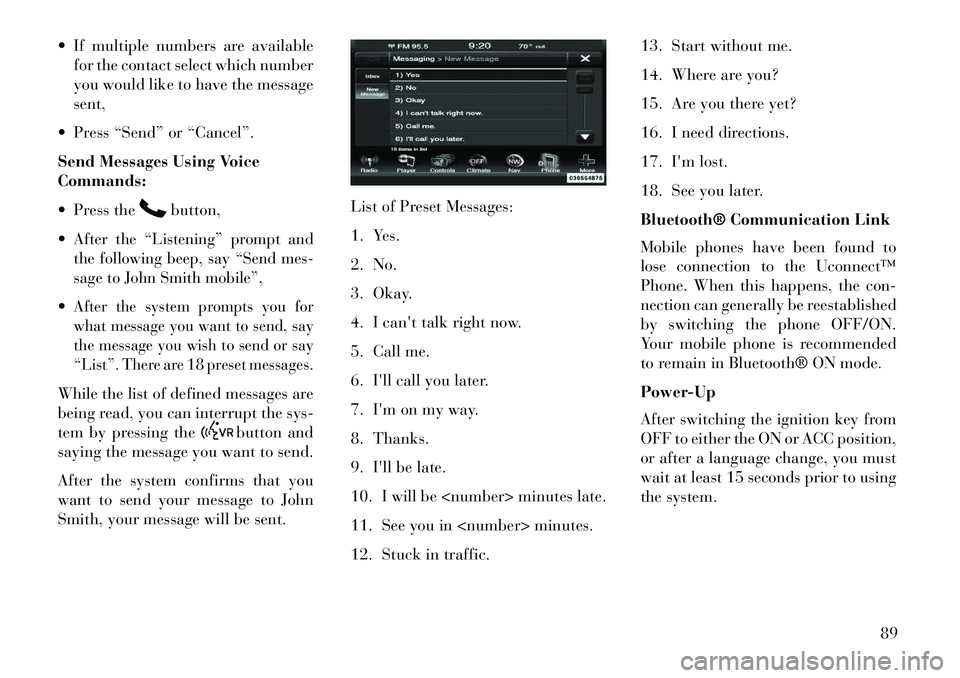
Smith, your message will be sent. List of Preset Messages:
1. Yes.
2. No.
3. Okay.
4. I can't talk right now.
5. Call me.
6. I'll call you later.
7. I'm on my way.
8. Thanks.
9. I'll be late.
10. I will be
11. See you in
12. Stuck in traffic.13. Start without me.
14. Where are you?
15. Are you there yet?
16. I need directions.
17. I'm lost.
18. See you later.
Bluetooth® Communication Link
Mobile phones have been found to
lose connection to the Uconnect™
Phone. When this happens, the con-
nection can generally be reestablished
by switching the phone OFF/ON.
Your mobile phone is recommended
to remain in Bluetooth® ON mode.
Power-Up
After switching the ignition key from
OFF to either the ON or ACC position,
or after a language change, you must
wait at least 15 seconds prior to using
the system.
89
Page 99 of 336

At any point, if the system does not
recognize one of your commands, you
will be prompted to repeat it.
To hear available commands, press
the Uconnect™ Voice Command
button and say “Help”. You will
hear available commands for the
screen displayed.
Natural Speech
Natural speech allows the user to
speak commands in phrases or com-
plete sentences. The system filters out
certain non-word utterances and
sounds such as “ah” and “eh”. The
system handles fill-in words such as
“I would like to”.
The system handles multiple inputs in
the same phrase or sentence such as
“make a phone call” and “to Kelly
Smith”. For multiple inputs in the
same phrase or sentence, the system
identifies the topic or context and pro-
vides the associated follow-up prompt
such as “Who do you want to call?” in
the case where a phone call was re-
quested but the specific name was not
recognized.
The system utilizes continuous dialog;
when the system requires more infor-
mation from the user it will ask a ques-
tion to which the user can respond
without pressing the Uconnect™ Voice
Command
button.
Uconnect™ Voice
Commands
The Uconnect™ Voice Command sys-
tem understands two types of com-
mands. Universal commands are avail-
able at all times. Local commands are
available if the supported radio mode is
active.Start a dialogue by pressing the
Uconnect™ Voice Commandbutton.
Changing the Volume
1. Start a dialogue by pressing the
Voice Command
button.
2. Say a command (e.g., “Help”). 3.
Use the ON/OFF VOLUME rotary
knob to adjust the volume to a com-
fortable level while the Voice Com-
mand system is speaking. Please note
the volume setting for Voice Command
is different than the audio system.
Starting Voice Recognition (VR)
Session in Radio/Player Modes
In this mode, you can say the follow-
ing commands:
NOTE:
The commands can be
said on any screen when a call is not
active after pushing the Uconnect™
Voice Command
button.
Disc
To switch to the disc mode, say
“Change source to Disc”. This com-
mand can be given in any mode or
screen: “Track” (#) (to change the track)
93
Page 108 of 336

HEATED SEATS
(for versions/markets,
where provided)
On some models, the front and rear
seats may be equipped with heaters in
both the seat cushions and seatbacks.
The front driver and passenger heated
seats are operated using the Uconnect
Touch™ System.WARNING!
Persons who are unable to feel
pain to the skin because of ad-
vanced age, chronic illness, dia-
betes, spinal cord injury, medica-
tion, alcohol use, exhaustion or
other physical condition must ex-
ercise care when using the seat
heater. It may cause burns even at
low temperatures, especially if
used for long periods of time.Do not place anything on the seat
or seatback that insulates against
heat, such as a blanket or cushion.
This may cause the seat heater to
overheat. Sitting in a seat that has
(Continued)
WARNING!(Continued)been overheated could cause seri-
ous burns due to the increased sur-
face temperature of the seat.
Front Heated Seat Operations —
Uconnect Touch™ 8.4 and 8.4 Nav:Press the “Controls” soft-key located
on the bottom of the Uconnect Touch™
display.
Press the “Driver” or “Pas-
senger” seat soft-key once
to select HI-level heating.
Press the soft-key a second
time to select LO-level heating. Press
the soft-key a third time to shut the
heating elements OFF. NOTE: Once a heat setting is se-
lected, heat will be felt within two
to five minutes.
When the HI-level setting is selected,
the heater will provide a boosted heat
level during the first four minutes of
operation. Then, the heat output will
drop to the normal HI-level. If the
HI-level setting is selected, the system
will automatically switch to LO-level
after a maximum of 60 minutes of
continuous operation. At that time,
the display will change from HI to LO,
indicating the change. The LO-level
setting will turn OFF automatically
after a maximum of 45 minutes.
Rear Heated Seats
On some models, the two outboard
seats are equipped with heated seats.
Controls Soft-Key
Heated Seats Soft-Keys
102
Page 109 of 336

The heated seat switches for these seats
are located on the rear of the center
console. There are two heated seat
switches that allow the rear passengers
to operate the seats independently.You can choose from HI, LO or OFF
heat settings. Amber indicator lights
in each switch indicate the level of
heat in use. Two indicator lights will
illuminate for HI, one for LO and
none for OFF.Press the switch once to se-
lect HI-level heating. Press
the switch a second time to
select LO-level heating.
Press the switch a third time to shut
the heating elements OFF.
NOTE:
Once a heat setting is selected, heat will be felt within two to
five minutes.
The engine must be running for the heated seats to operate.
When the HI-level setting is selected,
the heater will provide a boosted heat
level during the first four minutes of operation. Then, the heat output will
drop to the normal HI-level. If the
HI-level setting is selected, the system
will automatically switch to LO-level
after a maximum of 60 minutes of
continuous operation. At that time,
the number of illuminated LEDs
changes from two to one, indicating
the change. The LO-level setting will
turn OFF automatically after a maxi-
mum of 45 minutes.
VENTILATED SEATS
(for versions/markets,
where provided)
On some models, both the driver and
passenger seats are ventilated. Lo-
cated in the seat cushion and seatback
are small fans that draw air from the
seat surface through fine perforations
in the seat cover to help keep the
driver and front passenger cooler in
higher ambient temperatures.
The ventilated seats can be operated
using the Uconnect Touch™ System.
NOTE: The engine must be run-
ning for the ventilated seats to
operate.
Front Ventilated Seat Operation —
Uconnect Touch™ 8.4/8.4 Nav:
Press the “Controls” soft-key located
on the bottom of the Uconnect Touch™
display.Press the “Driver” or “Passenger”
seat soft-key once to select HI-level
ventilation. Press the soft-key a sec-
ond time to select LO-level ventila-
tion. Press the soft-key a third time to
shut off the seat ventilation.
Controls Soft-Key
Ventilated Seats Soft-Keys
103
Page 115 of 336

WARNING!
Be sure the hood is fully latched
before driving your vehicle. If the
hood is not fully latched, it could
open when the vehicle is in motion
and block your vision. Failure to
follow this warning could result in
serious injury or death.
LIGHTS
HEADLIGHT SWITCH The headlight switch is located
on the left side of the instru-
ment panel. This switch con-
trols the operation of the headlights,
parking lights, instrument panel
lights, instrument panel light dim-
ming, interior lights and fog lights.
NOTE: In certain European
countries, the parking light feature
will only operate with the ignition
OFF, or with either the fog lamps or
headlights also ON. Regardless of
ignition switch position, the park-
ing lights will remain ON as long as
the switch is in this first detent.
Rotate the headlight switch clockwise
to the first detent for parking light
and instrument panel light operation.
Rotate the headlight switch to the sec-
ond detent for headlight, parking light
and instrument panel light operation.AUTOMATIC HEADLIGHTS
This system automatically turns the
headlights on or off according to am-
bient light levels. To turn the system
on, rotate the headlight switch coun-
terclockwise to the AUTO position.
When the system is on, the headlight
time delay feature is also on. This
means the headlights will stay on for
up to 90 seconds after you place the
ignition into the OFF position. To turn the automatic system off, move the
headlight switch out of the AUTO
position.
NOTE: The engine must be run-
ning before the headlights will
come on in the automatic mode.
HEADLIGHTS ON WITH
WIPERS (Available With
Automatic Headlights Only)
When this feature is active, the head-
lights will turn on approximately
10 seconds after the wipers are turned
on if the headlight switch is placed in
the AUTO position. In addition, the
headlights will turn off when the wip-
ers are turned off if they were turned
on by this feature.
NOTE:
The Headlights On with
Wipers feature can be turned on
or off using the Uconnect Touch™
System, refer to “Uconnect Touch™
Settings” in “Understanding Your
Instrument Panel” for further infor-
mation.
Headlight Switch
109
Page 116 of 336

HEADLIGHT TIME DELAYThis feature provides the safety of
headlight illumination for up to 90 sec-
onds (programmable) when leaving
your vehicle in an unlit area.To activate the delay feature, place
the ignition in the OFF position while
the headlights are still on. Then, turn
off the headlights within 45 seconds.
The delay interval begins when the
headlight switch is turned off.If you turn the headlights or parking
lights on, or place the ignition in ACC
or RUN, the system will cancel the
delay.If you turn the headlights off before
the ignition, they will turn off in the
normal manner.
NOTE:
The lights must be turned offwithin 45 seconds of placing the
ignition in the OFF position to
activate this feature.
The headlight delay time is pro-
grammable using the Uconnect
Touch™ System, refer to
“Uconnect Touch™ Settings” in
“Understanding Your Instrument
Panel” for further information.SMARTBEAM™
(for versions/markets,
where provided)
The SmartBeam™ system provides
increased forward lighting at night by
automating high beam control
through the use of a digital camera
mounted on the inside rearview mir-
ror. This camera detects vehicle spe-
cific light and automatically switches
from high beams to low beams until
the approaching vehicle is out of view.
NOTE:
SmartBeam™ can be turned on or
off using the Uconnect Touch™
System, refer to “Uconnect
Touch™ Settings” in “Under-
standing Your Instrument Panel”
for further information.
Broken, muddy, or obstructed
headlights and taillights of ve-
hicles in the field of view will
cause the high beams to remain
on longer and not automatically
switch to low beams until you
are closer to the approaching ve-
hicle. Also, dirt, film, and other
obstructions on the windshield
or camera lens will cause the
system to function improperly.
If the windshield or SmartBeam™
mirror is replaced, the SmartBeam™
mirror must be re-aimed to ensure
proper performance. See your local
authorized dealer.
To Activate
1. Turn the headlight switch to the
AUTO headlight position.
2. Push the multifunction lever away
from you (toward front of vehicle) to
engage the high beam mode.
NOTE: This system will not acti-
vate until the vehicle is at or above
32 km/h.
110
Page 120 of 336

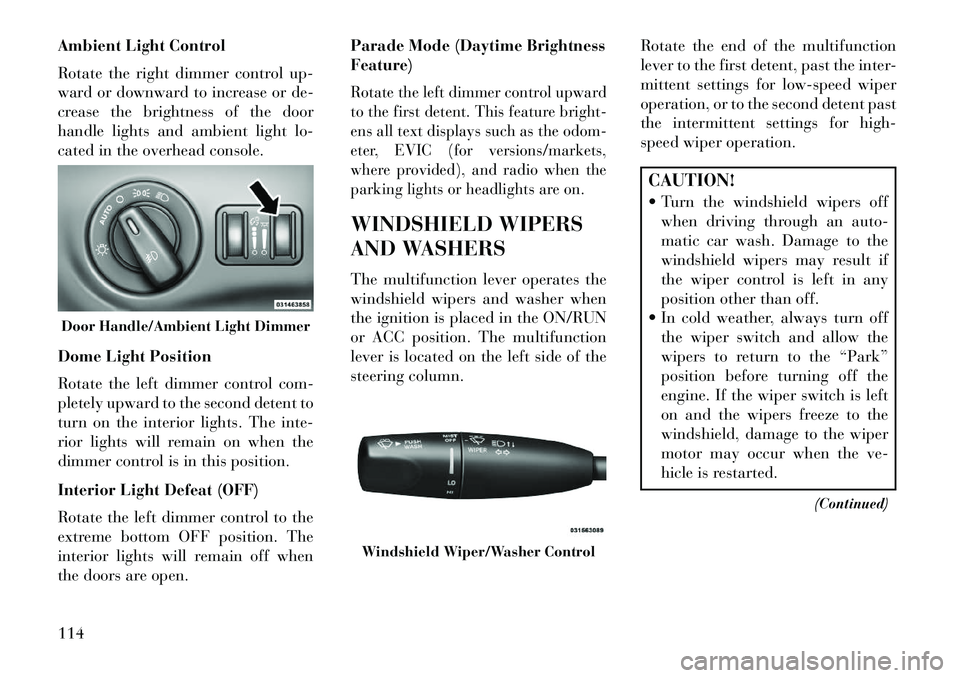
Ambient Light Control
Rotate the right dimmer control up-
ward or downward to increase or de-
crease the brightness of the door
handle lights and ambient light lo-
cated in the overhead console.
Dome Light Position
Rotate the left dimmer control com-
pletely upward to the second detent to
turn on the interior lights. The inte-
rior lights will remain on when the
dimmer control is in this position.
Interior Light Defeat (OFF)
Rotate the left dimmer control to the
extreme bottom OFF position. The
interior lights will remain off when
the doors are open.Parade Mode (Daytime Brightness
Feature)
Rotate the left dimmer control upward
to the first detent. This feature bright-
ens all text displays such as the odom-
eter, EVIC (for versions/markets,
where provided), and radio when the
parking lights or headlights are on.WINDSHIELD WIPERS
AND WASHERS
The multifunction lever operates the
windshield wipers and washer when
the ignition is placed in the ON/RUN
or ACC position. The multifunction
lever is located on the left side of the
steering column.
Rotate the end of the multifunction
lever to the first detent, past the inter-
mittent settings for low-speed wiper
operation, or to the second detent past
the intermittent settings for high-
speed wiper operation.
CAUTION!
Turn the windshield wipers off
when driving through an auto-
matic car wash. Damage to the
windshield wipers may result if
the wiper control is left in any
position other than off.
In cold weather, always turn off the wiper switch and allow the
wipers to return to the “Park”
position before turning off the
engine. If the wiper switch is left
on and the wipers freeze to the
windshield, damage to the wiper
motor may occur when the ve-
hicle is restarted.
(Continued)
Door Handle/Ambient Light Dimmer
Windshield Wiper/Washer Control
114