2013 Hyundai Equus wheel
[x] Cancel search: wheelPage 430 of 479

745
Maintenance
2. Tire size designation
A tire’s sidewall is marked with a tire
size designation. You will need this
information when selecting replace-
ment tires for your car. The following
explains what the letters and num-
bers in the tire size designation
mean.
Example tire size designation:
(These numbers are provided as an
example only; your tire size designa-
tor could vary depending on your
vehicle.)
P245/50R18 100V
P - Applicable vehicle type (tires
marked with the prefix “P’’ are
intended for use on passenger
vehicles or light trucks; however,
not all tires have this marking).
245 - Tire width in millimeters.
50 - Aspect ratio. The tire’s section
height as a percentage of its
width.
R - Tire construction code (Radial).
18 - Rim diameter in inches.100 - Load Index, a numerical code
associated with the maximum
load the tire can carry.
V - Speed Rating Symbol. See the
speed rating chart in this section
for additional information.
Wheel size designation
Wheels are also marked with impor-
tant information that you need if you
ever have to replace one. The follow-
ing explains what the letters and
numbers in the wheel size designa-
tion mean.
Example wheel size designation:
7.5JX18
7.5 - Rim width in inches.
J - Rim contour designation.
18 - Rim diameter in inches.Tire speed ratings
The chart below lists many of the dif-
ferent speed ratings currently being
used for passenger car tires. The
speed rating is part of the tire size
designation on the sidewall of the
tire. This symbol corresponds to that
tire's designed maximum safe oper-
ating speed.
S 180 km/h (112 mph)
T 190 km/h (118 mph)
H 210 km/h (130 mph)
V 240 km/h (149 mph)
Z Above 240 km/h (149 mph)
Maximum Speed Speed
Rating
Symbol
Page 431 of 479
Maintenance
46 7
3. Checking tire life (TIN : Tire
Identification Number)
Any tires that are over 6 years old,
based on the manufacturing date,
(including the spare tire) should be
replaced by new ones. You can find
the manufacturing date on the tire
sidewall (possibly on the inside of the
wheel), displaying the DOT Code.
The DOT Code is a series of num-
bers on a tire consisting of numbers
and English letters. The manufactur-
ing date is designated by the last four
digits (characters) of the DOT code.
DOT : XXXX XXXX OOOO
The front part of the DOT means a
plant code number, tire size and
tread pattern and the last four num-
bers indicate week and year manu-
factured.
For example:
DOT XXXX XXXX 1614 represents
that the tire was produced in the 16th
week of 2014.
4. Tire ply composition and mate-
rial
The number of layers or plies of rub-
ber-coated fabric in the tire. Tire
manufacturers also must indicate the
materials in the tire, which include
steel, nylon, polyester, and others.
The letter "R" means radial ply con-
struction; the letter "D" means diago-
nal or bias ply construction; and the
letter "B" means belted-bias ply con-
struction.
5. Maximum permissible inflation
pressure
This number is the greatest amount
of air pressure that should be put in
the tire. Do not exceed the maximum
permissible inflation pressure. Refer
to the Tire and Loading Information
label for recommended inflation
pressure.
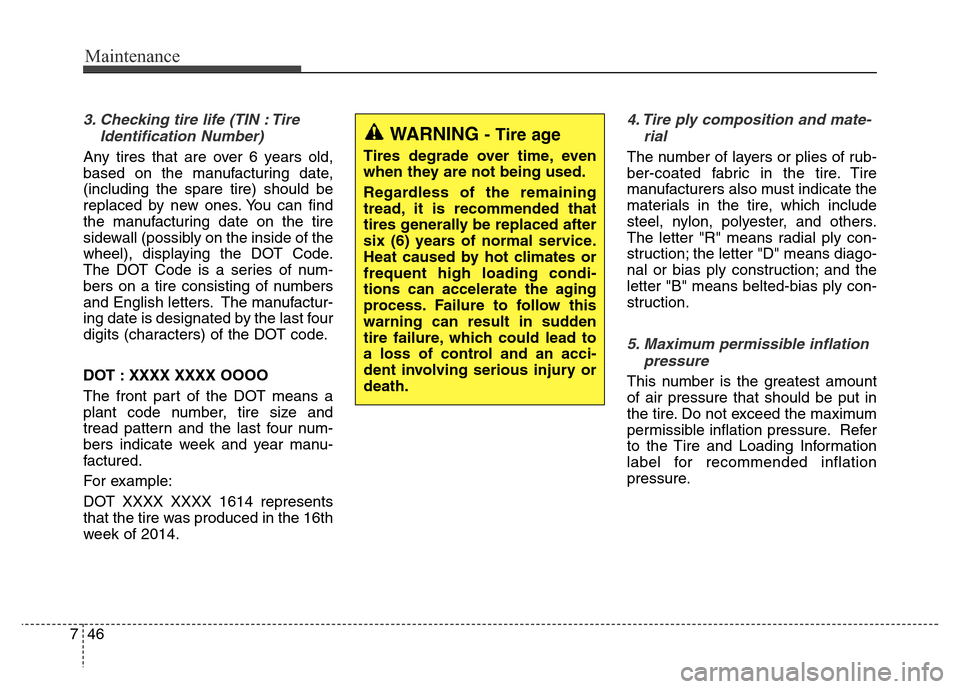
WARNING - Tire age
Tires degrade over time, even
when they are not being used.
Regardless of the remaining
tread, it is recommended that
tires generally be replaced after
six (6) years of normal service.
Heat caused by hot climates or
frequent high loading condi-
tions can accelerate the aging
process. Failure to follow this
warning can result in sudden
tire failure, which could lead to
a loss of control and an acci-
dent involving serious injury or
death.
Page 433 of 479
Maintenance
48 7
Temperature -A, B & C
The temperature grades are A (the
highest), B, and C, representing the
tire’s resistance to the generation of
heat and its ability to dissipate heat
when tested under controlled condi-
tions on a specified indoor laboratory
test wheel. Sustained high tempera-
ture can cause the material of the tire
to degenerate and reduce tire life,
and excessive temperature can lead
to sudden tire failure. Grades B and
A represent higher levels of perform-
ance on the laboratory test wheel
than the minimum required by law.Low aspect ratio tire
(if equipped)
Low aspect ratio tires, whose aspect
ratio is lower than 50, are provided
for sporty looks.
Because the low aspect ratio tires
are optimized for handling and brak-
ing, it may be more uncomfortable to
ride in and there is more noise com-
pare with normal tires.
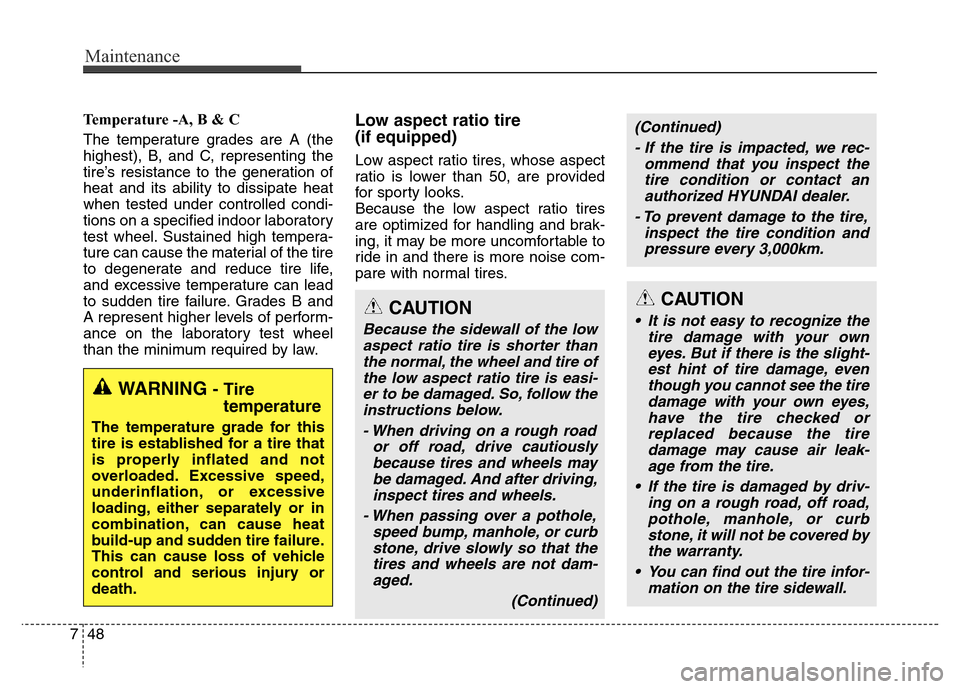
WARNING - Tire
temperature
The temperature grade for this
tire is established for a tire that
is properly inflated and not
overloaded. Excessive speed,
underinflation, or excessive
loading, either separately or in
combination, can cause heat
build-up and sudden tire failure.
This can cause loss of vehicle
control and serious injury or
death.
CAUTION
Because the sidewall of the low
aspect ratio tire is shorter than
the normal, the wheel and tire of
the low aspect ratio tire is easi-
er to be damaged. So, follow the
instructions below.
- When driving on a rough road
or off road, drive cautiously
because tires and wheels may
be damaged. And after driving,
inspect tires and wheels.
- When passing over a pothole,
speed bump, manhole, or curb
stone, drive slowly so that the
tires and wheels are not dam-
aged.
(Continued)
CAUTION
• It is not easy to recognize the
tire damage with your own
eyes. But if there is the slight-
est hint of tire damage, even
though you cannot see the tire
damage with your own eyes,
have the tire checked or
replaced because the tire
damage may cause air leak-
age from the tire.
• If the tire is damaged by driv-
ing on a rough road, off road,
pothole, manhole, or curb
stone, it will not be covered by
the warranty.
• You can find out the tire infor-
mation on the tire sidewall.
(Continued)
- If the tire is impacted, we rec-
ommend that you inspect the
tire condition or contact an
authorized HYUNDAI dealer.
- To prevent damage to the tire,
inspect the tire condition and
pressure every 3,000km.
Page 444 of 479
759
Maintenance
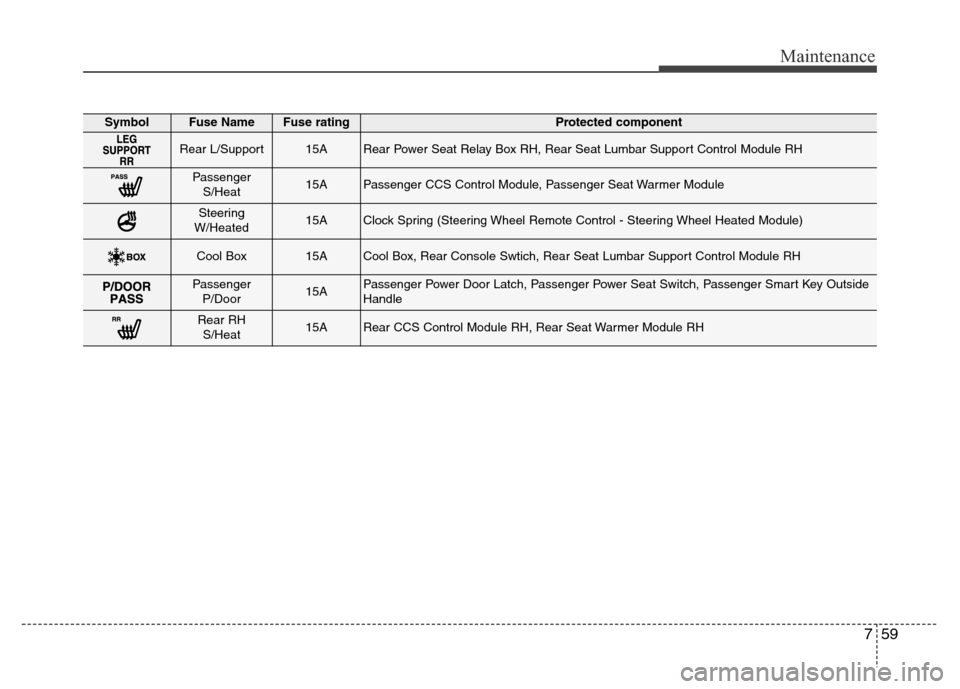
SymbolFuse NameFuse ratingProtected component
Rear L/Support15ARear Power Seat Relay Box RH, Rear Seat Lumbar Support Control Module RH
Passenger
S/Heat15APassenger CCS Control Module, Passenger Seat Warmer Module
Steering
W/Heated15AClock Spring (Steering Wheel Remote Control - Steering Wheel Heated Module)
Cool Box15ACool Box, Rear Console Swtich, Rear Seat Lumbar Support Control Module RH
Passenger
P/Door15APassenger Power Door Latch, Passenger Power Seat Switch, Passenger Smart Key Outside
Handle
Rear RH
S/Heat15ARear CCS Control Module RH, Rear Seat Warmer Module RH
Page 452 of 479
767
Maintenance
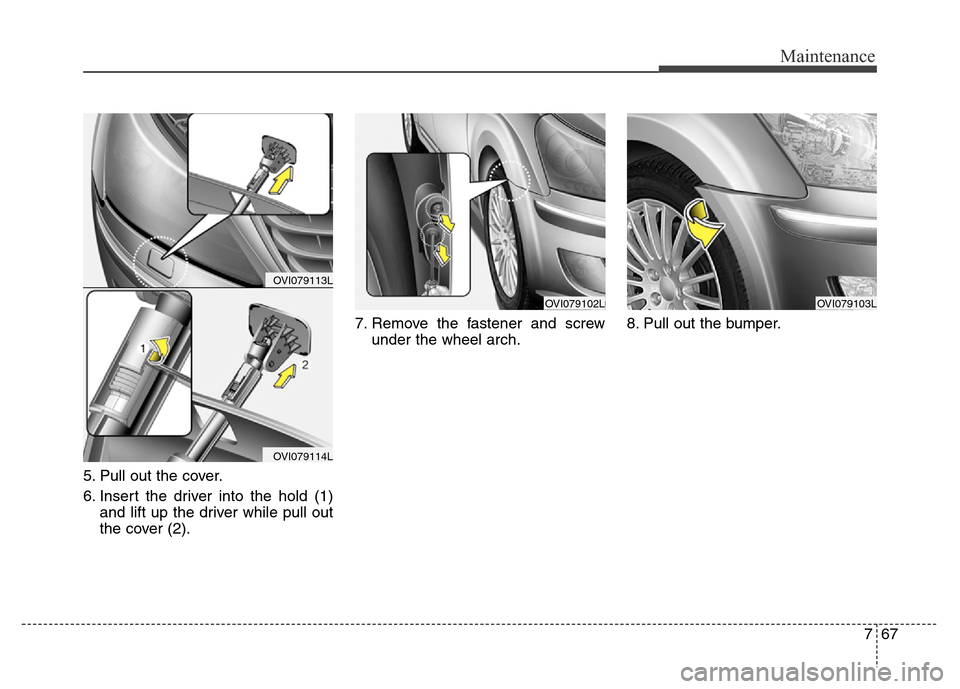
5. Pull out the cover.
6. Insert the driver into the hold (1)
and lift up the driver while pull out
the cover (2).7. Remove the fastener and screw
under the wheel arch.8. Pull out the bumper.
OVI079113L
OVI079114L
OVI079103LOVI079102L
Page 462 of 479
777
Maintenance
Finish damage repair
Deep scratches or stone chips in the
painted surface must be repaired
promptly. Exposed metal will quickly
rust and may develop into a major
repair expense.
✽NOTICE
If your vehicle is damaged and
requires any metal repair or
replacement, be sure the body shop
applies anti-corrosion materials to
the parts repaired or replaced.
Bright-metal maintenance
• To remove road tar and insects,
use a tar remover, not a scraper or
other sharp object.
• To protect the surfaces of bright-
metal parts from corrosion, apply a
coating of wax or chrome preser-
vative and rub to a high luster.
• During winter weather or in coastal
areas, cover the bright metal parts
with a heavier coating of wax or
preservative. If necessary, coat the
parts with non-corrosive petroleum
jelly or other protective compound.
Underbody maintenance
Corrosive materials used for ice and
snow removal and dust control may
collect on the underbody. If these
materials are not removed, acceler-
ated rusting can occur on the under-
body parts such as the fuel lines,
frame, floor pan and exhaust system,
even though they have been treated
with rust protection.
Thoroughly flush the vehicle under-
body and wheel openings with luke-
warm or cold water once a month,
after off-road driving and at the end
of each winter. Pay special attention
to these areas because it is difficult
to see all the mud and dirt. It will do
more harm than good to wet down
the road grime without removing it.
The lower edges of the doors, rocker
panels, and frame members have
drain holes that should not clog with
dirt; trapped water in these areas can
cause rusting.
Page 463 of 479
Maintenance
78 7
Aluminum wheel maintenance
The aluminum wheels are coated
with a clear protective finish.
• Do not use any abrasive cleaner,
polishing compound, solvent, or
wire brushes on aluminum wheels.
They may scratch or damage the
finish.
• Clean the wheel when it has
cooled.
• Use only a mild soap or neutral
detergent, and rinse thoroughly
with water. Also, be sure to clean
the wheels after driving on salted
roads. This helps prevent corrosion.
• Avoid washing the wheels with
high-speed car wash brushes.
• Do not use any alkaline or acid
detergent. It may damage and cor-
rode the aluminum wheels coated
with a clear protective finish.
Corrosion protection
Protecting your vehicle from corro-
sion
By using the most advanced design
and construction practices to combat
corrosion, we produces cars of the
highest quality. However, this is only
part of the job. To achieve the long-
term corrosion resistance your vehi-
cle can deliver, the owner's coopera-
tion and assistance is also required.
Common causes of corrosion
The most common causes of corro-
sion on your car are:
• Road salt, dirt and moisture that is
allowed to accumulate underneath
the vehicle.
• Removal of paint or protective
coatings by stones, gravel, abra-
sion or minor scrapes and dents
which leave unprotected metal
exposed to corrosion.WARNING
After washing the vehicle, test
the brakes while driving slowly
to see if they have been affected
by water. If braking performance
is impaired, dry the brakes by
applying them lightly while
maintaining a slow forward
speed.
Page 466 of 479
781
Maintenance
Cleaning the upholstery and inte-
rior trim
Vinyl
Remove dust and loose dirt from
vinyl with a whisk broom or vacuum
cleaner. Clean vinyl surfaces with a
vinyl cleaner.
Fabric
Remove dust and loose dirt from fab-
ric with a whisk broom or vacuum
cleaner. Clean with a mild soap solu-
tion recommended for upholstery or
carpets. Remove fresh spots imme-
diately with a fabric spot cleaner. If
fresh spots do not receive immediate
attention, the fabric can be stained
and its color can be affected. Also, its
fire-resistant properties can be
reduced if the material is not proper-
ly maintained.
Cleaning the lap/shoulder belt
webbing
Clean the belt webbing with any mild
soap solution recommended for
cleaning upholstery or carpet. Follow
the instructions provided with the
soap. Do not bleach or re-dye the
webbing because this may weaken
it.
Cleaning the interior window
glass
If the interior glass surfaces of the
vehicle become fogged (that is, cov-
ered with an oily, greasy or waxy
film), they should be cleaned with
glass cleaner. Follow the directions
on the glass cleaner container.
CAUTION
When cleaning leather products
(steering wheel, seats etc.), use
neutral detergents or low alco-
hol content solutions. If you use
high alcohol content solutions
or acid/alkaline detergents, the
color of the leather may fade or
the surface may get stripped off.
CAUTION
Using anything but recommend-
ed cleaners and procedures
may affect the fabric’s appear-
ance and fire-resistant proper-
ties.
CAUTION
Do not scrape or scratch the
inside of the rear window. This
may result in damage to the rear
window defroster grid.