Page 309 of 433
308Driving
BrakingBrake SystemUse the parking brake to keep the vehicle stationary when parking.
To apply:
Depress the parking brake pedal down with
your foot.
To release:
1.Depress the brake pedal.
2.Depress the parking brake.■
Parking Brake
1Parking BrakeNOTICERelease the parking brake fully before driving. The
rear brakes and axle can be damaged if you drive
with the parking brake applied.
If you start driving without fully releasing the parking
brake, a buzzer sounds as a warning, and RELEASE
PARKING BRAKE appears on the multi-information
display
*.
Always apply the parking brake when parking.
To apply
To release
* Not available on all models
Page 311 of 433

310
uuBrakinguABS (Anti-lock Brake System)
Driving
ABS (Anti-lock Brake System)Helps prevent the wheels from locking up, and helps you retain steering control by
pumping the brakes rapidly, much faster than you.
The electronic brake distribution (EBD) system, which is part of the ABS, also
balances the front-to-rear braking distribution according to vehicle loading.
You should never pump the brake pedal. Let the ABS work for you by always
keeping firm, steady pressure on the brake pedal. This is sometimes referred to as
“stomp and steer.”■ABS operation
The brake pedal may pulsate slightly when the ABS is working. Keep holding the
pedal firmly down. On dry pavement, you will need to press on the brake pedal very
hard before the ABS activates. However, you may feel the ABS activate immediately
if you are trying to stop on snow or ice.
When the vehicle speed goes under 6 mph (10 km/h), the ABS stops.■
ABS
1ABS (Anti-lock Brake System)NOTICEThe ABS may not function correctly if you use an
incorrect tire type and size.
When the ABS indicator comes on while driving,
there may be a problem with the system.
While normal braking is not affected, there is a
possibility of the ABS not operating. Have the vehicle
checked by a dealer immediately.
The ABS does not reduce the time or distance it takes
to stop the vehicle. It only helps with steering control
during hard braking.
In the following cases, your vehicle may need more
stopping distance than a vehicle without the ABS:•When driving on rough road surfaces, including
when driving on uneven surfaces, such as gravel or
snow.•When tire chains are installed.
You may hear a motor sound coming from the
engine compartment while system checks are being
performed immediately after starting the engine or
while driving. This is normal.
Page 314 of 433

313
uuParking Your VehicleuParking Sensor System
*
Continued
Driving
Parking Sensor System
*
The corner and rear center sensors monitor obstacles around your vehicle, and the
beeper and display let you know the approximate distance between your vehicle and
the obstacle.■The sensor location and range
1Parking Sensor System
*
Even when the system is on, always confirm if there is
no obstacle near your vehicle before parking.
The system may not work properly when:•The sensors are covered with snow, ice, mud, or
dirt.•The vehicle is on an uneven surface, such as grass,
bumps, or a hill.•The vehicle has been out in hot or cold weather.•The system is affected by some electric devices that
generate ultrasonic waves.•Driving in bad weather.
The system may not sense:•Thin or low objects.•Sonic-absorptive materials, such as snow, cotton,
or sponge.•Objects directly under the bumper.
Do not put any accessories on or around the sensors.
Within about 60 cm (24 in) or lessWithin about 110 cm (43 in) or less Front Corner Sensors Rear Center Sensors
Rear Corner Sensors
* Not available on all models
Page 315 of 433
uuParking Your VehicleuParking Sensor System
*
314Driving
■When you activate the system
The indicator in the button comes on and the beeper sounds when the system is on.
The corner sensors start to detect an obstacle when the shift lever is in any position
other than
(P
, and the vehicle speed is less than 5 mph (8 km/h).
The rear center sensors start to detect an obstacle when the shift lever is in
(R
, and
the vehicle speed is less than 5 mph (8 km/h).
1Parking Sensor System
*
When you turn the ignition switch to ON
(w, the
system will be in the previously selected condition.
Parking Sensor
System Button:
Press to activate
the system with
the ignition switch
in ON
(w.Beep
* Not available on all models
Page 317 of 433

uuParking Your VehicleuParking Sensor System
*
316Driving
■The parking sensor system on audio/navigation screen
•An appropriate indicator blinks when there
are any obstacles around the parking
sensors. The color of the indicator changes
in accordance with the distance between
your vehicle and obstacles.
•An appropriate indicator stays on in red
when there is a problem with the
corresponding parking sensor.
2Parking Sensor Indicator
* P. 77
2Multi-Information Display Warning
and Information Messages* P. 85
1.Make sure that the parking sensor system is not activated. Turn the ignition
switch to LOCK
(0
.
2.Press and hold the parking sensor system button, and turn the ignition switch to
ON
(w
.
3.Keep pressing the button for 10 seconds. Release the button when the indicator
in the button flashes.
4.Press the button again. The indicator in the button goes off.
uThe beeper sounds twice. The rear sensors are now turned off.
To turn the rear sensors on again, follow the above procedure. The beeper sounds
three times when the rear sensors come back on.
Models without navigation systemModels without navigation system
■
Turning off All Rear Sensors
1Turning off All Rear Sensors
When you shift to
(R, the indicator in the parking
sensor system button blinks as a reminder that the
rear sensors have been turned off.
* Not available on all models
Page 318 of 433

317Driving
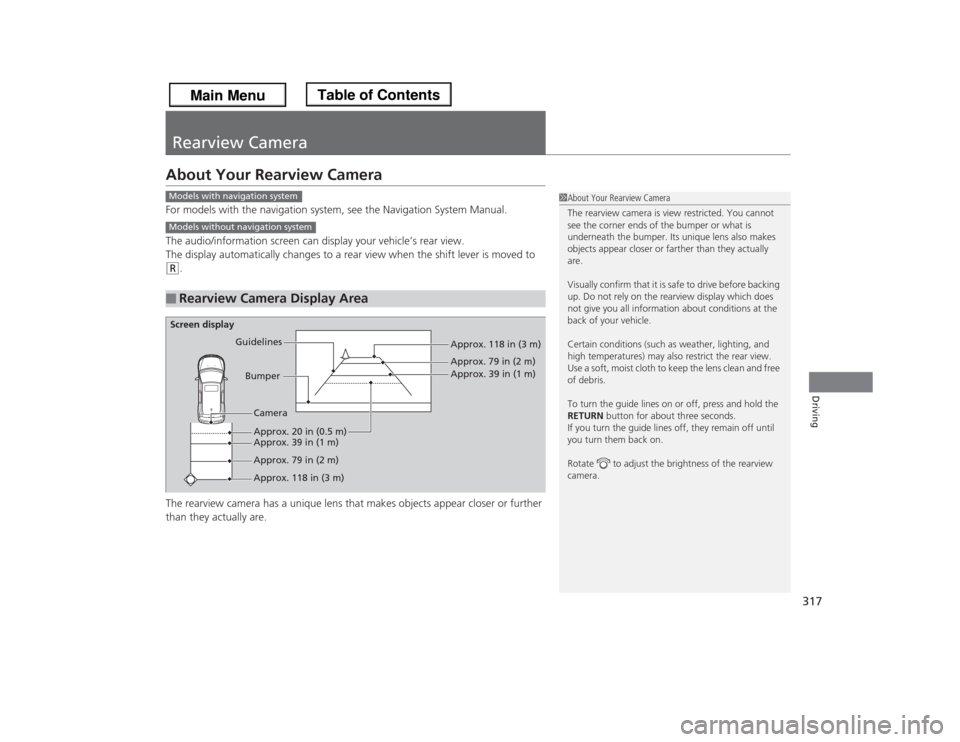
Rearview CameraAbout Your Rearview CameraFor models with the navigation system, see the Navigation System Manual.
The audio/information screen can display your vehicle’s rear view.
The display automatically changes to a rear view when the shift lever is moved to (R
.
The rearview camera has a unique lens that makes objects appear closer or further
than they actually are.
■
Rearview Camera Display Area
1About Your Rearview Camera
The rearview camera is view restricted. You cannot
see the corner ends of the bumper or what is
underneath the bumper. Its unique lens also makes
objects appear closer or farther than they actually
are.
Visually confirm that it is safe to drive before backing
up. Do not rely on the rearview display which does
not give you all information about conditions at the
back of your vehicle.
Certain conditions (such as weather, lighting, and
high temperatures) may also restrict the rear view.
Use a soft, moist cloth to keep the lens clean and free
of debris.
To turn the guide lines on or off, press and hold the
RETURN button for about three seconds.
If you turn the guide lines off, they remain off until
you turn them back on.
Rotate to adjust the brightness of the rearview
camera.
Models with navigation systemModels without navigation systemScreen display
Bumper Guidelines
Approx. 118 in (3 m)
Approx. 79 in (2 m)
Approx. 39 in (1 m)
Approx. 20 in (0.5 m)
Approx. 118 in (3 m) Approx. 79 in (2 m) Approx. 39 in (1 m)Camera
Page 320 of 433

Continued
319
uuRefuelinguHow to Refuel
Driving
Qualifying gasoline retailers will, in most cases, identify their gasoline as having met
“TOP TIER Detergent Gasoline” standards at the retail location. This fuel is
guaranteed to contain the proper level of detergent additives and be free of metallic
additives. The proper level of detergent additives, and absence of harmful metallic
additives in gasoline, help avoid build-up of deposits in your engine and emission
control system.
For further important fuel-related information for your vehicle, or on information on
gasoline that does not contain MMT, visit www.hondacars.com. In Canada, visit
www.honda.ca for additional information on gasoline. For more information on top
tier gasoline, visit www.toptiergas.com.■Fuel tank capacity: 21 US gal (79.5 liters)How to Refuel
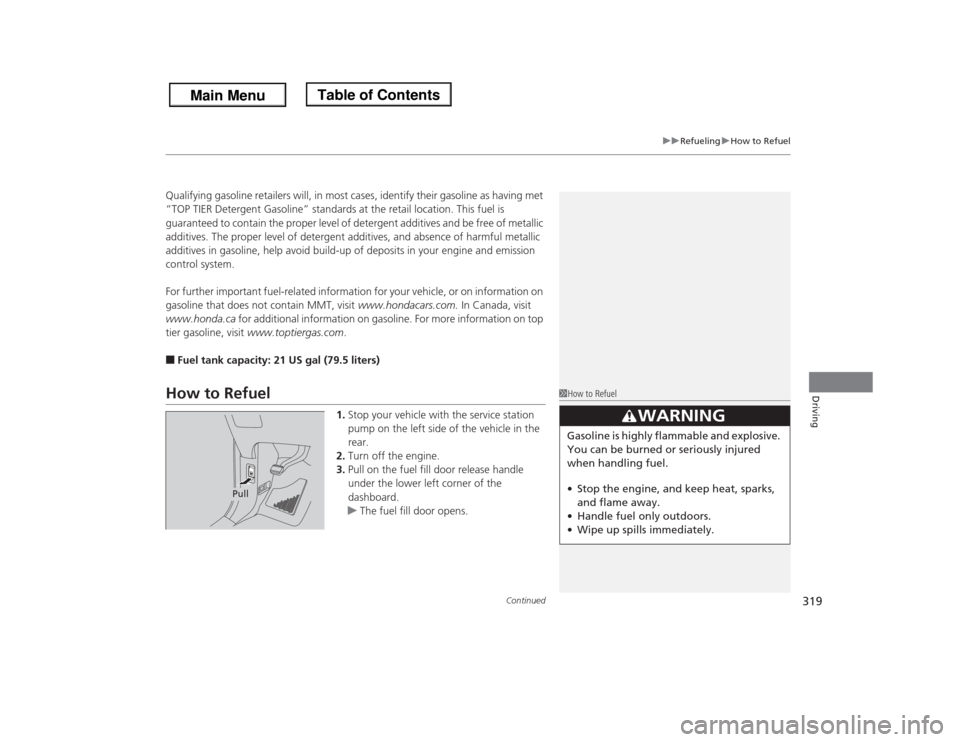
1.Stop your vehicle with the service station
pump on the left side of the vehicle in the
rear.
2.Turn off the engine.
3.Pull on the fuel fill door release handle
under the lower left corner of the
dashboard.
uThe fuel fill door opens.
1How to Refuel
3
WARNING
Gasoline is highly flammable and explosive.
You can be burned or seriously injured
when handling fuel.
•Stop the engine, and keep heat, sparks,
and flame away.
•Handle fuel only outdoors.
•Wipe up spills immediately.
Pull
Page 330 of 433

329
uuMaintenance Minder™uTo Use Maintenance Minder
TM
Continued
Maintenance
■
Maintenance Service Items
1Maintenance Service Items•Independent of the Maintenance Minder
information, replace the brake fluid every 3 years.•Inspect idle speed every 160,000 miles (256,000
km).•Adjust the valves during services A, B, 1, 2, or 3 if
they are noisy.
Maintenance Minder Message Maintenance
Minder Indicator
Sub Items Main Item
*1: If a message SERVICE does not appear more than 12 months after the display is reset, change the
engine oil every year.
# : See information on maintenance and emissions warranty.CODE
Maintenance Main Items
A
●Replace engine oil
*1
B
●Replace engine oil
*1 and oil filter
●Inspect front and rear brakes/service as necessary●Check parking brake adjustment●Inspect tie rod ends, steering gearbox, and boots●Inspect suspension components●Inspect driveshaft boots●Inspect brake hoses and lines (Including ABS/VSA)●Inspect all fluid levels and condition of fluids●Inspect exhaust system
#
●Inspect fuel lines and connections
#
*2: If you drive in dusty conditions, replace the air cleaner element every 15,000 miles (24,000 km).
*3: If you drive primarily in urban areas that have high concentrations of soot in the air from industry and
from diesel-powered vehicles, replace the dust and pollen filter every 15,000 miles (24,000 km).
*4: If you drive regularly in very high temperatures (over 110ºF, 43ºC), in very low temperatures (under
20ºF, 29ºC), replace every 60,000 miles/100,000 km.CODE
Maintenance Sub Items
1
●Rotate tires
2
●Replace air cleaner element
*2
●Replace dust and pollen filter
*3
●Inspect drive belt
3●Replace transmission fluid
4
●Replace spark plugs●Replace timing belt and inspect water pump
*4
●Inspect valve clearance
5●Replace engine coolant