Page 334 of 433

333
uuMaintenance Minder™uTo Use Maintenance Minder
TM
Continued
Maintenance
■
Maintenance Service Items
1Maintenance Service Items•Independent of the Maintenance Minder
information, replace the brake fluid every 3 years.•Inspect idle speed every 160,000 miles (256,000
km).•Adjust the valves during services A, B, 1, 2, or 3
only if they are noisy.
Maintenance Minder Message System Message
Indicator
Sub Items Main Item
*1: If a message SERVICE does not appear more than 12 months after the display is reset, change the
engine oil every year.
# : See information on maintenance and emissions warranty.CODE
Maintenance Main Items
A
●Replace engine oil
*1
B
●Replace engine oil
*1 and oil filter
●Inspect front and rear brakes/service as necessary●Check parking brake adjustment●Inspect tie rod ends, steering gearbox, and boots●Inspect suspension components●Inspect driveshaft boots●Inspect brake hoses and lines (Including ABS/VSA)●Inspect all fluid levels and condition of fluids●Inspect exhaust system
#
●Inspect fuel lines and connections
#
*2: If you drive in dusty conditions, replace the air cleaner element every 15,000 miles (24,000 km).
*3: If you drive primarily in urban areas that have high concentrations of soot in the air from industry and
from diesel-powered vehicles, replace the dust and pollen filter every 15,000 miles (24,000 km).
*4: If you drive regularly in very high temperatures (over 110ºF, 43ºC), in very low temperatures (under
20ºF, 29ºC), replace every 60,000 miles/100,000 km.CODE
Maintenance Sub Items
1
●Rotate tires
2
●Replace air cleaner element
*2
●Replace dust and pollen filter
*3
●Inspect drive belt
3●Replace transmission fluid
4
●Replace spark plugs●Replace timing belt and inspect water pump
*4
●Inspect valve clearance
5●Replace engine coolant
Page 354 of 433
353
uuReplacing Light BulbsuBrake/Rear Side Marker/Taillight and Rear Turn Signal Light Bulbs
Continued
Maintenance
Brake/Rear Side Marker/Taillight and Rear Turn Signal Light BulbsWhen replacing, use the following bulbs.
1.Remove the mounting bolts.Brake/Rear Side Marker/Taillight: 21/5 W
Rear Turn Signal Light: 21 W (Amber)Mounting
Bolts
Page 355 of 433
uuReplacing Light BulbsuBrake/Rear Side Marker/Taillight and Rear Turn Signal Light Bulbs
354Maintenance
2.Place one hand on the outer corner of the
taillight assembly and other hand on the
lower edge of the taillight, near the cargo
area.
3.Pull the outer corner of the taillight
assembly toward you while supporting the
assembly with the hand closest to the cargo
area.
4.Turn the socket to the left and remove it.
5.Remove the old bulb and insert a new bulb.
1Brake/Rear Side Marker/Taillight and Rear Turn Signal Light Bulbs
To reinstall, insert the fasteners into the grommets
and push the assembly back into place.
uDo not reinstall the assembly if the grommets are
loose or out of the holes. Contact a dealer to
replace them.
Grommet
Bulb
SocketUpper
Fastener
Lower
Fastener
Page 357 of 433
356
uuReplacing Light BulbsuRear License Plate Light Bulbs
Maintenance
Rear License Plate Light BulbsWhen replacing, use the following bulbs.
1.Remove the cover by prying on the edge of
the cover using a flat-tip screwdriver.
uWrap the flat-tip screwdriver with a cloth
to prevent scratches.
2.Remove the license plate light assembly by
squeezing the tabs on both sides of the
socket.
3.Remove the old bulb and insert a new bulb.Rear License Plate Light: 5 W
Cover
Bulb
Socket
Page 361 of 433
360
uuChecking and Maintaining Wiper BladesuChanging the Rear Wiper Blade Rubber
Maintenance
Changing the Rear Wiper Blade Rubber
1.Raise the wiper arm off.
2.Pivot the bottom end of the wiper blade up
until it comes off from the wiper arm.
3.Slide the blade out of the wiper.
4.Remove the retainers from wiper blade and
mount it to a new rubber blade.
1Changing the Rear Wiper Blade RubberNOTICEAvoid dropping the wiper arm, it may damage the
rear window.
Wiper
Blade
Wiper Arm
Blade
Retainer
Rubber
Page 362 of 433
361
uuChecking and Maintaining Wiper BladesuChanging the Rear Wiper Blade Rubber
Maintenance
5.Slide the new wiper blade onto the holder.
uMake sure it is engaged correctly, then
install the wiper blade assembly onto the
wiper arm.
Page 364 of 433

363
uuChecking and Maintaining TiresuTire and Loading Information Label
Continued
Maintenance
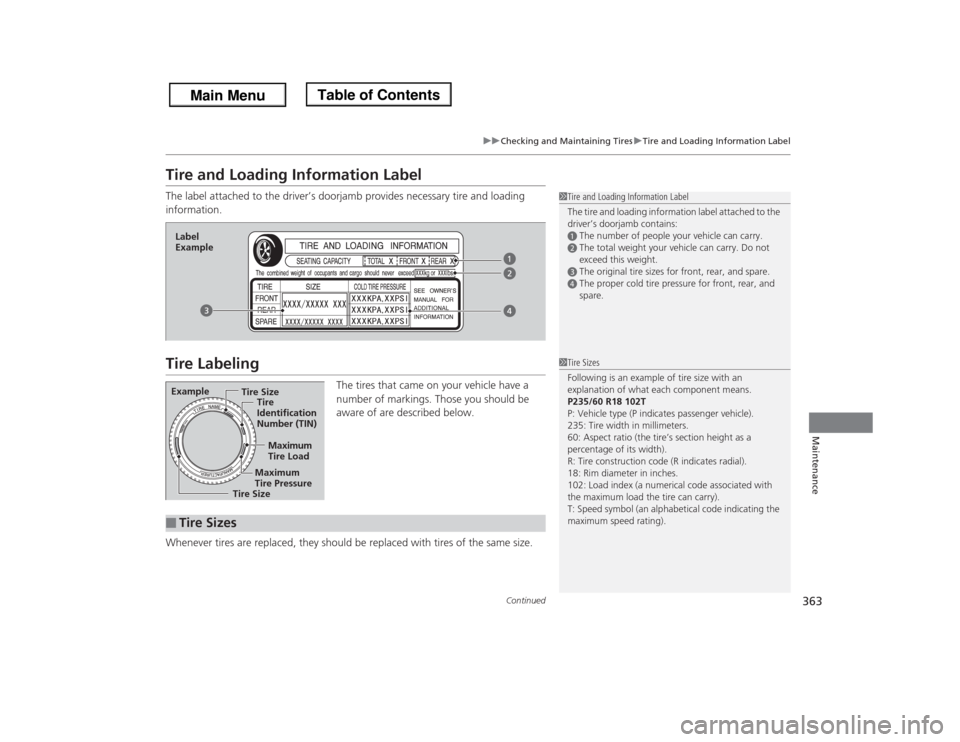
Tire and Loading Information LabelThe label attached to the driver’s doorjamb provides necessary tire and loading
information.Tire Labeling
The tires that came on your vehicle have a
number of markings. Those you should be
aware of are described below.
Whenever tires are replaced, they should be replaced with tires of the same size.
1Tire and Loading Information Label
The tire and loading information label attached to the
driver’s doorjamb contains:aThe number of people your vehicle can carry.bThe total weight your vehicle can carry. Do not
exceed this weight.cThe original tire sizes for front, rear, and spare.dThe proper cold tire pressure for front, rear, and
spare.
Label
ExampleExample
Tire Size
Tire
Identification
Number (TIN)
Maximum
Tire Load
Maximum
Tire Pressure
Tire Size■
Tire Sizes
1Tire Sizes
Following is an example of tire size with an
explanation of what each component means.
P235/60 R18 102T
P: Vehicle type (P indicates passenger vehicle).
235: Tire width in millimeters.
60: Aspect ratio (the tire’s section height as a
percentage of its width).
R: Tire construction code (R indicates radial).
18: Rim diameter in inches.
102: Load index (a numerical code associated with
the maximum load the tire can carry).
T: Speed symbol (an alphabetical code indicating the
maximum speed rating).
Page 368 of 433

367
uuChecking and Maintaining TiresuWear Indicators
Maintenance
Wear Indicators
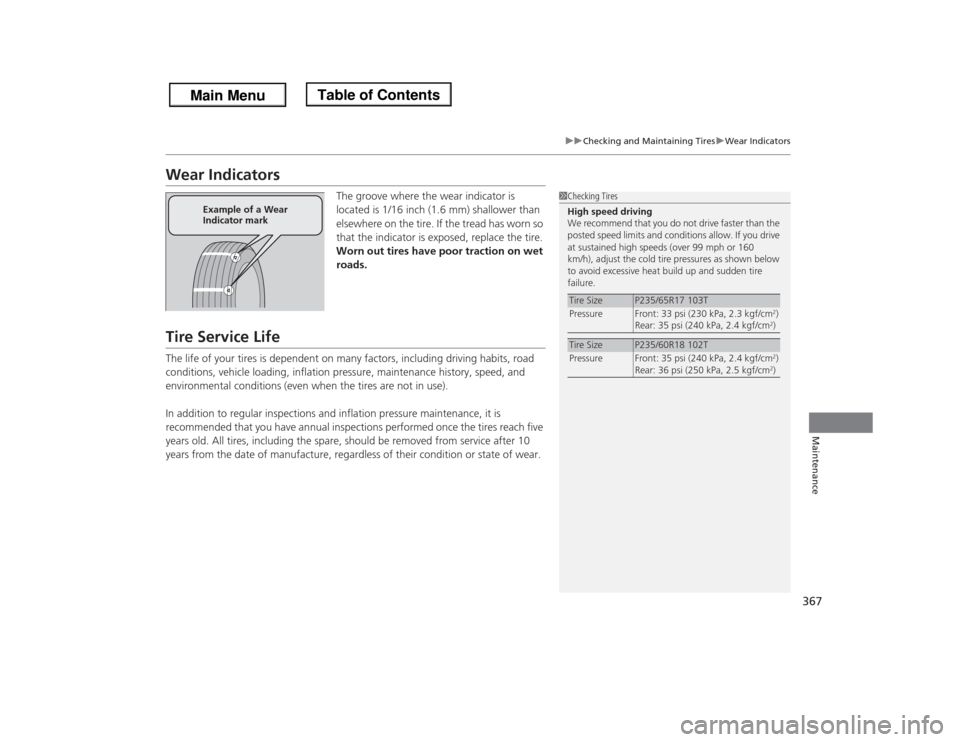
The groove where the wear indicator is
located is 1/16 inch (1.6 mm) shallower than
elsewhere on the tire. If the tread has worn so
that the indicator is exposed, replace the tire.
Worn out tires have poor traction on wet
roads.
Tire Service LifeThe life of your tires is dependent on many factors, including driving habits, road
conditions, vehicle loading, inflation pressure, maintenance history, speed, and
environmental conditions (even when the tires are not in use).
In addition to regular inspections and inflation pressure maintenance, it is
recommended that you have annual inspections performed once the tires reach five
years old. All tires, including the spare, should be removed from service after 10
years from the date of manufacture, regardless of their condition or state of wear.
1Checking Tires
High speed driving
We recommend that you do not drive faster than the
posted speed limits and conditions allow. If you drive
at sustained high speeds (over 99 mph or 160
km/h), adjust the cold tire pressures as shown below
to avoid excessive heat build up and sudden tire
failure.Tire Size
P235/65R17 103T
Pressure Front: 33 psi (230 kPa, 2.3 kgf/cm
2)
Rear: 35 psi (240 kPa, 2.4 kgf/cm2)
Tire Size
P235/60R18 102T
Pressure Front: 35 psi (240 kPa, 2.4 kgf/cm
2)
Rear: 36 psi (250 kPa, 2.5 kgf/cm2)
Example of a Wear
Indicator mark