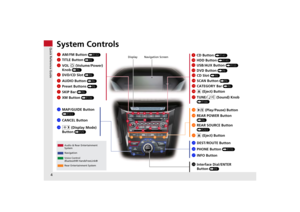
Page 9 of 267
7Quick Reference Guide
Audio Control DisplayPress the AUDIO button to display the audio system on the navigation screen.FM/AM Radio
(P132)
, XM® Radio
(P136)
Hard Disk Drive (HDD)
(P145)
, iPod®
(P155)
,USB Flash Drive
(P160)
Band
Stereo indicatorPresets
Tune, scan, and
other functions
iPod® mode
(HDD mode,
USB mode)
Search
menu
Track list Repeat, shuffle, and other functions
Compact Disc
(P141)
Bluetooth
® Audio
(P164)
Disc mode
Play mode
Recorded
icon
Recording icon
Recording
ready icon
Repeat, random, scan, and
other functions
Track listBluetooth®
Audio mode
Stop/Start
control
Sound preferences
Page 10 of 267
8Quick Reference Guide
Interface Dial/ENTER Button Operation
You will see these icons in each chapter.
They represent how you can operate the Interface Dial.
Changes scaleMap screensHighlights menu optionsMenu screens
Rotate dial Press ENTER
Move up Move left Move down Move rightScrolls map
(8 directions)Menu screens
Selects labeled
functionMenu screens
Selects function Selects map iconMap screens
Selecting Icon
Selects highlighted optionMenu screens
Rotate dial i Press ENTER u
Move
e up r down w left y right
Page 11 of 267

9Quick Reference Guide
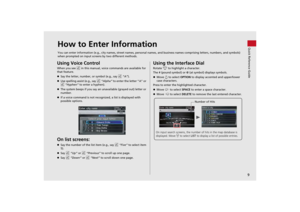
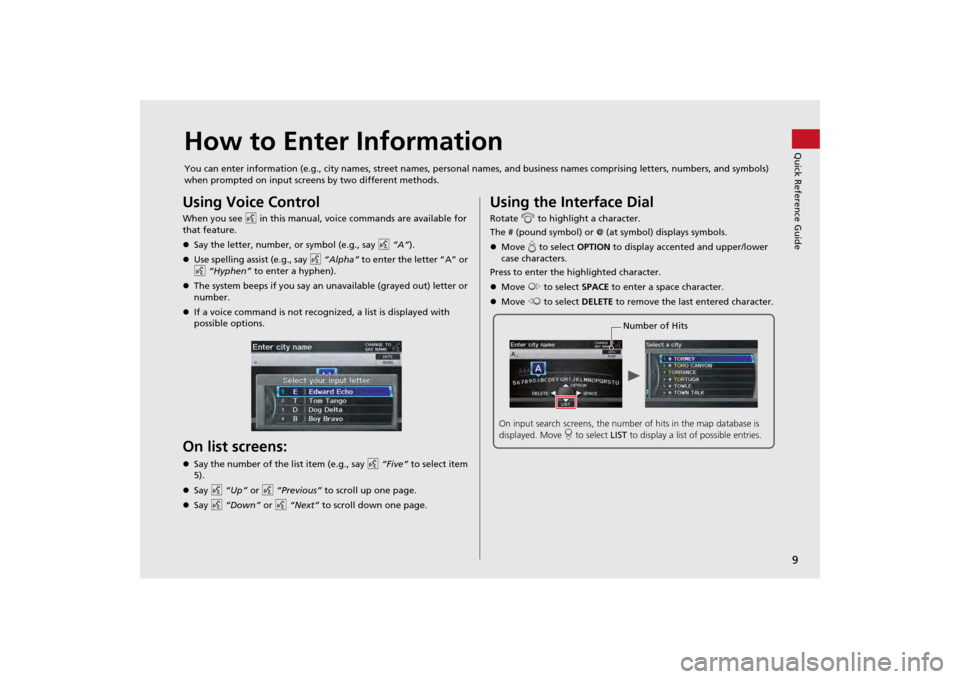
How to Enter InformationYou can enter information (e.g., city names, street names, personal names, and business names comprising letters, numbers, and symbols)
when prompted on input screens by two different methods.Using Voice ControlWhen you see d in this manual, voice commands are available for
that feature.
Say the letter, number, or symbol (e.g., say d “A”).
Use spelling assist (e.g., say d “Alpha” to enter the letter “A” or
d “Hyphen” to enter a hyphen).
The system beeps if you say an unavailable (grayed out) letter or
number.
If a voice command is not recognized, a list is displayed with
possible options.On list screens:Say the number of the list item (e.g., say d “Five” to select item
5).
Say d “Up” or d “Previous” to scroll up one page.
Say d “Down” or d “Next” to scroll down one page.
Using the Interface DialRotate i to highlight a character.
The # (pound symbol) or @ (a t symbol) displays symbols.
Move e to select OPTION to display accented and upper/lower
case characters.
Press to enter the highlighted character.
Move y to select SPACE to enter a space character.
Move w to select DELETE to remove the last entered character.
Number of Hits
On input search screens, the number of hits in the map database is
displayed. Move r to select LIST to display a list of possible entries.
Page 12 of 267

10Quick Reference Guide
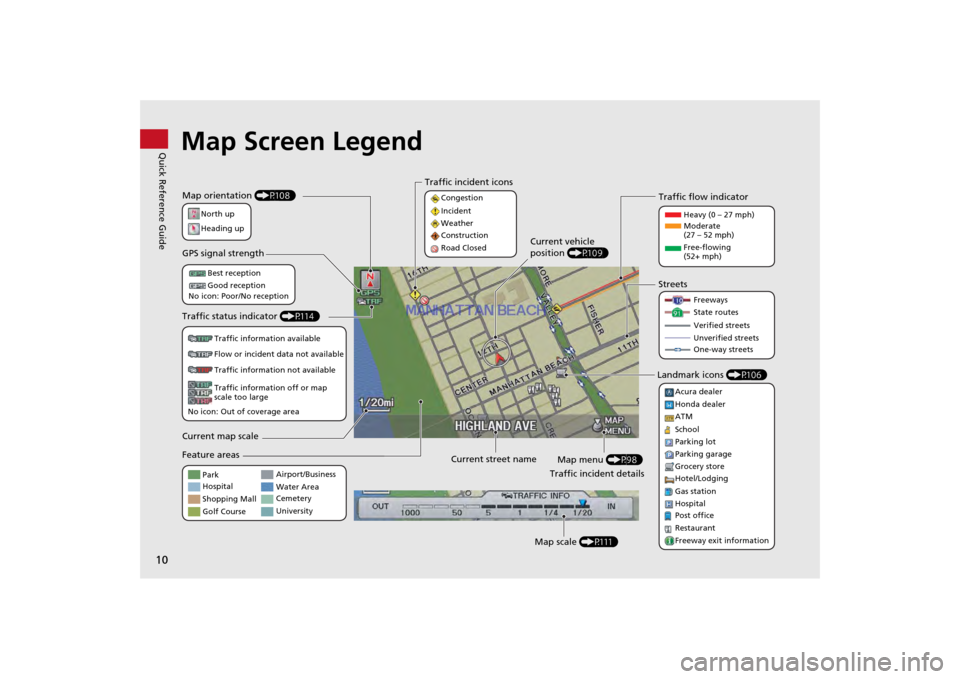
Map Screen LegendMap orientation (P108)
GPS signal strength
North up
Heading upBest reception
Good reception
No icon: Poor/No reception
Traffic status indicator (P114)
Traffic information available
Flow or incident data not available
Traffic information not available
Traffic information off or map
scale too large
No icon: Out of coverage area
Current street name Map menu (P98)
Map scale (P111)
Current vehicle
position
(P109)
Streets
Landmark icons (P106)
Park
Hospital
Shopping Mall
Golf Course Airport/Business
Water Area
Cemetery
University Freeways
State routes
Verified streets
Unverified streets
One-way streets
Acura dealer
Honda dealer
ATM
School
Parking lot
Parking garage
Grocery store
Hotel/Lodging
Gas station
Hospital
Post office
Restaurant
Freeway exit information
Feature areas Current map scale Traffic incident icons
Congestion
Incident
Weather
Construction
Road Closed
Traffic flow indicator
Heavy (0 – 27 mph)
Moderate
(27 – 52 mph)
Free-flowing
(52+ mph)
Traffic incident details
Page 13 of 267
11Quick Reference Guide
During Route GuidanceDuring route guidance, route information is displayed on the ma p screen and guidance screen.
Press the MAP/GUIDE button to toggle between the map and guidance screen.Map Screen
Guidance ScreenCalculated route
(P93)
Destination direction
indicator
Direction “as the crow
flies” Next guidance
indicator
Distance to the next
guidance point.
Distance to destination
Distance of the actual
route.
Estimated time to
destination Waypoint (P118) Destination icon
(P92)
Calculated route
(unverified roads)
(P94)Street name of
guidance point Route guidance list scroll bar
Rotate
i to scroll the list of
guidance points.
Route progress bar Distance to
guidance point
No entry icon
Map MenuContains map or routing options.Day or Night ModePress the a (Display mode) button
to manually switch between day and
night mode.
Day mode Night mode
Page 14 of 267

12Quick Reference Guide
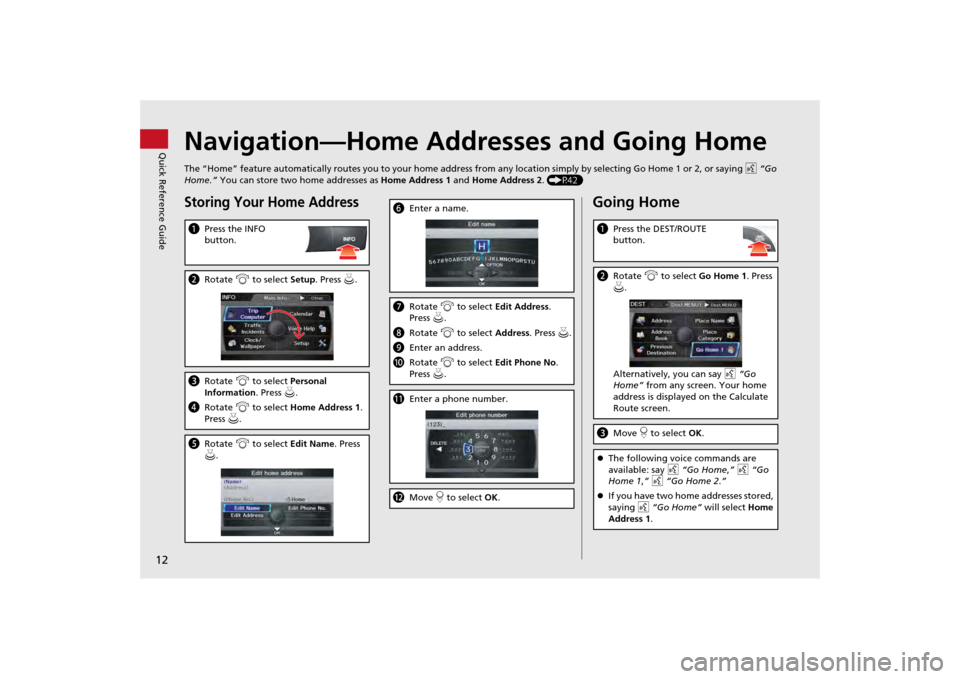
Navigation—Home Addresses and Going HomeThe “Home” feature automatically routes you to your home address from any location simply by selecting Go Home 1 or 2, or saying d “Go
Home.” You can store two home addresses as Home Address 1 and Home Address 2. (P42)Storing Your Home AddressaPress the INFO
button.bRotate i to select Setup . Press u.cRotate i to select Personal
Information . Press u.
d Rotate i to select Home Address 1.
Press u.e Rotate i to select Edit Name. Press
u .
f Enter a name.gRotate i to select Edit Address .
Press u.
h Rotate i to select Address. Press u.
i Enter an address.
j Rotate i to select Edit Phone No .
Press u.k Enter a phone number.lMove r to select OK .
Going HomeaPress the DEST/ROUTE
button.bRotate i to select Go Home 1. Press
u .
Alternatively, you can say d “Go
Home” from any screen. Your home
address is displayed on the Calculate
Route screen.c Move r to select OK.The following voice commands are
available: say d “Go Home ,” d “Go
Home 1 ,” d “Go Home 2.”
If you have two home addresses stored,
saying d “Go Home” will select Home
Address 1.
Page 15 of 267
13Quick Reference Guide
Navigation—Entering a DestinationEnter your destination using one of several methods, then follow route guidance on the map or guidance screen to your destinati on. You
can also perform these steps using d voice control.a Press the DEST/ROUTE
button.bRotate i to select Address . Press u.cRotate i to select Street . Press u.dEnter the name of your destination
street.
eRotate i to select your destination
street from the list. Press u.f Enter the street number. Move r to
select OK when finished.g If there is more than one city with the
specified street, a list of cities is
displayed. Rotate i to select the
desired city from the list. Press u.
h Rotate i to select OK . Press u.
Route guidance to the destination
begins.
Select View Routes : Choose one of
three routes.
Select Route Pref. : Choose MAX or MIN
for the four settings.
Page 16 of 267

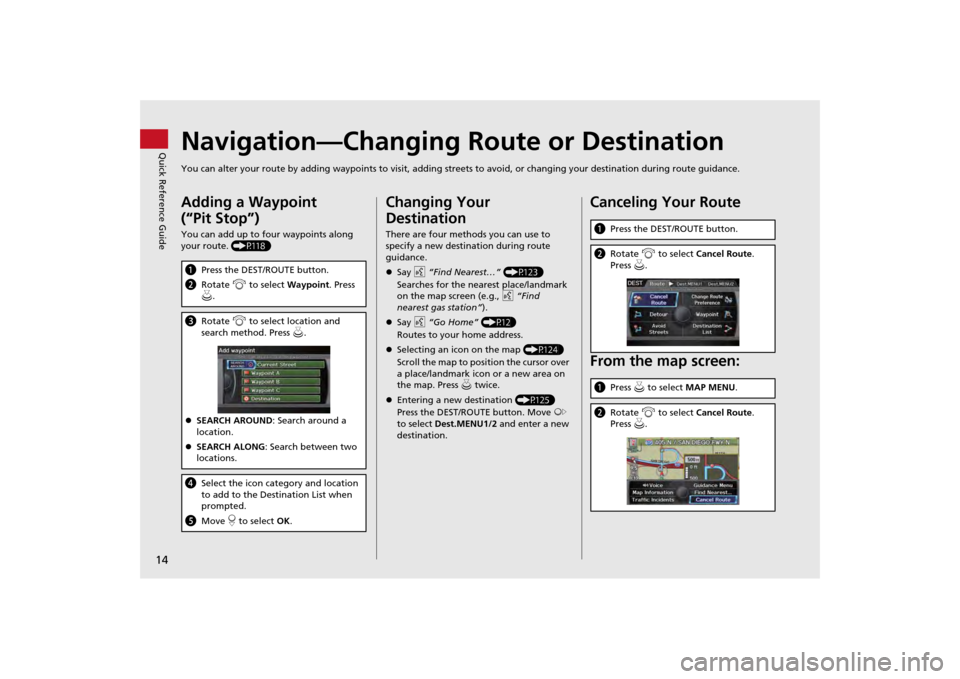
14Quick Reference Guide
Navigation—Changing Route or DestinationYou can alter your route by adding waypoints to visit, adding streets to avoid, or changing your destination during route guida nce.Adding a Waypoint
(“Pit Stop”)You can add up to four waypoints along
your route. (P118)aPress the DEST/ROUTE button.
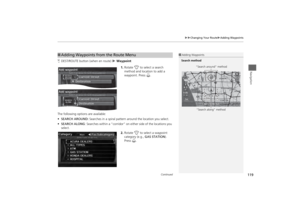
b Rotate i to select Waypoint . Press
u .c Rotate i to select location and
search method. Press u .
SEARCH AROUND : Search around a
location.
SEARCH ALONG : Search between two
locations.d Select the icon category and location
to add to the Destination List when
prompted.
e Move r to select OK.
Changing Your
DestinationThere are four methods you can use to
specify a new destination during route
guidance.
Say d “Find Nearest…” (P123)
Searches for the nearest place/landmark
on the map screen (e.g., d “Find
nearest gas station” ).
Say d “Go Home” (P12)
Routes to your home address.
Selecting an icon on the map (P124)
Scroll the map to positi on the cursor over
a place/landmark icon or a new area on
the map. Press u twice.
Entering a new destination (P125)
Press the DEST/ROUTE button. Move y
to select Dest.MENU1/2 and enter a new
destination.
Canceling Your Route
From the map screen:a Press the DEST/ROUTE button.bRotate i to select Cancel Route .
Press u.a Press u to select MAP MENU .bRotate i to select Cancel Route .
Press u.