Page 25 of 267
23
Voice Control System
Voice Recognition
System Setup
Voice RecognitionTo achieve optimum voice recognition when using either the navigation voice
control system or Bluetooth® HandsFreeLink®:
• Make sure the correct screen is displa yed for the voice command that you are
using. 2 Voice Commands
P. 246
• Close the windows and moonroof.
• Adjust the dashboard and side vents so air does not blow onto the microphone on
the ceiling.
• Speak clearly in a clear, natural speaking voice without pausing between words.
• Reduce any background noise if possible. The system may misinterpret your
command if more than one person is speaking at the same time.
• Refer to the Voice Help tutorial.
2 Voice Help
P. 5
1Voice Recognition
The voice control system can only be used from
the driver’s seat beca use the microphone unit
removes noises from the front passenger’s side.
Page 26 of 267
24System Setup
Interface SettingsDisplay and Volume SettingsHINFO button
Setup
Use the Main Setup screen to ad just the display and volume.
1.Rotate i to select an item. Press
u .
2. Rotate i to make the
adjustment. Press u.
The following item s are available:
• Brightness: Adjusts the screen’s brightness.
• Contrast: Adjusts the screen’s contrast.
• Black Level: Adjusts the screen’s black level.
• Volume: Adjusts the navigation system volume level.
1Display and Volume Settings
You can set separate daytime and nighttime
settings for Brightness, Contrast, and Black
Level . Adjust each setting when the display is in
either daytime or nighttime mode.
You can set the display and volume settings
using voice commands on the Setup screen.
2 Main Setup Screen Commands P. 254
Volume
If you set Volume to OFF, you will not hear
route guidance or voic e command confirmations.
If you then select Voice in the Map Menu, you
will hear route guidance at the default volume.
Page 27 of 267
25
Interface Settings
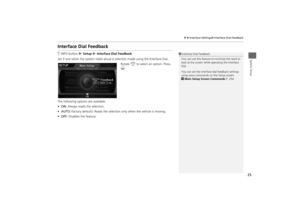
Interface Dial Feedback
System Setup
Interface Dial FeedbackHINFO button
Setup
Interface Dial Feedback
Set if and when the system reads aloud a selection made using the Interface Dial.
Rotate i to select an option. Press
u .
The following options are available:
• ON : Always reads the selection.
• AUTO (factory default): Reads the selectio n only when the vehicle is moving.
• OFF: Disables the feature.
1Interface Dial Feedback
You can use this feature to minimize the need to
look at the screen while operating the Interface
Dial.
You can set the interface dial feedback settings
using voice commands on the Setup screen.
2 Main Setup Screen Commands P. 254
Page 28 of 267
26
Interface Settings
Basic Settings
System Setup
Basic SettingsHINFO button
Setup
Other
Basic Settings
Set the map units to either miles or kilome ters (km), and control the voice feedback
from the navigation system.
Rotate i to select an item. Press u .
The following item s are available:
• Units : Sets the map units to eith er miles (factory default) or kilometers (km).
• Voice Recognition Tutor : Turns the voice feedback feature on or off.
ON (factory default): Provides voice control system confirmation or prompts.
OFF : Disables the feature.
Page 29 of 267
27
Interface Settings
Color
System Setup
ColorHINFO button
Setup
Other
Color
Choose the color of the navigation map and system menus. Rotate i to select an item. Press u.
The following items are available:
• Map Color : Sets the color of the map screen.
2Map Color
P. 28
• Menu Color : Sets the color of the menu screens.
2Menu Color
P. 28
Continued
Page 30 of 267
28
Interface Settings
Color
System Setup
HINFO button
Setup
Other
Color
Map Color
Set separate map colors for Day and Night modes. 1.Rotate i to select Day or Night .
Press u.
2. Rotate i to select a color for the
map screen. Press u.
H INFO button
Setup
Other
Color
Menu Color
Set separate menu colors for Day and Night modes. 1.Rotate i to select Day or Night .
Press u.
2. Rotate i to select a color for the
menu screens. Press u.
■Map Color
1 Map Color
For Day mode
Set to WHITE (factory default is BEIGE) to obtain
the best daytime display contrast.
For Night mode
Set to BLACK (factory default) to obtain the best
nighttime display contrast.
■ Menu Color
1 Menu Color
For Day mode
Set to WHITE (factory default) to obtain the best
daytime display contrast.
For Night mode
Set to BLACK (factory default) to obtain the best
nighttime display contrast.
Page 31 of 267
29
Interface Settings
Color
System Setup
Set the screen brightness separately for Day and Night modes. Press the
a
(Display mode) button to cycle through the display modes (Day to Night to Off).
1. Press the a button.
The Brightness bar is displayed
for a few seconds.
2. Press the a button again.
Repeat the procedure to switch
the display modes.
Rotate i to adjust the
brightness. Press u.
■Switching Display Mode Manually
1 Switching Display Mode Manually
A visual guide helps y ou see the difference
between Day an d Night modes.
2 Day or Night Mode P. 11
Recommended Settings•Select mid-range for the dash illumination.•Select WHITE for the map Day display and
BLACK for the map Night display.
Continued
Page 32 of 267

30
Interface Settings
Color
System Setup
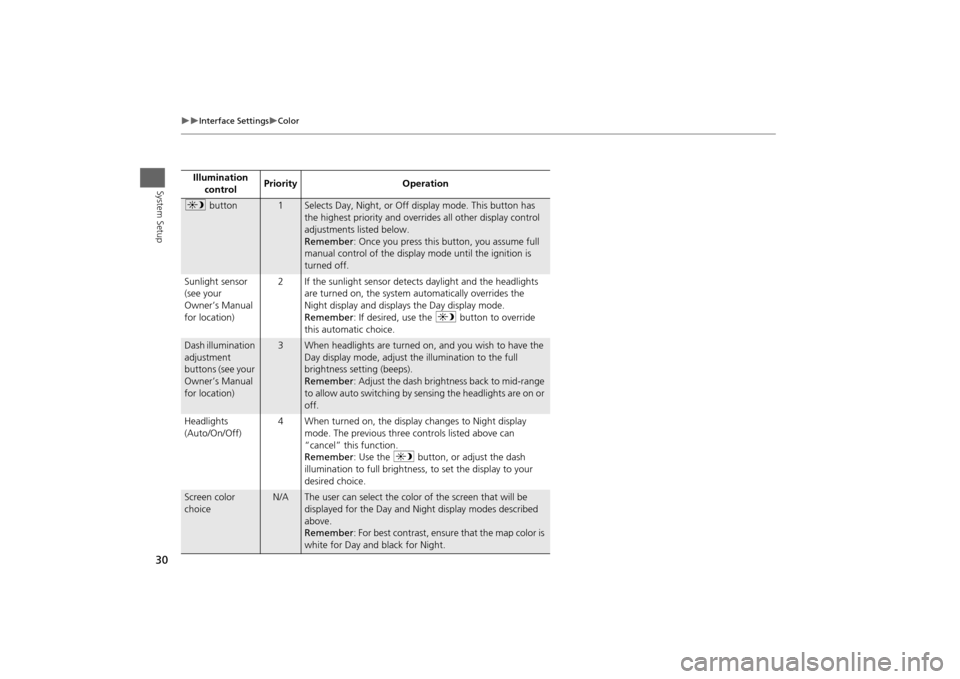
Illumination control Priority Operationa
button
1
Selects Day, Night, or Off display mode. This button has
the highest priority and overrides all other display control
adjustments listed below.
Remember : Once you press this button, you assume full
manual control of the display mode until the ignition is
turned off.
Sunlight sensor
(see your
Owner’s Manual
for location) 2 If the sunlight sensor detects daylight and the headlights
are turned on, the system automatically overrides the
Night display and displays the Day display mode.
Remember : If desired, use the a button to override
this automatic choice.
Dash illumination
adjustment
buttons (see your
Owner’s Manual
for location)
3
When headlights are turned on, and you wish to have the
Day display mode, adjust the illumination to the full
brightness setting (beeps).
Remember : Adjust the dash brightness back to mid-range
to allow auto switching by sensing the headlights are on or
off.
Headlights
(Auto/On/Off) 4 When turned on, the display changes to Night display
mode. The previous three controls listed above can
“cancel” this function.
Remember : Use the a button, or adjust the dash
illumination to full brightness, to set the display to your
desired choice.
Screen color
choice
N/A
The user can select the color of the screen that will be
displayed for the Day and Night display modes described
above.
Remember : For best contrast, ensure that the map color is
white for Day and black for Night.