Page 3 of 267
Contents
2System Setup P. 19Start-up 20 Voice Control System 22 Inte rface Settings 24Personal Information 37
Music Search 45 Routing & Guidance 49 Clock Adjustment 58 Vehicle 61
Data Reset 642 Navigation P. 67Entering a Destination 68 Calculating the Route 90 Driving to Your Destination 93 Map Menu 98
Changing Your Route 116 Changing Your Destination 123 Resuming Your Trip 1272 Audio P. 129Audio System 130 Playing FM/AM Radio 132 Playing XM® Radio 136 Playing a Disc 141
Playing Hard Disc Drive (HDD)
Audio 145 Playing an iPod® 155
Searching for Music Using
Song By Voice™ (SBV) 159 Playing a USB Flash
Drive 160Playing Bluetooth® Audio 164
Adjusting the Sound 166 Audio Remote Controls 167
2
Bluetooth® HandsFreeLink® P. 169Bluetooth®
HandsFreeLink® 170 Pairing a Phone 172 Importing Phonebook
Data 177Setting Up Speed
Dialing 178
Editing User Name and
PIN 180 Making a Call 182 Receiving a Call 185 HFL Menus 1862
Rear Entertainment System P. 189Rear Entertainment
System 190 Rear Control Panel
Operation 192 Front Control Panel
Operation 203Wireless Headphones 2062
Other Features P. 209Trip Computer 210 Calendar 211 Calculator 213Information Functions 215
Multi-view Rear Camera 2172 Troubleshooting P. 219Troubleshooting 220 Error Messages 2272Reference Information P. 231System Initialization 232 System Limitations 234 Client Assistance 236 Legal Information 2392Voice Commands P. 245Voice Commands 246
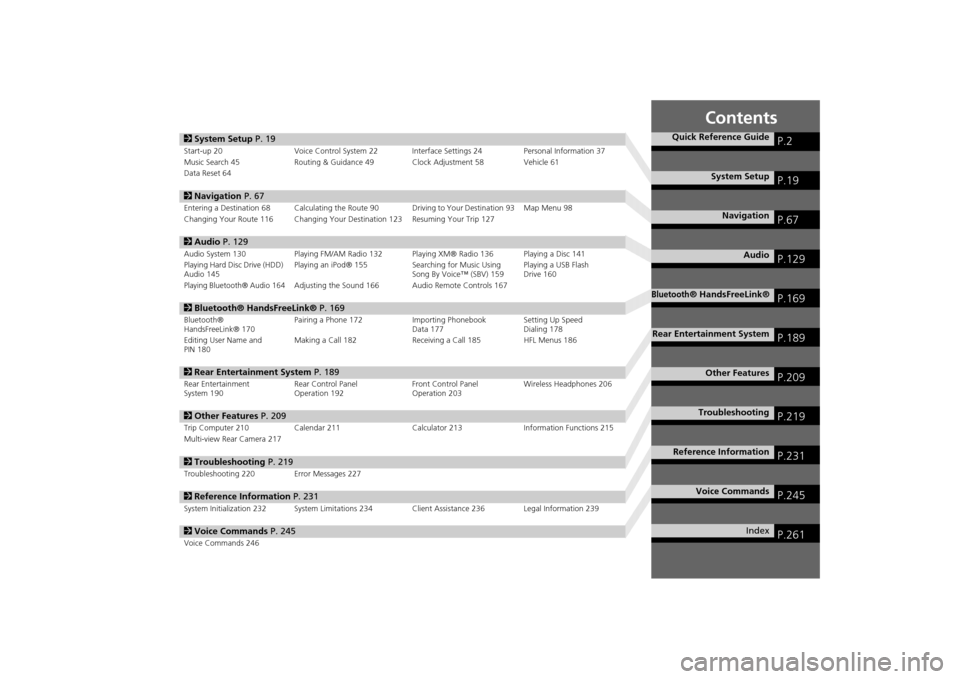
Quick Reference Guide
P.2
System Setup
P.19
Navigation
P.67
Audio
P.129
Bluetooth
® HandsFreeLink®
P.169
Rear Entertainment System
P.189
Other Features
P.209
Troubleshooting
P.219
Reference Information
P.231
Voice Commands
P.245
Index
P.261
Page 34 of 267
32
Interface Settings
Wallpaper
System Setup
WallpaperHINFO button
Clock/Wallpaper
Picture Setup
Select, delete, and import wallpaper pi ctures for display on the screen.
Rotate i to select an item. Press u .
The following item s are available:
• Select a Picture for Wallpaper : Sets the desired picture for the wallpaper.
2Selecting a Wallpaper Picture
P. 34
• Delete Pictures on HDD : Deletes pictures on the Hard Disc Drive.
2Deleting Pictures from HDD
P. 35
• Import Pictures from USB : Stores pictures on the Hard Disc Drive.
2Importing Pictures from USB
P. 36
Page 38 of 267
36
Interface Settings
Wallpaper
System Setup
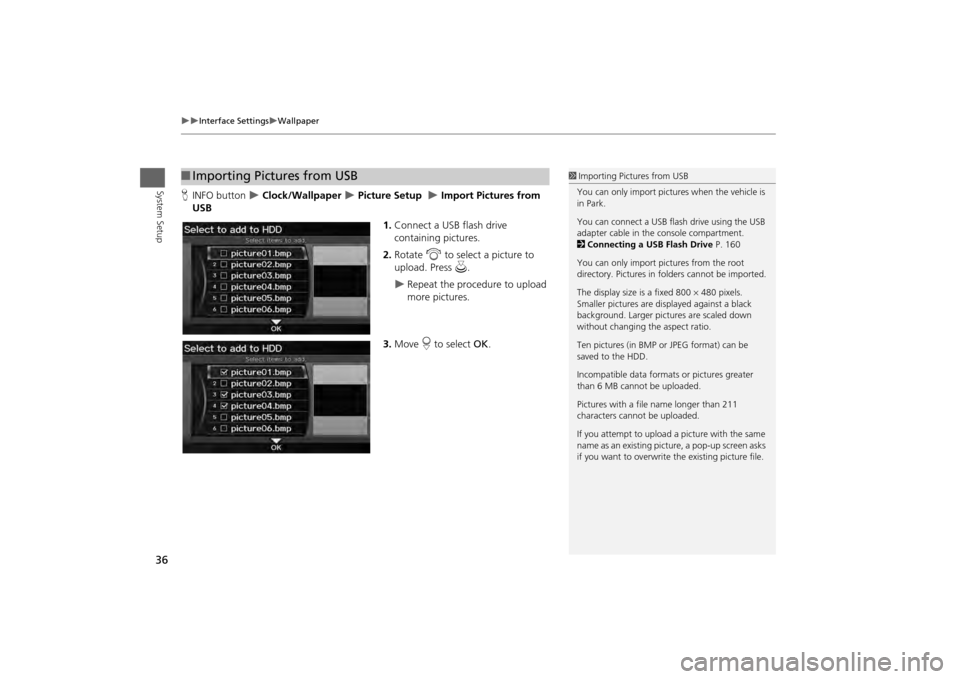
HINFO button
Clock/Wallpaper
Picture Setup
Import Pictures from
USB
1.Connect a USB flash drive
containing pictures.
2. Rotate i to select a picture to
upload. Press u.
Repeat the procedure to upload
more pictures.
3. Move r to select OK.
■Importing Pictures from USB
1 Importing Pictures from USB
You can only import pictures when the vehicle is
in Park.
You can connect a USB flash drive using the USB
adapter cable in the console compartment.
2 Connecting a USB Flash Drive P. 160
You can only import pict ures from the root
directory. Pictures in folders cannot be imported.
The display size is a fixed 800 480 pixels.
Smaller pictures are displayed against a black
background. Larger pictures are scaled down
without changing the aspect ratio.
Ten pictures (in BMP or JPEG format) can be
saved to the HDD.
Incompatible data format s or pictures greater
than 6 MB cannot be uploaded.
Pictures with a file name longer than 211
characters cannot be uploaded.
If you attempt to upload a picture with the same
name as an existing picture, a pop-up screen asks
if you want to overwrite the existing picture file.
Page 132 of 267
130Audio
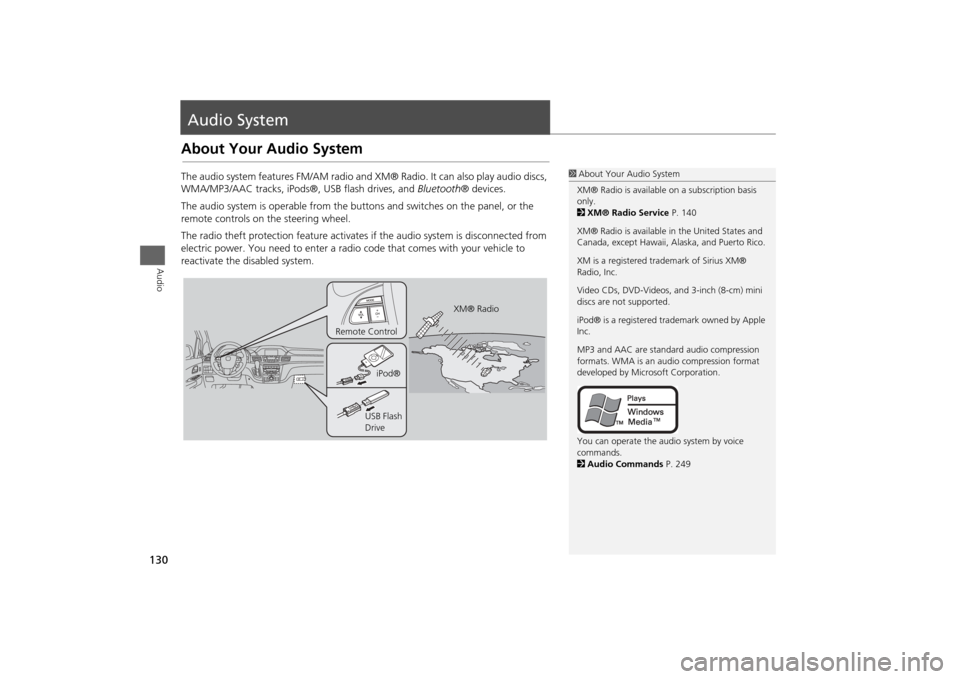
Audio SystemAbout Your Audio SystemThe audio system features FM/AM radio and XM® Radio. It can also play audio discs,
WMA/MP3/AAC tracks, iPods®, USB flash drives, and Bluetooth® devices.
The audio system is operable from the butto ns and switches on the panel, or the
remote controls on the steering wheel.
The radio theft protection feature activates if the audio system is disconnected from
electric power. You need to enter a radio code that comes with your vehicle to
reactivate the disabled system.
1 About Your Audio System
XM® Radio is available on a subscription basis
only.
2 XM® Radio Service P. 140
XM® Radio is available in the United States and
Canada, except Ha waii, Alaska, and Puerto Rico.
XM is a registered trademark of Sirius XM®
Radio, Inc.
Video CDs, DVD-Videos, and 3-inch (8-cm) mini
discs are not supported.
iPod® is a registered tra demark owned by Apple
Inc.
MP3 and AAC are standard audio compression
formats. WMA is an audio compression format
developed by Micr osoft Corporation.
You can operate the audio system by voice
commands.
2 Audio Commands P. 249
XM® Radio
Remote Control
iPod®
USB Flash
Drive
Page 162 of 267
160Audio
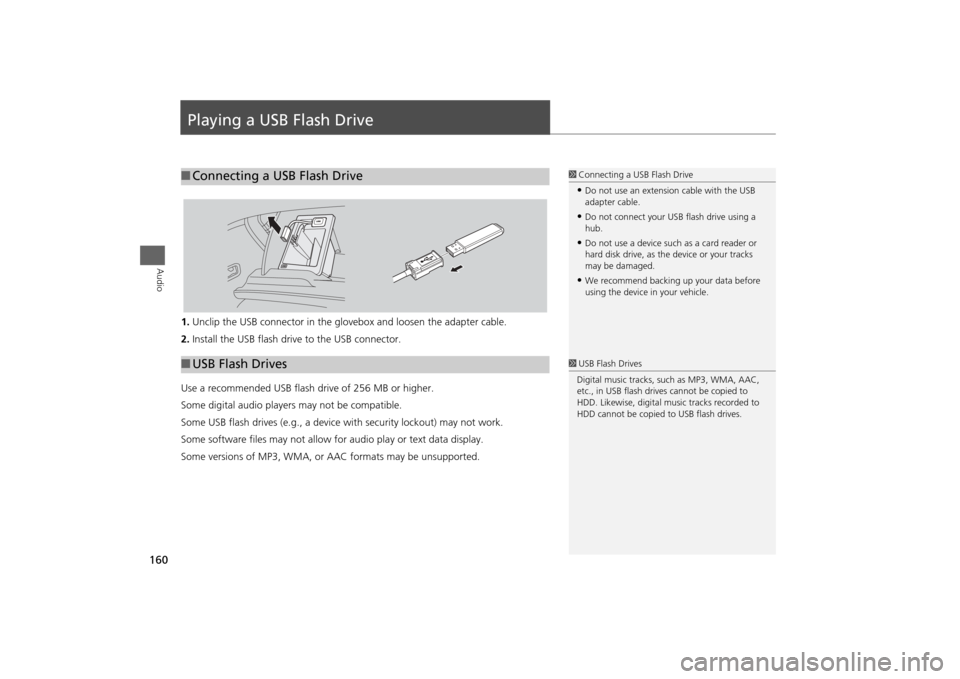
Playing a USB Flash Drive1.Unclip the USB connector in the glov ebox and loosen the adapter cable.
2. Install the USB flash drive to the USB connector.
Use a recommended USB flash drive of 256 MB or higher.
Some digital audio players may not be compatible.
Some USB flash drives (e.g., a device with security lockout) may not work.
Some software files may not allow for audio play or text data display.
Some versions of MP3, WMA, or AAC formats may be unsupported.■ Connecting a USB Flash Drive
1 Connecting a USB Flash Drive•Do not use an extension cable with the USB
adapter cable.•Do not connect your US B flash drive using a
hub.•Do not use a device such as a card reader or
hard disk drive, as th e device or your tracks
may be damaged.•We recommend backing up your data before
using the device in your vehicle.
■ USB Flash Drives
1 USB Flash Drives
Digital music tracks, such as MP3, WMA, AAC,
etc., in USB flash drives cannot be copied to
HDD. Likewise, digital music tracks recorded to
HDD cannot be copied to USB flash drives.
Page 163 of 267
161
Playing a USB Flash Drive
Selecting USB Mode
Audio
Selecting USB Mode1.Connect the USB flash drive to the USB adapter cable in the console
compartment.
2. Press the USB/AUX button until you get to USB mode.
3. Select a track using skip, scan, folder list, or track list.
The current track number and folder number are displayed on the display.
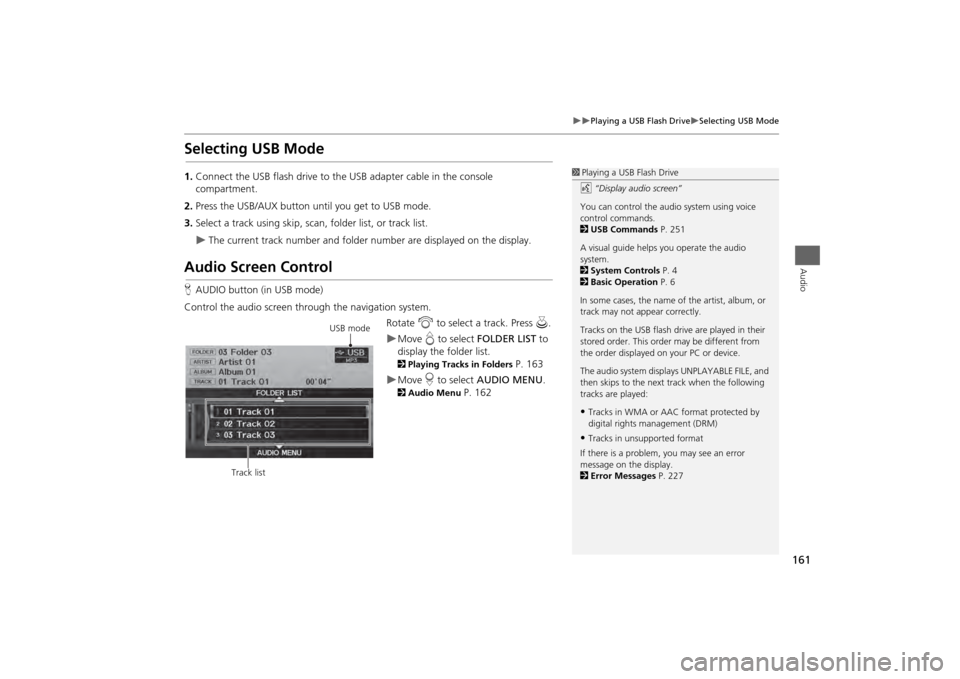
Audio Screen ControlHAUDIO button (in USB mode)
Control the audio screen through the navigation system. Rotate i to select a track. Press u .
Move e to select FOLDER LIST to
display the folder list. 2 Playing Tracks in Folders
P. 163
Move r to select AUDIO MENU . 2Audio Menu
P. 162
1Playing a USB Flash Drive
d “Display audio screen”
You can control the audio system using voice
control commands.
2 USB Commands P. 251
A visual guide helps you operate the audio
system.
2 System Controls P. 4
2 Basic Operation P. 6
In some cases, the name of the artist, album, or
track may not appear correctly.
Tracks on the USB flash drive are played in their
stored order. This orde r may be different from
the order displayed on your PC or device.
The audio system displa ys UNPLAYABLE FILE, and
then skips to the next track when the following
tracks are played:•Tracks in WMA or AAC format protected by
digital rights management (DRM)•Tracks in unsupported format
If there is a problem, you may see an error
message on the display.
2 Error Messages P. 227
USB mode
Track list
Page 166 of 267
164Audio
Playing Bluetooth ® AudioYour audio system allows you to listen to music tracks stored on your Bluetooth-
compatible phone.
This function is available when the phone is linked to the vehicle’s Bluetooth®
HandsFreeLink® (HFL) system. 2 Bluetooth® HandsFreeLink®
P. 169
Selecting Bluetooth ® Audio Mode1.Make sure that your phone is on, paired, and linked to HFL. 2Pairing a Phone
P. 172
2. Press the USB/AUX button to select Bluetooth® Audio mode.
A Bluetooth ® message and icon are displaye d on the display and screen.
3. If necessary, follow the cell phone operating instructions for playing audio tracks.
Check the following if the phone is not recognized:
• Another HFL-compatible phone, which is not compatible for Bluetooth® Audio, is
already connected.
1 Playing Bluetooth ® Audio
d “Display audio screen”
You can control the audio system using voice
control commands.
2 Bluetooth® Audio Commands P. 251
Not all Bluetooth -enabled phones with
streaming audio capabilities are compatible. To
check if your phone is compatible:•U.S.: Visit automobiles.honda.com/
handsfreelink.•Canada: Visit www.handsfreelink.ca .•Call HandsFreeLink customer support at
(888) 528-7876.
In some states, it may be illegal to perform some
data device functions while driving.
In some cases, the name of the artist, album, or
track may not appear correctly.
Only one phone can be used with HFL at a time.
When there are more than two paired phones in
the vehicle, the first paired phone the system
finds will be automatically linked.
Pressing the TITLE side of the SCAN/TITLE bar
switches the center display between the
Bluetooth ® Audio message and the device
name.
Page 169 of 267
167Audio
Audio Remote ControlsSteering Wheel ControlsControl basic audio system functions using the controls mounted on the steering
wheel.
Adjusts the volume.
•Press the R (Volume) button to increase the volume.
• Press the U (Volume) button to decrease the volume.
Changes the audio source mode. Press to cycle through all currently connected
media sources.
1 MODE Button
DISC mode appears only when a disc is loaded.
When in AUX mode, the following are operable
from the remote audio controls:•iPod®/USB flash drive connected to the USB
adapter cable•Audio unit plugged into th e auxiliary input jack•Bluetooth® Audio (not all phones support this
function)
Volume button Mode button
Channel button
■ VOL (Volume) Button■MODE Button
FM2
FM1
AUX
XM1
AM
DISC
HDD
XM2
Continued