Page 100 of 286

99
uuOperating the Switches Around the Steering WheeluBrightness Control
Controls
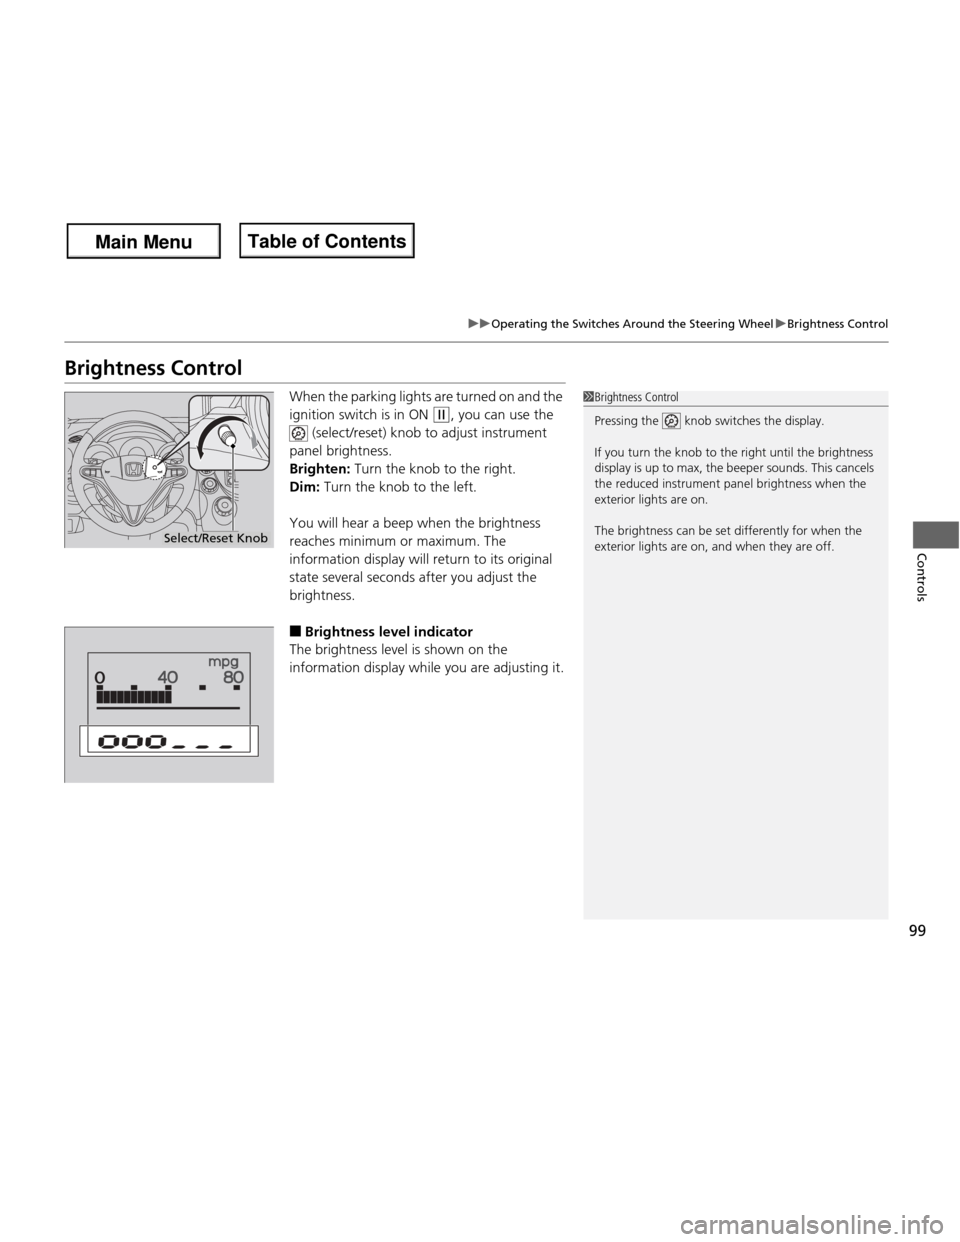
Brightness ControlWhen the parking lights are turned on and the
ignition switch is in ON
(w, you can use the
(select/reset) knob to adjust instrument
panel brightness.
Brighten: Turn the knob to the right.
Dim: Turn the knob to the left.
You will hear a beep when the brightness
reaches minimum or maximum. The
information display will return to its original
state several seconds after you adjust the
brightness.
■ Brightness level indicator
The brightness level is shown on the
information display while you are adjusting it.
1Brightness Control
Pressing the knob switches the display. If you turn the knob to the right until the brightness
display is up to max, the beeper sounds. This cancels
the reduced instrument panel brightness when the
exterior lights are on.
The brightness can be set differently for when the
exterior lights are on, and when they are off.
Select/Reset Knob
Main Menu
Main MenuTable of Contents
Page 101 of 286
100
uuOperating the Switches Around the Steering WheeluRear Defogger/Heated Door Mirror*
Button
Controls
Rear Defogger/Heated Door Mirror *
Button
Press the rear defogger and heated door
mirror button to defog the rear window and
mirrors when the ignition switch is in ON
(w .
1Rear Defogger/Heated Door Mirror *
Button
NOTICE
When cleaning the inside of the rear window, be
careful not to damage the heating wires.
It is critical to wipe the window from side to side
along the defogger heating wires.
This system consumes a lot of power, so turn it off
when the window has been defogged.
Also, do not use the system for a long period when
the engine is idling. This may weaken the battery, making it difficult to start the engine.
Models with navigation system
Models without navigation system
* Not available on all models
Main Menu
Main MenuTable of Contents
Page 102 of 286

101
uuOperating the Switches Around the Steering WheeluAdjusting the Steering Wheel
Controls
Adjusting the Steering Wheel
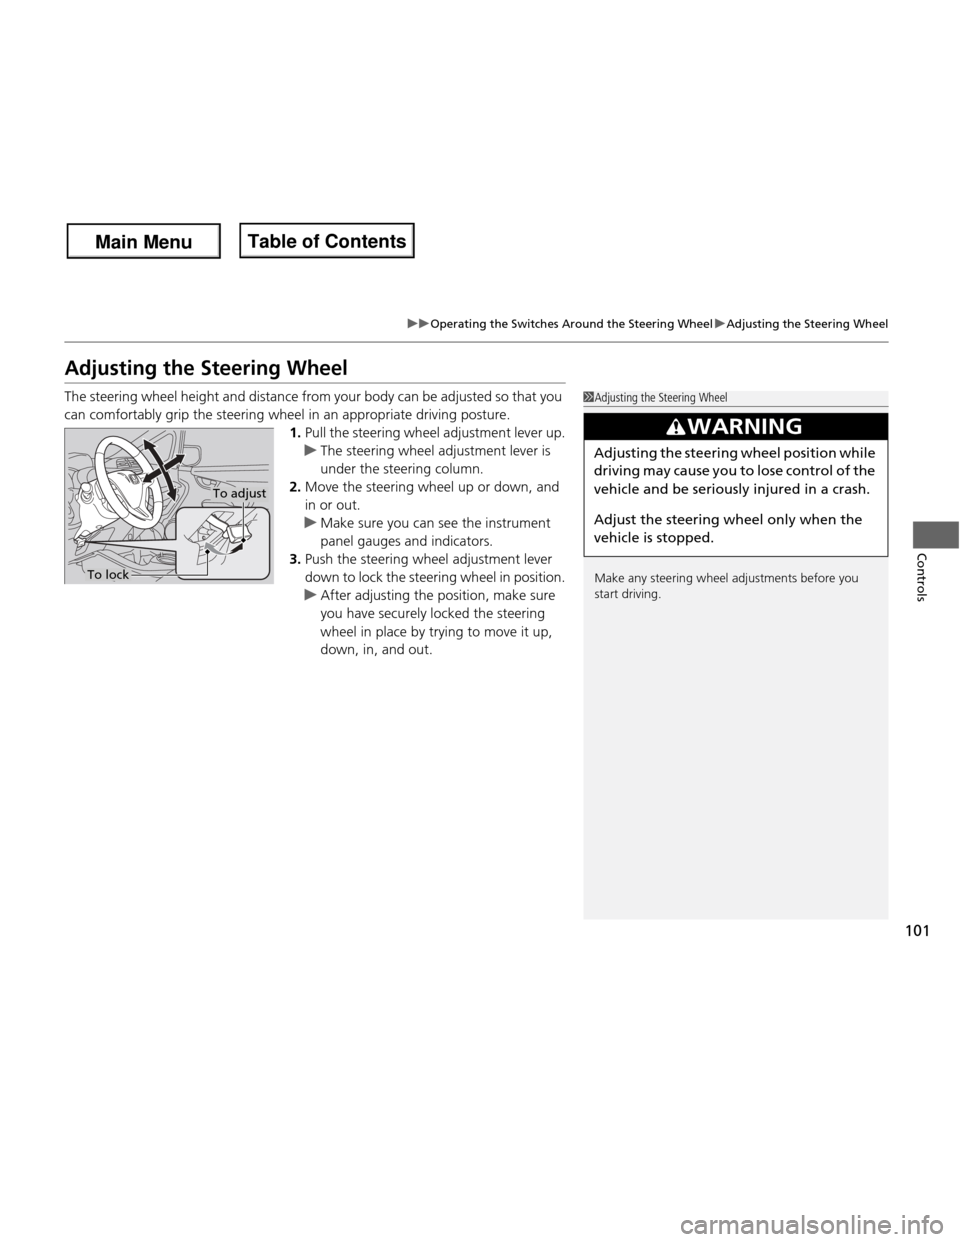
The steering wheel height and distance from your body can be adjusted so that you
can comfortably grip the steering wheel in an appropriate driving posture.1.Pull the steering wheel adjustment lever up.
uThe steering wheel adjustment lever is
under the steering column.
2. Move the steering wheel up or down, and
in or out.
uMake sure you can see the instrument
panel gauges and indicators.
3. Push the steering wheel adjustment lever
down to lock the steering wheel in position.
uAfter adjusting the position, make sure
you have securely locked the steering
wheel in place by trying to move it up,
down, in, and out.
1Adjusting the Steering Wheel
Make any steering wheel adjustments before you
start driving.
3WARNING
Adjusting the steering wheel po sition while
driving may cause you to lose control of the
vehicle and be seriously injured in a crash.
Adjust the steering wheel only when the
vehicle is stopped.
To adjust
To lock
Main Menu
Main MenuTable of Contents
Page 103 of 286
102
Controls
Adjusting the Mirrors
Interior Rearview Mirror
Adjust the angle of the rearview mirror when you are sitting in the correct driving
position.Flip the tab to switch the position.
The night position will help to reduce the glare
from headlights behind you when driving
after dark.
Power Door MirrorsYou can adjust the door mirrors when the
ignition switch is in ON
(w.
■ Mirror position adjustment
L/R selector switch: Select the left or right
mirror. After adjusting the mirror, return the
switch to the center position.
Mirror position adjustment switch: Press
the switch left, right, up, or down to move the mirror.
■Rearview Mirror with Day and Night Positions
1Adjusting the Mirrors
Keep the inside and outside mirrors clean and
adjusted for best visibility.
Adjust the mirrors before you start driving. 2 Adjusting the Seat Positions P. 103
Tab
Daytime Position
Night PositionUp
Down
Selector Switch
Adjustment Switch
Main Menu
Main MenuTable of Contents
Page 112 of 286

111
Continued
Controls
Interior Lights/Interior Convenience Items
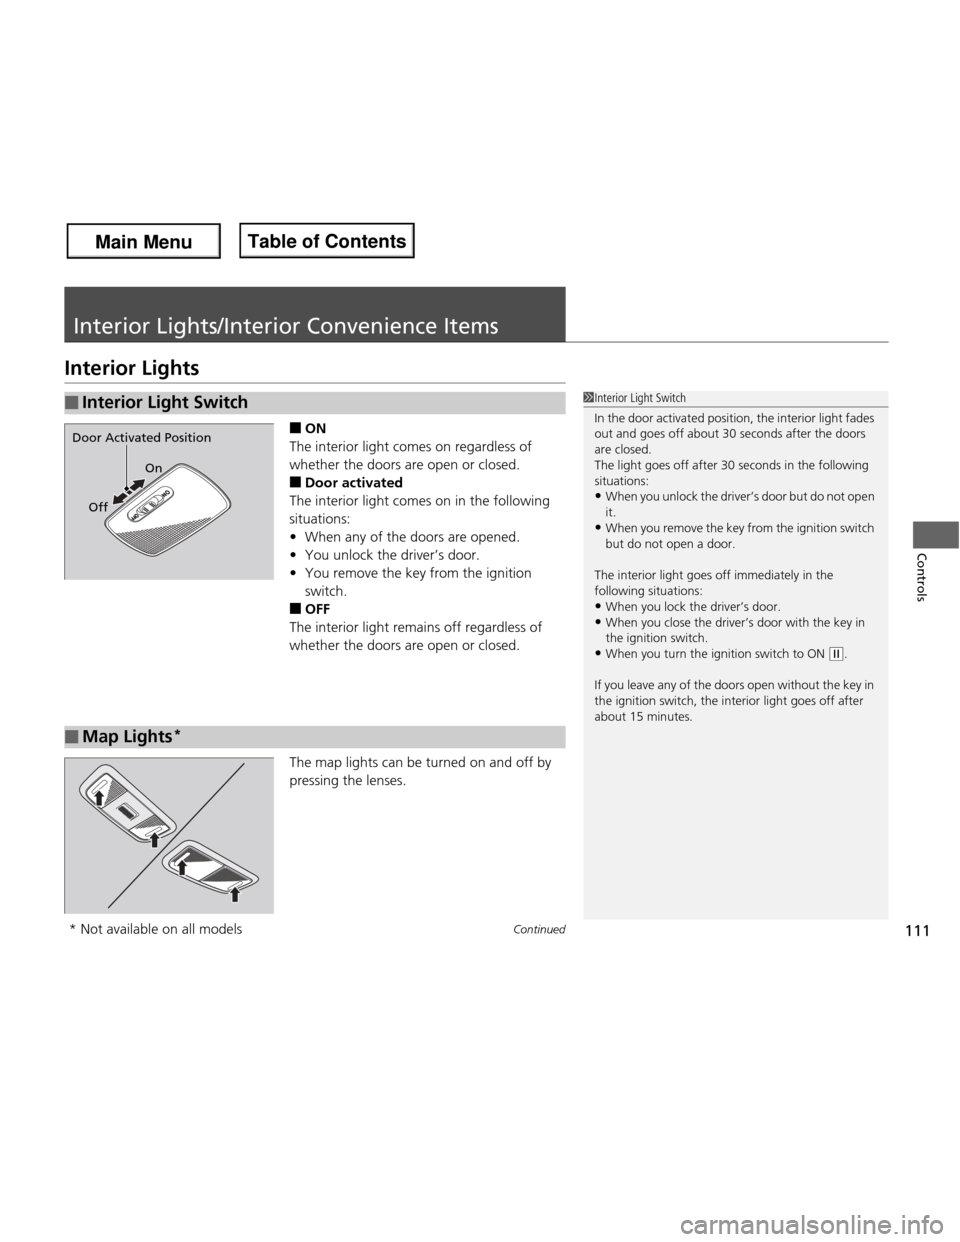
Interior Lights
■ON
The interior light comes on regardless of
whether the doors are open or closed. ■ Door activated
The interior light comes on in the following situations: • When any of the doors are opened.
• You unlock the driver’s door.
• You remove the key from the ignition
switch.
■ OFF
The interior light remains off regardless of
whether the doors are open or closed.
The map lights can be turned on and off by
pressing the lenses.
■Interior Light Switch1Interior Light Switch
In the door activated position, the interior light fades
out and goes off about 30 seconds after the doors
are closed.
The light goes off after 30 seconds in the following
situations: • When you unlock the driver’s door but do not open
it.
• When you remove the key from the ignition switch
but do not open a door.
The interior light goes off immediately in the following situations:
• When you lock the driver’s door.
• When you close the driver’s door with the key in
the ignition switch.
• When you turn the ignition switch to ON
(w .
If you leave any of the doors open without the key in
the ignition switch, the interior light goes off after
about 15 minutes.
On
Off
Door Activated Position
■Map Lights *
* Not available on all models
Main Menu
Main MenuTable of Contents
Page 116 of 286
Continued115
uuInterior Lights/Interior Convenience ItemsuInterior Convenience Items
Controls
Pull up the strap and open the cargo area floor lid.
The accessory power socket can be used when the ignition switch is in ACCESSORY
(q or ON (w.
Open the cover to use it.
■Cargo Floor Box*
Cargo Floor Box
Strap
■Accessory Power Socket1Accessory Power Socket
NOTICE
Do not insert an automotive type cigarette lighter
element.
This can overheat the power socket.
The accessory power socket is designed to supply
power for 12 volt DC accessories that are rated 120
watts or less (10 amps).
To prevent battery drain, only use the power socket
with the engine running.
* Not available on all models
Main Menu
Main MenuTable of Contents
Page 121 of 286

uuHeating and Cooling*uUsing Vents, Heating and A/C
*
120
Controls
1. Adjust the fan speed using the fan control dial.
2. Select and .
3. Adjust the temperature using the temperature control dial.
4. Press the A/C button (the indicator on).
■ To rapidly cool down the interior
1. Set the fan to the maximum speed.
2. Set the temperature to maximum cool.
3. Select .
1. Select turns the air conditioning system
on.
2. Select .
■ To rapidly defrost the windows
1. Set the fan to the maximum speed.
2. Select .
3. Select .
4. Set the temperature to maximum heat.
■Cooling *1To rapidly cool down the interior
If the interior is very warm, you can cool it down
more rapidly by partially opening the windows.
■Defrosting the Windshield and Windows
*1Defrosting the Windshield and Windows
*
For your safety, make sure you have a clear view
through all the windows before driving.
Do not set the temperature near the upper or lower
limit.
When cold air hits the windshield, the outside of the
windshield may fog up.
If the side windows fog up, adjust the vents so that
the air hits the side windows.
1To rapidly defrost the windows
After defrosting the windows, switch over to fresh air mode.
If you keep the system in recirculation mode, the
windows may fog up from humidity. This impedes
visibility.
* Not available on all models
Main Menu
Main MenuTable of Contents
Page 123 of 286
122
Features
Audio System
About Your Audio System
On models with navigation system, see the Navigation System Manual for operation
of the audio system, and Bluetooth®HandsFreeLink ®.
The audio system features FM/AM radio. It can also play audio CDs, WMA/MP3/AAC files, iPod ®, and USB flash drives.
You can operate the audio system from the buttons and switches on the panel.
1About Your Audio System
Video CDs, DVDs, and 3-inch (8-cm) mini CDs are not
supported.
iPod® is a registered trademark owned by Apple Inc.
State or local laws may prohibit the operation of
handheld electronic devices while operating a
vehicle.
iPod ®
USB Flash Drive
Auxiliary Input Jack
Main Menu
Main MenuTable of Contents