2013 HONDA FIT Switch ac
[x] Cancel search: Switch acPage 188 of 286

Continued187
uuRefuelinguHow to Refuel
Driving
■Gasoline co ntaining ethanol
Some gasoline today is blended with oxygenates such as ethanol. Your vehicle is
designed to operate on oxygenated gasoline containing up to 10% ethanol by
volume. Do not use gasoline containing methanol. If you notice any undesirable
operating symptoms, try another service station or switch to another brand of
gasoline. ■ Fuel tank capacity: 10.6 US gal (40 liters)
How to Refuel
1.Stop your vehicle with the service station
pump on the left side of the vehicle in the rear.
2. Turn off the engine.
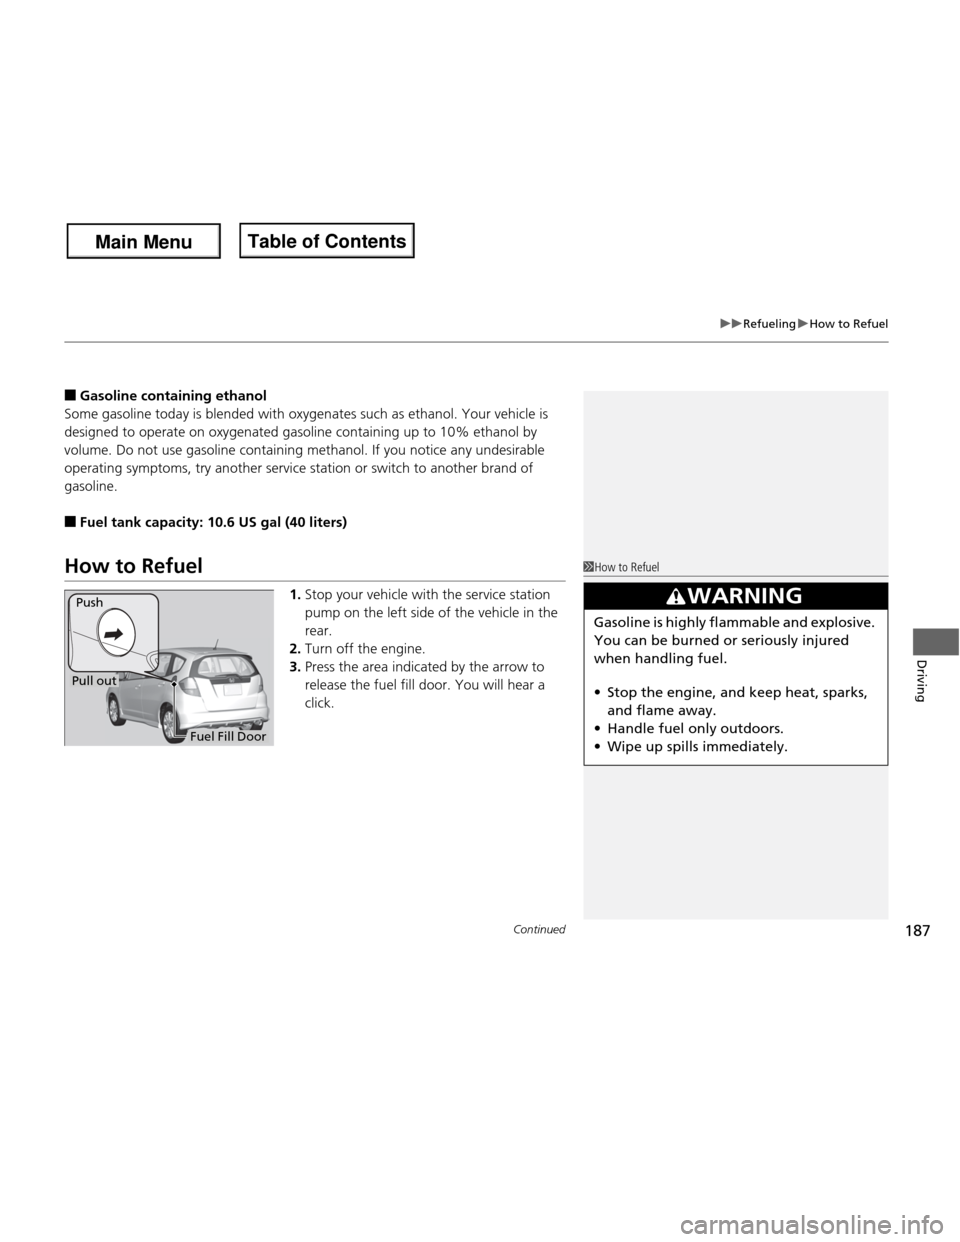
3. Press the area indicated by the arrow to
release the fuel fill door. You will hear a
click.1How to Refuel
3WARNING
Gasoline is highly flammable and explosive.
You can be burned or seriously injured
when handling fuel. •Stop the engine, and keep heat, sparks,
and flame away.
• Handle fuel only outdoors.
• Wipe up spills immediately.
Fuel Fill Door
Push
Pull out
Main Menu
Main MenuTable of Contents
Page 196 of 286

195
Continued
Maintenance
Maintenance Minder TM
If the engine oil life is less than 15%, you will see the Maintenance Minder messages
appear on the information display every time you turn the ignition switch to ON
(w
.
The messages notify you when to change the engine oil, or when to bring your
vehicle to a dealer for indicated maintenance services.
To Use Maintenance Minder TM
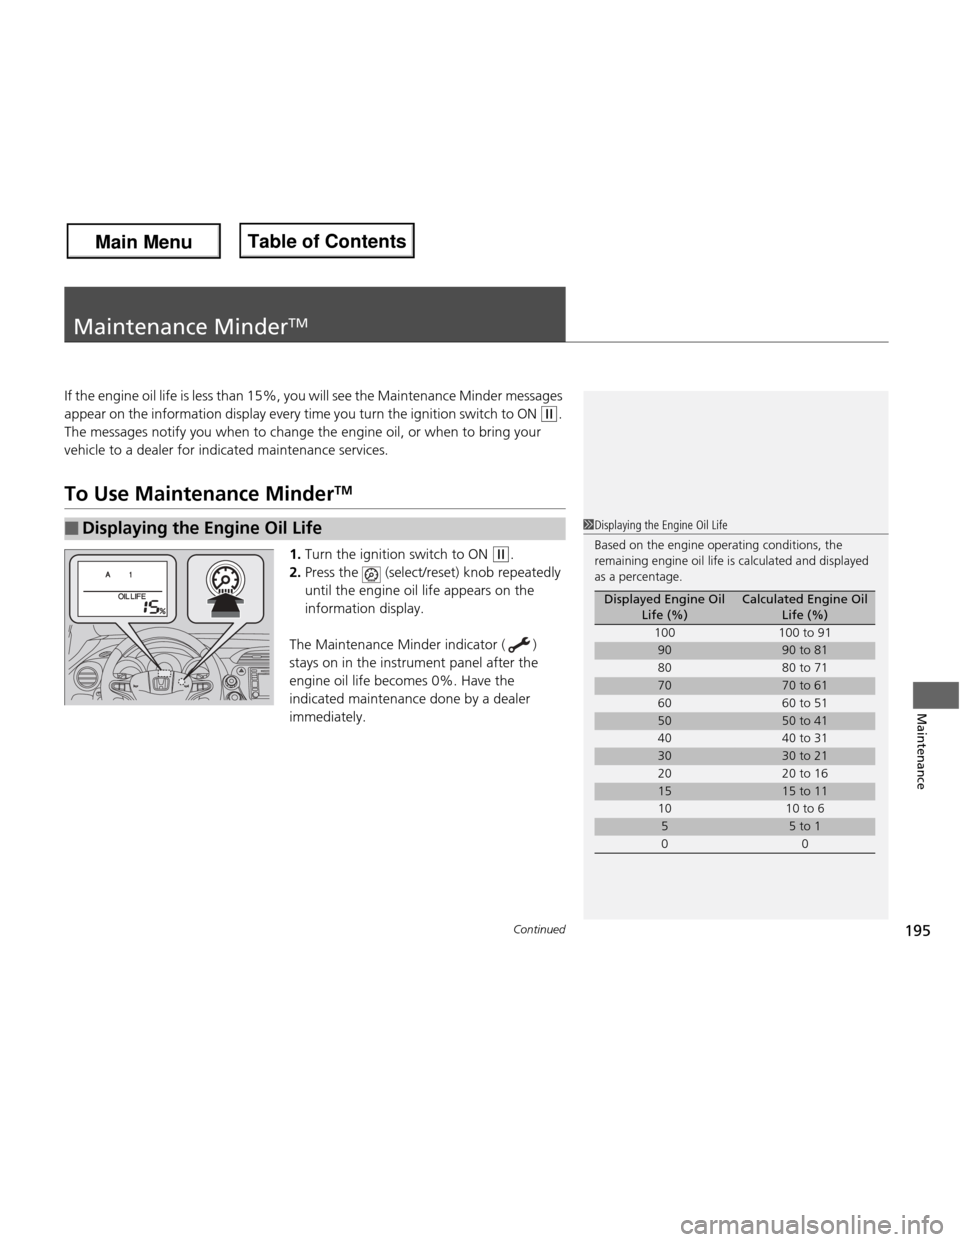
1. Turn the ignition switch to ON
(w .
2. Press the (select/reset) knob repeatedly
until the engine oil life appears on the
information display.
The Maintenance Minder indicator ( )
stays on in the instrument panel after the
engine oil life becomes 0%. Have the
indicated maintenance done by a dealer immediately.
■Displaying the Engine Oil Life1Displaying the Engine Oil Life
Based on the engine operating conditions, the
remaining engine oil life is calculated and displayed
as a percentage.
Displayed Engine Oil Life (%)Calculated Engine Oil Life (%)
100 100 to 91
9090 to 81
80 80 to 71
7070 to 61
60 60 to 51
5050 to 41
40 40 to 31
3030 to 21
20 20 to 16
1515 to 11
10 10 to 6
55 to 1
00
Main Menu
Main MenuTable of Contents
Page 197 of 286

196
uuMaintenance MinderTMuTo Use Maintenance Minder TM
Maintenance
To switch the display, press the (select/reset) knob.
■Maintenance Minder Messages on the Information Display
Oil Life DisplayExplanationInformationMaintenance Minder Indicator
The engine oil life indicator starts
to appear along with other due
soon maintenance item codes
when the remaining oil life
becomes 15 percent.The engine oil is approaching the
end of its service life.
Starts to come on when the
remaining engine oil life becomes 15 percent.
It goes off when the display is switched.
The
SERVICE message also starts
to appear along with the engine oil
life indicator and the maintenance item codes.The engine oil has almost reached
the end of its service life, and the
maintenance items should be inspected and serviced as soon as
possible.
The remaining engine oil life has
passed its service life, and a
negative distance appears after
driving over 10 miles (U.S. models)
or 10 km (Canadian models). The
negative distance on the display
blinks.The engine oil life has passed.
The maintenance items must be inspected and serviced
immediately.
Stays on as a reminder even when
the display is switched.
Main Menu
Main MenuTable of Contents
Page 199 of 286

uuMaintenance MinderTMuTo Use Maintenance Minder TM
198
Maintenance
Reset the engine oil life display if you have performed the maintenance service. 1.Turn the ignition switch to ON
(w .
2. Display the engine oil life by repeatedly
pressing the (select/reset) knob.
3. Press and hold the knob for ten seconds
or more.
uThe engine oil life indicator and the
maintenance item codes blink.
4. Press the knob for five seconds or more.
uThe displayed maintenance items
disappear, and the engine oil life display
returns to 100%.
■Resetting the Display1Resetting the Display
NOTICE
Failure to reset the engine oil life after a maintenance
service results in the system showing incorrect
maintenance intervals, which can lead to serious
mechanical problems.
The dealer will reset th e engine oil life display after
completing the requi red maintenance service. If
someone other than a dealer performs maintenance
service, reset the engine oil life display yourself.
Main Menu
Main MenuTable of Contents
Page 235 of 286

234
Maintenance
Cleaning
Interior Care
Use a damp cloth with a mixture of mild detergent and warm water to remove dirt.
Use a clean cloth to remove detergent residue.
Use a soft brush with a mixture of mild soap and warm water to clean the seat belts.
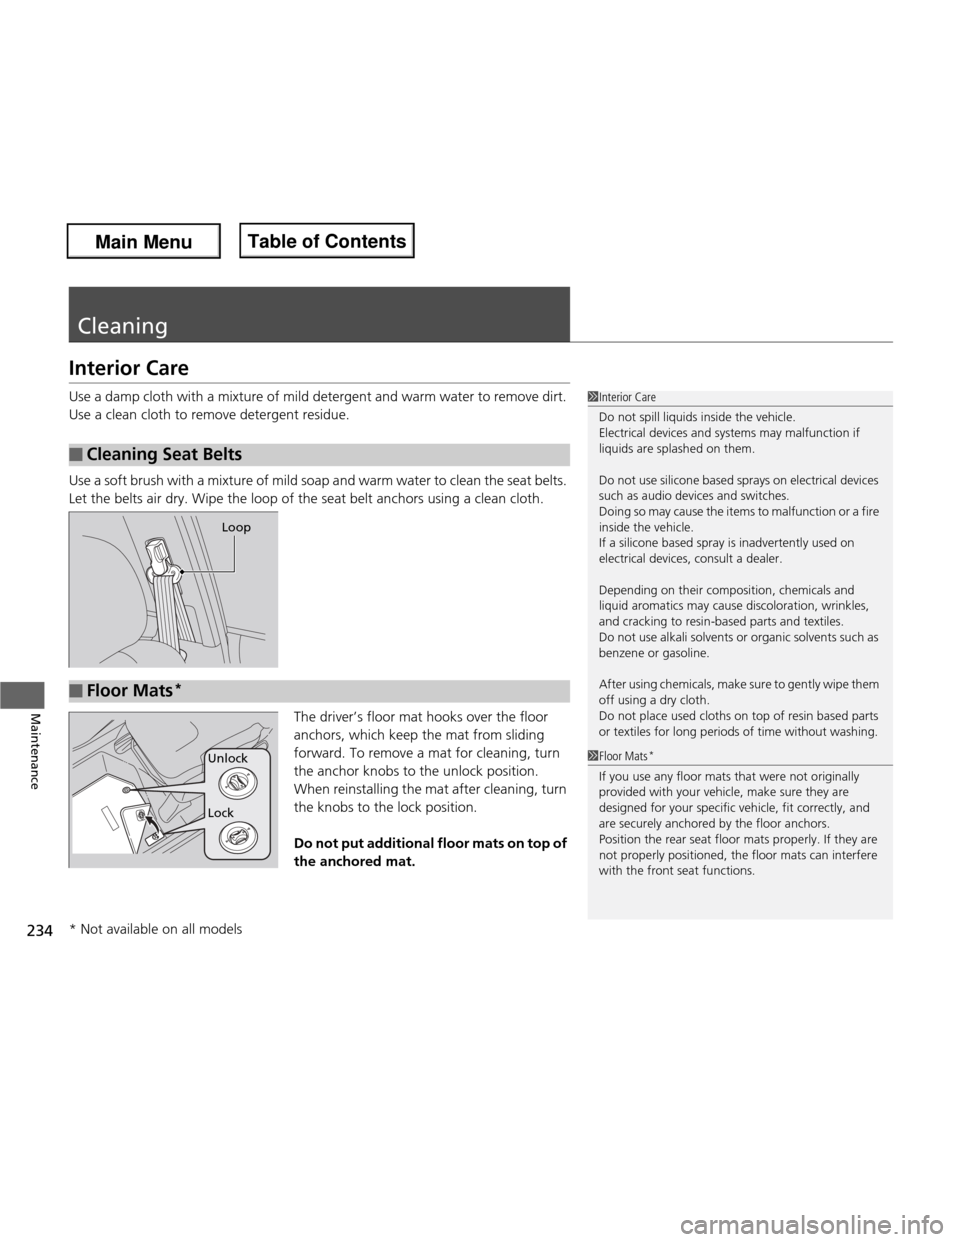
Let the belts air dry. Wipe the loop of the seat belt anchors using a clean cloth.The driver’s floor mat hooks over the floor
anchors, which keep the mat from sliding
forward. To remove a mat for cleaning, turn
the anchor knobs to the unlock position.
When reinstalling the mat after cleaning, turn
the knobs to the lock position.
Do not put additional floor mats on top of the anchored mat.
■Cleaning Seat Belts
1Interior Care
Do not spill liquids inside the vehicle.
Electrical devices and systems may malfunction if
liquids are splashed on them.
Do not use silicone based sprays on electrical devices
such as audio devices and switches.
Doing so may cause the items to malfunction or a fire
inside the vehicle.
If a silicone based spray is inadvertently used on
electrical devices, consult a dealer.
Depending on their composition, chemicals and
liquid aromatics may cause discoloration, wrinkles,
and cracking to resin-based parts and textiles.
Do not use alkali solvents or organic solvents such as
benzene or gasoline.
After using chemicals, make sure to gently wipe them
off using a dry cloth.
Do not place used cloths on top of resin based parts
or textiles for long periods of time without washing.
Loop
■Floor Mats *
1Floor Mats
*
If you use any floor mats that were not originally
provided with your vehicle, make sure they are
designed for your specific vehicle, fit correctly, and
are securely anchored by the floor anchors.
Position the rear seat floor mats properly. If they are
not properly positioned, the floor mats can interfere
with the front seat functions.
Lock
Unlock
* Not available on all models
Main Menu
Main MenuTable of Contents
Page 240 of 286

239
Continued
Handling the Unexpected
If a Tire Goes Flat
Changing a Flat Tire *
If a tire goes flat while driving, grasp the steering wheel firmly, and brake gradually
to reduce speed. Then, stop in a safe place. Replace the flat tire with a compact
spare tire. Go to a dealer as soon as possible to have the full size tire repaired or
replaced. 1. Park the vehicle on firm, level, non-slippery surface and apply the parking brake.
2. Move the shift lever to
(P .
2. Move the shift lever to
(R .
3. Turn on the hazard warning lights and turn the ignition switch to LOCK
(0 .
1Changing a Flat Tire *
Periodically check the tire pressure of the compact
spare. It should be set to the specified pressure.
Specified Pressure: 60 psi (420 kPa, 4.2 kgf/cm 2
)
When driving with the compact spare tire, keep the
vehicle speed under 50 mph (80 km/h). Replace with
a full size tire as soon as possible.
The compact spare tire and wheel in your vehicle are
specifically for this model.
Do not use them with another vehicle.
Do not use another type of compact spare tire or
wheel with your vehicle.
Do not mount tire chains on a compact spare tire.
If a chain-mounted front tire goes flat, remove one of
the full-size rear tires and replace it with the compact
spare tire. Remove the flat front tire and replace it
with the full size tire that was removed from the rear.
Mount the tire chains on the front tire.
Do not use a puncture-repairing agent on a flat tire,
as it can damage the tire pressure sensor.
U.S. models only
Automatic transmission models
Manual transmission models
All models
Main Menu
Main MenuTable of Contents
Page 246 of 286

245
uuIf a Tire Goes FlatuTemporarily Repairing a Flat Tire
Continued
Handling the Unexpected
Temporarily Repairing a Flat Tire
If the tire has a large cut or is otherwise severely damaged, you will need to have the
vehicle towed. If the tire only has a small puncture, from a nail for instance, you can
use the tire repair kit so that you can drive to the nearest service station for a more
permanent repair.
If a tire goes flat while driving, grasp the steering wheel firmly, and brake gradually
to reduce speed. Then stop in a safe place. 1.Park the vehicle on firm, level, and non-slippery ground.
2. Put the shift lever in
(P .
3. Set the parking brake.
4. Turn on the hazard warning lights and turn the ignition switch to LOCK
(0 .
■Getting Ready to Temporarily Repair the Flat Tire
Canadian models with automatic transmission
1Temporarily Repairing a Flat Tire
The kit should not be used in the following situations.
Instead, contact a dealer or a roadside assistant to
have the vehicle towed.
• The tire sealant has expired.
• More than two tires are punctured.
• The puncture is greater than 3/16 inch (4 mm) in diameter.
• The tire side wall is damaged or the puncture is
outside the tire tread.
• Damage has been caused by driving with the tires
extremely under inflated.
• The tire bead is no longer seated.
• A rim is damaged.
Do not remove a nail or screw that punctured the
tire. If you remove it from the tire, you may not be
able to repair the puncture using the kit.
NOTICE
Do not use a puncture-repairing agent other than the
one provided in the ki t that came with your vehicle. If
used, you may permanently damage the tire pressure
sensor.
When the puncture is:
Smaller than 3/16 inch
(4 mm)
Larger than 3/16 inch
(4 mm) Kit Use
YesNo
Contact
Area
Instruction Manual
Air Compressor
Wheel
Label
Sealant Bottle
Expiration Date
Speed Limit Label
Main Menu
Main MenuTable of Contents
Page 248 of 286

Continued247
uuIf a Tire Goes FlatuTemporarily Repairing a Flat Tire
Handling the Unexpected
6.Remove the bottle cap from the bottle
adapter.
7. Attach the air compressor hose onto the
bottle adapter. Screw it until it is tight.
8. Plug in the compressor to the accessory power socket. Be careful not to pinch the
cord in a door or window.
9. Turn the ignition switch to ACCESSORY
(q .
uIn freezing temperatures, start the
engine on and leave it running while
the flat tire is being serviced.
2 Carbon Monoxide Gas P. 61
10. Turn the air compressor on to inflate the tire.
uThe compressor starts injecting sealant
and air into the tire.
11. Inflate the tire.
12. After the air pressure reaches to 33 psi
(230 kPa), turn off the kit.
uCheck the air pressure gauge on the air
compressor.
1Injecting Sealant and Air
NOTICE
Operating the pump for more than 15 minutes may
cause it to overheat and become permanently damaged.
Until the sealant injectio n is complete, the pressure
shown on the pressure gauge will appear higher than
actual. After the sealan t injection is complete the
pressure will drop and then begin to rise again as the
tire is inflated with air. Th is is normal. To accurately
measure the air pressure using the gauge, turn the air
compressor off only after the sealant injection is complete.
3WARNING
Running the engine with the vehicle in an
enclosed or even partly enclosed area can
cause a rapid build-up of toxic carbon
monoxide.
Breathing this colorless, odorless gas can
cause unconsciousness and even death. Only run the engi ne to power the air
compressor with the vehicle outdoors.
Bottle Adapter
Air Compressor Hose Bottle Cap
Air Compressor Switch
OFF
ON
Main Menu
Main MenuTable of Contents