2013 FORD SUPER DUTY clock
[x] Cancel search: clockPage 373 of 563

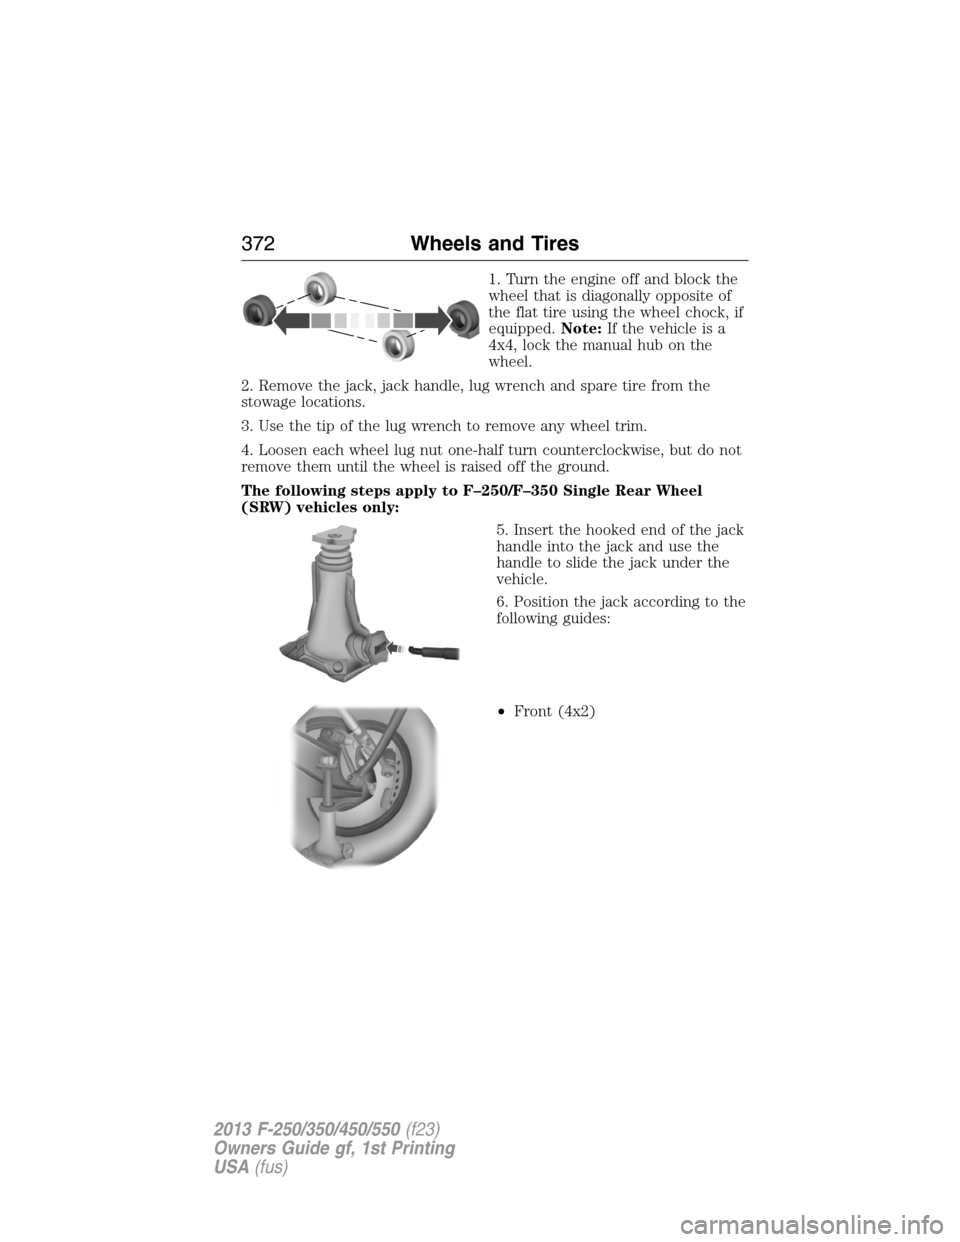
1. Turn the engine off and block the
wheel that is diagonally opposite of
the flat tire using the wheel chock, if
equipped.Note:If the vehicle is a
4x4, lock the manual hub on the
wheel.
2. Remove the jack, jack handle, lug wrench and spare tire from the
stowage locations.
3. Use the tip of the lug wrench to remove any wheel trim.
4. Loosen each wheel lug nut one-half turn counterclockwise, but do not
remove them until the wheel is raised off the ground.
The following steps apply to F–250/F–350 Single Rear Wheel
(SRW) vehicles only:
5. Insert the hooked end of the jack
handle into the jack and use the
handle to slide the jack under the
vehicle.
6. Position the jack according to the
following guides:
•Front (4x2)
372Wheels and Tires
2013 F-250/350/450/550(f23)
Owners Guide gf, 1st Printing
USA(fus)
Page 375 of 563

7. Turn the jack handle clockwise
until the wheel is completely off the
ground and high enough to install
the spare tire.
8. Remove the lug nuts with the lug
wrench.
9. Replace the flat tire with the spare
tire, making sure the valve stem is
facing outward for all front wheels
and single rear wheel vehicles. If
replacing an inboard rear tire on dual rear wheel vehicles, the valve stem
must be facing outward. If replacing the outboard wheel, the valve stem
must be facing inward. Reinstall the lug nuts until the wheel is snug against
the hub. Do not fully tighten the lug nuts until the wheel has been lowered.
10. Lower the wheel by turning the jack handle counterclockwise.
Go to Step 19.
The following steps apply to F–350 Dual Rear Wheel (DRW) and
F–450/F–550 vehicles only:
11. Slide the notched end of the
jack handle over the release valve
and use the handle to slide the jack
under the vehicle. Make sure the
valve is closed by turning it
clockwise.
12. Position the jack according to
the following guides:
•Front (4x2): F–350 DRW
Note:Place the jack directly under
I-beam.
374Wheels and Tires
2013 F-250/350/450/550(f23)
Owners Guide gf, 1st Printing
USA(fus)
Page 377 of 563

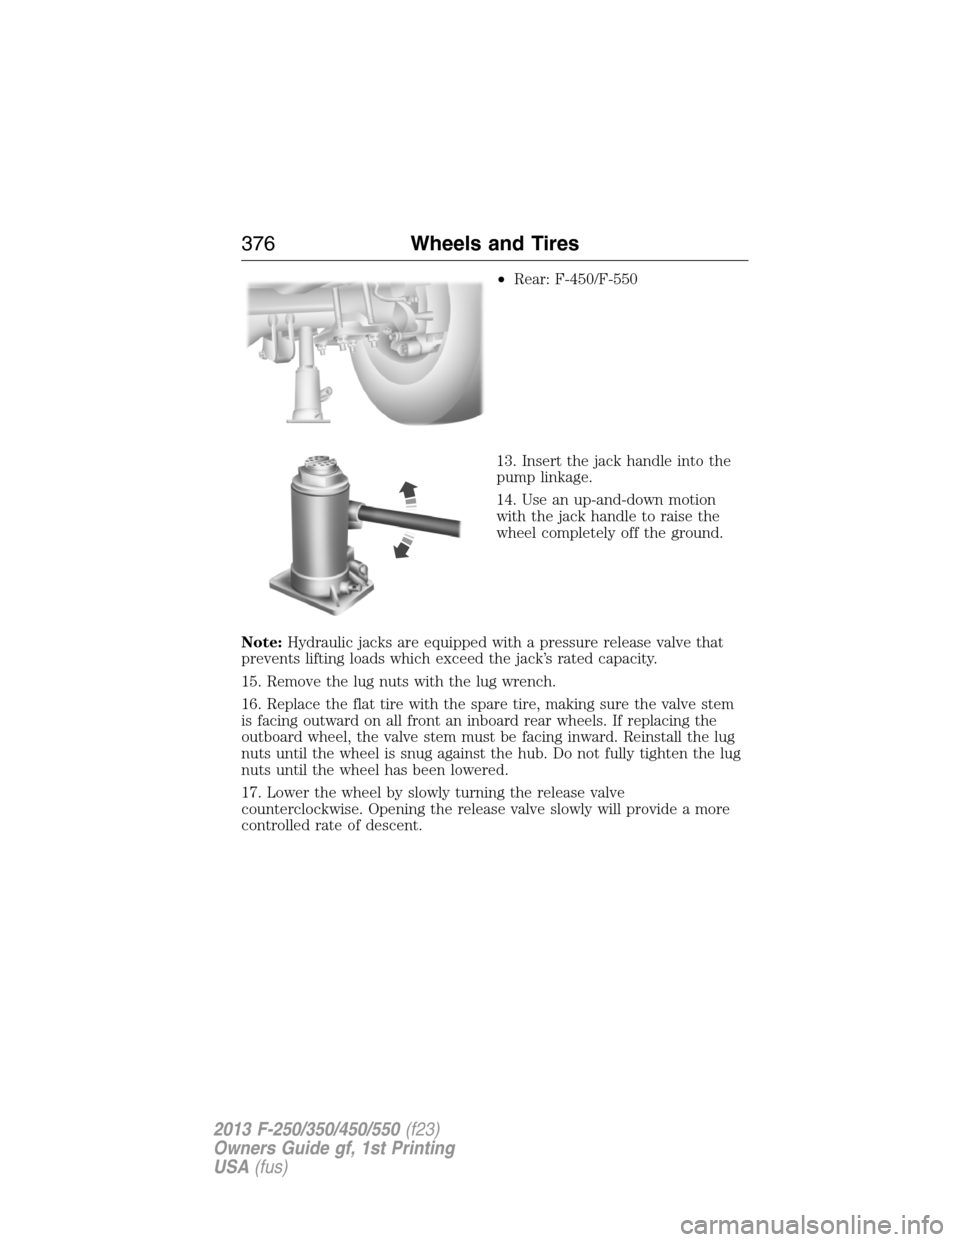
•Rear: F-450/F-550
13. Insert the jack handle into the
pump linkage.
14. Use an up-and-down motion
with the jack handle to raise the
wheel completely off the ground.
Note:Hydraulic jacks are equipped with a pressure release valve that
prevents lifting loads which exceed the jack’s rated capacity.
15. Remove the lug nuts with the lug wrench.
16. Replace the flat tire with the spare tire, making sure the valve stem
is facing outward on all front an inboard rear wheels. If replacing the
outboard wheel, the valve stem must be facing inward. Reinstall the lug
nuts until the wheel is snug against the hub. Do not fully tighten the lug
nuts until the wheel has been lowered.
17. Lower the wheel by slowly turning the release valve
counterclockwise. Opening the release valve slowly will provide a more
controlled rate of descent.
376Wheels and Tires
2013 F-250/350/450/550(f23)
Owners Guide gf, 1st Printing
USA(fus)
Page 381 of 563

3. Lay the tire on the ground with the valve stem facing up.
4. Slide the wheel partially under the vehicle and install the retainer
through the wheel center. Pull on the cable to align the components at
the end of the cable.
5. Turn the jack handle clockwise until the tire is raised to its stowed
position underneath the vehicle. The effort to turn the jack handle
increases significantly and the spare tire carrier ratchets or slips when
the tire is raised to the maximum tightness. Tighten to the best of your
ability, to the point where the ratchet/slip occurs, if possible. The spare
tire carrier will not allow you to overtighten. If the spare tire carrier
ratchets or slips with little effort, take the vehicle to your authorized
dealer for assistance at your earliest convenience.
6. Check that the tire lies flat against the frame and is properly
tightened. Try to push or pull, then turn the tire to be sure it will not
move. Loosen and retighten, if necessary. Failure to properly stow the
spare tire may result in failure of the winch cable and loss of the tire.
7. Repeat this tightness check procedure when servicing the spare tire
pressure (every six months, perscheduled maintenance information),
or at any time that the spare tire is disturbed through service of other
components.
8. If removed, install the spare tire lock (if equipped) into the bumper
drive tube with the spare tire lock key (if equipped) and jack handle.
TECHNICAL SPECIFICATIONS
Wheel Lug Nut Torque Specifications
WARNING:When a wheel is installed, always remove any
corrosion, dirt or foreign materials present on the mounting
surfaces of the wheel or the surface of the wheel hub, brake drum or
brake disc that contacts the wheel. Make sure that any fasteners that
attach the rotor to the hub are secured so they do not interfere with
the mounting surfaces of the wheel. Installing wheels without correct
metal-to-metal contact at the wheel mounting surfaces can cause the
wheel nuts to loosen and the wheel to come off while the vehicle is in
motion, resulting in loss of control.
On vehicles equipped with single rear wheels, retighten the lug nuts to
the specified torque at 100 miles (160 kilometers) after any wheel
disturbance (such as tire rotation, changing a flat tire, wheel removal).
380Wheels and Tires
2013 F-250/350/450/550(f23)
Owners Guide gf, 1st Printing
USA(fus)
Page 459 of 563

INTRODUCTION
WARNING:Driving while distracted can result in loss of vehicle
control, accident and injury. Ford strongly recommends that
drivers use extreme caution when using any device or feature that may
take their focus off the road. Your primary responsibility is the safe
operation of the vehicle. We recommend against the use of any
handheld device while driving, encourage the use of voice-operated
systems when possible and that you become aware of applicable state
and local laws that may affect use of electronic devices while driving.
Note:Some features are not available while your vehicle is moving.
Note:Your system is equipped with a feature that allows you to access
and control audio features for 30 minutes after you switch the ignition
off (and no doors open).
This system uses a four-corner strategy to provide quick access several
vehicle features and settings. The touchscreen provides easy interaction
with your cellular phone, multimedia, climate control and navigation
system. The corners display any active modes within those menus, such
as phone status or the climate temperature.
SETTINGS
Press to select any of the following:
•Clock
•Display
•Sound
•Vehicle
•Settings
•Help
INFORMATION
Press to select any of the following:
•SYNC® Services
•SIRIUS® Travel Link™
•Alerts
•Calendar
•SYNC Apps
If the icon is yellow, seeAlertsin theInformationsection of this chapter.
458MyFord Touch® (If Equipped)
2013 F-250/350/450/550(f23)
Owners Guide gf, 1st Printing
USA(fus)
Page 510 of 563

SETTINGS
Under this menu, you can set your clock, access and adjust the display,
sound and vehicle settings as well as access settings for specific modes
or the help feature.
Clock
Note:You cannot manually set the date. Your vehicle’s GPS does this for
you.
Note:If the battery has been disconnected, your vehicle needs to
acquire a GPS signal to update the clock. Once your vehicle acquires the
signal, it may take a few minutes for the update to display the correct
time.
1. Press theSettingsicon >Clock.
2. Press + and � to adjust the time.
From this screen, you can also make other adjustments, such as 12– or
24–hour mode, activate GPS time synchronization and have the system
automatically update for daylight savings time and new time zones.
You can also turn the outside air temperature display on and off. It
appears at the top center of the touchscreen, next to the time and date.
The system automatically saves any updates you make to the settings.
Display
You can adjust the touchscreen display through the touchscreen or by
pressing the voice button on your steering wheel controls and when
prompted, say, “Display settings”.
Press theSettingsicon >Display,then select from the following:
Brightnessallows you to make the screen display brighter or dimmer.
Modeallows you to set the screen to a certain brightness or have the
system automatically change based on the outside light level.
•If you select AUTO or NIGHT, you have the options of turning the
display’s Auto Dim feature on or off and changing the Auto Dim
Manual Offset feature.
Edit Wallpaper
•You can have your touchscreen display the default photo or upload
your own.
MyFord Touch® (If Equipped)509
2013 F-250/350/450/550(f23)
Owners Guide gf, 1st Printing
USA(fus)
Page 524 of 563

F.A/C:Touch to turn the air conditioning on or off.
•Use with recirculated air to improve cooling performance and
efficiency.
•Engages automatically in MAX A/C, defrost and floor/defrost.
G.AUTO:Touch to engage automatic operation, then set the
temperature using the temperature control. The system automatically
controls:
•Fan speed
•Airflow distribution
•A/Conoroff
•Outside or recirculated air.
H.Rear defroster:Touch to turn the rear window defroster and heated
mirrors.
I.Defrost:Touch to clear the windshield of fog and thin ice. Touch
again to return to the previous airflow selection. When on, defrost:
•Provides outside air to reduce window fogging.
•Distributes air through the windshield defroster vents and demister
vents.
J.Manual controls:Select any of the following airflow distribution
modes:
•Floor and Defrost:Distributes air through the windshield defroster
vents, demister vents, floor vents and rear seat floor vents, and
provides outside air to reduce window fogging.
•Panel:Distributes air through the instrument panel vents.
•Panel and Floor:Distributes air through the instrument panel vents,
demister vents, floor vents and rear seat floor vents.
•Floor:Distributes air through the demister vents, floor vents and
rear seat floor vents.
K.Driver settings:Depending on your vehicle and option package, you
may have the following features:
•Touch + or – to adjust the temperature.
•If your vehicle is equipped with heated seats, touch the heated seat
icon to control the heated seat. See theSeatschapter.
•If your vehicle is equipped with cooled seats, touch the cooled seat
icon to control the cooled seat. See theSeatschapter.
•Touch and hold MyTemp to select a temperature you would like your
vehicle to remember and maintain for you.
•If your vehicle is equipped with a heated steering wheel, touch the
heated steering wheel icon to warm the steering wheel.
Note:If your vehicle is equipped with a wood-trimmed steering wheel, it
does not heat between the 10 o’clock and 2 o’clock positions.
MyFord Touch® (If Equipped)523
2013 F-250/350/450/550(f23)
Owners Guide gf, 1st Printing
USA(fus)
Page 557 of 563

maintenance-free ....................312
replacement, specifications ...388
servicing ..................................312
Bed extender ............................247
Booster seats ...............................23
Brakelamp
bulb replacement ....................324
Brakes ........................................220
anti-lock ...................................220
anti-lock brake system (ABS)
warning light ...........................220
brake warning light ................220
fluid, checking and adding ....311
fluid, refill capacities ..............384
fluid, specifications .................384
parking ....................................221
shift interlock ..........................204
trailer .......................................254
Bulbs ..........................................325
C
Capacities for refilling fluids ....384
Car2U® Home Automation
System .......................................167
CD ..............................135–136, 139
CD player ..........................133, 482
CD voice commands .................483
Cell phone use ............................16
Changing a tire .........................366
Changing the air filter ..............317
Child safety seats
attaching with tether straps ....31
automatic locking mode
(retractor) .................................40
in front seat ..............................28
in rear seat ................................28
LATCH .......................................31Child safety seats -
booster seats ...............................23
Cleaning the touchscreen ........460
Cleaning your vehicle ...............327
engine compartment ..............329
exterior ....................................327
instrument panel ............331–332
interior .....................................330
plastic parts ............................329
washing ....................................327
waxing .....................................329
wheels ......................................334
wiper blades ............................330
Climate control (see Air
conditioning or Heating) ..........145
Climate voice commands .........524
Clock ..........................135–136, 509
Console ......................................180
overhead ..................................181
Controls
power seat ...............................158
Coolant ......................................301
checking and adding ..............301
recovery reservoir ..................298
refill capacities ........................384
Customer Assistance ................271
Ford Extended Service
Plan ..................................393, 395
Getting roadside assistance ...271
Getting the service you
need .........................................277
Ordering additional owner’s
literature .................................283
Utilizing the
Mediation/Arbitration
Program ...................................281
556Index
2013 F-250/350/450/550(f23)
Owners Guide gf, 1st Printing
USA(fus)