Page 137 of 576
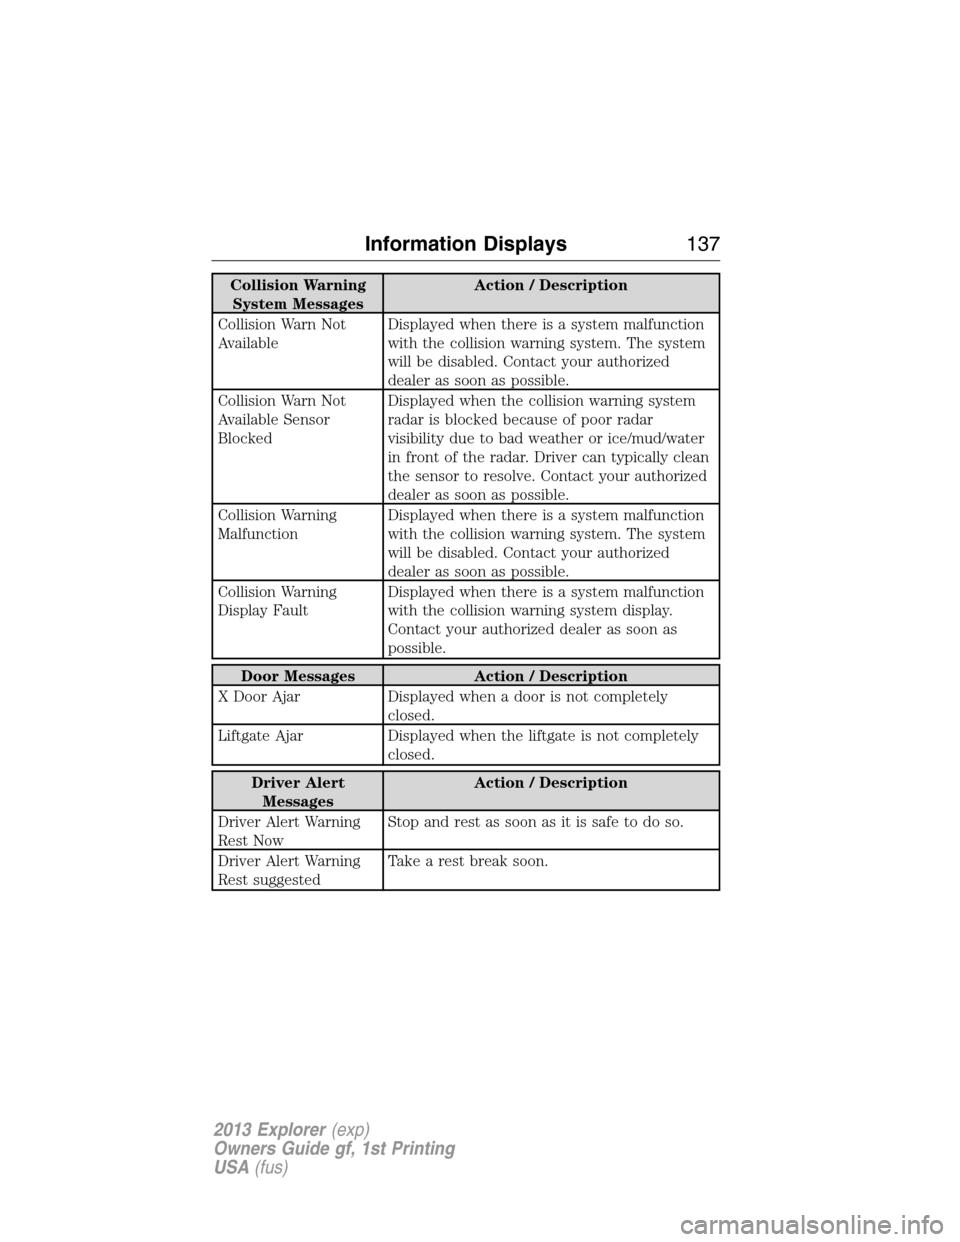
Collision Warning
System MessagesAction / Description
Collision Warn Not
AvailableDisplayed when there is a system malfunction
with the collision warning system. The system
will be disabled. Contact your authorized
dealer as soon as possible.
Collision Warn Not
Available Sensor
BlockedDisplayed when the collision warning system
radar is blocked because of poor radar
visibility due to bad weather or ice/mud/water
in front of the radar. Driver can typically clean
the sensor to resolve. Contact your authorized
dealer as soon as possible.
Collision Warning
MalfunctionDisplayed when there is a system malfunction
with the collision warning system. The system
will be disabled. Contact your authorized
dealer as soon as possible.
Collision Warning
Display FaultDisplayed when there is a system malfunction
with the collision warning system display.
Contact your authorized dealer as soon as
possible.
Door Messages Action / Description
X Door Ajar Displayed when a door is not completely
closed.
Liftgate Ajar Displayed when the liftgate is not completely
closed.
Driver Alert
MessagesAction / Description
Driver Alert Warning
Rest NowStop and rest as soon as it is safe to do so.
Driver Alert Warning
Rest suggestedTake a rest break soon.
Information Displays137
2013 Explorer(exp)
Owners Guide gf, 1st Printing
USA(fus)
Page 143 of 576
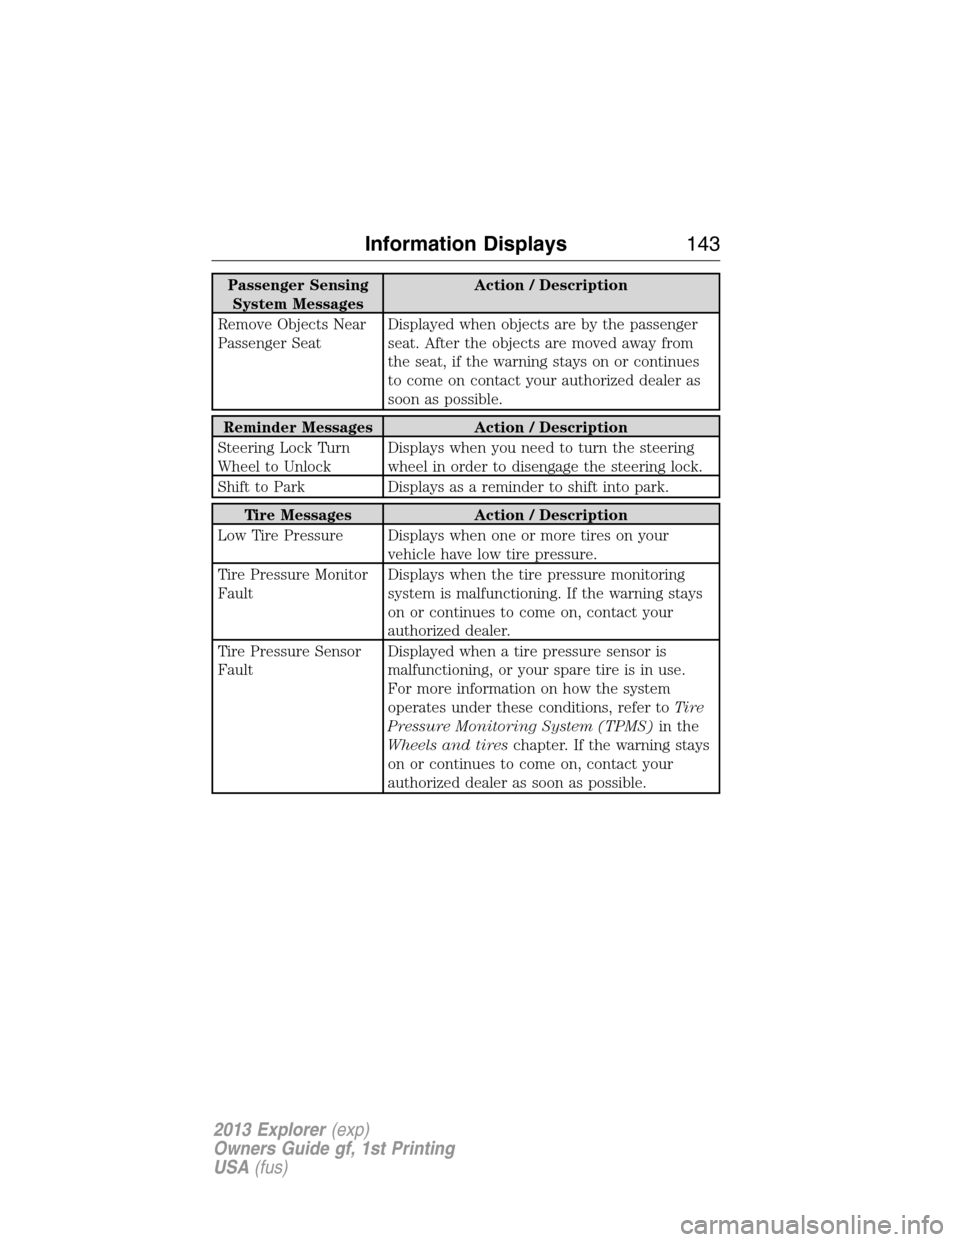
Passenger Sensing
System MessagesAction / Description
Remove Objects Near
Passenger SeatDisplayed when objects are by the passenger
seat. After the objects are moved away from
the seat, if the warning stays on or continues
to come on contact your authorized dealer as
soon as possible.
Reminder Messages Action / Description
Steering Lock Turn
Wheel to UnlockDisplays when you need to turn the steering
wheel in order to disengage the steering lock.
Shift to Park Displays as a reminder to shift into park.
Tire Messages Action / Description
Low Tire Pressure Displays when one or more tires on your
vehicle have low tire pressure.
Tire Pressure Monitor
FaultDisplays when the tire pressure monitoring
system is malfunctioning. If the warning stays
on or continues to come on, contact your
authorized dealer.
Tire Pressure Sensor
FaultDisplayed when a tire pressure sensor is
malfunctioning, or your spare tire is in use.
For more information on how the system
operates under these conditions, refer toTi r e
Pressure Monitoring System (TPMS)in the
Wheels and tireschapter. If the warning stays
on or continues to come on, contact your
authorized dealer as soon as possible.
Information Displays143
2013 Explorer(exp)
Owners Guide gf, 1st Printing
USA(fus)
Page 148 of 576

When you select: You can:
G. OK Allows you to confirm commands with special
phone and media features. If your vehicle is
equipped with SYNC, refer to theSYNC
chapter for more information.
H. Eject Eject the CD.
I. Power and Volume Press the power control to turn the system on
and off.
Turn to adjust the volume.
J. CLOCK Set the time. Use the center arrow controls to
move between options and set time.
K. SOUND Allows you to adjust the sound settings
(Treble, Bass, Middle, Fade and Balance).
1. Press Menu.
2. Scroll until Audio is selected and press OK.
3. Scroll to select Sound and press OK.
L. MENU Allows you to access many functions of the
audio system. Refer toMenu structure
following this table.
M. PHONE Access SYNC phone features.
N. AUX Access your auxiliary input jack. Refer to
Auxiliary input jacklater in this chapter.
O. SIRIUS Access SIRIUS satellite radio features.
Menu Structure
Note:Depending on your system, some options may appear slightly
different, not at all or on-screen and able to be selected using the
function buttons.
Press MENU.
Press the up and down arrow buttons to scroll through the options (if
active).
Press the right arrow to enter a menu. Press the left arrow to exit a
menu.
148Audio System
2013 Explorer(exp)
Owners Guide gf, 1st Printing
USA(fus)
Page 149 of 576
Menu structure
RadioScan
RBDS/RDS Set category
SIRIUS optionsScan
Show ESN
Channel guide Tune channel
Skip channel
Lock channel
Set category
Alerts
Unlock all stations
Skip no stations
Parental lock (PIN)
Audio settingsSCV level
Sound
CDScan all
Scan folder
CD compression
Display settingsDimming Automatic
Daylight
Language English
French
Spanish
Temp setting Fahrenheit
Celsius
Clock settingsSet time
Set date
12/24 hour
Audio System149
2013 Explorer(exp)
Owners Guide gf, 1st Printing
USA(fus)
Page 157 of 576
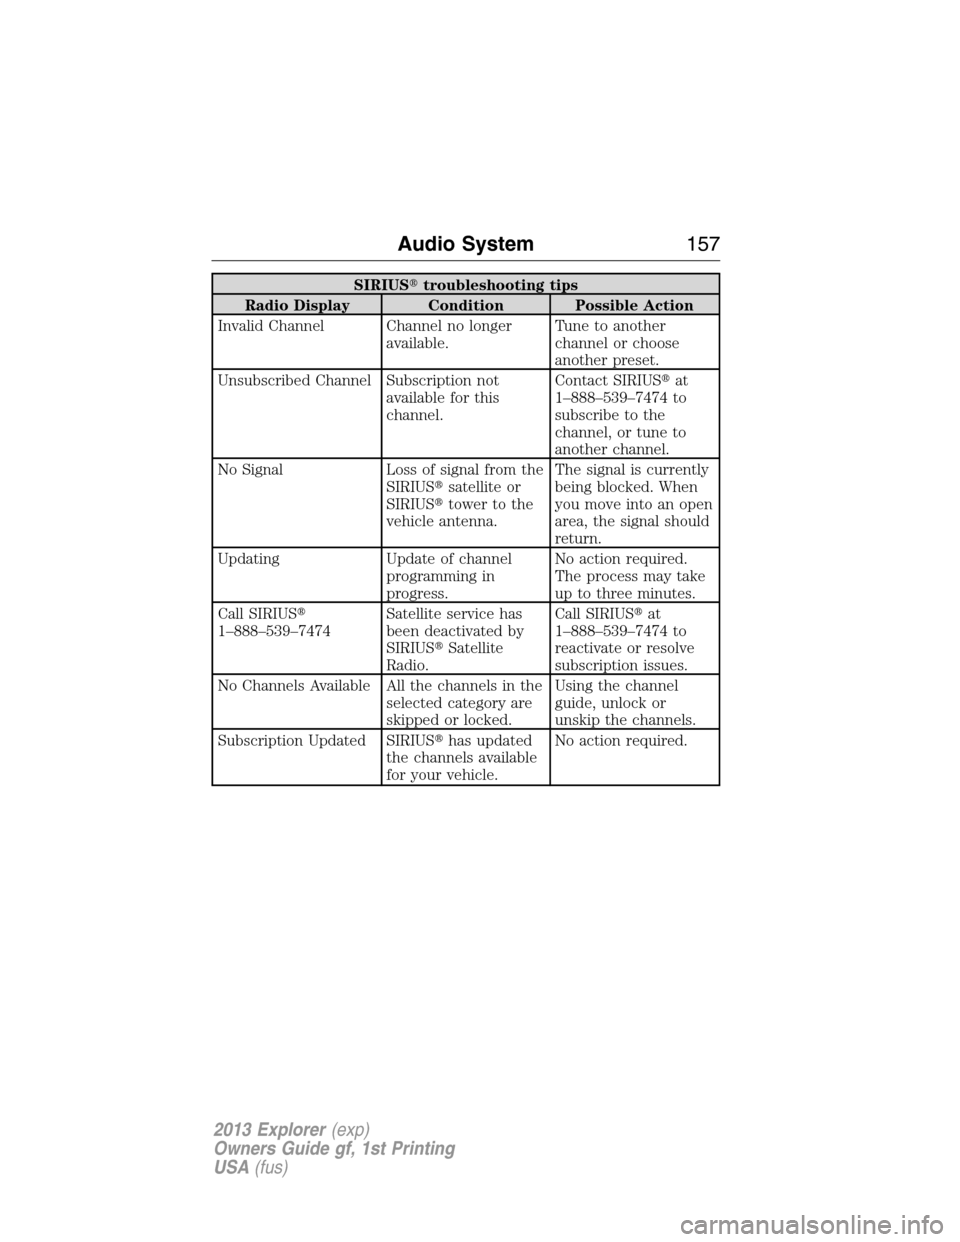
SIRIUS�troubleshooting tips
Radio Display Condition Possible Action
Invalid Channel Channel no longer
available.Tune to another
channel or choose
another preset.
Unsubscribed Channel Subscription not
available for this
channel.Contact SIRIUS�at
1–888–539–7474 to
subscribe to the
channel, or tune to
another channel.
No Signal Loss of signal from the
SIRIUS�satellite or
SIRIUS�tower to the
vehicle antenna.The signal is currently
being blocked. When
you move into an open
area, the signal should
return.
Updating Update of channel
programming in
progress.No action required.
The process may take
up to three minutes.
Call SIRIUS�
1–888–539–7474Satellite service has
been deactivated by
SIRIUS�Satellite
Radio.Call SIRIUS�at
1–888–539–7474 to
reactivate or resolve
subscription issues.
No Channels Available All the channels in the
selected category are
skipped or locked.Using the channel
guide, unlock or
unskip the channels.
Subscription Updated SIRIUS�has updated
the channels available
for your vehicle.No action required.
Audio System157
2013 Explorer(exp)
Owners Guide gf, 1st Printing
USA(fus)
Page 163 of 576
F.A/C:Press the button to turn air conditioning on or off. Air conditioning
cools the vehicle using outside air. To improve air conditioning when starting
your vehicle, drive with the windows slightly open for two to three minutes.
Use A/C with recirculated air to improve cooling performance and efficiency.
Note:A/C turns on automatically in MAX A/C, Defrost and Floor/Defrost.
G.AUTO:Press the button to turn on fully automatic operation. Select
the desired temperature using the temperature control. The system
automatically determines fan speed, air distribution, A/C operation, and
outside or recirculated air, to heat or cool the vehicle to maintain the
selected temperature.
H.Rear defrost:Turns the heated rear window on and off. Refer to
Heated rear windowlater in this chapter for more information. If your
vehicle is equipped with heated mirrors, this button turns them on also.
I.Defrost:Distributes air through the windshield defroster vents and
de-mister vents. This setting can also be used to defog and clear the
windshield of a thin covering of ice.
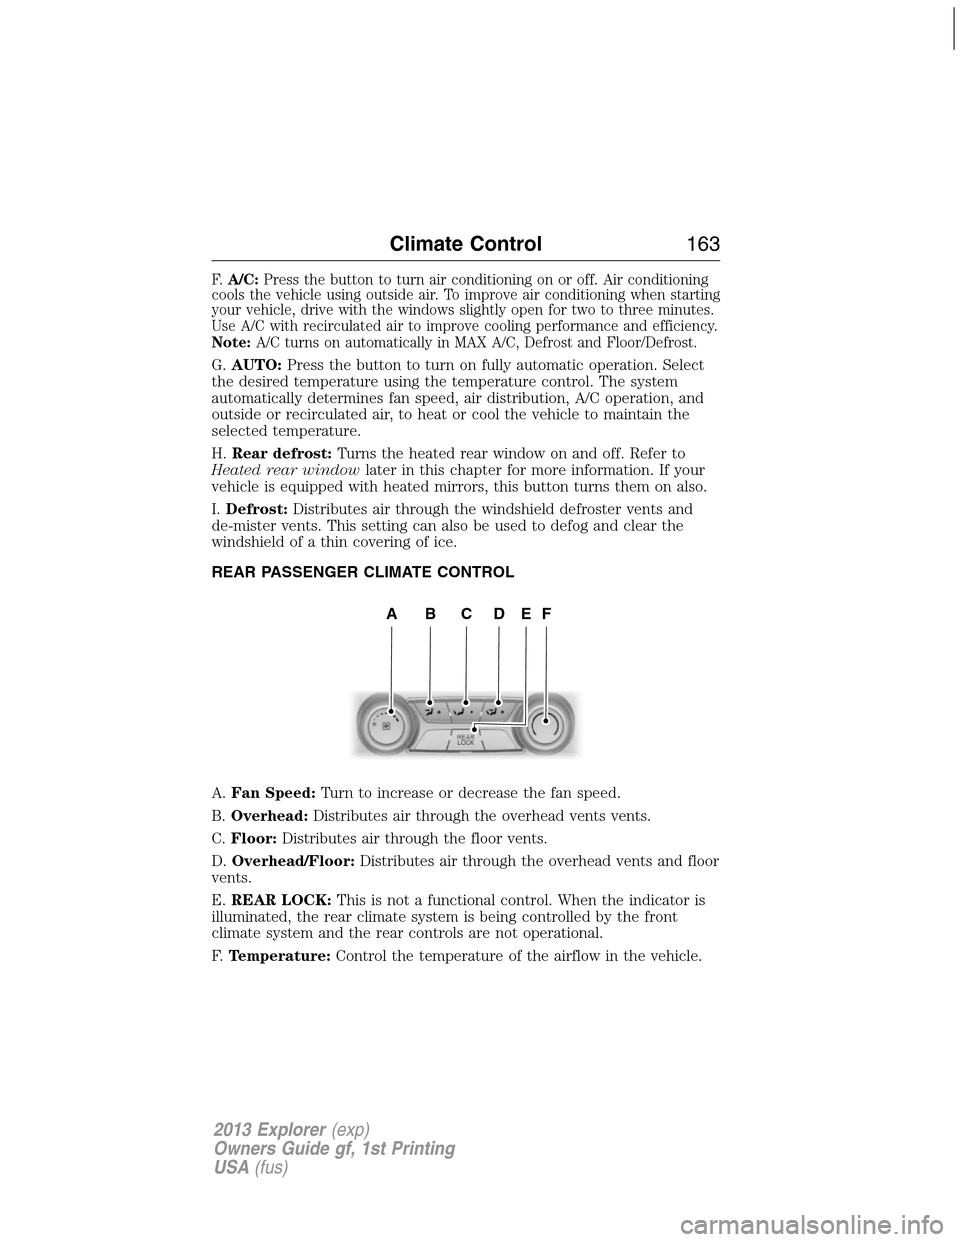
REAR PASSENGER CLIMATE CONTROL
A.Fan Speed:Turn to increase or decrease the fan speed.
B.Overhead:Distributes air through the overhead vents vents.
C.Floor:Distributes air through the floor vents.
D.Overhead/Floor:Distributes air through the overhead vents and floor
vents.
E.REAR LOCK:This is not a functional control. When the indicator is
illuminated, the rear climate system is being controlled by the front
climate system and the rear controls are not operational.
F.Temperature:Control the temperature of the airflow in the vehicle.
ABCDEF
Climate Control163
2013 Explorer(exp)
Owners Guide gf, 1st Printing
USA(fus)
Page 170 of 576
Second row center seat head
restraint (if equipped)
The head restraints consist of:
A. Energy absorbing head restraint
B. Steel stems
C. Guide sleeve adjust/release button
D. Guide sleeve unlock/remove button
•Raise:pull up on the head restraint (A).
•Lower:press and hold the guide sleeve adjust/release button (C) and
push down on the head restraint (A).
•
Remove:Pull up the head restraint until it reaches the highest adjustment
position and then press and hold both the adjust/release button (C) and
the unlock/remove button (D), then pull up on the head restraint.
•Reinstall:Align the steel stems into the guide sleeves and push the
head restraint down until it locks.
Second row outboard seat head
restraints
The head restraints consist of:
A. Energy absorbing head restraint
B. Steel stems
C. Guide sleeve unlock/remove buttons
D
B
A
B
C
C
B
AD
170Seats
2013 Explorer(exp)
Owners Guide gf, 1st Printing
USA(fus)
Page 171 of 576
D. Fold strap
•Fold:pull the fold strap (D). Pull it back up to reset.
•Remove:fold the head restraint. Press and hold both of the
unlock/remove buttons (C), then pull up on the head restraint.
•Reinstall:align the steel stems into the guide sleeves and push the
head restraint down until it locks.
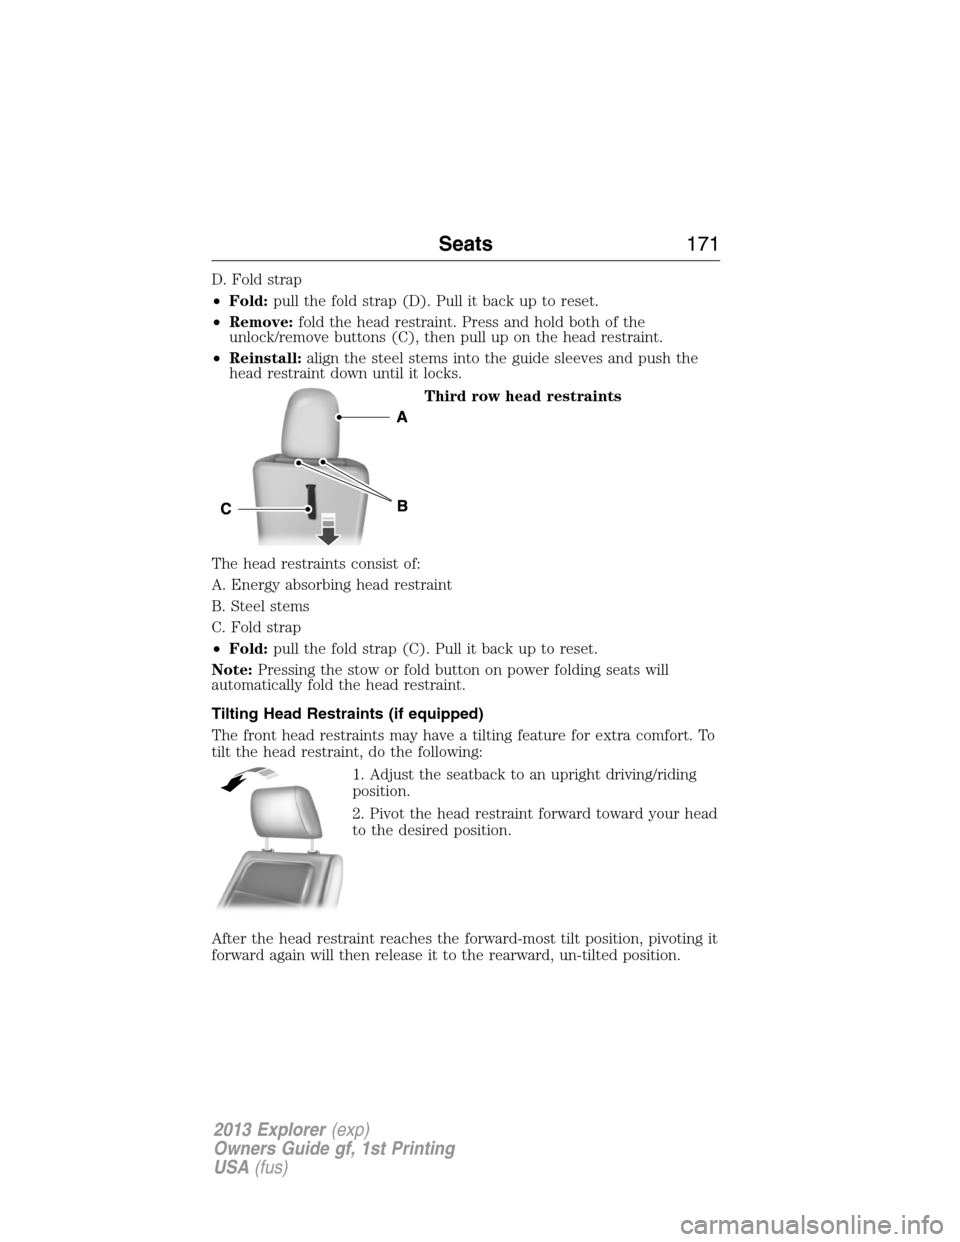
Third row head restraints
The head restraints consist of:
A. Energy absorbing head restraint
B. Steel stems
C. Fold strap
•Fold:pull the fold strap (C). Pull it back up to reset.
Note:Pressing the stow or fold button on power folding seats will
automatically fold the head restraint.
Tilting Head Restraints (if equipped)
The front head restraints may have a tilting feature for extra comfort. To
tilt the head restraint, do the following:
1. Adjust the seatback to an upright driving/riding
position.
2. Pivot the head restraint forward toward your head
to the desired position.
After the head restraint reaches the forward-most tilt position, pivoting it
forward again will then release it to the rearward, un-tilted position.
Seats171
2013 Explorer(exp)
Owners Guide gf, 1st Printing
USA(fus)