2013 CHEVROLET CORVETTE lock
[x] Cancel search: lockPage 242 of 414
Black plate (30,1)Chevrolet Corvette Owner Manual - 2013 - crc2 - 11/8/12
9-30 Driving and Operating
Neutral:Use this position when
you start or idle the engine. The
shift lever is in Neutral when it is
centered in the shift pattern, not in
any gear.
R (Reverse): To back up, press
down the clutch pedal and shift into
R (Reverse). Just apply pressure to
get the lever past 5 (Fifth) and
6 (Sixth) into R (Reverse). Let up on
the clutch pedal slowly while
pressing the accelerator pedal.
The six-speed manual transmission
has a feature that allows you to
safely shift into R (Reverse) while
the vehicle is rolling at less than
5 km/h (3 mph). You will be locked
out if you try to shift into
R (Reverse) while the vehicle is
moving faster than 5 km/h (3 mph).Shift Speeds
(Manual Transmission)
{WARNING
If you skip a gear when you
downshift, you could lose control
of the vehicle. You could injure
yourself or others. Do not shift
down more than one gear at a
time when you downshift.
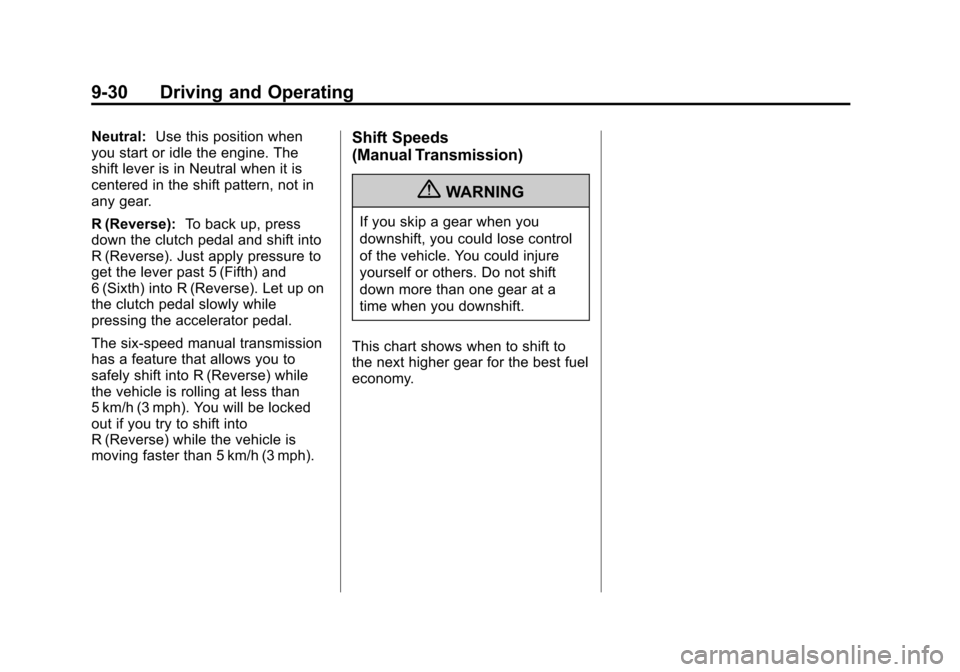
This chart shows when to shift to
the next higher gear for the best fuel
economy.
Page 244 of 414
Black plate (32,1)Chevrolet Corvette Owner Manual - 2013 - crc2 - 11/8/12
9-32 Driving and Operating
Be careful when shifting from
1 (First) to 2 (Second) or
downshifting from 6 (Sixth) to
5 (Fifth). The spring will try to pull
the shift lever toward 4 (Fourth) and
3 (Third). Make sure you move the
lever into 2 (Second) or 5 (Fifth).
If you let the shift lever move in the
direction of the pulling, you may end
up shifting from 1 (First) to 4 (Fourth)
or from 6 (Sixth) to 3 (Third).
If the driver does not upshift as the
engine speed approaches fuel shut
off RPM, the engine speed will be
limited to protect the engine. See
Tachometer on page 5‑12for more
information.Brakes
Antilock Brake
System (ABS)
This vehicle has the Antilock Brake
System (ABS), an advanced
electronic braking system that helps
prevent a braking skid.
When the vehicle begins to drive
away, ABS checks itself.
A momentary motor or clicking noise
might be heard while this test is
going on, and it might even be
noticed that the brake pedal moves
a little. This is normal.
If there is a problem with ABS, this
warning light stays on. See Antilock
Brake System (ABS) Warning Light
on page 5‑21. If driving safely on a wet road and it
becomes necessary to slam on the
brakes and continue braking to
avoid a sudden obstacle, a
computer senses that the wheels
are slowing down. If one of the
wheels is about to stop rolling, the
computer will separately work the
brakes at each wheel.
ABS can change the brake pressure
to each wheel, as required, faster
than any driver could. This can help
you steer around the obstacle while
braking hard.
As the brakes are applied, the
computer keeps receiving updates
on wheel speed and controls
braking pressure accordingly.
Page 260 of 414
Black plate (48,1)Chevrolet Corvette Owner Manual - 2013 - crc2 - 11/8/12
9-48 Driving and Operating
WARNING (Continued)
.Fuel can spray out if the fuel
cap is opened too quickly.
This spray can happen if the
tank is nearly full, and is
more likely in hot weather.
Open the fuel cap slowly and
wait for any hiss noise to stop
then unscrew the cap all
the way
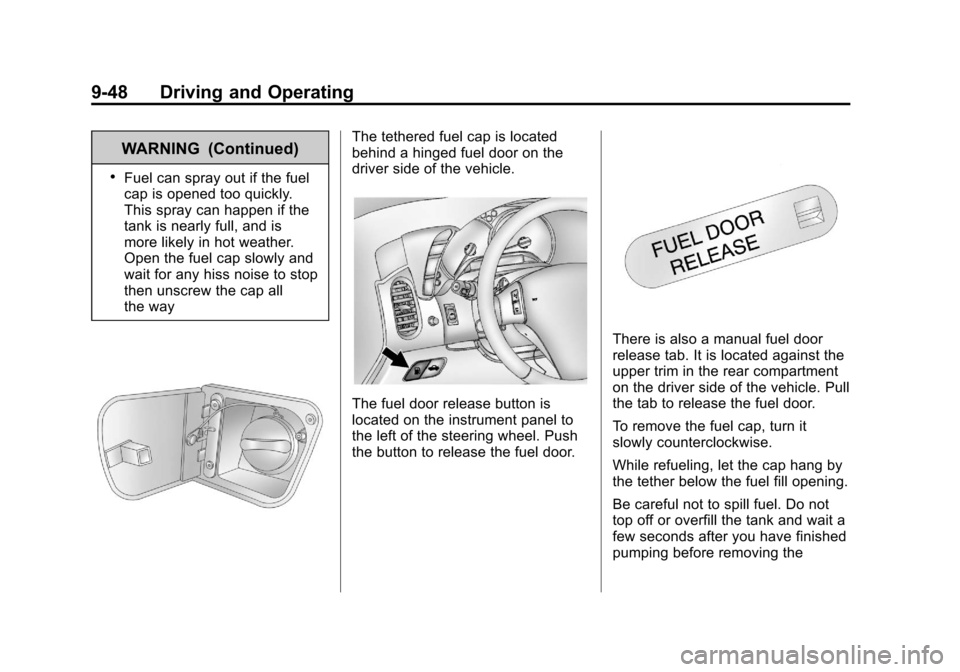
The tethered fuel cap is located
behind a hinged fuel door on the
driver side of the vehicle.
The fuel door release button is
located on the instrument panel to
the left of the steering wheel. Push
the button to release the fuel door.
There is also a manual fuel door
release tab. It is located against the
upper trim in the rear compartment
on the driver side of the vehicle. Pull
the tab to release the fuel door.
To remove the fuel cap, turn it
slowly counterclockwise.
While refueling, let the cap hang by
the tether below the fuel fill opening.
Be careful not to spill fuel. Do not
top off or overfill the tank and wait a
few seconds after you have finished
pumping before removing the
Page 261 of 414
Black plate (49,1)Chevrolet Corvette Owner Manual - 2013 - crc2 - 11/8/12
Driving and Operating 9-49
nozzle. Clean fuel from painted
surfaces as soon as possible. See
Exterior Care on page 10‑79.
When replacing the fuel cap, turn it
clockwise until it clicks. Make sure
the cap is fully installed. The
diagnostic system can determine if
the fuel cap has been left off or
improperly installed. This would
allow fuel to evaporate into the
atmosphere. SeeMalfunction
Indicator Lamp on page 5‑18.
The CHECK GAS CAP message
displays on the Driver Information
Center (DIC) if the fuel cap is not
properly installed. See Fuel System
Messages on page 5‑40 for more
information.
{WARNING
If a fire starts while you are
refueling, do not remove the
nozzle. Shut off the flow of fuel by
shutting off the pump or by
notifying the station attendant.
Leave the area immediately. Notice:
If you need a new fuel
cap, be sure to get the right type.
Your dealer can get one for you.
If you get the wrong type, it may
not fit properly. This may cause
the malfunction indicator lamp to
light and may damage the fuel
tank and emissions system. See
Malfunction Indicator Lamp on
page 5‑18.
Filling a Portable Fuel
Container
{WARNING
Filling a portable fuel container
while it is in the vehicle can cause
fuel vapors that can ignite either
by static electricity or other
means. You or others could be
badly burned and the vehicle
could be damaged. Always:
.Use approved fuel
containers.
(Continued)
WARNING (Continued)
.Remove the container from
the vehicle, trunk, or pickup
bed before filling.
.Place the container on the
ground.
.Place the nozzle inside the fill
opening of the container
before dispensing fuel, and
keep it in contact with the fill
opening until filling is
complete.
.Fill the container no more
than 95% full to allow for
expansion.
.Do not smoke, light matches,
or use lighters while
pumping fuel.
.Avoid using cell phones or
other electronic devices.
Page 263 of 414

Black plate (1,1)Chevrolet Corvette Owner Manual - 2013 - crc2 - 11/8/12
Vehicle Care 10-1
Vehicle Care
General Information
General Information . . . . . . . . . . 10-2
California Proposition65 Warning . . . . . . . . . . . . . . . . . 10-2
California Perchlorate Materials Requirements . . . . 10-3
Accessories and Modifications . . . . . . . . . . . . . . . 10-3
Lifting the Vehicle . . . . . . . . . . . . 10-3
Vehicle Checks
Doing Your Own Service Work . . . . . . . . . . . . . . . 10-6
Hood . . . . . . . . . . . . . . . . . . . . . . . . 10-7
Engine Compartment Overview . . . . . . . . . . . . . . . . . . . 10-8
Engine Oil . . . . . . . . . . . . . . . . . . 10-13
Engine Oil Life System . . . . . 10-19
Automatic Transmission Fluid . . . . . . . . . . . . . . . . . . . . . . 10-20
Manual Transmission Fluid . . . . . . . . . . . . . . . . . . . . . . 10-21
Hydraulic Clutch . . . . . . . . . . . . 10-21
Engine Air Cleaner/Filter . . . . 10-21
Cooling System (Engine) . . . 10-24 Cooling System
(Intercooler) . . . . . . . . . . . . . . . 10-25
Engine Coolant . . . . . . . . . . . . . 10-26
Engine Overheating . . . . . . . . 10-29
Overheated Engine Protection
Operating Mode . . . . . . . . . . . 10-30
Power Steering Fluid . . . . . . . 10-31
Washer Fluid . . . . . . . . . . . . . . . 10-32
Brakes . . . . . . . . . . . . . . . . . . . . . 10-32
Brake Fluid . . . . . . . . . . . . . . . . . 10-36
Battery . . . . . . . . . . . . . . . . . . . . . 10-37
Rear Axle . . . . . . . . . . . . . . . . . . 10-38
Starter Switch Check . . . . . . . 10-38
Automatic Transmission Shift Lock Control Function
Check . . . . . . . . . . . . . . . . . . . . . 10-39
Park Brake and P (Park) Mechanism Check . . . . . . . . 10-39
Wiper Blade Replacement . . . . . . . . . . . . . . 10-40
Windshield Replacement . . . 10-41
Headlamp Aiming
Headlamp Aiming . . . . . . . . . . 10-41
Bulb Replacement
Bulb Replacement . . . . . . . . . . 10-41
Halogen Bulbs . . . . . . . . . . . . . . 10-41 High Intensity Discharge
(HID) Lighting . . . . . . . . . . . . . 10-42
Headlamps, Front Turn Signal and Parking
Lamps . . . . . . . . . . . . . . . . . . . . 10-42
Taillamps, Turn Signal, and Stoplamps . . . . . . . . . . . . . . . . 10-43
Back-Up Lamps . . . . . . . . . . . . 10-43
License Plate Lamp . . . . . . . . 10-44
Replacement Bulbs . . . . . . . . . 10-44
Electrical System
Electrical System Overload . . . . . . . . . . . . . . . . . . 10-44
Fuses and Circuit Breakers . . . . . . . . . . . . . . . . . . 10-45
Engine Compartment Fuse
Block . . . . . . . . . . . . . . . . . . . . . 10-45
Instrument Panel Fuse Block . . . . . . . . . . . . . . . . . . . . . 10-48
Wheels and Tires
Tires . . . . . . . . . . . . . . . . . . . . . . . . 10-52
Winter Tires . . . . . . . . . . . . . . . . 10-53
Run-Flat Tires . . . . . . . . . . . . . . 10-53
Low-Profile Tires . . . . . . . . . . . 10-54
Sport Cup Tires . . . . . . . . . . . . 10-55
Summer Tires . . . . . . . . . . . . . . 10-55
Tire Sidewall Labeling . . . . . . 10-55
Page 265 of 414
Black plate (3,1)Chevrolet Corvette Owner Manual - 2013 - crc2 - 11/8/12
Vehicle Care 10-3
cause cancer and birth defects or
other reproductive harm. Engine
exhaust, many parts and systems,
many fluids, and some component
wear by-products contain and/or
emit these chemicals.
California Perchlorate
Materials Requirements
Certain types of automotive
applications, such as airbag
initiators, safety belt pretensioners,
and lithium batteries contained in
Remote Keyless Entry transmitters,
may contain perchlorate materials.
Special handling may be necessary.
For additional information, see
www.dtsc.ca.gov/hazardouswaste/
perchlorate.
Accessories and
Modifications
Adding non‐dealer accessories or
making modifications to the vehicle
can affect vehicle performance and
safety, including such things as
airbags, braking, stability, ride andhandling, emissions systems,
aerodynamics, durability, and
electronic systems like antilock
brakes, traction control, and stability
control. These accessories or
modifications could even cause
malfunction or damage not covered
by the vehicle warranty.
Damage to vehicle components
resulting from modifications or the
installation or use of non‐GM
certified parts, including control
module or software modifications, is
not covered under the terms of the
vehicle warranty and may affect
remaining warranty coverage for
affected parts.
GM Accessories are designed to
complement and function with other
systems on the vehicle. See your
dealer to accessorize the vehicle
using genuine GM Accessories
installed by a dealer technician.
Also, see
Adding Equipment to the
Airbag-Equipped Vehicle on
page 3‑25.
Lifting the Vehicle
{WARNING
Lifting a vehicle can cause an
injury. The vehicle can slip off the
jack and roll over you or other
people. You and they could be
badly injured. Find a level place
to lift your vehicle. To help
prevent the vehicle from moving:
1. Set the parking brake firmly.
2. Put an automatic transmission shift lever in
P (Park), or shift a manual
transmission to 1 (First) or
R (Reverse).
3. Turn off the engine.
To be even more certain the
vehicle won't move, put blocks in
front of and behind the wheels.
Page 266 of 414
Black plate (4,1)Chevrolet Corvette Owner Manual - 2013 - crc2 - 11/8/12
10-4 Vehicle Care
{WARNING
Getting under a vehicle when it is
lifted on a jack is dangerous.
If the vehicle slips off the jack,
you could be badly injured or
killed. Never get under a vehicle
when it is supported only by
a jack.
{WARNING
Raising the vehicle with the jack
improperly positioned can
damage the vehicle or the vehicle
may fall and cause you or others
injury.
If you ever use a jack to lift your
vehicle, follow the instructions that
came with the jack, and be sure to
use the correct lifting points to avoid
damaging your vehicle. Notice:
Lifting your vehicle
improperly can damage your
vehicle and result in costly
repairs not covered by your
warranty. To lift your vehicle
properly, follow the advice in
this part.
To help prevent vehicle damage:
.Be sure to place a block or
pad between the jack and the
vehicle.
.Make sure the jack you are
using spans at least two
crossmember ribs.
.Lift only in the areas shown
in the following pictures.
For additional information, see
your dealer and the Chevrolet
Corvette service manual.
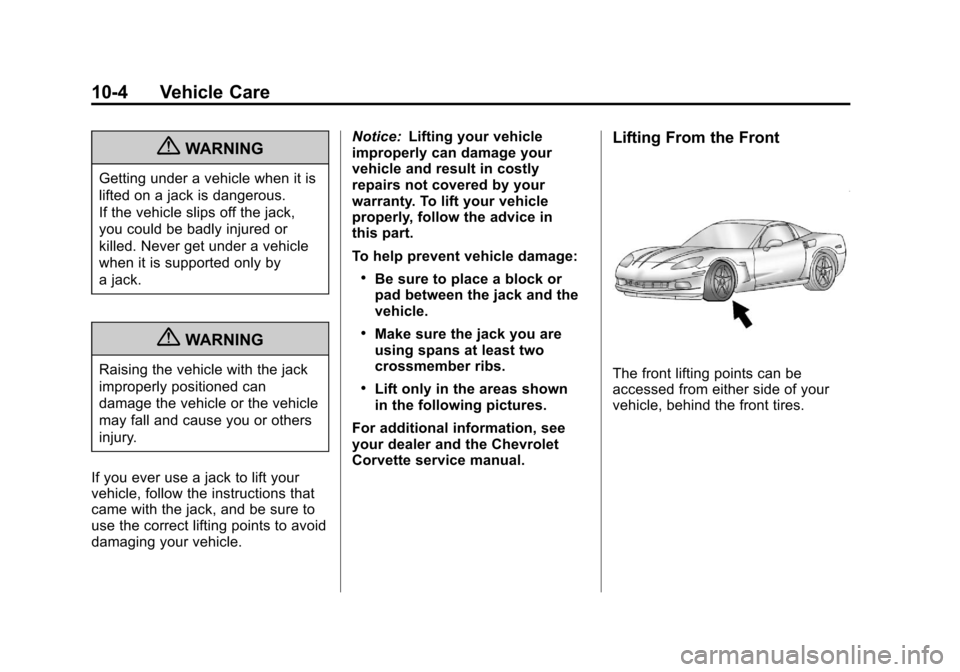
Lifting From the Front
The front lifting points can be
accessed from either side of your
vehicle, behind the front tires.
Page 267 of 414
Black plate (5,1)Chevrolet Corvette Owner Manual - 2013 - crc2 - 11/8/12
Vehicle Care 10-5
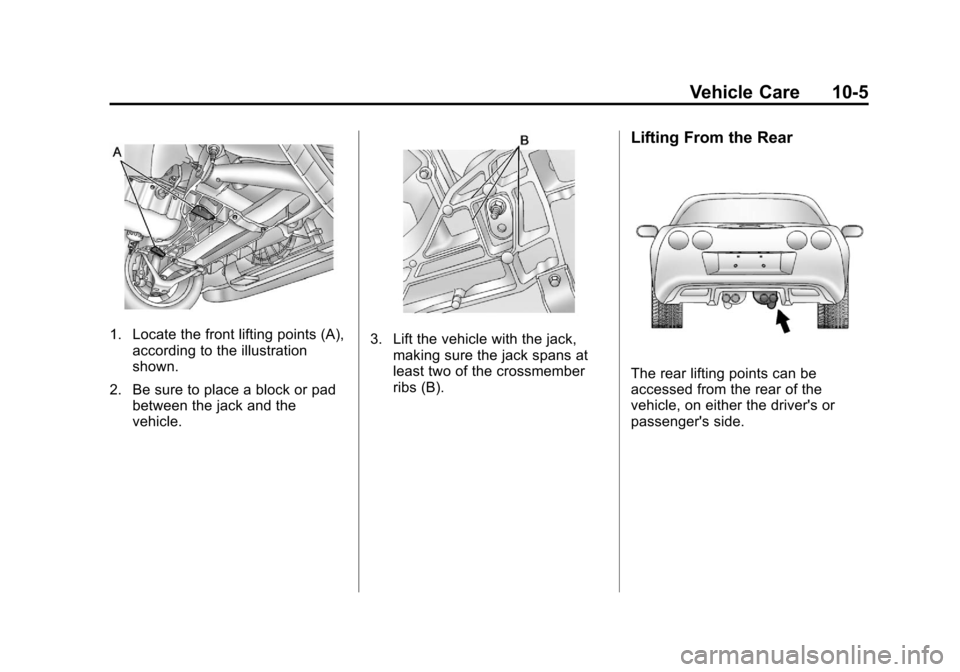
1. Locate the front lifting points (A),according to the illustration
shown.
2. Be sure to place a block or pad between the jack and the
vehicle.3. Lift the vehicle with the jack,making sure the jack spans at
least two of the crossmember
ribs (B).
Lifting From the Rear
The rear lifting points can be
accessed from the rear of the
vehicle, on either the driver's or
passenger's side.