2013 CHEVROLET CORVETTE phone
[x] Cancel search: phonePage 1 of 414

Black plate (1,1)Chevrolet Corvette Owner Manual - 2013 - crc2 - 11/8/12
2013 Chevrolet Corvette Owner ManualM
In Brief. . . . . . . . . . . . . . . . . . . . . . . . 1-1
Instrument Panel . . . . . . . . . . . . . . 1-2
Initial Drive Information . . . . . . . . 1-4
Vehicle Features . . . . . . . . . . . . . 1-15
Performance and Maintenance . . . . . . . . . . . . . . . . 1-20
Keys, Doors, and Windows . . . . . . . . . . . . . . . . . . . . 2-1
Keys and Locks . . . . . . . . . . . . . . . 2-1
Doors . . . . . . . . . . . . . . . . . . . . . . . . 2-10
Vehicle Security . . . . . . . . . . . . . . 2-12
Exterior Mirrors . . . . . . . . . . . . . . . 2-15
Interior Mirrors . . . . . . . . . . . . . . . . 2-16
Windows . . . . . . . . . . . . . . . . . . . . . 2-16
Roof . . . . . . . . . . . . . . . . . . . . . . . . . . 2-18
Seats and Restraints . . . . . . . . . 3-1
Head Restraints . . . . . . . . . . . . . . . 3-2
Front Seats . . . . . . . . . . . . . . . . . . . . 3-2
Safety Belts . . . . . . . . . . . . . . . . . . . . 3-8
Airbag System . . . . . . . . . . . . . . . . 3-14
Child Restraints . . . . . . . . . . . . . . 3-26 Storage
. . . . . . . . . . . . . . . . . . . . . . . 4-1
Storage Compartments . . . . . . . . 4-1
Additional Storage Features . . . 4-2
Instruments and Controls . . . . 5-1
Controls . . . . . . . . . . . . . . . . . . . . . . . 5-2
Warning Lights, Gauges, and
Indicators . . . . . . . . . . . . . . . . . . . . 5-8
Information Displays . . . . . . . . . . 5-25
Vehicle Messages . . . . . . . . . . . . 5-34
Vehicle Personalization . . . . . . . 5-51
Universal Remote System . . . . 5-60
Lighting . . . . . . . . . . . . . . . . . . . . . . . 6-1
Exterior Lighting . . . . . . . . . . . . . . . 6-1
Interior Lighting . . . . . . . . . . . . . . . . 6-6
Lighting Features . . . . . . . . . . . . . . 6-6
Infotainment System . . . . . . . . . 7-1
Introduction . . . . . . . . . . . . . . . . . . . . 7-1
Radio . . . . . . . . . . . . . . . . . . . . . . . . . . 7-6
Audio Players . . . . . . . . . . . . . . . . 7-12
Phone . . . . . . . . . . . . . . . . . . . . . . . . 7-17
Trademarks and License Agreements . . . . . . . . . . . . . . . . . 7-25 Climate Controls
. . . . . . . . . . . . . 8-1
Climate Control Systems . . . . . . 8-1
Air Vents . . . . . . . . . . . . . . . . . . . . . . . 8-6
Maintenance . . . . . . . . . . . . . . . . . . . 8-6
Driving and Operating . . . . . . . . 9-1
Driving Information . . . . . . . . . . . . . 9-2
Starting and Operating . . . . . . . 9-17
Engine Exhaust . . . . . . . . . . . . . . 9-24
Automatic Transmission . . . . . . 9-25
Manual Transmission . . . . . . . . . 9-29
Brakes . . . . . . . . . . . . . . . . . . . . . . . 9-32
Ride Control Systems . . . . . . . . 9-34
Cruise Control . . . . . . . . . . . . . . . . 9-42
Fuel . . . . . . . . . . . . . . . . . . . . . . . . . . 9-45
Towing . . . . . . . . . . . . . . . . . . . . . . . 9-50
Conversions and Add-Ons . . . 9-50
Vehicle Care . . . . . . . . . . . . . . . . . 10-1
General Information . . . . . . . . . . 10-2
Vehicle Checks . . . . . . . . . . . . . . . 10-6
Headlamp Aiming . . . . . . . . . . . 10-41
Bulb Replacement . . . . . . . . . . 10-41
Electrical System . . . . . . . . . . . . 10-44
Wheels and Tires . . . . . . . . . . . 10-52
Jump Starting . . . . . . . . . . . . . . . 10-75
Page 22 of 414

Black plate (16,1)Chevrolet Corvette Owner Manual - 2013 - crc2 - 11/8/12
1-16 In Brief
5. Press and hold one of the sixnumbered pushbuttons until the
radio beeps once.
6. Repeat the steps for each pushbutton.
See Operation on page 7‑4.
Setting the Clock
To set the clock:
1. Press and hold H until the
correct hour displays.
2. Press and hold M until the correct minute displays.
See Clock on page 5‑6.
Satellite Radio
SiriusXM is a satellite radio service
based in the 48 contiguous United
States and 10 Canadian provinces.
SiriusXM satellite radio has a wide
variety of programming and
commercial-free music, coast to
coast, and in digital-quality sound.
A fee is required to receive the
SiriusXM service. For more information, refer to:
.www.siriusxm.com or call
1-800-929-2100 (U.S.)
.www.xmradio.ca or call
1-877-438-9677 (Canada)
See Satellite Radio on page 7‑8.
Portable Audio Devices
The vehicle has an auxiliary input
jack located on the right side of the
faceplate. External devices such as
iPod
®, MP3 players, etc. can be
connected to the auxiliary input jack
using a 3.5 mm (1/8 in) input jack
cable. This is not an audio output;
do not plug a headphone set into
the auxiliary input jack. See
Auxiliary Devices on page 7‑17.
Bluetooth®
For vehicles with a Bluetooth
system, it allows users with a
Bluetooth-enabled cell phone to
make and receive hands-free calls
using the vehicle’ s audio system
and controls. The Bluetooth-enabled cell phone
must be paired with the Bluetooth
system before it can be used in the
vehicle. Not all phones will support
all functions. For more information,
see www.gm.com/bluetooth and
Bluetooth on page 7‑17.
Steering Wheel Controls
For vehicles with steering wheel
controls, some audio controls can
be adjusted at the steering wheel.
Page 25 of 414

Black plate (19,1)Chevrolet Corvette Owner Manual - 2013 - crc2 - 11/8/12
In Brief 1-19
Power Outlets
The accessory power outlet can be
used to plug in electrical equipment,
such as a cell phone or MP3 player.
The accessory power outlet is
located inside the center console
storage compartment, on the
forward left side.
Remove the cover to access and
replace when not in use.
SeePower Outlets on page 5‑6.
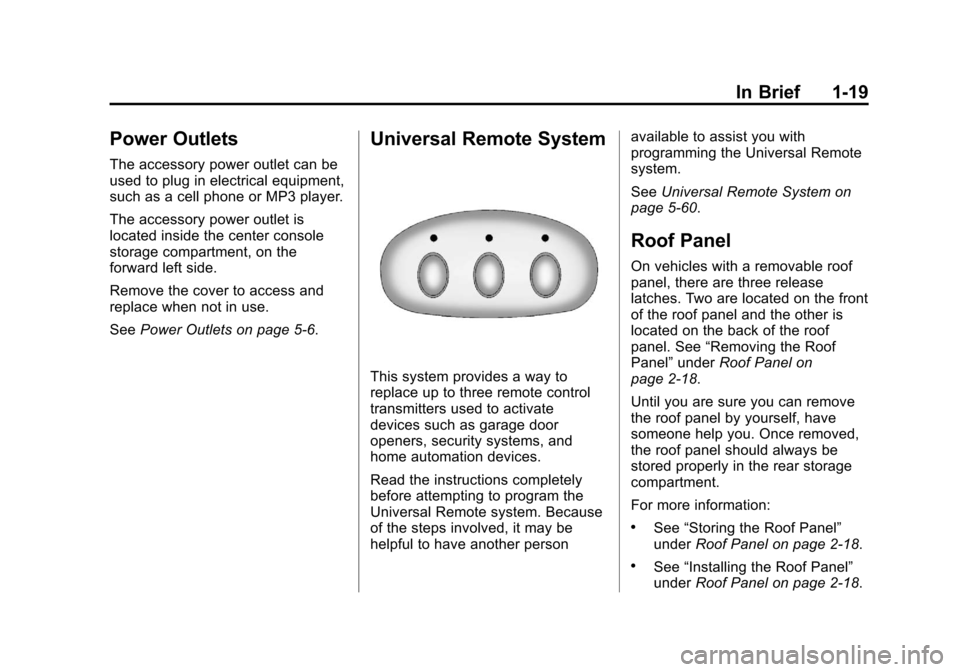
Universal Remote System
This system provides a way to
replace up to three remote control
transmitters used to activate
devices such as garage door
openers, security systems, and
home automation devices.
Read the instructions completely
before attempting to program the
Universal Remote system. Because
of the steps involved, it may be
helpful to have another person available to assist you with
programming the Universal Remote
system.
See
Universal Remote System on
page 5‑60.
Roof Panel
On vehicles with a removable roof
panel, there are three release
latches. Two are located on the front
of the roof panel and the other is
located on the back of the roof
panel. See “Removing the Roof
Panel” underRoof Panel on
page 2‑18.
Until you are sure you can remove
the roof panel by yourself, have
someone help you. Once removed,
the roof panel should always be
stored properly in the rear storage
compartment.
For more information:
.See “Storing the Roof Panel”
under Roof Panel on page 2‑18.
.See“Installing the Roof Panel”
under Roof Panel on page 2‑18.
Page 107 of 414

Black plate (3,1)Chevrolet Corvette Owner Manual - 2013 - crc2 - 11/8/12
Instruments and Controls 5-3
The telescopic steering column
position can be stored with your
memory settings. SeeMemory
Seats on page 3‑4.
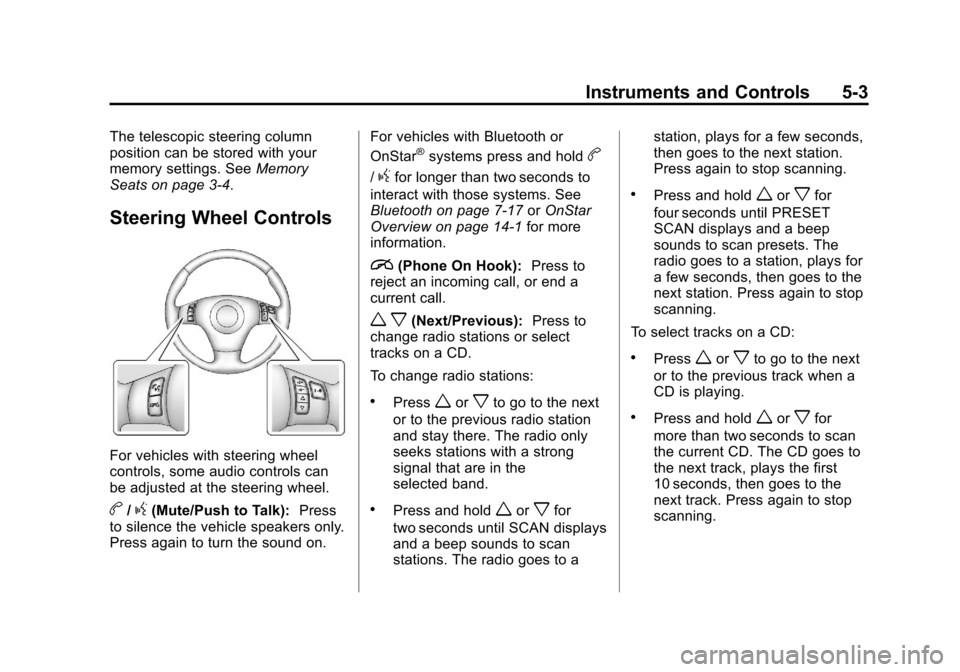
Steering Wheel Controls
For vehicles with steering wheel
controls, some audio controls can
be adjusted at the steering wheel.
b/g(Mute/Push to Talk): Press
to silence the vehicle speakers only.
Press again to turn the sound on. For vehicles with Bluetooth or
OnStar
®systems press and holdb
/gfor longer than two seconds to
interact with those systems. See
Bluetooth on page 7‑17 orOnStar
Overview on page 14‑1 for more
information.
i(Phone On Hook): Press to
reject an incoming call, or end a
current call.
w x(Next/Previous): Press to
change radio stations or select
tracks on a CD.
To change radio stations:
.Pressworxto go to the next
or to the previous radio station
and stay there. The radio only
seeks stations with a strong
signal that are in the
selected band.
.Press and holdworxfor
two seconds until SCAN displays
and a beep sounds to scan
stations. The radio goes to a station, plays for a few seconds,
then goes to the next station.
Press again to stop scanning.
.Press and holdworxfor
four seconds until PRESET
SCAN displays and a beep
sounds to scan presets. The
radio goes to a station, plays for
a few seconds, then goes to the
next station. Press again to stop
scanning.
To select tracks on a CD:
.Pressworxto go to the next
or to the previous track when a
CD is playing.
.Press and holdworxfor
more than two seconds to scan
the current CD. The CD goes to
the next track, plays the first
10 seconds, then goes to the
next track. Press again to stop
scanning.
Page 110 of 414

Black plate (6,1)Chevrolet Corvette Owner Manual - 2013 - crc2 - 11/8/12
5-6 Instruments and Controls
2. Press and holdPuntil a Z and
a zone number displays. The
compass is now in zone mode.
3. Once the zone number displays, press
Prepeatedly until you
reach the correct zone number.
Stop pressing
Pand the mirror
returns to normal operation.
Clock
To set the clock:
1. Press and hold H until the correct hour displays.
2. Press and hold M until the correct minute displays.
The clock mode automatically times
out with the changed display format
set as the current default setting.
To set the clock on a navigation
system, see the navigation manual.
Power Outlets
The accessory power outlet can be
used to plug in electrical equipment,
such as a cell phone or MP3 player.
The accessory power outlet is
located inside the center console
storage compartment, on the
forward left side.
Remove the cover to access and
replace when not in use.
{WARNING
Power is always supplied to the
outlets. Do not leave electrical
equipment plugged in when the
vehicle is not in use because the
vehicle could catch fire and cause
injury or death.
Notice: Leaving electrical
equipment plugged in for an
extended period of time while the
vehicle is off will drain the
battery. Always unplug electrical
equipment when not in use and
do not plug in equipment that
exceeds the maximum 20 ampere
rating.
Certain electrical accessories may
not be compatible with the
accessory power outlet and could
overload vehicle or adapter fuses.
If a problem is experienced, see
your dealer.
Page 111 of 414

Black plate (7,1)Chevrolet Corvette Owner Manual - 2013 - crc2 - 11/8/12
Instruments and Controls 5-7
When adding electrical equipment,
be sure to follow the proper
installation instructions included with
the equipment. SeeAdd-On
Electrical Equipment on page 9‑50.
It is recommended that a qualified
technician or dealer be seen for the
proper installation of your
equipment.
Notice: Hanging heavy
equipment from the power outlet
can cause damage not covered
by the vehicle warranty. The
power outlets are designed for
accessory power plugs only, such
as cell phone charge cords.Cigarette Lighter
To use the cigarette lighter, push it
in all the way and let go. When it is
ready, it will pop back out by itself.
Notice: Holding a cigarette lighter
in while it is heating does not let
the lighter back away from the
heating element when it is hot.
Damage from overheating can
occur to the lighter or heating
element, or a fuse could be
blown. Do not hold a cigarette
lighter in while it is heating.
Ashtrays
The ashtray and cigarette lighter are
located on the instrument panel, in
front of the shift lever. To use the
ashtray, press on the indentation at
the top of the door.
Notice: If papers, pins, or other
flammable items are put in the
ashtray, hot cigarettes or other
smoking materials could ignite
them and possibly damage the
vehicle. Never put flammable
items in the ashtray.
Loose objects, such as paper clips,
can lodge behind and beneath the
ashtray lid and prevent movement of
the lid. You should avoid putting
small, loose objects near the
ashtray.
Page 145 of 414

Black plate (41,1)Chevrolet Corvette Owner Manual - 2013 - crc2 - 11/8/12
Instruments and Controls 5-41
FOB BATTERY LOW
See“Battery Replacement” under
Remote Keyless Entry (RKE)
System Operation on page 2‑3.
KNOWN FOB
See “Matching Transmitter(s) to
Your Vehicle” underRemote
Keyless Entry (RKE) System
Operation on page 2‑3.
MAXIMUM NUMBER OF FOBS
LEARNED
See “Matching Transmitter(s) to
Your Vehicle” underRemote
Keyless Entry (RKE) System
Operation on page 2‑3.
NO FOBS DETECTED
This message displays if the vehicle
does not detect the presence of a
Remote Keyless Entry (RKE)
transmitter when you have
attempted to start the vehicle or a
vehicle door has just closed. The
following conditions may cause this
message to appear.
.Driver-added equipment plugged
into the accessory power outlet
on the center console is causing
interference. Examples of these
devices are cell phones and cell
phone chargers, two-way radios,
power inverters, or similar items.
Try moving the RKE transmitter
away from these devices when
starting the vehicle. In addition,
PDA devices and remote garage
and gate openers may also
generate Electromagnetic
Interference (EMI) that may
interfere with the RKE
transmitter. Do not carry the
RKE transmitter in the same
pocket or bag as these devices.
.The vehicle is experiencing
Electromagnetic
Interference (EMI). Some
locations, such as airports,
automatic toll booths, and some
gas stations have EMI fields
which may interfere with the
RKE transmitter.
If moving the transmitter to
different locations within the
vehicle does not help, place the
transmitter in the glove box
transmitter pocket with the
buttons facing to the right and
then press the START button.
Page 169 of 414

Black plate (65,1)Chevrolet Corvette Owner Manual - 2013 - crc2 - 11/8/12
Instruments and Controls 5-65
7. Press and hold the button thatwill be used to control the
garage door until the garage
door moves. The indicator light
above the selected button
should slowly blink. This button
may need to be held for up to
55 seconds.
8. Immediately release the button when the garage door moves.
The indicator light blinks rapidly
until programming is complete.
9. Press and release the same button again. The garage door
should move, confirming that
programming is successful and
complete.
To program another Fixed Code
device such as an additional garage
door opener, a security device,
or home automation device, repeat
Steps 1 through 9, choosing a
different button in Step 7 than what
was used for the garage door
opener.Universal Remote System
Operation
Press and hold the appropriate
button for at least one-half second.
The indicator light comes on while
the signal is being transmitted.
Operation can occur:
.If the vehicle is in
accessory mode.
.If the vehicle is running.
.If the vehicle is in Retained
Accessory Mode (RAP). See
Retained Accessory Power
(RAP) on page 9‑21 for more
information.
.Up to an additional 10 minutes
after RAP finishes.
.Up to 10 minutes after any door
is opened.
Reprogramming Universal
Home Remote Buttons
Any of the three buttons can be
reprogrammed by repeating the
instructions.
Erasing Universal Home
Remote Buttons
The programmed buttons should be
erased when the vehicle is sold or
the lease ends.
To erase either Rolling Code or
Fixed Code on the Universal Home
Remote device:
1. Press and hold the two outside buttons at the same time for
approximately 20 seconds, until
the indicator lights, located
directly above the buttons, begin
to blink rapidly.
2. Once the indicator lights begin to blink, release both buttons. The
codes from all buttons are
erased.
For help or information on the
Universal Home Remote System,
call the customer assistance phone
number under Customer Assistance
Offices (U.S. and Canada) on
page 13‑5 orCustomer Assistance
Offices (Mexico) on page 13‑5.