2013 CHEVROLET CAPTIVA SPORT light
[x] Cancel search: lightPage 58 of 374
Black plate (16,1)Chevrolet Captiva Sport Owner Manual - 2013 - crc - 11/12/12
3-16 Seats and Restraints
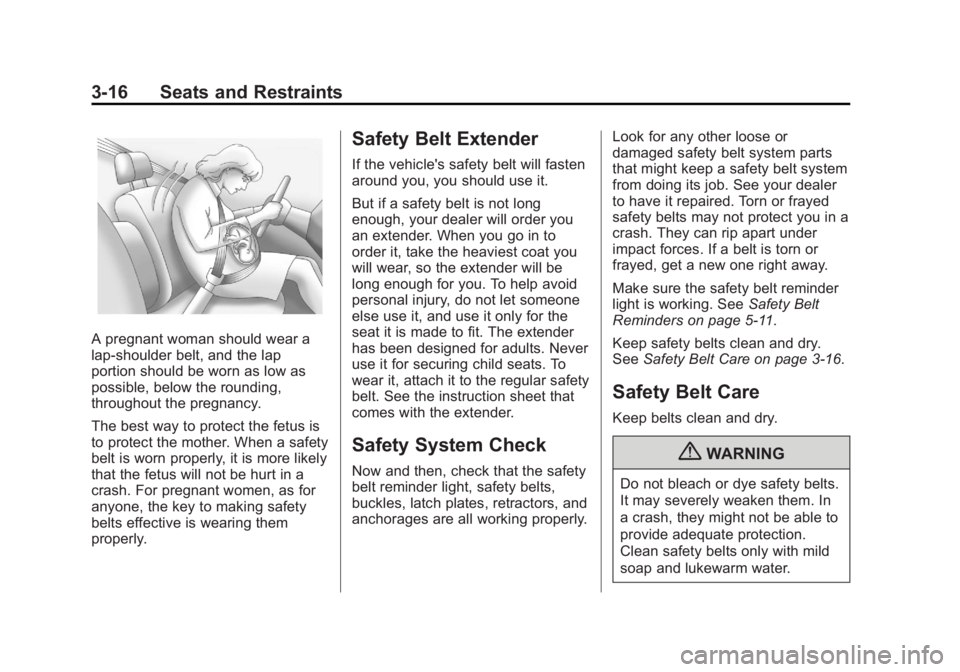
A pregnant woman should wear a
lap-shoulder belt, and the lap
portion should be worn as low as
possible, below the rounding,
throughout the pregnancy.
The best way to protect the fetus is
to protect the mother. When a safety
belt is worn properly, it is more likely
that the fetus will not be hurt in a
crash. For pregnant women, as for
anyone, the key to making safety
belts effective is wearing them
properly. Safety Belt Extender If the vehicle's safety belt will fasten
around you, you should use it.
But if a safety belt is not long
enough, your dealer will order you
an extender. When you go in to
order it, take the heaviest coat you
will wear, so the extender will be
long enough for you. To help avoid
personal injury, do not let someone
else use it, and use it only for the
seat it is made to fit. The extender
has been designed for adults. Never
use it for securing child seats. To
wear it, attach it to the regular safety
belt. See the instruction sheet that
comes with the extender.
Safety System Check Now and then, check that the safety
belt reminder light, safety belts,
buckles, latch plates, retractors, and
anchorages are all working properly. Look for any other loose or
damaged safety belt system parts
that might keep a safety belt system
from doing its job. See your dealer
to have it repaired. Torn or frayed
safety belts may not protect you in a
crash. They can rip apart under
impact forces. If a belt is torn or
frayed, get a new one right away.
Make sure the safety belt reminder
light is working. See Safety Belt
Reminders on page 5 ‑ 11 .
Keep safety belts clean and dry.
See Safety Belt Care on page 3 ‑ 16 .
Safety Belt Care Keep belts clean and dry.
{ WARNING
Do not bleach or dye safety belts.
It may severely weaken them. In
a crash, they might not be able to
provide adequate protection.
Clean safety belts only with mild
soap and lukewarm water.
Page 59 of 374
Black plate (17,1)Chevrolet Captiva Sport Owner Manual - 2013 - crc - 11/12/12
Seats and Restraints 3-17
Replacing Safety Belt
System Parts after a
Crash
{ WARNINGA crash can damage the safety
belt system in the vehicle.
A damaged safety belt system
may not properly protect the
person using it, resulting in
serious injury or even death in a
crash. To help make sure the
safety belt systems are working
properly after a crash, have them
inspected and any necessary
replacements made as soon as
possible. After a minor crash, replacement of
safety belts may not be necessary.
But the safety belt assemblies that
were used during any crash may
have been stressed or damaged.
See your dealer to have the safety
belt assemblies inspected or
replaced.
New parts and repairs may be
necessary even if the safety belt
system was not being used at the
time of the crash.
Have the safety belt pretensioners
checked if the vehicle has been in a
crash, or if the airbag readiness light
stays on after you start the vehicle
or while you are driving. See Airbag
Readiness Light on page 5 ‑ 12 .Airbag System The vehicle has the following
airbags: .
A frontal airbag for the driver. .
A frontal airbag for the right front
passenger. .
A seat-mounted side impact
airbag for the driver. .
A seat-mounted side impact
airbag for the right front
passenger. .
A roof-rail airbag for the driver
and the passenger seated
directly behind the driver. .
A roof-rail airbag for the right
front passenger and the
passenger seated directly
behind the right front passenger.
All of the airbags in the vehicle will
have the word AIRBAG embossed
in the trim or on an attached label
near the deployment opening.
Page 61 of 374
Black plate (19,1)Chevrolet Captiva Sport Owner Manual - 2013 - crc - 11/12/12
Seats and Restraints 3-19
{ WARNINGBecause airbags inflate with great
force and faster than the blink of
an eye, anyone who is up
against, or very close to any
airbag when it inflates can be
seriously injured or killed. Do not
sit unnecessarily close to any
airbag, as you would be if sitting
on the edge of the seat or leaning
forward. Safety belts help keep
you in position before and during
a crash. Always wear a safety
belt, even with airbags. The driver
should sit as far back as possible
while still maintaining control of
the vehicle.
Occupants should not lean on or
sleep against the door or side
windows in seating positions with
seat-mounted side impact airbags
and/or roof-rail airbags. { WARNINGChildren who are up against,
or very close to, any airbag when
it inflates can be seriously injured
or killed. Airbags plus
lap-shoulder belts offer protection
for adults and older children, but
not for young children and infants.
Neither the vehicle's safety belt
system nor its airbag system is
designed for them. Young
children and infants need the
protection that a child restraint
system can provide. Always
secure children properly in the
vehicle. To read how, see Older
Children on page 3 ‑ 32 or Infants
and Young Children on
page 3 ‑ 34 . There is an airbag readiness light
on the instrument cluster, which
shows the airbag symbol.
The system checks the airbag
electrical system for malfunctions.
The light tells you if there is an
electrical problem. See Airbag
Readiness Light on page 5 ‑ 12 for
more information.
Page 69 of 374
Black plate (27,1)Chevrolet Captiva Sport Owner Manual - 2013 - crc - 11/12/12
Seats and Restraints 3-27When the passenger sensing
system has turned off the right front
passenger frontal airbag, the off
indicator will light and stay lit to
remind you that the airbags are off.
See Passenger Airbag Status
Indicator (United States) on
page 5 ‑ 12 .
The passenger sensing system is
designed to turn on (may inflate) the
right front passenger frontal airbag
anytime the system senses that a
person of adult size is sitting
properly in the right front
passenger seat.
When the passenger sensing
system has allowed the airbag to be
enabled, the on indicator will light
and stay lit to remind you that the
airbag is active.
For some children who have
outgrown child restraints, and for
very small adults, the passenger
sensing system may or may not turn
off the right front passenger frontal
airbag, depending upon the
person ’ s seating posture and body build. Everyone in the vehicle who
has outgrown child restraints should
wear a safety belt properly —
whether or not there is an airbag for
that person.
{ WARNINGIf the airbag readiness light ever
comes on and stays on, it means
that something may be wrong
with the airbag system. To help
avoid injury to yourself or others,
have the vehicle serviced right
away. See Airbag Readiness
Light on page 5 ‑ 12 for more
information, including important
safety information.
If the On Indicator is Lit for a
Child Restraint
If a child restraint has been installed
and the on indicator is lit:
1. Turn the vehicle off.
2. Remove the child restraint from
the vehicle. 3. Remove any additional items
from the seat such as blankets,
cushions, seat covers, seat
heaters, or seat massagers.
4. Reinstall the child restraint
following the directions provided
by the child restraint
manufacturer and refer to
Securing Child Restraints (Rear
Seat) on page 3 ‑ 44 or Securing
Child Restraints (Front
Passenger Seat) on page 3 ‑ 46 .
5. If, after reinstalling the child
restraint and restarting the
vehicle, the on indicator is still lit,
turn the vehicle off. Then slightly
recline the vehicle seatback and
adjust the seat cushion,
if adjustable, to make sure that
the vehicle seatback is not
pushing the child restraint into
the seat cushion.
Page 73 of 374
Black plate (31,1)Chevrolet Captiva Sport Owner Manual - 2013 - crc - 11/12/12
Seats and Restraints 3-31
Airbag System Check The airbag system does not need
regularly scheduled maintenance or
replacement. Make sure the airbag
readiness light is working. See
Airbag Readiness Light on
page 5 ‑ 12 .
Notice: If an airbag covering is
damaged, opened, or broken, the
airbag may not work properly. Do
not open or break the airbag
coverings. If there are any
opened or broken airbag covers,
have the airbag covering and/or
airbag module replaced. For the
location of the airbags, see
Where Are the Airbags? on
page 3 ‑ 20 . See your dealer for
service. Replacing Airbag System
Parts after a Crash
{ WARNINGA crash can damage the airbag
systems in the vehicle.
A damaged airbag system may
not work properly and may not
protect you and your
passenger(s) in a crash, resulting
in serious injury or even death. To
help make sure the airbag
systems are working properly
after a crash, have them
inspected and any necessary
replacements made as soon as
possible. If an airbag inflates, you will need to
replace airbag system parts. See
your dealer for service.
If the airbag readiness light stays on
after the vehicle is started or comes
on when you are driving, the airbag
system may not work properly. Have
the vehicle serviced right away. See
Airbag Readiness Light on
page 5 ‑ 12 .
Page 90 of 374
Black plate (48,1)Chevrolet Captiva Sport Owner Manual - 2013 - crc - 11/12/12
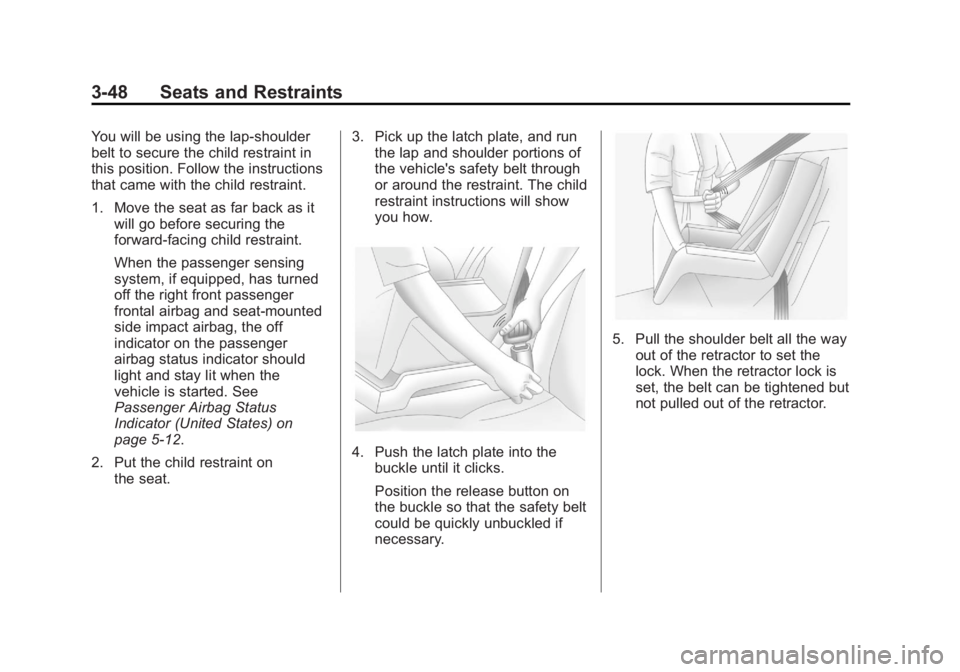
3-48 Seats and Restraints You will be using the lap-shoulder
belt to secure the child restraint in
this position. Follow the instructions
that came with the child restraint.
1. Move the seat as far back as it
will go before securing the
forward-facing child restraint.
When the passenger sensing
system, if equipped, has turned
off the right front passenger
frontal airbag and seat-mounted
side impact airbag, the off
indicator on the passenger
airbag status indicator should
light and stay lit when the
vehicle is started. See
Passenger Airbag Status
Indicator (United States) on
page 5 ‑ 12 .
2. Put the child restraint on
the seat. 3. Pick up the latch plate, and run
the lap and shoulder portions of
the vehicle's safety belt through
or around the restraint. The child
restraint instructions will show
you how.
4. Push the latch plate into the
buckle until it clicks.
Position the release button on
the buckle so that the safety belt
could be quickly unbuckled if
necessary. 5. Pull the shoulder belt all the way
out of the retractor to set the
lock. When the retractor lock is
set, the belt can be tightened but
not pulled out of the retractor.
Page 97 of 374
Black plate (1,1)Chevrolet Captiva Sport Owner Manual - 2013 - crc - 11/12/12
Instruments and Controls 5-1
Instruments and
Controls Controls Steering Wheel Adjustment . . . 5-2
Steering Wheel Controls . . . . . . 5-2
Horn . . . . . . . . . . . . . . . . . . . . . . . . . . 5-3
Windshield Wiper/Washer . . . . . 5-3
Rear Window Wiper/
Washer . . . . . . . . . . . . . . . . . . . . . . 5-4
Compass . . . . . . . . . . . . . . . . . . . . . 5-4
Clock . . . . . . . . . . . . . . . . . . . . . . . . . 5-6
Power Outlets . . . . . . . . . . . . . . . . . 5-7
Warning Lights, Gauges, and
Indicators Warning Lights, Gauges, and
Indicators . . . . . . . . . . . . . . . . . . . . 5-8
Instrument Cluster . . . . . . . . . . . . 5-9
Speedometer . . . . . . . . . . . . . . . . 5-10
Odometer . . . . . . . . . . . . . . . . . . . . 5-10
Trip Odometer . . . . . . . . . . . . . . . 5-10
Tachometer . . . . . . . . . . . . . . . . . . 5-10
Fuel Gauge . . . . . . . . . . . . . . . . . . 5-10
Safety Belt Reminders . . . . . . . 5-11 Airbag Readiness Light . . . . . . 5-12
Passenger Airbag Status
Indicator (United States) . . . . 5-12
Charging System Light . . . . . . 5-13
Malfunction
Indicator Lamp . . . . . . . . . . . . . 5-14
Service Vehicle Soon
Light . . . . . . . . . . . . . . . . . . . . . . . 5-16
Brake System Warning
Light . . . . . . . . . . . . . . . . . . . . . . . 5-16
Electric Parking Brake
Light . . . . . . . . . . . . . . . . . . . . . . . 5-17
Antilock Brake System (ABS)
Warning Light . . . . . . . . . . . . . . 5-18
All-Wheel-Drive Light . . . . . . . . 5-18
Power Steering Warning
Light . . . . . . . . . . . . . . . . . . . . . . . 5-19
StabiliTrak ®
Indicator Light . . . 5-19
Traction Control System
(TCS) Warning Light . . . . . . . 5-19
Engine Coolant Temperature
Warning Light . . . . . . . . . . . . . . 5-20
Tire Pressure Light . . . . . . . . . . 5-20
Fuel Economy Light . . . . . . . . . 5-20
Low Fuel Warning Light . . . . . . 5-21
Security Light . . . . . . . . . . . . . . . . 5-21 Reduced Engine Power
Light . . . . . . . . . . . . . . . . . . . . . . . 5-21
High-Beam On Light . . . . . . . . . 5-22
Front Fog Lamp Light . . . . . . . . 5-22
Low Washer Fluid Warning
Light . . . . . . . . . . . . . . . . . . . . . . . 5-22
Cruise Control Light . . . . . . . . . 5-22
Door Ajar Light . . . . . . . . . . . . . . 5-22
Gate Ajar Light . . . . . . . . . . . . . . 5-23
Information Displays Driver Information
Center (DIC) . . . . . . . . . . . . . . . 5-23
Vehicle Messages Vehicle Messages . . . . . . . . . . . 5-28
Brake System Messages . . . . 5-28
Compass Messages . . . . . . . . . 5-29
Cruise Control Messages . . . . 5-29
Door Ajar Messages . . . . . . . . . 5-29
Engine Cooling System
Messages . . . . . . . . . . . . . . . . . . 5-30
Engine Oil Messages . . . . . . . . 5-30
Engine Power Messages . . . . 5-31
Fuel System Messages . . . . . . 5-31
Key and Lock Messages . . . . . 5-32
Lamp Messages . . . . . . . . . . . . . 5-32
Page 102 of 374
Black plate (6,1)Chevrolet Captiva Sport Owner Manual - 2013 - crc - 11/12/12
5-6 Instruments and Controls It is suggested to calibrate away
from tall buildings, utility wires,
manhole covers, or other industrial
structures, if possible.
If CAL should ever appear in the
DIC display, the compass should be
calibrated.
If the DIC display does not show a
heading, for example, N for North,
or the heading does not change
after making turns, there may be a
strong magnetic field interfering with
the compass. Such interference
may be caused by a magnetic CB or
cell phone antenna mount, a
magnetic emergency light, magnetic
note pad holder, or any other
magnetic item. Turn off the vehicle,
move the magnetic item, then turn
on the vehicle and calibrate the
compass. To calibrate the compass, use the
following procedure:
Compass Calibration Procedure
1. Before calibrating the compass,
make sure the compass is set to
the variance zone in which the
vehicle is located. See
“ Compass Variance (Zone)
Procedure ” earlier in this
section.
Do not operate any switches
such as window, sunroof,
climate controls, seats, etc.
during the calibration procedure.
2. Press the vehicle information
button until PRESS
V TO
CALIBRATE COMPASS
displays.
3. Press the set/reset button to
start the compass calibration.
4. The DIC will display
CALIBRATING COMPASS:
TURN IN CIRCLES. Drive the
vehicle in tight circles at less
than 8 km/h (5 mph) to complete
the calibration. The DIC will display COMPASS
CALIBRATION COMPLETE for a
few seconds when the
calibration is complete. The DIC
display will then return to the
previous menu.
Clock To set the time and date:
1. Turn the ignition key to ACC/
ACCESSORY or ON/RUN.
Press
O to turn the radio on.
2. Press
H and HR, MIN, MM, DD,
and YYYY (hour, minute, month,
day, and year) display.
3. Press the softkey below any one
of the tabs to be changed.
4. To increase the time or date do
one of the following: .
Press the softkey below the
selected tab. .
Press
¨ SEEK, or
\ FWD. .
Turn
f clockwise.