2013 CHEVROLET CAPTIVA SPORT adding oil
[x] Cancel search: adding oilPage 239 of 374

Black plate (5,1)Chevrolet Captiva Sport Owner Manual - 2013 - crc - 11/12/12
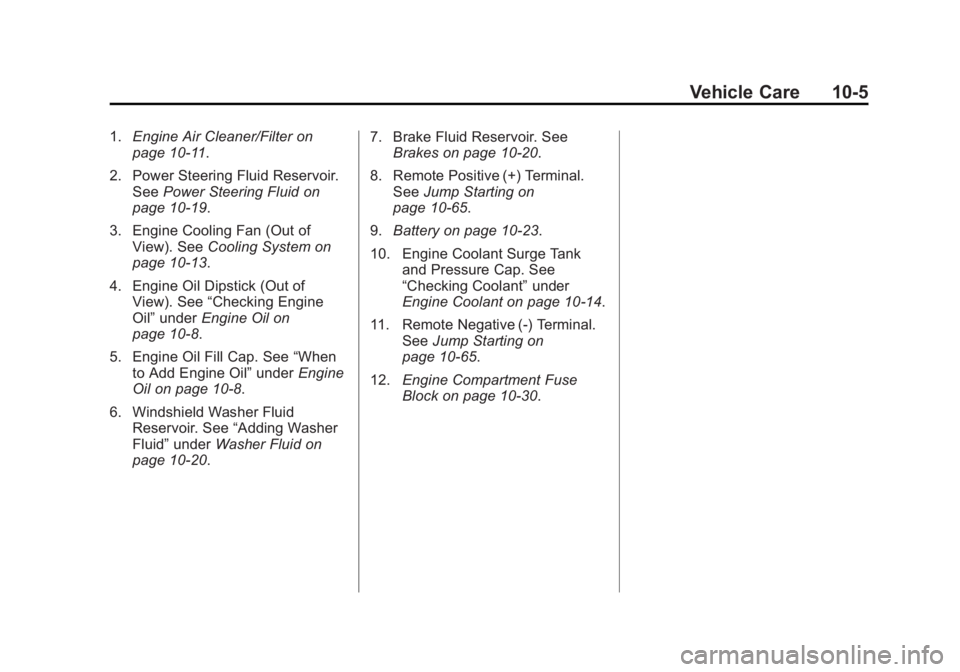
Vehicle Care 10-51. Engine Air Cleaner/Filter on
page 10 ‑ 11 .
2. Power Steering Fluid Reservoir.
See Power Steering Fluid on
page 10 ‑ 19 .
3. Engine Cooling Fan (Out of
View). See Cooling System on
page 10 ‑ 13 .
4. Engine Oil Dipstick (Out of
View). See “ Checking Engine
Oil ” under Engine Oil on
page 10 ‑ 8 .
5. Engine Oil Fill Cap. See “ When
to Add Engine Oil ” under Engine
Oil on page 10 ‑ 8 .
6. Windshield Washer Fluid
Reservoir. See “ Adding Washer
Fluid ” under Washer Fluid on
page 10 ‑ 20 . 7. Brake Fluid Reservoir. See
Brakes on page 10 ‑ 20 .
8. Remote Positive (+) Terminal.
See Jump Starting on
page 10 ‑ 65 .
9. Battery on page 10 ‑ 23 .
10. Engine Coolant Surge Tank
and Pressure Cap. See
“ Checking Coolant ” under
Engine Coolant on page 10 ‑ 14 .
11. Remote Negative (-) Terminal.
See Jump Starting on
page 10 ‑ 65 .
12. Engine Compartment Fuse
Block on page 10 ‑ 30 .
Page 241 of 374

Black plate (7,1)Chevrolet Captiva Sport Owner Manual - 2013 - crc - 11/12/12
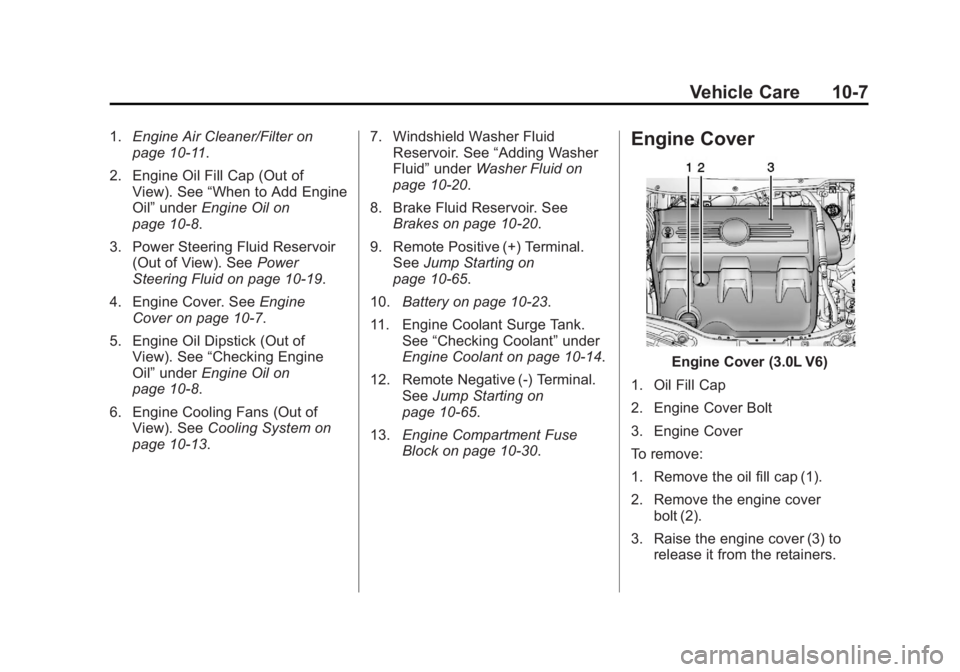
Vehicle Care 10-71. Engine Air Cleaner/Filter on
page 10 ‑ 11 .
2. Engine Oil Fill Cap (Out of
View). See “ When to Add Engine
Oil ” under Engine Oil on
page 10 ‑ 8 .
3. Power Steering Fluid Reservoir
(Out of View). See Power
Steering Fluid on page 10 ‑ 19 .
4. Engine Cover. See Engine
Cover on page 10 ‑ 7 .
5. Engine Oil Dipstick (Out of
View). See “ Checking Engine
Oil ” under Engine Oil on
page 10 ‑ 8 .
6. Engine Cooling Fans (Out of
View). See Cooling System on
page 10 ‑ 13 . 7. Windshield Washer Fluid
Reservoir. See “ Adding Washer
Fluid ” under Washer Fluid on
page 10 ‑ 20 .
8. Brake Fluid Reservoir. See
Brakes on page 10 ‑ 20 .
9. Remote Positive (+) Terminal.
See Jump Starting on
page 10 ‑ 65 .
10. Battery on page 10 ‑ 23 .
11. Engine Coolant Surge Tank.
See “ Checking Coolant ” under
Engine Coolant on page 10 ‑ 14 .
12. Remote Negative (-) Terminal.
See Jump Starting on
page 10 ‑ 65 .
13. Engine Compartment Fuse
Block on page 10 ‑ 30 .Engine Cover
Engine Cover (3.0L V6)
1. Oil Fill Cap
2. Engine Cover Bolt
3. Engine Cover
To remove:
1. Remove the oil fill cap (1).
2. Remove the engine cover
bolt (2).
3. Raise the engine cover (3) to
release it from the retainers.
Page 249 of 374

Black plate (15,1)Chevrolet Captiva Sport Owner Manual - 2013 - crc - 11/12/12
Vehicle Care 10-15sooner than DEX-COOL. Any
repairs would not be covered by
the vehicle warranty. Always use
DEX-COOL (silicate-free) coolant
in the vehicle.
What to Use Use a mixture of one-half clean,
drinkable water and one-half
DEX-COOL coolant which will not
damage aluminum parts. If you use
this coolant mixture, you do not
need to add anything else.
{ WARNINGAdding only plain water or some
other liquid to the cooling system
can be dangerous. Plain water
and other liquids, can boil before
the proper coolant mixture will.
The coolant warning system is set
for the proper coolant mixture.
(Continued) WARNING (Continued) With plain water or the wrong
mixture, the engine could get too
hot but you would not get the
overheat warning. The engine
could catch fire and you or
others could be burned. Use a
50/50 mixture of clean, drinkable
water and DEX-COOL coolant.
Notice: If an improper coolant
mixture is used, the engine could
overheat and be badly damaged.
The repair cost would not be
covered by the vehicle warranty.
Too much water in the mixture
can freeze and crack the engine,
radiator, heater core, and other
parts.
If coolant has to be added more
than four times a year, have the
dealer check the vehicle cooling
system. Notice: If extra inhibitors and/or
additives are used in the vehicle's
cooling system, the vehicle could
be damaged. Use only the proper
mixture of the engine coolant
listed in this manual for the
cooling system. See
Recommended Fluids and
Lubricants on page 11 ‑ 12 for
more information.
Never dispose of engine coolant by
putting it in the trash, pouring it on
the ground, or into sewers, streams,
or bodies of water. Have the coolant
changed by an authorized service
center, familiar with legal
requirements regarding used
coolant disposal. This will help
protect the environment and your
health.
Checking Coolant
The coolant surge tank is located on
the driver side of the engine
compartment. See Engine
Compartment Overview on
page 10 ‑ 4 for more information on
location.
Page 251 of 374

Black plate (17,1)Chevrolet Captiva Sport Owner Manual - 2013 - crc - 11/12/12
Vehicle Care 10-17
{ WARNINGAdding only plain water or some
other liquid to the cooling system
can be dangerous. Plain water
and other liquids, can boil before
the proper coolant mixture will.
The coolant warning system is set
for the proper coolant mixture.
With plain water or the wrong
mixture, the engine could get too
hot but you would not get the
overheat warning. The engine
could catch fire and you or
others could be burned. Use a
50/50 mixture of clean, drinkable
water and DEX-COOL coolant.
Notice: In cold weather, water
can freeze and crack the engine,
radiator, heater core and other
parts. Use the recommended
coolant and the proper coolant
mixture. { WARNINGYou can be burned if you spill
coolant on hot engine parts.
Coolant contains ethylene glycol
and it will burn if the engine parts
are hot enough. Do not spill
coolant on a hot engine.
1. Remove the coolant surge tank
pressure cap when the cooling
system, including the coolant
surge tank pressure cap and
upper radiator hose, is no
longer hot. Turn the pressure cap slowly
counterclockwise about
one-quarter of a turn. If a hiss
is heard, wait for that to stop.
This will allow any pressure
still left to be vented out the
discharge hose.
2. Keep turning the pressure cap
slowly, and remove it.
3. Fill the coolant surge tank with
the proper DEX-COOL coolant
mixture, to between the MIN and
MAX lines.
Page 256 of 374

Black plate (22,1)Chevrolet Captiva Sport Owner Manual - 2013 - crc - 11/12/12
10-22 Vehicle Care There are only two reasons why the
brake fluid level in the reservoir
might go down: .
The brake fluid level goes down
because of normal brake lining
wear. When new linings are
installed, the fluid level goes
back up. .
A fluid leak in the brake
hydraulic system can also cause
a low fluid level. Have the brake
hydraulic system fixed, since a
leak means that sooner or later
the brakes will not work well.
Do not top off the brake fluid.
Adding fluid does not correct a leak.
If fluid is added when the linings are
worn, there will be too much fluid
when new brake linings are
installed. Add or remove brake fluid,
as necessary, only when work is
done on the brake hydraulic system. { WARNINGIf too much brake fluid is added, it
can spill on the engine and burn,
if the engine is hot enough. You
or others could be burned, and
the vehicle could be damaged.
Add brake fluid only when work is
done on the brake hydraulic
system.
When the brake fluid falls to a low
level, the brake warning light comes
on. See Brake System Warning
Light on page 5 ‑ 16 .
What to Add
Use only new DOT 3 brake fluid
from a sealed container.
Always clean the brake fluid
reservoir cap and the area around
the cap before removing it. This
helps keep dirt from entering the
reservoir. { WARNINGWith the wrong kind of fluid in the
brake hydraulic system, the
brakes might not work well. This
could cause a crash. Always use
the proper brake fluid.
Notice .
Using the wrong fluid can
badly damage brake
hydraulic system parts. For
example, just a few drops of
mineral-based oil, such as
engine oil, in the brake
hydraulic system can
damage brake hydraulic
system parts so badly that
they will have to be replaced.
Do not let someone put in
the wrong kind of fluid.