2013 AUDI Q5 the jack and the wheel wrench
[x] Cancel search: the jack and the wheel wrenchPage 271 of 316

What do I do now?
Jack, tools and
inflatable spare tire
Onboard tool kit and vehicle jack
The vehicle tools and vehicle jack* are stored
in the luggage compartment under the floor
cover.
Fig . 209 Luggage co mpa rtment: onboard too l kit and
v e hicle jack
The vehicle jack* is sto red under the on board
tool kit¢
fig. 209.
Hybr id drive*: the storage location of the on
board tool kit varies
¢ page 104.
The on board tool kit includes:
- Hook for removing wheel covers*
- Plastic hook to remove wheel bolt covers*
- Al ignment p in for changing wheels
- Wheel bolt wrench
- Folding chocks
- Screwdriver with reversible blade
- Socket (removable Torx socket)*
- 10 x 13 open ended wrench (for disconnect-
ing the battery cables)
- Towing eye
Before storing the jack*, make sure it is
wound back down as far as it will go.
A WARNING
Imprope r use of the vehicle jack* can
cause serious personal injuries.
- Never use the j ack* supplied with your
Audi on another vehicle, particularly on a heavier one . The jack* is only suitable for
use on the vehicle it came with .
What do I d o now ? 269
-Using a bumper jack to ra ise the vehicle
will damage the bumper system. The
jack may slip, causing injury.
- Never support your vehicle on cinder
blocks, br icks or other objects. These
may not be able to support the load and
could cause injury when they fa il.
- Never start or run the engine while the
veh icle is supported by the jack* .
- If you must work under the vehicle, al
ways use safety stands specifically de signed for th is purpose .
- Never use the hexagonal socket in the
handle of the screwdriver to loosen or
tighten the wheel bolts .
- Always make sure the inflatable spare
tire* and even a flat tire are secured in
place and not loose, otherwise they
could fly forward, causi ng personal injury
to passengers in the vehicle in an acci
dent or sudden maneuver.
(0 Tips
Some of the on board items listed above
a re provided on certain models only or are
optiona l extras.
Folding chocks
The folding chocks are part of the on board
tool kit.
Fig . 210 Ope ning folding chocks .
To use the chocks, you first have to raise the
support plate¢
fig. 210 (D and then insert
the locking plate with the two "tabs" into the
elongated holes in the base plate@¢& . ""
Page 276 of 316

274 What do I do no w?
Special ca re is requ ired if you are repairin g
t he t ire o n a steep incline.
@ Tips
- Do not operate the compressor for more
than 12 minutes continuously, otherwise i t can overheat. Once the compressor has
cooled, you can continue to use it.
- If sealant has spi lled out, let it dry and
then you can remove it by pee ling it away
like a fo il.
- Remember to obtain a new bottle of
sealant from your authorized Audi dealer
after repairing a tire. After this, the func
tionality of the tire repair set is restored.
- Obey all laws.
Changing a wheel
Before changing a wheel
Observe the following precautions for your
own and your passenger's safety when chang
ing a wheel .
.,. After you experience a tire fa ilure, pull the
car well away from moving traffic and try to
reach
le ve l ground before yo u stop ¢&_ .
.,. All p assengers sho uld
le ave the c ar and
move to a safe location (for instance, behind
the guardrai l)¢
,A .
.,. Engage the parking brake to prevent your
vehicle from ro lling un intentionally¢ &_.
.,. Move
selecto r le ver to pos ition P ¢ ,A .
.,. If you are tow ing a trailer: unhitch the trail
er from your veh icle.
.,. Block the diagonally opposite wheel with
the fo ld ing chocks or other objects.
.,. Take the
jack * and the inflatab le spare tir e*
out o f the luggage compartmen t
¢page 269.
A WARNING
You or your passengers cou ld be injured
while changing a whee l if yo u do not fol
low these safety precautions:
-
- If you have a flat tire, move a safe d is
tance off the road. Turn off the engine,
turn the emergency flashers on and use
other warning devices to a lert other mo
torists.
- Make sure that passengers wait in a safe
place away from the vehicle and well
away from the road and traffic.
- To help prevent the vehicle from moving
suddenly a nd possib ly slipping off the
jack*, always fully set the pa rking brake
a nd b lock the wheel d iagonally opposite
t he wheel be ing c hanged w it h t he fold
ing chocks or other objec ts. When one
front wheel is lifted off the ground, plac
ing the Automatic Transmission in P
(Park) will
not prevent the vehicle from
mov ing.
- Before you change a wheel, be sure t he
ground is level and firm. If necessary,
use a sturdy board under the jack*.
- Always store the vehicle tool kit, the
jack * and the replaced tire in the luggage
compartment¢
page 145.
Changing a wheel
When you change a wheel, follow these
quence described below step-by-step and in
exactly that order.
1. Remove the decorative wheel cover* . For
more details see also ¢
page 2 75, Deco
rative wheel covers
or¢ page 2 75,
Wheels with wheel bolt caps .
2. Loosen the wheel bolts ¢ page 276 .
3. Locate the prope r mounting point fo r the
jack* and align the jack * below that point
¢ page 276.
4 .
Lift the c ar with t he jack *¢ page 2 76 .
5 . Remove the
wheel with the flat tir e and
then insta ll the
inflatable spare tire*
¢ page 277 .
6. Tighten all whee l bolts lightly.
7.
Lower the vehicle with the jack*.
8. Use the wheel bolt wrench and
firmly
t ighten all wheel bolts¢ page 276.
9. Replace the decorative
whe el cover *.
Page 277 of 316
/! WARNING
Always read and follow all WARNINGS and information
~ .& in Raising the vehicle on
page
277 and ~page 278.
After changing a wheel
A wheel change is not complete without the
doing the following.
• Always store the vehicle too l kit, the jack*
and the repla ced tire in t he l uggage com
partment ~
page 145.
• As soon as possible, have the tightening
to rques
on all wheel bolts checked with a
torque wrench . The correct tightening tor
que is 105
ft lb (140 Nm).
• Have the flat tire
re pl ac ed as soon as possi
ble.
(D Tips
- If you notice that the wheel bolts are
corroded and difficult to t urn wh ile
changing a tir e, they should be replaced
before yo u check the tighten ing torque.
- Drive at reduced speed unt il you have the
t ightening torques checked .
Decorative wheel covers
Applies to vehicles: with decora tive wheel covers
The decorative wheel covers must be removed
first to access the wheel bolts.
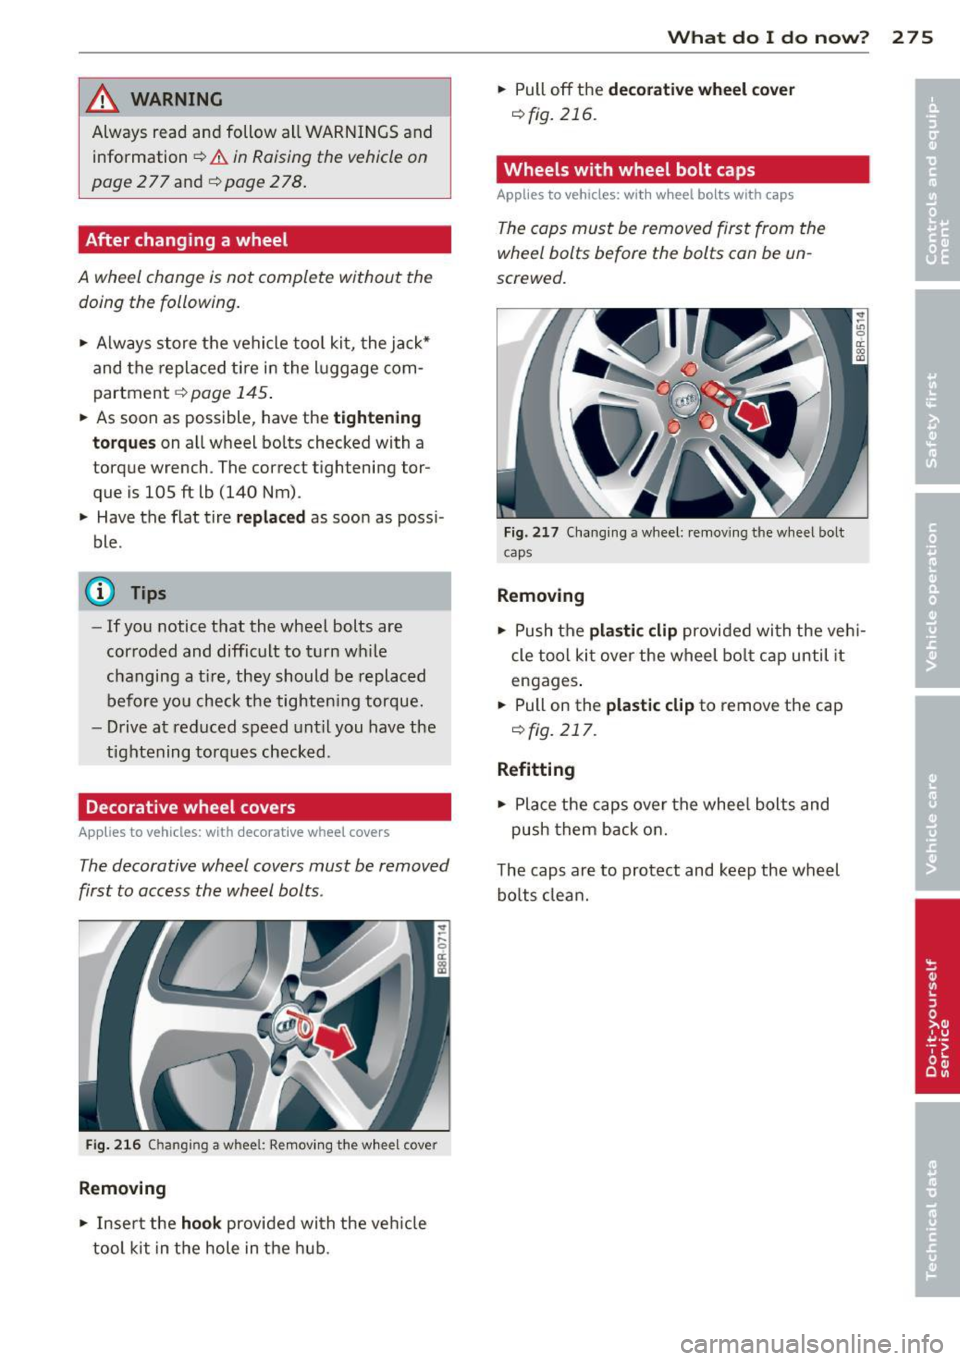
Fig. 2 16 Ch anging a wheel: Removi ng the wheel cove r
Removing
• Inse rt the hook provided wi th the ve hicle
tool kit in the hole in the h ub.
What do I d o now ? 275
• Pull off the deco rative wheel co ver
~ fig. 216.
Wheels with wheel bolt caps
Applies to vehicles: with wheel bolts with caps
The caps must be removed first from the
wheel bolts before the bolts con be un
screwed.
Fi g. 217 Cha ngi ng a w heel : rem ovi ng the wheel bolt
caps
Removing
• Push the plast ic clip provided with the ve hi
cle too l ki t over the wheel bo lt cap until it
engages .
• Pull on the
pla sti c clip to remove the cap
r:!) fig. 217.
Refitting
• Place the caps over the whee l bolts and
push them back o n.
T he caps are to protect and keep the whe el
bo lts clea n.
Page 278 of 316

276 What do I do n ow ?
loosening and tightening the wheel
bolts
The wheel bolts must be loosened before rais
ing the vehicle.
F ig. 218 Chang ing a wheel: loosen ing the w hee l bo lts
loosening
.. Install the wheel b olt wrench over the
whee l bolt and push it down as fa r as it wi ll
go .
.. Take tight hold of the
end of the wrench
handle and turn the wheel bolts
counter
clockwise
about one single turn in the direc
t io n ofarrow ¢fig .
218 .
Tightening
.. Install the wheel bolt w rench over the
wheel bolt and push it down as far as it will
go.
.. Take tight hold of the
end of the wrench
hand le and turn each wheel bol t
clockwise
unti l it is seated.
_& WARNING
- Do no t use for ce or hu rry w hen ch angi ng
a whee l - you c an c ause the vehicle to s lip
off the jack* and ca use serious personal
injuries .
-Do no t loosen the whee l bolts more than
one turn
before you ra ise the veh icle with
the jack* . -You risk an i njur y.
(D Tips
If a wheel bo lt is very t ight, you may find i t
e asie r to loosen by ca refully push ing dow n
on t he end of the whee l bolt wrench with
one foot only . As you do so, ho ld on to the ca
r to kee p your ba lance and take care no t
to s lip.
Raising the vehicle
The vehicle must be lifted with the jack * firs t
before the wheel can be removed.
Fig . 2 1 9 Sill pane ls: mark in gs
Fi g. 22 0 Sill: pos it io nin g the jack
.. Engage the parking brake to prevent your
veh icle from rolling unintentionally
.. Move the
select or lever to po sition P.
.. Find the marking (imp rint) on the sill tha t
is nearest t he wheel that w ill be changed
r:::;, fig . 219. Be hind the mar kin g, there is a
lifting point on the sill for the jack *.
.. Turn t he
jack* located under the lifting
point on the sill to ra ise the jack until its
arm @
r:::;, fig. 220 is located under the des
ig nated p lastic mount
r:::;, ,& ¢ 0.
.. Align the jac k* so t hat its arm @ r:::;, fig. 220
engage s in the desig nated lifting poin t in
t he doo r sill and the movable base ® lies
flat on the ground. The base ® must be
ver
tical
un der the lifting point @.
.. Win d the jack * up further until the flat tire
comes off the ground
Q ,& .
Position the jack* only under the designated
li fting points on the s ill
r:::;,fig. 219. There is Ill-
Page 280 of 316
278 What do I do no w?
• Use the hexagonal socket in the screwdriver
hand le to screw in and tighten all wheel
bolts
slightly .
• Remove the alignment pin and insert and
t ighten the remaining wheel bolt slightly
Like the rest .
• Turn the jack handle* counter-clockwise to
lower the vehicle unt il the jack* is fully re
leased .
• Use the whee l bolt wrench to t ighten al l
wheel bolts firmly¢
page 2 76. Tighten
them
crosswise, from one bolt to the (ap
proximate ly) opposite one, to keep the
whee l centered.
@ Note
When removing or installing the wheel,
the rim could hit the brake rotor and dam
age the rotor. Work carefully and have a
second person help you.
@ Tips
Never use the hexagonal socket in the han
dle of the screwdriver to loosen or tighten
the wheel bolts .
- Pull the reversible b lade from the screw
driver before you use the hexagonal
socket in the handle to turn the whee l
bo lts.
- When mounting tires with
un id irectional
t re ad desi gn
make sure the tread pat
tern is pointed the right way
~ page 278.
- The wheel bolts should be clean and easy
to turn . Check for d irt and corrosion on
the mat ing surfaces of both the whee l
and the hub. Remove all dirt from these
s ur faces before remo unt ing the wheel.
Tires with unidirectional tread design
Tires with unidirectional tread design must be
mounted with their tread pattern pointed in the right direction .
Using a sp are t ire w ith a tre ad pattern
intended for use in a specific direction
When using a spare t ire with a tread patter n
intended for use in a spec ific d irection , please
note the following :
- The direct ion of rotation is marked by an ar
row on the side of the ti re .
- If the spare tire has to be installed in the in
correct direct ion, use the spare tire only
temporarily s ince the tire will not be able to
achieve its optimum performance cha racter
isti cs wit h regard to aquap lan ing, no ise and
wear .
- We recommend that you pay part icu la r at
t ention to th is fact d uring wet wea ther and
t ha t you adjust you r speed to match road
conditions .
- Replace the fl at tir e with a new one and
have it insta lled on you r vehicle as soon as
possible to restore the handling advantages
of a u nidirectional tire .
Notes on wheel changing
Please read the information¢ page 259, New
tires and replacing tires and wheels
if you a re
going to use a spare tire which is different
from the ti res on your vehicle .
After you change a tire:
- Check the tire pre ssure on the spare imme
diately after install ation.
- Have th e whe el bolt tight ening torqu e
c hecked with a torque wrench as soon a s
pos sible by your author ized Audi de aler or
a q ualified wo rkshop.
- With steel and alloy wheel r im s, the wheel
bolt s are cor re ctl y tightened at a torque of
105 ft lb (140 Nm).
- If you noti ce th at the wheel bolts are cor
roded and diffi cult to turn while changing
a ti re , they should be repl aced before you
check the t ightening torque. .,..