2012 VOLKSWAGEN TRANSPORTER tow
[x] Cancel search: towPage 273 of 486
heavy load on the brakes should be avoided. For example, when driving too close to the vehicle ahead.
The rate of wear of the brake pads depends to a great extent on the conditions under which the ve-hicle is operated and the way in which the vehicle is driven. With regular urban trips, short journeys and a sporty driving style, the brake pads must be checked by a qualified workshop more regularly than stated in the service schedule.
When driving with wet brakes, for example after driving through water, after heavy rainfall or after washing the vehicle, the braking effect may be de-layed as the brake discs will be wet, or possibly ic-ed up (in winter). The brakes must be "dried" as quickly as possible by careful braking at higher speed. Ensure that no vehicle behind you or no other road user is put at risk as a result of this ac-
Any salt layer accumulating on the discs and pads will delay the braking effect and increase the braking distance. If the brakes on the vehicle have not been applied for a long time on roads that have been gritted with salt, the layer of salt must be re-duced through careful braking &.
Corrosion on the brake discs and dirt in the brake pads are facilitated through long periods of inactivi-ty, low mileage and low load levels. With inactivity or low use levels for the brake pads as well as cor-rosion, Volkswagen Commercial Vehicles recom-mends that the brake discs and brake pads be cleaned by braking strongly several times from high speed. Ensure that no vehicle behind you or no other road user is put at risk as a result of this
Fault in the brake system
A brake circuit may have failed if you have to re-duce speed and the vehicle does not brake as nor-mal (sudden increase in braking distance). This will be indicated by the warning lamp m and in some cases a text message. Go to the nearest qualified workshop immediately to have the fault corrected. Drive at low speed when doing this and anticipate much longer braking distances and an increase in the pressure required on the pedal.
Brake servo
The brake serve will only function when the engine is running and reinforces the pressure applied by the driver on the brake pedal.
If the brake serve is not functioning or the vehicle is being towed, the brake pedal will have to be de-pressed more forcefully as the braking distance will be increased due to the lack of assistance for the brake system &.
A WARNING
New brake pads will not have the optimal braking effect when first fitted.
• New brake pads cannot generate the full braking effect during the first 300 km and must first be run In. A reduced braking effect can be Increased by applying more pressure to the brake pedal.
• You must drive particularly carefully when driving with new brake pads In order to re-duce the risk of accidents, serious Injuries and loss of control of the vehicle.
• Never drive too close to other vehicles when running in new brake pads, and never create a driving situation that will place a heavy load on the brakes.
A WARNING
Overheated brakes reduce the braking effect and considerably Increase the braking dis-tance.
• When driving downhill the brakes are placed under particular strain and become hot very quickly.
• Before driving down a long, steep gradi-ent, reduce speed and change to a lower gear or move the selector lever to a lower position. This will make use of the engine braking ef-fect and relieve the load on the brakes.
• Non-standard or damaged front spoilers could restrict the airflow to the brakes and cause them to overheat.
A WARNING
Wet brakes or brakes coated with ice or road salt react more slowly and require longer braking distances.
• Carefully apply the brakes to test them.
• Always dry brakes and clean off any coat-Ing of Ice and salt with a few cautious appli-cations of the brake when visibility, weather, road and traffic conditions permit.
A WARNING
Driving without the brake servo can consider-ably Increase the braking distance and thus cause accidents and serious Injuries.
• Never allow the vehicle to roll if the engine Is switched off.
Starting the engine, changing gear and parking 273
Page 274 of 486

A WARNING (Continued)
• If the brake servo does not function or the vehicle is being towed, the brake pedal will have to be depressed more forcefully as the braking distance will be Increased due to the lack of assistance for the brake system.
CD
• Never let the brakes "rub" by applying light pressure to the brake when it is not necessary to brake. Continual pressure on the brake pedal will overheat the brakes. This can considerably reduce the brake effect, increase the braking distance and, In certain circumstances, cause the brake system to fail completely.
Brake support systems
r-f'n First read and observe the Introductory l..-Wl information and safety warnings&. on page 269.
The brake support systems ESC, ABS, BAS, TCS and EDL only function when the engine is running. They make a considerable contribution to active driving safety.
Electronic stability control (ESC)
The ESC helps to reduce the risk of skidding and to improve driving stability by braking individual wheels in certain driving situations. The ESC de-tects critical driving situations such as oversteer, understeer and wheelspin. The system helps to stabilise the vehicle through targeted application of the brakes or by reducing engine torque.
ESC has its limitations. lt is important to realise that ESC cannot overcome the laws of physics. ESC will not be able to assist in every situation faced by a driver. For example, ESC will not be able to assist every time that there is a sudden change in the road surface quality. If a section of dry road is suddenly covered with water, mud or snow, ESC will not be able to assist in the same manner as on a dry road. If the vehicle aquaplanes (drives on a layer of water rather than on the road surface), ESC will not be able to assist in steering the vehicle as the contact to the road surface has been interrupted and it is therefore no longer pos-sible to steer or brake the vehicle. When driving at speed through bends, particularly on stretches of road with many bends, the ESC will not always be able to process complicated driving situations as
2741 While dnvang
m If the front brake pads are tested, the rear L!..J brake pads should be tested at the same time. Regularly check the thickness of the brake pads through the openings in the rims or from the underside of the vehicle. If necessary, remove the wheels to carry out a comprehensive check. Volks-wagen Commercial Vehicles recommends using a Volkswagen Commercial Vehicles dealership for this purpose.
Always adapt your speed and driving style to suit visibility, weather, road and traffic conditions. ESC cannot defy the laws of motion, improve the availa-ble power output, or keep the vehicle on the road if insufficient care and attention on the part of the driver causes the vehicle to leave the road. In-stead, the ESC improves the chances of keeping the vehicle under control and, in extreme on-road driving situations, exploits the driver's steering in-put to keep the vehicle travelling in the desired di-rection. If the vehicle is driving at a speed that leads it to leave the road before the ESC can pro-vide any kind of support, the ESC will be unable to provide any assistance.
The ASS, BAS, TCS and EDL systems are integra-ted into the ESC. The ESC is always on. If the trac-tion achieved in certain situations is not sufficient, TCS can be switched off by pressing the ASR (TCS) button =>Fig. 224. Always ensure that ASR (TCS) is switched back on again once traction is sufficient.
Automatic Post-Collision Braking System
In the event of an accident, the Automatic Post-Collision Braking System can help the driver to re-duce the risk of skidding, and the danger of secon-dary collisions, through automatic braking.
Page 281 of 486
Steering
CJ:n Introduction
This chapter contains information on the following subjects:
Information on steering . . . . . . . . . . . . . . . . . . . 281
Additional information and warnings:
• Starting and stopping the engine 257
• Battery 362
• Tow-starting and towing 446
Information on steering
r--f"n First read and observe the introductory L-la.LI infonmation and safety warnings & on page 281.
Locking the steering wheel
• When the vehicle key has been removed, turn the steering wheel slightly until you hear the lock-ing pin engage.
The steering should be locked every time you leave the vehicle to make il more difficult for the vehicle to be stolen.
Unlocking the steering wheel
• Turn the steering wheel slightly to lake the load off the steering lock mechanism. Hold the steering wheel in this position and tu m the vehicle key clockwise out of position 217 @.
A WARNING
If the power steering is not working, the steering wheel is difficult to turn, which makes it difficult to steer the vehicle.
• The power steering only functions when the engine Is running.
• Never allow the vehicle to roll if the engine is switched off.
• Never remove the vehicle key from the ig-nition lock when the vehicle is in motion. The steering lock may be activated and you will no longer be able to steer the vehicle.
With power steering, the steering assistance is au-tomatically matched to vehicle speed, the steering wheel torque and the steering wheel angle. The power steering will only function when the engine is running.
You will need considerably more strength than nor-mal to steer the vehicle if lhe power steering is re-duced or has failed completely.
Page 286 of 486
Rear axle differential lock
OSG-0041
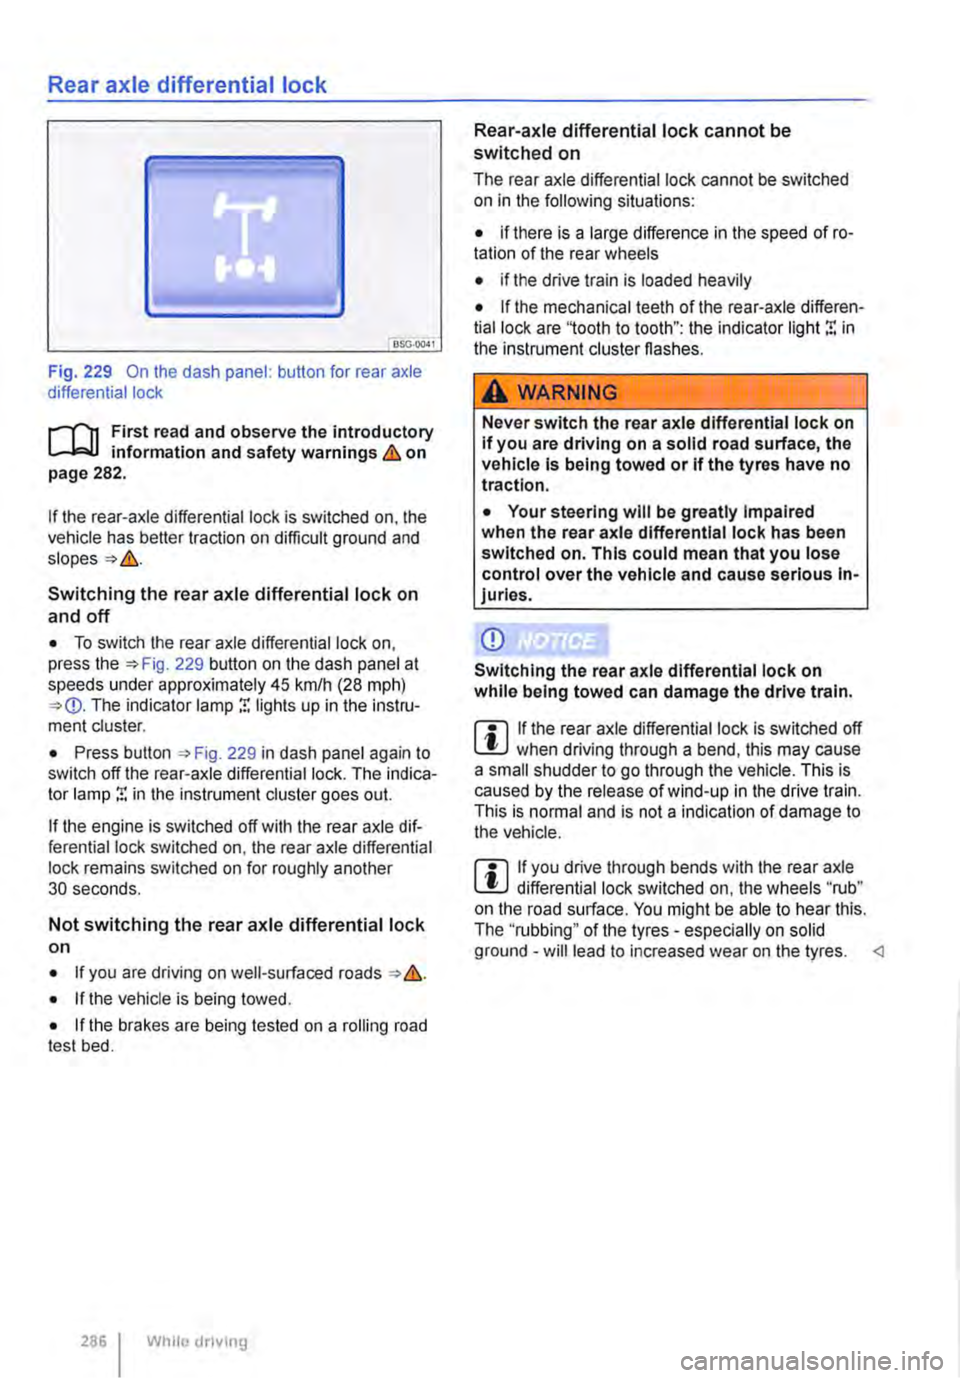
Fig. 229 On the dash panel: button for rear axle differential lock
i""('n First read and observe the introductory information and safety warnings & on page 282.
If the rear-axle differential lock is switched on, the vehicle has better traction on difficult ground and
Switching the rear axle differential lock on
and off
• To switch the rear axle differential lock on, press the 229 button on the dash panel at speeds under approximately 45 krnlh (28 mph) The indicator lamp r. lights up in the instru-ment cluster.
• Press button , Fig. 229 in dash panel again to switch off the rear-axle differential lock. The indica-tor lamp r. in the instrument cluster goes out.
If the engine is switched off with the rear axle dif-ferential lock switched on, the rear axle differential lock remains switched on for roughly another 30 seconds.
Not switching the rear axle differential lock on
• If you are driving on well-surfaced roads &.
• If the vehicle is being towed.
• If the brakes are being tested on a rolling road test bed.
286 I While dnving
Rear-axle differential lock cannot be switched on
The rear axle differential lock cannot be switched on in the following situations:
• if there is a large difference in the speed of ro-tation of the rear wheels
• if the drive train is loaded heavily
• If the mechanical teeth of the rear-axle differen-tial lock are '1ooth to tooth": the indicator light r. in the instrument cluster flashes.
A WARNING
Never switch the rear axle differential lock on If you are driving on a solid road surface, the vehicle is being towed or if the tyres have no traction.
• Your steering will be greatly Impaired when the rear axle differential lock has been switched on. This could mean that you lose control over the vehicle and cause serious In-juries.
CD
Switching the rear axle differential lock on while being towed can damage the drive train.
m If the rear axle differential lock is switched off W when driving through a bend, this may cause a small shudder to go through the vehicle. This is caused by the release of wind-up in the drive train. This is normal and is not a indication of damage to the vehicle.
m If you drive through bends with the rear axle W differential lock switched on, the wheels "rub" on the road surface. You might be able to hear this. The ''rubbing" of the tyres -especially on solid ground -will lead to increased wear on the tyres.
Page 288 of 486

CD
• In some cases water and ice on the ultra-sound sensors could be registered as an ob-struction.
• Any equipment that has been retrofitted to the vehicle, e.g. bicycle carriers or number plate holders, can prevent the ParkPIIot from fu nctlonlng properly.
m Volkswagen Commercial Vehicles recom-L!J mends that drivers practise using the ParkPi-lot in a traffic-calmed area or car park to allow them to familiarise themselves with the system and its functions.
ParkPilot only at rear
,....-m First read and observe the introductory L-J.:.I.I Information and safety warnings & on page 287.
Switching ParkPilot on and off
m If an ultrasound sensor fails, the correspond-L!J ing area of the ultrasound sensor cluster is switched off and cannot be reactivated until the fault has been rectified (depending on the equip-ment level). Consult a qualified workshop in the event of a system fault. Volkswagen Commercial Vehicles recommends using a Volkswagen Com-mercial Vehicles dealership for this purpose.
Function What to do when the Ignition Is switched on
Switching on the ParkPilot:
Switching off the ParkPilot:
Switching off the ParkPilot display manually (sound output remains active)
Switching to the rear view camera system picture as required
Select reverse gear or move the selector lever to position R.
Deselect the reverse gear or selector lever position R. If the ParkPilot screen display is activated, the ParkPilot is switched off approximately 10 seconds after the reverse gear has been disengaged or the selector lever has been moved out of the R position.
OR: (depending on the equipment level) immediately after shifting out of re-verse gear, or selector lever position R, with an inactive ParkPilot screen dis-play.
OR: accelerate forwards to a speed greater than approximately 1 0-15 km/ h (6-9 mph).
Press a button, e.g.(RADIOl. on the factory-fitted radio or navigation system.
OR: touch the 0 function button.
Select reverse gear or move the selector lever to position R.
OR: touch the button.
Special features of ParkPilot • No acoustic signal is given in vehicles with a dual clutch gearbox DSG® if the selector lever is in position P. • In some cases, the ParkPilot registers water and ice on the ultrasound sensors as an obstacle.
• The acoustic warning will become quieter after a few seconds if the distance remains the same. The volume will remain constant if the signal tone is continuous.
• The intermittent signal tone switches off auto-matically as soon as the vehicle moves away from an obstacle again. If the vehicle approaches the obstacle again, the acoustic warning is switched on automatically.
288 I While driving
• The ParkPilot ultrasound sensors cannot be switched on if the factory-fitted towing bracket is electrically connected to the trailer.
• A Volkswagen Commercial Vehicles dealership can adjust the volume of the acoustic warning sig-
Page 290 of 486

Special features of ParkPilot
• In some cases, the ParkPilot registers water and ice on the ultrasound sensors as an obstacle.
• The acoustic warning will become quieter after a few seconds if the distance remains the same. The volume will remain constant if the signal tone is continuous.
• The intermittent signal tone switches off auto-matically as soon as the vehicle moves away from an obstacle again. If the vehicle approaches the obstade again, the acoustic warning is switched on automatically.
• No acoustic signal is given in vehicles with a dual clutch gearbox DSG® if the selector lever is in position P.
ParkPilot signal tones and displays
Fig. 232 ParkPilot screen display (colour display).
r--f"'n First read and observe the introductory L-.I=.U Information and safety warnings & on page 287.
Key to diagram
Fig. 232 Meaning
® Monitored area behind the vehide.
® Scanned area in front of the vehicle.
l J
•
0
•
290 I
The yellow segment represents an obstacle in the vehicle's path.
Red segment depicts an obstacle close to the vehicle.
The grey segment represents an obstacle outside of the vehicle's path.
Black segment depicts an obstacle (monochrome display).
While droving
• The rear ultrasound ParkPilot sensors cannot be switched on if the factory-fitted towing bracket is electrically connected to the trailer.
• A Volkswagen Commercial Vehicles dealership can adjust the volume of the acoustic warning sig-nals.
CD
Failure to observe the illuminated text messag-es can lead to the vehicle being damaged.
The areas to the front (only with ParkPilot front and rear) and rear of the vehicle are fully scanned by the ultrasound sensors.
Acoustic signals and screen
Acoustic signals are given when the vehicle ap-proaches an obstacle located in the range of the ultrasound sensors. An intermittent signal tone is given if a sufficiently short distance between the vehicle and an obstacle is detected. The shorter the distance, the shorter the intervals. The signal tone will sound continuously if the obstacle is very close.
If you continue to drive the vehide closer to the ob-sta de despite the continuous signal tone, the sys-tem will no longer be able to measure the distance.
With some vehicle equipment levels the scanned areas may be displayed as several segments in a display. The closer the vehicle drives lowards an obstacle, the closer the segment will move to the vehicle in the display. The collision area has been reached when the penultimate segment is dis-played, if not before. Do not drive onl .,..
Page 291 of 486
Vehicles with ParkPilot at the front and rear
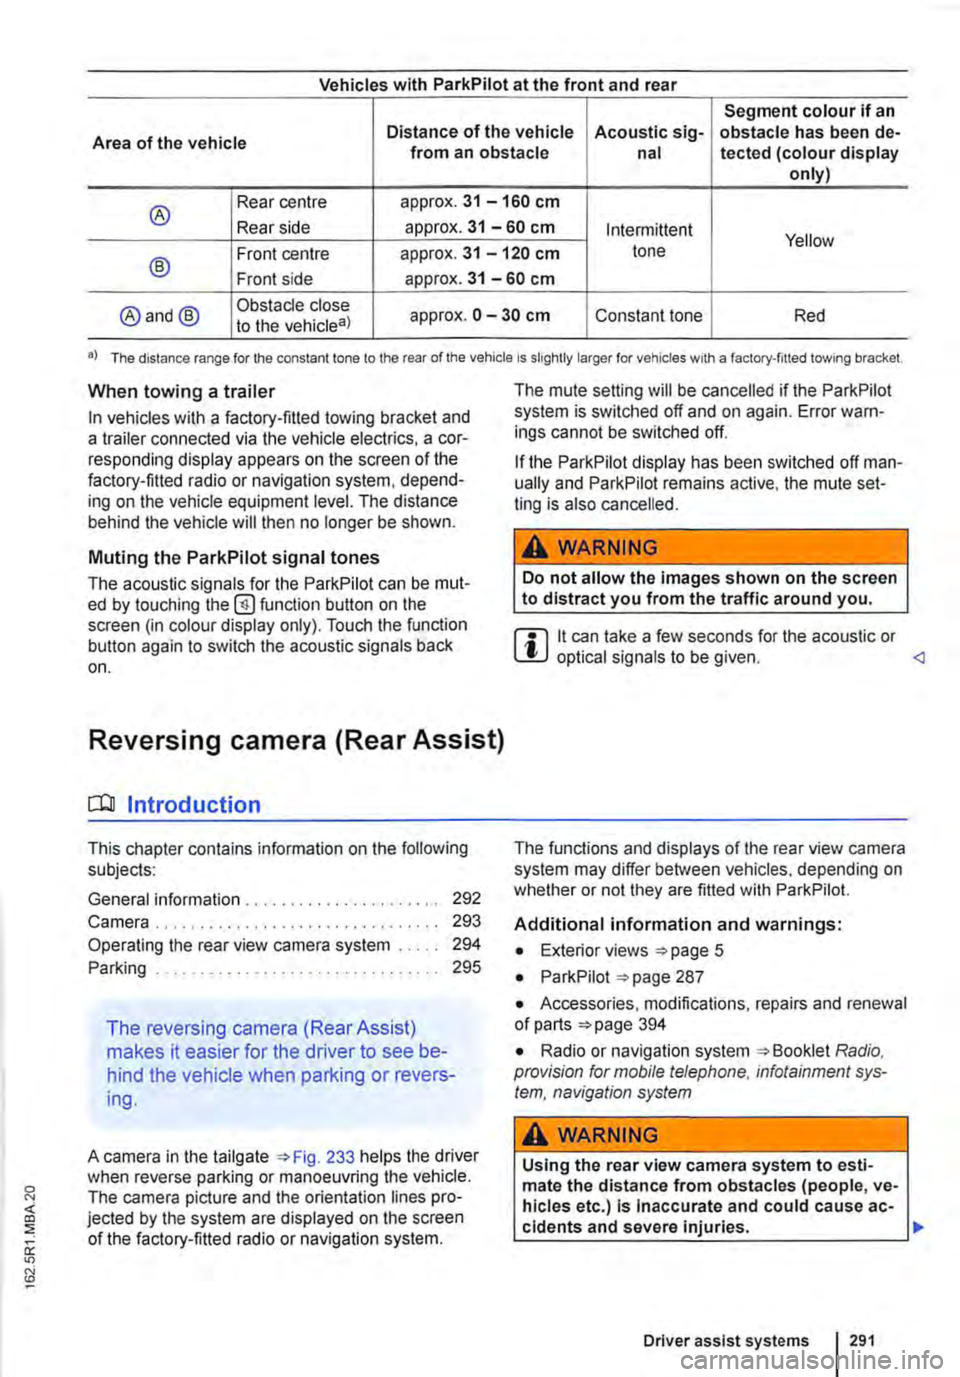
Segment colour if an
Area of the vehicle Distance of the vehicle Acoustic sig-obstacle has been de-from an obstacle nal tected (colour display only)
® Rear centre approx. 31 -160 cm
Rear side approx. 31 -60 cm Intermittent Yellow
® Front centre approx. 31 -120 cm tone
Front side approx. 31 -60 cm
@and@ Obstacle close approx. 0 -30 cm Constant tone Red to the vehicle8)
•) The distance range for the constant lone to the rear of the vehicle is slightly larger for vehicles w1th a factory-filled towing bracket.
When towing a trailer
In vehicles with a factory-fitted towing bracket and a trailer connected via the vehicle electrics, a cor-responding display appears on the screen of the factory-fitted radio or navigation system, depend-ing on the vehicle equipment level. The distance behind the vehicle will then no longer be shown.
Muting the ParkPilot signal tones
The acoustic signals for the ParkPilot can be mut-ed by touching the @function button on the screen (in colour display only). Touch the function button again to switch the acoustic signals back on.
Reversing camera (Rear Assist)
o:n Introduction
This chapter contains information on the following subjects:
General information ..................... . Camera.
292 293
Operating the rear view camera system . . . . . 294
....................... 2%
The reversing camera (Rear Assist)
makes it easier for the driver to see be-
hind the vehicle when parking or revers-
ing.
A camera in the tailgate 233 helps the driver when reverse parking or manoeuvring the vehicle. The camera picture and the orientation lines pro-jected by the system are displayed on the screen of the factory-fitted radio or navigation system.
The mute setting will be cancelled if the ParkPilot system is switched off and on again. Error warn-ings cannot be switched off.
If the ParkPilot display has been switched off man-ually and ParkPilot remains active, the mute set-ting is also cancelled.
A WARNING
Do not allow the Images shown on the screen to distract you from the traffic around you.
m it can take a few seconds for the acoustic or W optical signals to be given.
Additional information and warnings:
• Exterior views =>page 5
• ParkPilot 287
• Accessories, modifications, repairs and renewal of parts 394
• Radio or navigation system Radio, provision for mobile telephone, infotainment sys-tem, navigation system
A WARNING
Using the rear view camera system to esti-mate the distance from obstacles (people, ve-hicles etc.) Is Inaccurate and could cause ac-cidents and severe injuries. 11>
Driver assist systems I 291
Page 293 of 486
• Switch on radio/navigation system, if not al-ready on.
• Select reverse gear or move the selector lever to position R.
Camera
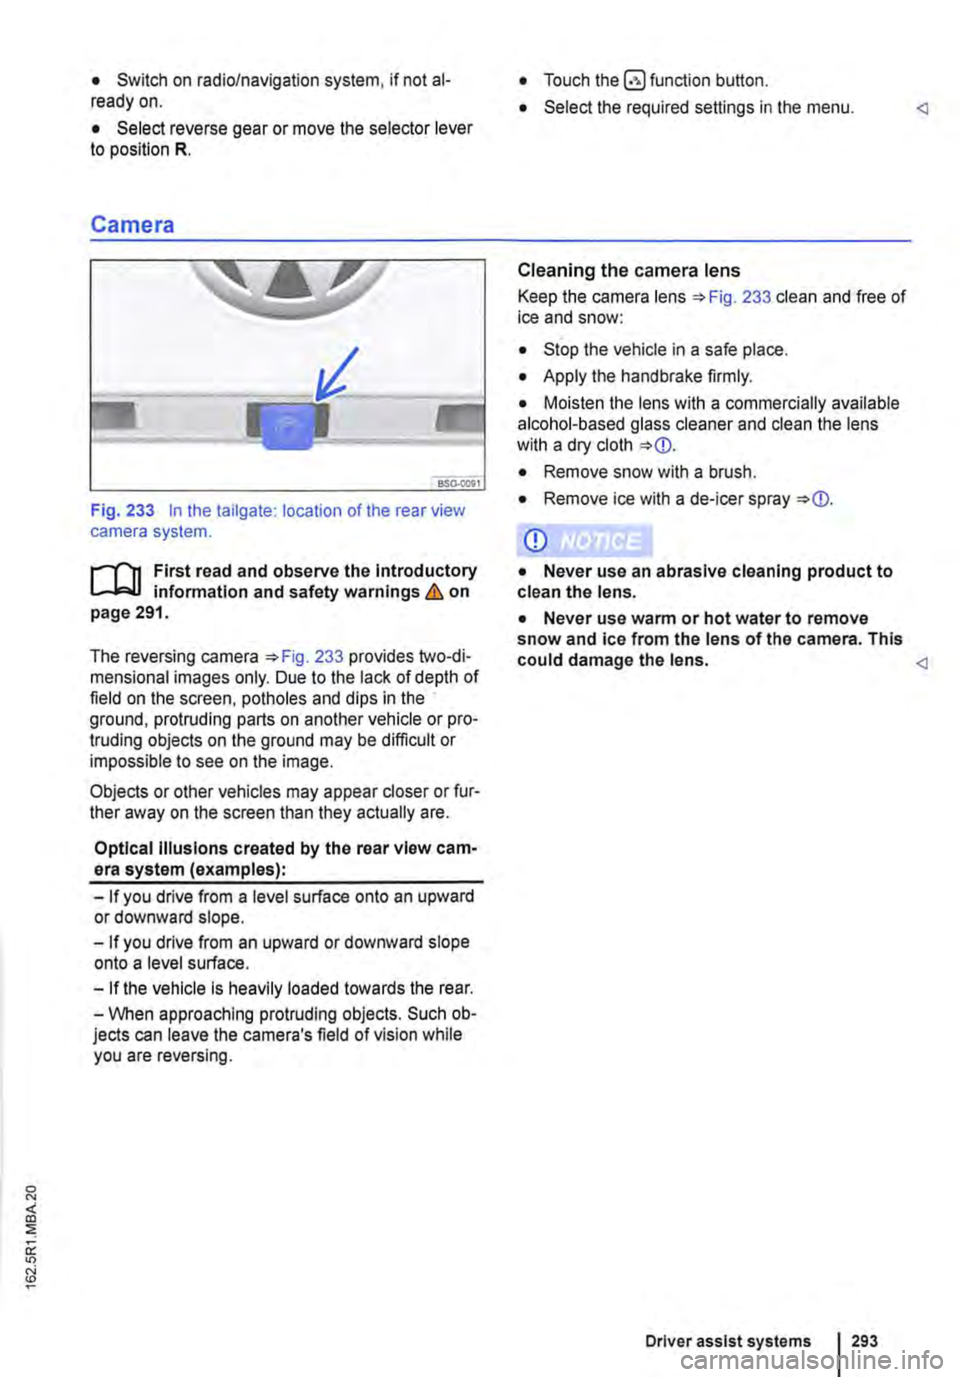
Fig. 233 In the tailgate: location of the rear view camera system.
....--r'n First read and observe the Introductory L.-J,:.U information and safety warnings & on page 291.
The reversing camera 233 provides two-di-mensional images only. Due to the lack of depth of field on the screen, potholes and dips in the ground, protruding parts on another vehicle or pro-truding objects on the ground may be difficult or impossible to see on the image.
Objects or other vehicles may appear closer or fur-ther away on the screen than they actually are.
Optical Illusions created by the rear view cam-era system (examples):
-If you drive from a level surface onto an upward or downward slope.
-If you drive from an upward or downward slope onto a level surface.
-If the vehicle Is heavily loaded towards the rear.
-When approaching protruding objects. Such ob-jects can leave the camera's field of vision while you are reversing.
• Touch the button.
• Select the required settings in the menu.
Cleaning the camera lens
Keep the camera lens 233 clean and free of ice and snow:
• Stop the vehicle in a safe place.
• Apply the handbrake firmly.
• Moisten the lens with a commercially available alcohol-based glass cleaner and clean the lens with a dry cloth
• Remove snow with a brush.
• Remove ice with a de-icer spray
CD
• Never use an abrasive cleaning product to clean the lens.
• Never use warm or hot water to remove snow and ice from the lens of the camera. This could damage the lens.
Driver assist systems 293