2012 VOLKSWAGEN TRANSPORTER tow
[x] Cancel search: towPage 199 of 486
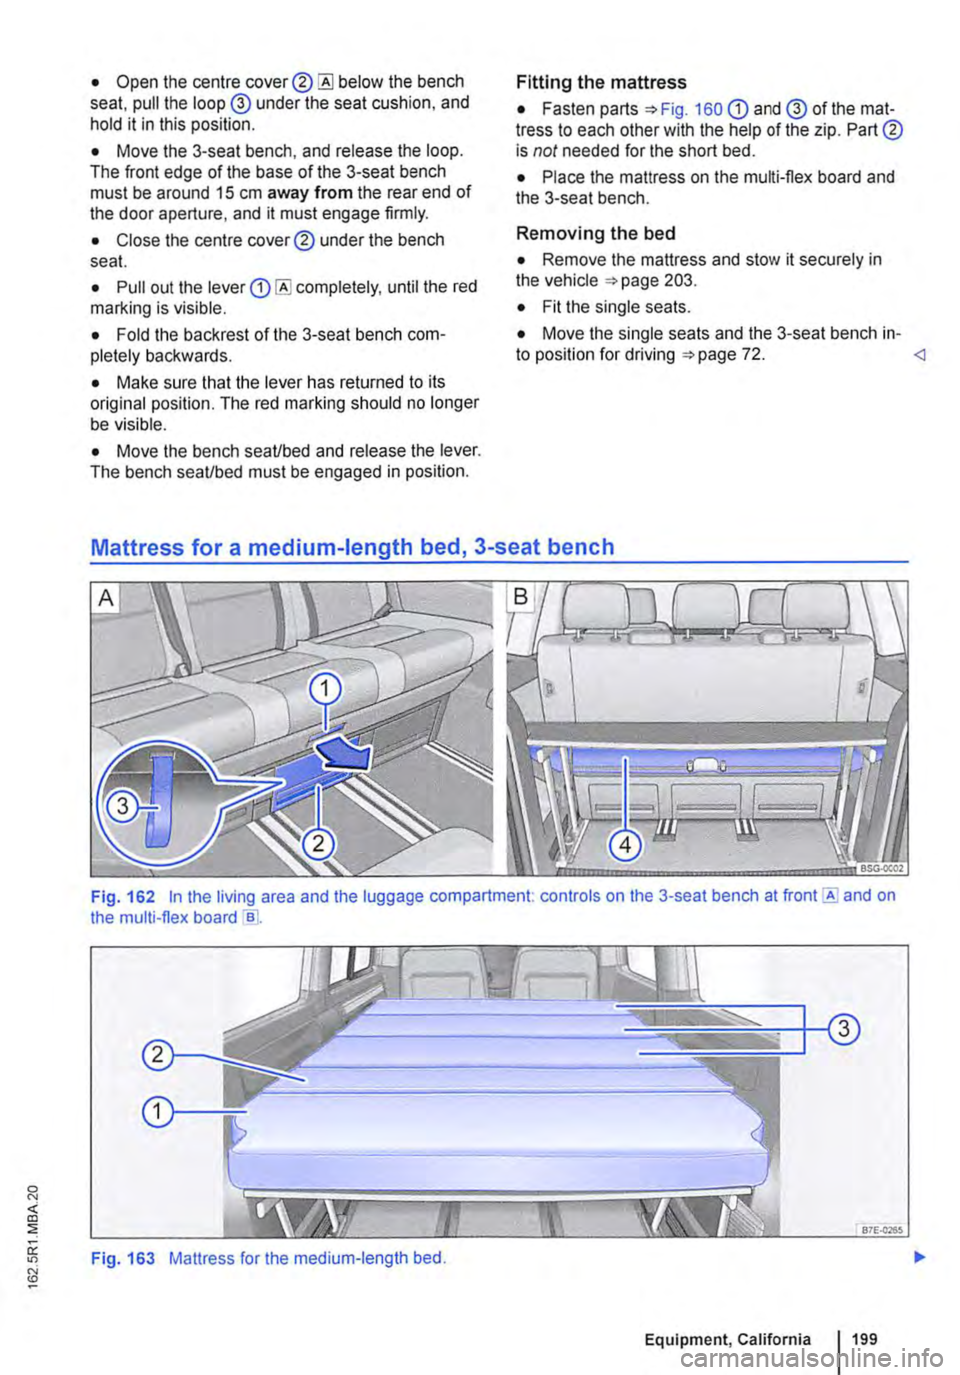
• Open the centre cover® below the bench seat, pull the loop @ under the seat cushion, and hold it in this position.
• Move the 3-seat bench, and release the loop. The front edge of the base of the 3-seat bench must be around 15 cm away from the rear end of the door aperture, and it must engage firmly.
• Close the centre cover® under the bench seat.
• Pull out the lever completely, until the red marlling is visible.
• Fold the backrest of the 3-seat bench com-pletely backwards.
• Make sure that the lever has returned to its original position. The red marking should no longer be visible.
• Move the bench seaVbed and release the lever. The bench seaVbed must be engaged in position.
Fitting the mattress
• Fasten parts =>Fig. 160 G) and @ of the mat-tress to each other with the help of the zip. Part® is not needed for the short bed.
• Place the mattress on the multi-flex board and the 3-seat bench.
Removing the bed
• Remove the mattress and stow it securely in the vehicle =>page 203.
• Fit the single seats.
• Move the single seats and the 3-seat bench in-to position for driving =>page 72.
Fig. 162 In the living area and the luggage compartment. controls on the 3-seat bench at front E and on the multi-flex board e .
Fig. 163 Mattress for the medium-length bed.
Equipment, California 199
Page 200 of 486
,...-m First read and observe the Introductory L--W.I Information and safety warnings & on page 193.
The medium-length bed is around 1.80 metres long. The bed can only be set up In vehicles with a 3-seat bench and with the single seats removed.
Setting up the medium-length bed
• Push the multi-flex board backwards to the stop.
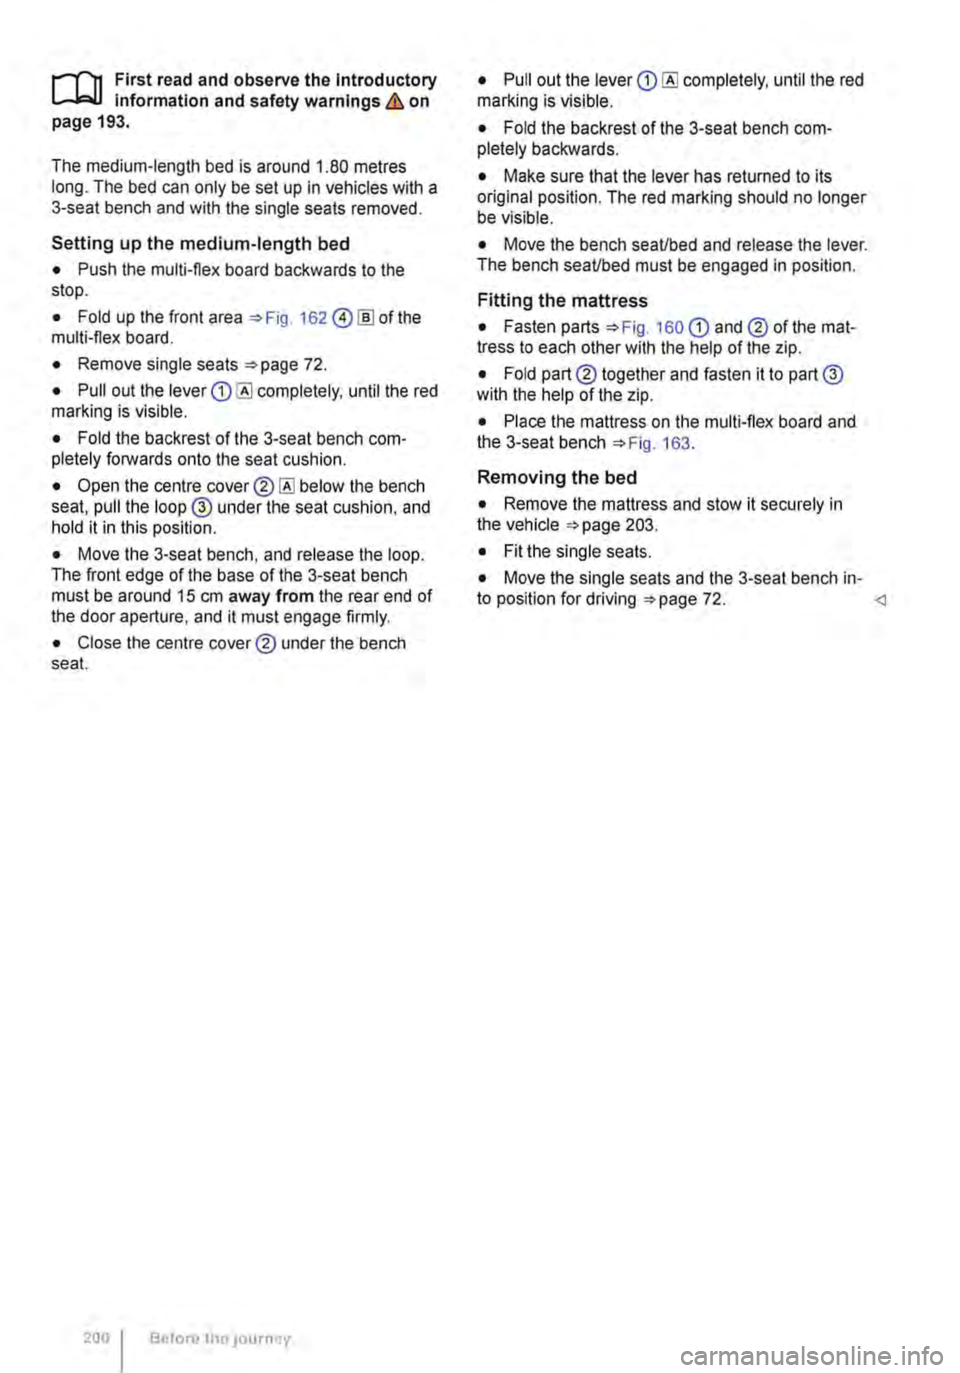
• Fold up the front area 162 @!ID of the multi-flex board.
• Remove single seats 72.
• Pull out the lever completely, until the red marking is visible.
• Fold the backrest of the 3-seat bench com-pletely forwards onto the seat cushion.
• Open the centre below the bench seat, pull the loop @ under the seat cushion, and hold it in this position.
• Move the 3-seat bench, and release the loop. The front edge of the base of the 3-seat bench must be around 15 cm away from the rear end of the door aperture, and it must engage firmly.
• Close the centre cover® under the bench seat.
200 Before tho JOurney
• Pull out the lever completely, until the red marking is visible.
• Fold the backrest of the 3-seat bench com-pletely backwards.
• Make sure that the lever has returned to its original position. The red marking should no longer be visible.
• Move the bench seaUbed and release the lever. The bench seaUbed must be engaged in position.
Fitting the mattress
• Fasten parts 160 CD and® of the mat-tress to each other with the help of the zip.
• Fold part® together and fasten it to part@ with the help of the zip.
• Place the mattress on the multi-flex board and the 3-seat bench 163.
Removing the bed
• Remove the mattress and stow it securely in the vehicle 203.
• Fit the single seats.
• Move the single seats and the 3-seat bench in-to position for driving 72.
Page 202 of 486
Fitting the mattress
• Fasten parts =>Fig. 160 CD and@ of the mat-tress to each other with the help of the zip.
• Fasten part® of the mattress to the other side of part@ at the zip.
• Tilt the backrests of the single seats a little if necessary in order to have a slanting surface to lean against.
• If you wish, fit the head restraints of the single seats the wrong way round in order to have an ad-ditional surface to lean against => &.
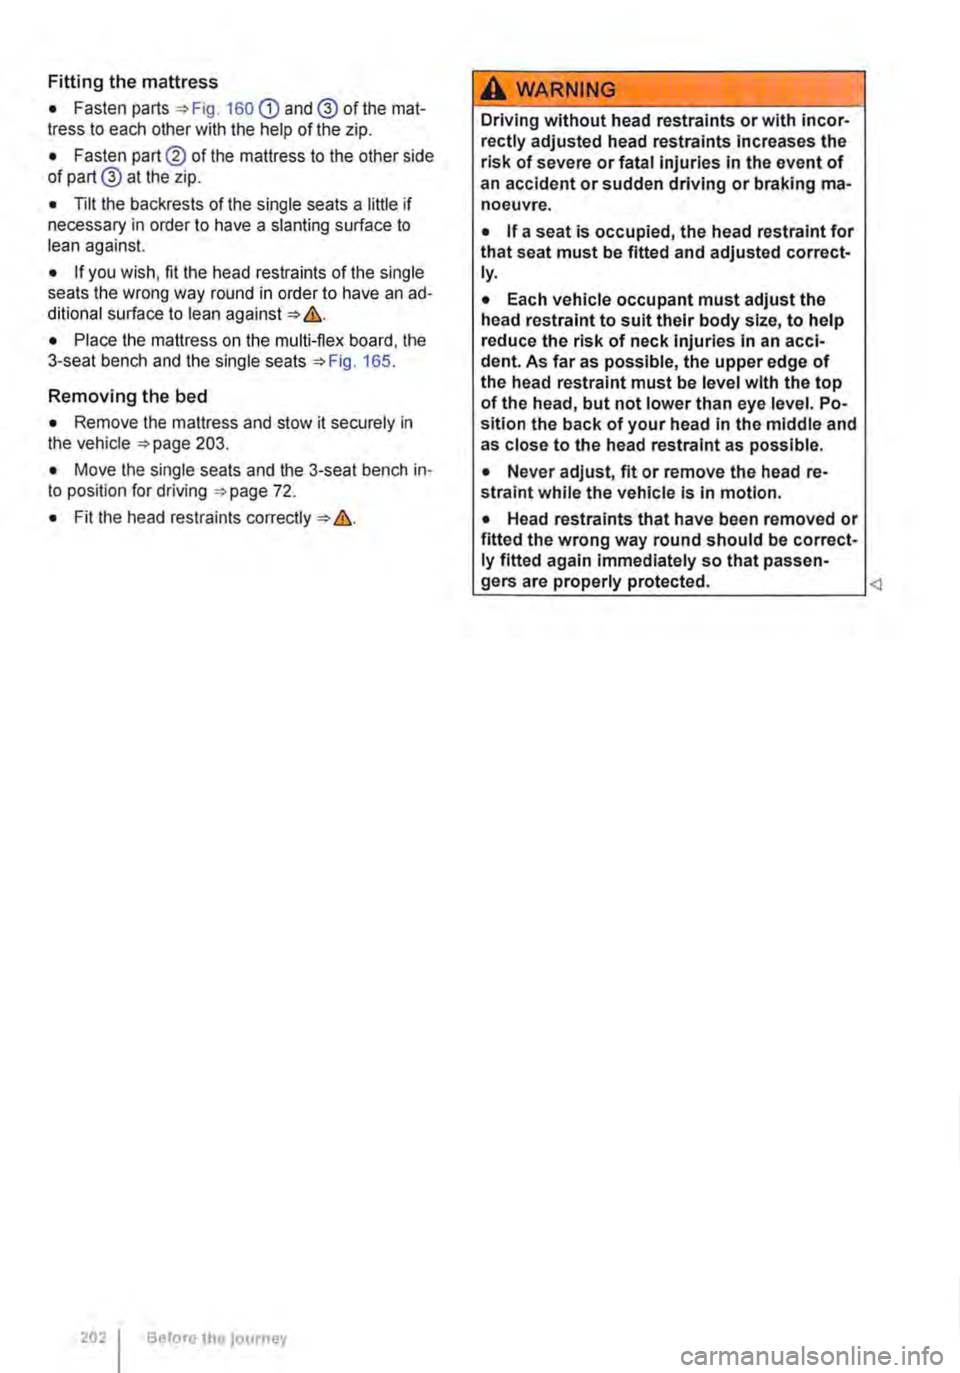
• Place the mattress on the multi-flex board, the 3-seat bench and the single seats =>Fig. 165.
Removing the bed
• Remove the mattress and stow it securely in the vehicle =>page 203.
• Move the single seats and the 3-seat bench in-to position for driving =>page 72.
• Fit the head restraints correctly => &.
202 I Before the journey
A wARNING
Driving without head restraints or with incor-rectly adjusted head restraints Increases the risk of severe or fatal injuries in the event of an accident or sudden driving or braking ma-noeuvre.
• If a seat is occupied, the head restraint for that seat must be fitted and adjusted correct-ly.
• Each vehicle occupant must adjust the head restraint to suit their body size, to help reduce the risk of neck Injuries In an acci-dent. As far as possible, the upper edge of the head restraint must be level with the top of the head, but not lower than eye level. Po-sition the back of your head In the middle and as close to the head restraint as possible.
• Never adjust, fit or remove the head re-straint while the vehicle Is In motion.
• Head restraints that have been removed or fitted the wrong way round should be correct-ly fitted again Immediately so that passen-gers are properly protected.
Page 203 of 486
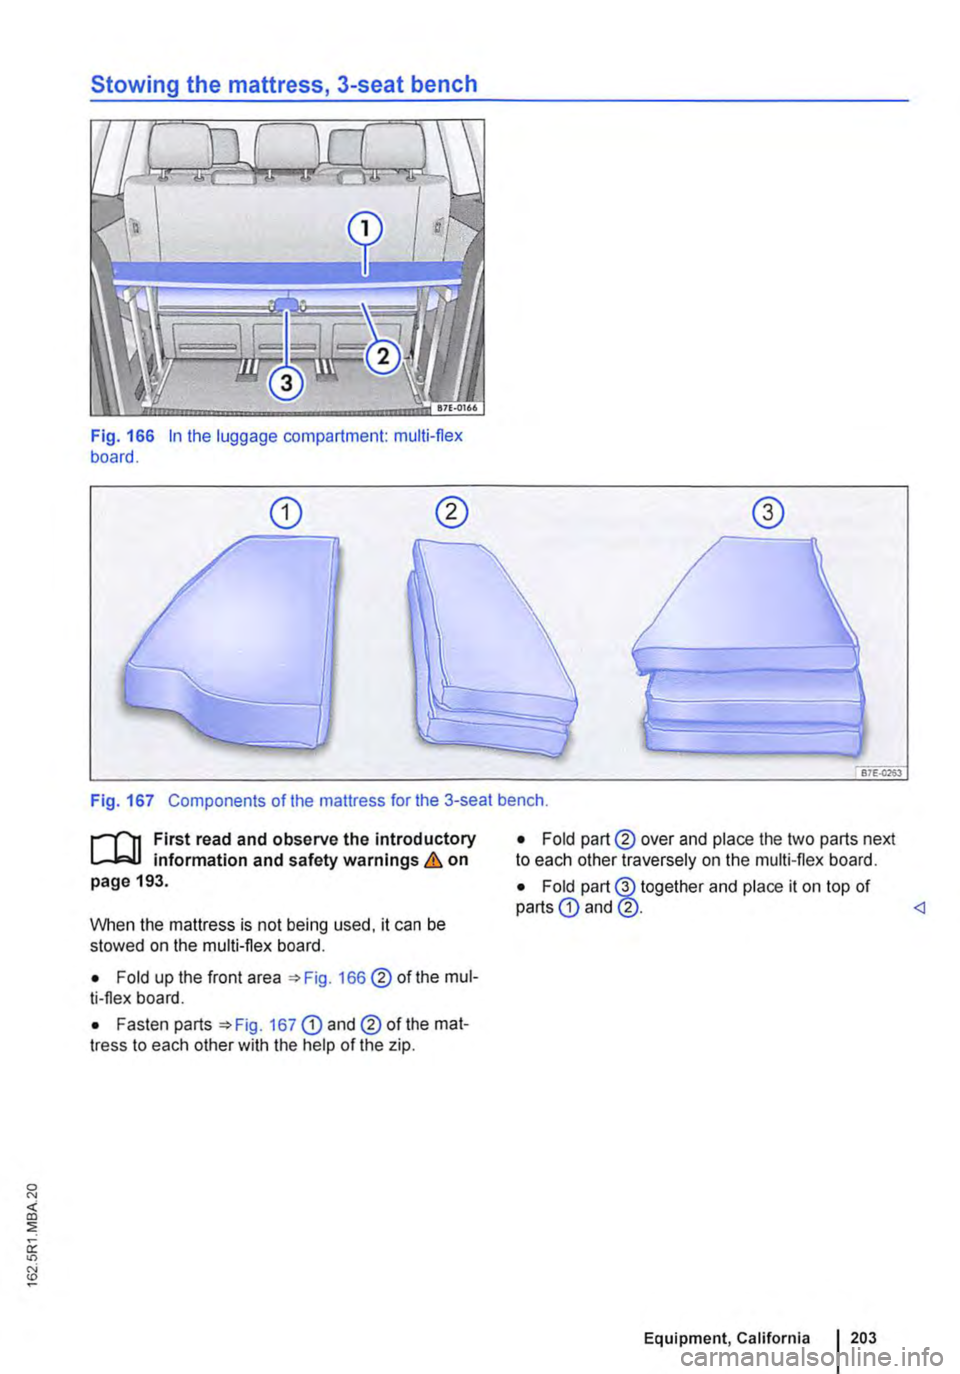
Fig. 166 In the luggage compartment: multi-flex board.
Fig. 167 Components of the mattress for the 3-seat bench.
r--f"'n First read and observe the introductory L-W.I information and safety warnings & on page 193.
When the mattress is not being used, it can be stowed on the multi-flex board.
• Fold up the front area 166 @of the mul-ti-flex board.
• Fasten parts 167 CD and@ of the mat-tress to each other with the help of the zip.
• Fold part@ over and place the two parts next to each other traversely on the multi-flex board.
• Fold part@ together and place it on top of parts CD and @.
Page 210 of 486
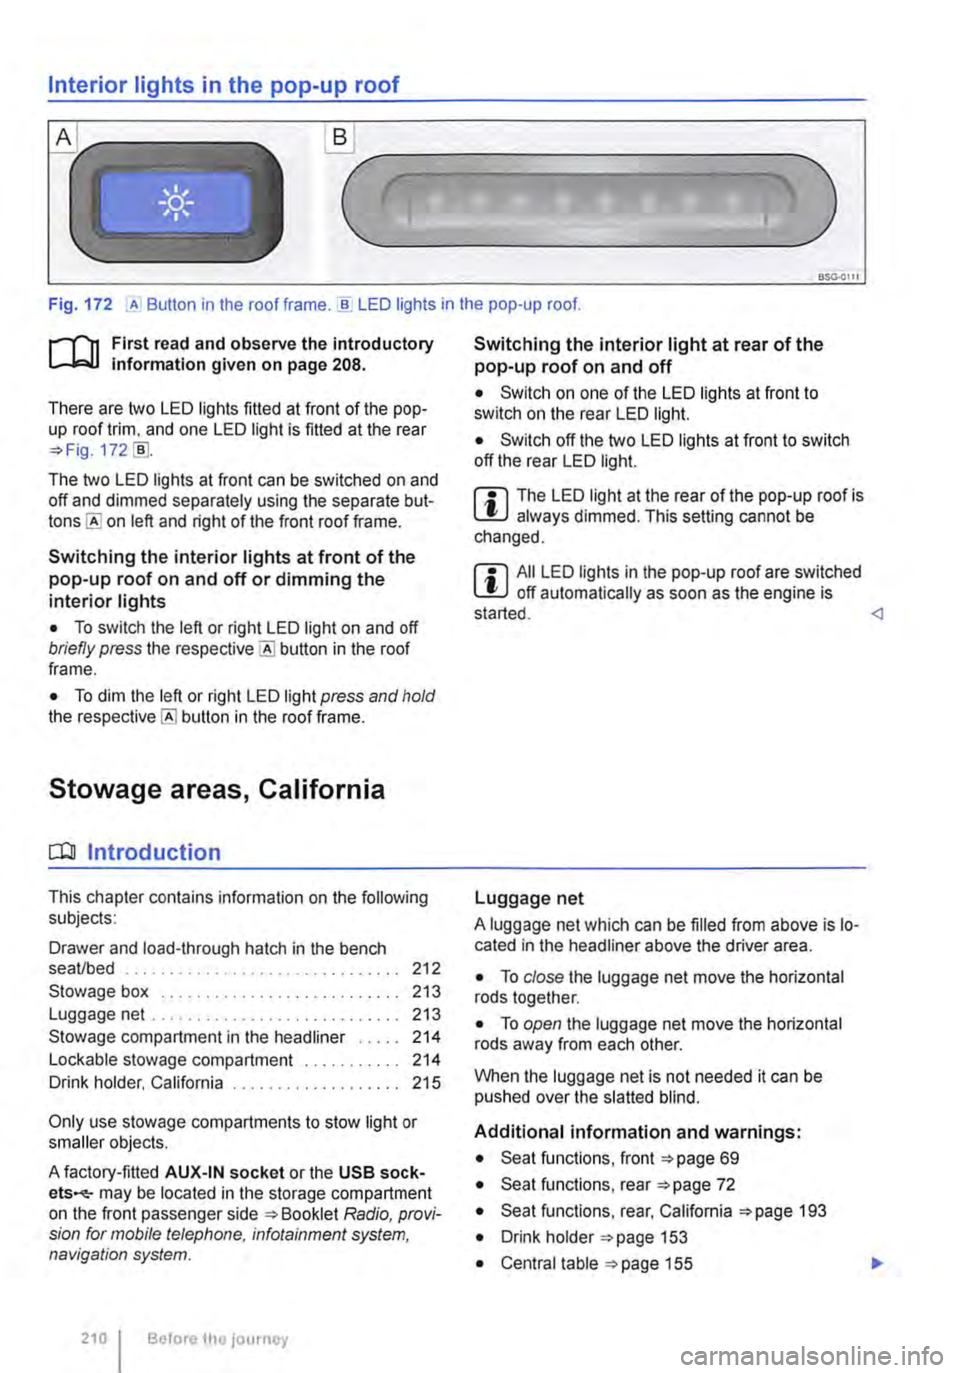
Interior lights in the pop-up roof
___ )
Fig. 172 ,A Button in the roof frame . ..!!. LED lights in the pop-up roof.
r--T'n First read and observe the introductory L-lcJ.I information given on page 208.
There are two LED lights fitted at front of the pop-up roof trim, and one LED light is fitted at the rear =?Fig. 172 [ID.
The two LED lights at front can be switched on and off and dimmed separately using the separate but-on left and right of the front roof frame.
Switching the interior lights at front of the pop-up roof on and off or dimming the interior lights
• To switch the left or right LED light on and off briefly press the button in the roof frame.
• To dim the left or right LED light press and hold the button in the roof frame.
Stowage areas, California
CQJ Introduction
This chapter contains information on the following subjects:
Drawer and load-through hatch in the bench seaVbed . . . . . . . . . . . . . . . . 212
Stowage box . . . . . . . . . . . . . . . . . . . 213 Luggage net .. .. .. . .. .. . 213
Stowage compartment in the headliner . . . . . 214 Lockable stowage compartment . . 214 Drink holder, California . . . . . . . . . . . 215
Only use stowage compartments to stow light or smaller objects.
A factory-fitted AUX-IN socket or the USB sock-ets-may be located in the storage compartment on the front passenger side =?Booklet Radio, provi-sion for mobile telephone, infotainment system, navigation system.
210 I Before the journey
Switching the interior light at rear of the pop-up roof on and off
• Switch on one of the LED lights at front to switch on the rear LED light.
• Switch off the two LED lights at front to switch off the rear LED light.
m The LED light at the rear of the pop-up roof is W always dimmed. This setting cannot be changed.
m All LED lights in the pop-up roof are switched W off automatically as soon as the engine is started.
A luggage net which can be filled from above is lo-cated in the headliner above the driver area.
• To close the luggage net move the horizontal rods together.
• To open the luggage net move the horizontal rods away from each other.
When the luggage net is not needed it can be pushed over the slatted blind.
Additional information and warnings:
• Seat functions, front =?page 69
• Seat functions, rear =?page 72
• Seat functions, rear, California =?page 193
• Drink holder =?page 153
• Central table =?page 155
Page 211 of 486
• Stowage page 1 50
• Cleaning and caring for the interior 388
A WARNING
Loose objects may be flung through the vehi-cle interior in the event of a sudden driving or braking manoeuvre. This can cause serious injury and can also lead to loss of control of the vehicle.
• Do not stow any pets or any hard, heavy or sharp objects in the vehicle's open stow-age compartments, in the luggage net, on the dash panel, on the shelf behind the rear seats or in items of clothing and bags in the vehicle interior.
• Always keep stowage compartments closed while the vehicle is in motion.
A WARNING
Objects in the driver footweli can hinder ped-al operation. This can lead to loss of control of the vehicle and increase the risk of serious injury.
• Please ensure that all pedals can always be operated without any hindrance.
• The foot mats must always be properly se-cured in the footwell.
• No additional foot mats or other floor cov-erings should be placed over the fitted foot mat.
• Ensure that no objects can enter the driv-er footwell while the vehicle is in motion.
• If there are any objects in the footwell, re-move them when the vehicle is parked.
A WARNING
Improper use of the stowage compartments can cause serious injury.
• Never fill stowage compartments beyond their capacity.
A WARNING (Continued)
• Always take care when closing stowage compartments that nobody is within their functional area.
A WARNING
Cigarette lighters in the vehicle could be damaged or accidentally lit. This could lead to serious burns and other injuries.
• Before adjusting the seats always make sure that there is no lighter on or near the moveable parts of the seat.
• Before closing stowage areas or compart-ments always ensure that there is no lighter in the way.
• Never stow lighters in stowage areas or compartments or on other surfaces in the ve-hicle. Cigarette lighters may self-ignite on high-temperature surfaces, especially in sum-mer.
CD
• Hard objects on the shelf can chafe against the wires of the heating element in the rear win-dow and cause damage.
• Do not store any heat-sensitive objects, food or medicines inside the vehicle. Hot and cold temperatures could damage them or ren-der them unusable.
• Objects stored in the vehicle that are made from transparent materials, such as glasses, magnifying glasses or transparent suction cups on the windows, can concentrate the sun's rays and thus cause damage to the vehi-cle.
m Always ensure that the ventilation openings L!J between the rear window and the stowage area are uncovered to allow stale air to escape from the vehicle.
Page 213 of 486
Stowage box
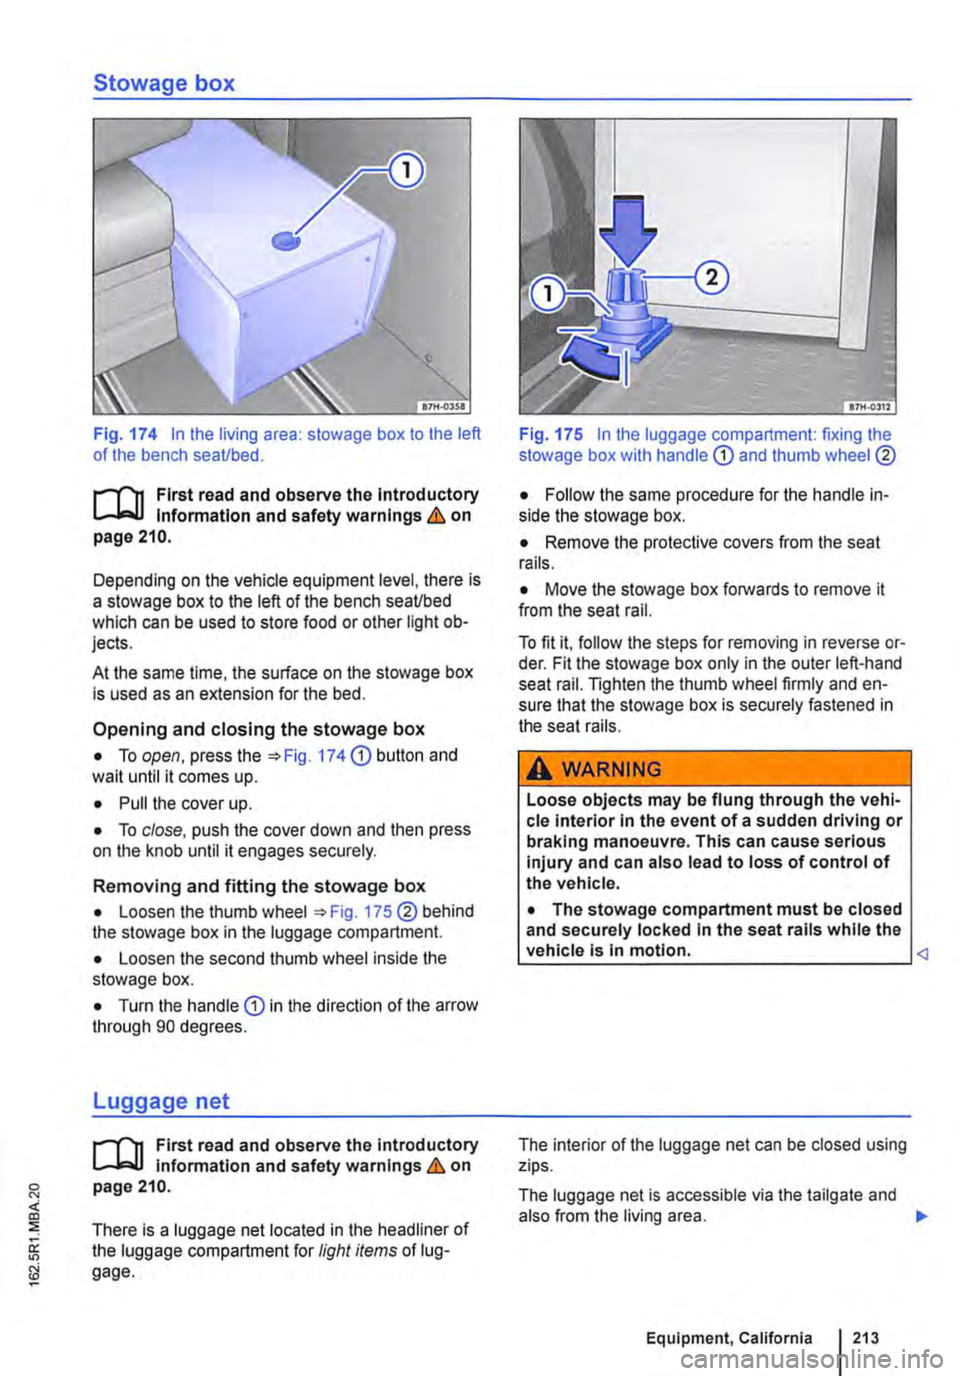
Fig. 174 In the living area: stowage box to the left of the bench seaUbed.
f""'"'('n First read and observe the lntrod uctory L-J,:.,LJ Information and safety warnings & on page 210.
Depending on the vehicle equipment level, there is a stowage box to the left of the bench seaUbed which can be used to store food or other light ob-jects.
At the same time, the surface on the stowage box is used as an extension for the bed.
Opening and closing the stowage box
• To open, press the :;. Fig. 174 (D button and wait until it comes up.
• Pull the cover up.
• To close, push the cover down and then press on the knob until it engages securely.
Removing and fitting the stowage box
• Loosen the thumb wheel :;. Fig. 175 ®behind the stowage box in the luggage compartment.
• Loosen the second thumb wheel inside the stowage box.
• Turn the handle (D in the direction of the arrow through 90 degrees.
Luggage net
f""'"'('n First read and observe the introductory L..-Wl Information and safety warnings & on page 210.
There is a luggage net located in the headliner of the luggage compartment for light items of lug-gage.
Fig. 175 In the luggage compartment: fixing the stowage box with handle
• Remove the protective covers from the seat rails.
• Move the stowage box forwards to remove it from the seat rail.
To fit it, follow the steps for removing in reverse or-der. Fit the stowage box only in the outer left-hand seat rail. Tighten the thumb wheel firmly and en-sure that the stowage box is securely fastened in the seat rails.
A WARNING
Loose objects may be flung through the vehi-cle interior in the event of a sudden driving or braking manoeuvre. This can cause serious injury and can also lead to loss of control of the vehicle.
• The stowage compartment must be closed and securely locked In the seat rails while the vehicle Is In motion.
The luggage net is accessible via the tailgate and also from the living area. .,..
Equipment, California I 213
Page 214 of 486
A wARNING
Always use the luggage net carefully, observ-ing the instructions. Risk of injury.
• Heavy, pointed or sharp items which are not stowed securely can cause injury in the event of sudden braking manoeuvres or acci-dents.
Stowage compartment in the headliner
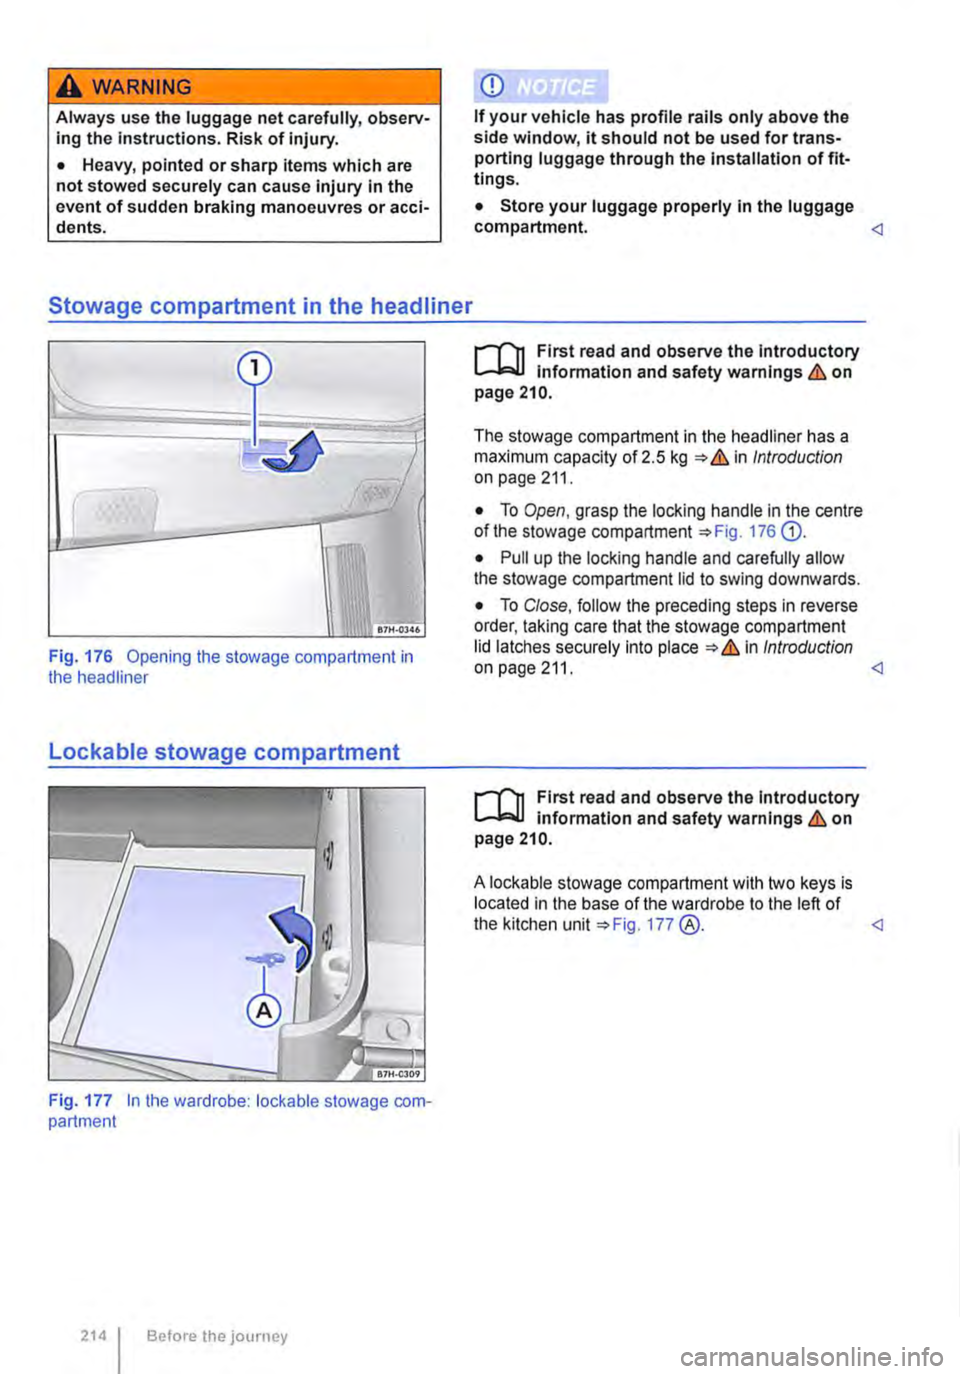
Fig. 176 Opening the stowage compartment in the headliner
Lockable stowage compartment
Fig. 177 In the wardrobe: lockable stowage com-partment
214 Before the journey
CD
If your vehicle has profile rails only above the side window, it should not be used for trans-porting luggage through the Installation of fit-tings.
• Store your luggage properly In the luggage compartment. <1
r-I'n First read and observe the Introductory L-Wl Information and safety warnings & on page 210.
The stowage compartment in the headliner has a maximum capacity of 2.5 kg & in Introduction on page 211.
• To Open, grasp the locking handle in the centre of the stowage compartment 176 G).
• Pull up the locking handle and carefully allow the stowage compartment lid to swing downwards.
• To Close, follow the preceding steps in reverse order, taking care that the stowage compartment lid latches securely into place & in Introduction on page 211.
r-I'n First read and observe the introductory L-Wl information and safety warnings & on page 210.
A lockable stowage compartment with two keys is located in the base of the wardrobe to the left of the kitchen unit 177 @. <1