2012 SUBARU OUTBACK ECO mode
[x] Cancel search: ECO modePage 126 of 474

possible to switch between the A trip
meter and B trip meter indications while
the odometer/trip meter is lit up. If you do
not press the trip knob within 10 seconds
of illumination of the odometer/trip meter,
the odometer/trip meter will turn off.
Also, if you open and close the driver’s
door within 10 seconds of illumination of
the odometer/trip meter, the odometer/trip
meter will turn off.
The display can be switched as shown in
the following illustration by pressing the
trip knob.
*1: “” or “”and “”or “”cannot
be displayed when the ignition switch is
in the “ON ”position.
*
2: MT models only
To set the trip meter to zero, select the A
trip or B trip meter by pressing the knob
and keep the knob pressed for more than
2 seconds.
CAUTION
To ensure safety, do not attempt to
change the function of the indicator
during driving, as an accident couldresult.
NOTE
If the connection between the combina-
tion meter and battery is broken for any
reason such as vehicle maintenance or
fuse replacement, the data recorded on
the trip meter will be lost. & Tachometer
The tachometer shows the engine speed
in thousands of revolutions per minute.
CAUTION
Do not operate the engine with the
pointer of the tachometer in the red
zone. In this range, fuel injection will
be cut by the engine control module
to protect the engine from overrev-
ving. The engine will resume run-
ning normally after the engine speed
is reduced below the red zone. NOTE
To protect the engine while the select
lever is in the
“P ” or “N ” position (for
AT and CVT models) or the shift lever is
in the neutral position (for MT models),
the engine is controlled so that the
engine speed may not become too high
even if the accelerator pedal is pressedhard.
& Fuel gauge
1) Low fuel warning light
The fuel gauge shows the approximate
amount of fuel remaining in the tank.
When the ignition switch is in the “LOCK ”
or “Acc ”position, the fuel gauge shows “E ”
even if the fuel tank contains fuel. Instruments and controls
3-7
– CONTINUED –
Page 127 of 474

3-8Instruments and controls
The gauge may move slightly during
braking, turning or acceleration due to fuel
level movement in the tank.
If you press the trip knob while the ignition
switch is in the “LOCK ”or “Acc ”position,
the fuel gauge ’s dial will light up and the
needle will indicate the amount of fuel
remaining in the tank.
If, while the fuel gauge needle is indicating
the amount of fuel remaining in the tank,
you (a) do not press the trip knob for 10
seconds or (b) open and close the driver ’s
door, the fuel gauge needle will drop to the“ E ” position and the dial and needle will
turn off.
NOTE
You will see the “”sign in the fuel gauge.
This indicates that the fuel filler door
(lid) is located on the right side of thevehicle. &
ECO gauge
1) U.S. spec. models
2) Except U.S. spec. models
The ECO gauge shows the difference
between the average rate of fuel con-
sumption since the trip meter was last
reset and the current rate of fuel con-sumption.
The ECO gauge indicates the current fuel
efficiency as shown in the following chart. Displayed unit
Needle position
“ + ” side “-” side
MPG Better Poorer
l/100km Poorer Better
NOTE . The ECO gauge shows only an
approximate indication. . After resetting the trip meter, the
average rate of fuel consumption is not
shown until driving 0.6 mile (1 km).
Until that time, the ECO gauge does notoperate.
Page 129 of 474

3-10Instruments and controls
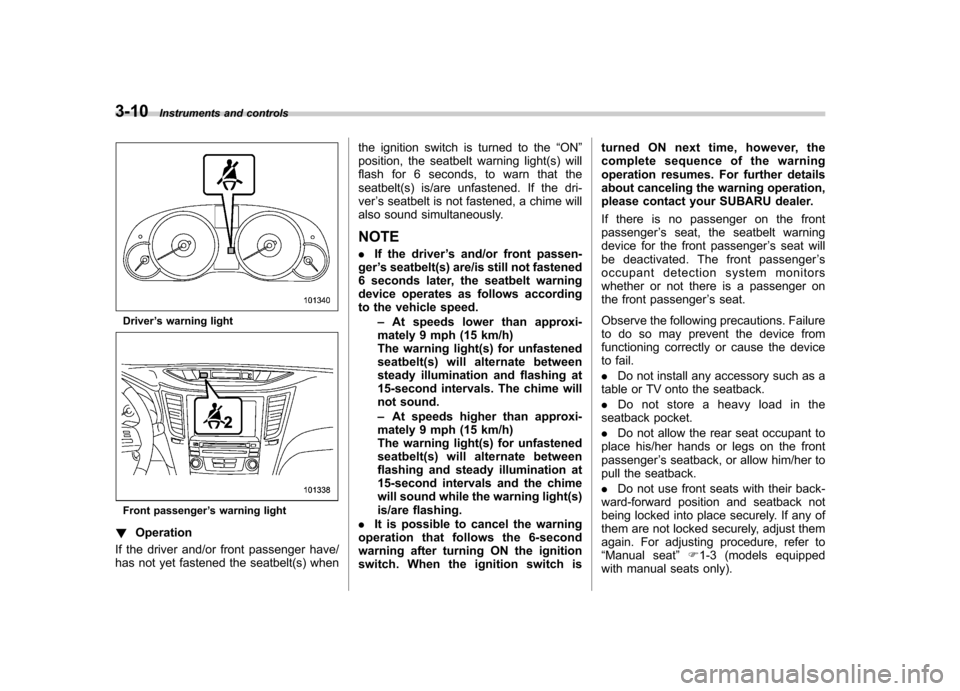
Driver’s warning light
Front passenger ’s warning light
! Operation
If the driver and/or front passenger have/
has not yet fastened the seatbelt(s) when the ignition switch is turned to the
“ON ”
position, the seatbelt warning light(s) will
flash for 6 seconds, to warn that the
seatbelt(s) is/are unfastened. If the dri-ver ’s seatbelt is not fastened, a chime will
also sound simultaneously.
NOTE . If the driver ’s and/or front passen-
ger ’s seatbelt(s) are/is still not fastened
6 seconds later, the seatbelt warning
device operates as follows according
to the vehicle speed.
–At speeds lower than approxi-
mately 9 mph (15 km/h)
The warning light(s) for unfastened
seatbelt(s) will alternate between
steady illumination and flashing at
15-second intervals. The chime will
not sound. – At speeds higher than approxi-
mately 9 mph (15 km/h)
The warning light(s) for unfastened
seatbelt(s) will alternate between
flashing and steady illumination at
15-second intervals and the chime
will sound while the warning light(s)
is/are flashing.
. It is possible to cancel the warning
operation that follows the 6-second
warning after turning ON the ignition
switch. When the ignition switch is turned ON next time, however, the
complete sequence of the warning
operation resumes. For further details
about canceling the warning operation,
please contact your SUBARU dealer.
If there is no passenger on the front passenger
’s seat, the seatbelt warning
device for the front passenger ’s seat will
be deactivated. The front passenger ’s
occupant detection system monitors
whether or not there is a passenger on
the front passenger ’s seat.
Observe the following precautions. Failure
to do so may prevent the device from
functioning correctly or cause the device
to fail. . Do not install any accessory such as a
table or TV onto the seatback.. Do not store a heavy load in the
seatback pocket.. Do not allow the rear seat occupant to
place his/her hands or legs on the front passenger ’s seatback, or allow him/her to
pull the seatback. . Do not use front seats with their back-
ward-forward position and seatback not
being locked into place securely. If any of
them are not locked securely, adjust them
again. For adjusting procedure, refer to“ Manual seat ”F1-3 (models equipped
with manual seats only).
Page 130 of 474

If the seatbelt warning device for the front passenger’s seat does not function cor-
rectly (e.g., it is activated even when the
front passenger ’s seat is empty or it is
deactivated even when the front passen-
ger has not fastened his/her seatbelt),
take the following actions. . Ensure that no article is placed on the
seat other than a child restraint system
and its child occupant. . Ensure that there is no article left in the
seatback pocket.. Ensure that the backward-forward po-
sition and seatback of front passenger ’s
seat are locked into place securely by
moving the seat back and forth. (Models
equipped with manual seats only)
If still the seatbelt warning device for front passenger ’s seat does not function cor-
rectly after taking relevant corrective ac-
tions described above, immediately con-
tact your SUBARU dealer for an inspec-tion.
& SRS airbag system
warning light
WARNING
If the warning light exhibits any of
the following conditions, there may
be a malfunction in the seatbelt pretensioners and/or SRS airbag
system. Immediately take your vehi-
cle to your nearest SUBARU dealer
to have the system checked. Unless
checked and properly repaired, the
seatbelt pretensioners and/or SRS
airbags will operate improperly (e.g.
SRS airbags may inflate in a very
minor collision or not inflate in a
severe collision), which may in-
crease the risk of injury. .
Flashing or flickering of the warn-
ing light
. No illumination of the warning
light when the ignition switch is
first turned to the “ON ”position
. Continuous illumination of the
warning light
. Illumination of the warning light
while driving &
Front passenger ’s frontal
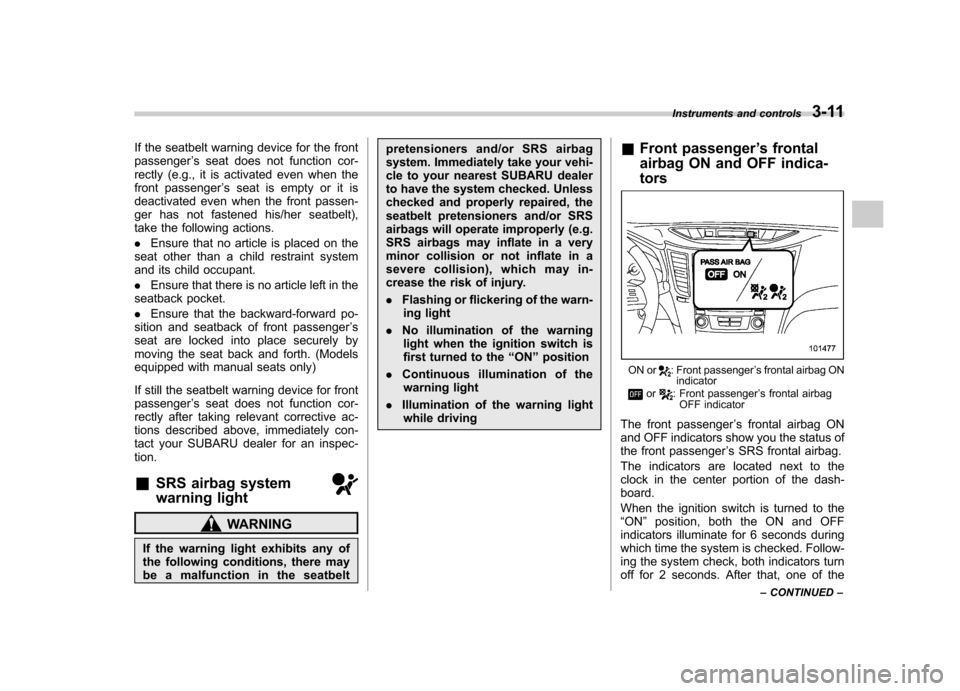
airbag ON and OFF indica- tors
ON or: Front passenger ’s frontal airbag ON
indicator
or: Front passenger ’s frontal airbag
OFF indicator
The front passenger ’s frontal airbag ON
and OFF indicators show you the status of
the front passenger ’s SRS frontal airbag.
The indicators are located next to the
clock in the center portion of the dash-board.
When the ignition switch is turned to the “ ON ”position, both the ON and OFF
indicators illuminate for 6 seconds during
which time the system is checked. Follow-
ing the system check, both indicators turn
off for 2 seconds. After that, one of the Instruments and controls
3-11
– CONTINUED –
Page 134 of 474

!Transmission control system warn- ing
If the “AT OIL TEMP ”warning light flashes
after the engine has started, it may
indicate that the transmission control
system is not working properly. Contact
your nearest SUBARU dealer for service
immediately.
& Low tire pressure
warning light (U.S. spec. models)
When the ignition switch is turned to the “ON ”position, the low tire pressure warn-
ing light will illuminate for approximately 2
seconds to check that the tire pressure
monitoring system (TPMS) is functioning
properly. If there is no problem and all tires
are properly inflated, the light will go out.
Each tire, including the spare (if provided),
should be checked monthly when cold
and inflated to the inflation pressure
recommended by the vehicle manufac-
turer on the vehicle placard or tire inflation
pressure label. (If your vehicle has tires of
a different size than the size indicated on
the vehicle placard or tire inflation pres-
sure label, you should determine the
proper tire inflation pressure for thosetires.)
As an added safety feature, your vehicle has been equipped with a tire pressure
monitoring system (TPMS) that illuminates
a low tire pressure telltale when one or
more of your tires is significantly under-
inflated. Accordingly, when the low tire
pressure telltale illuminates, you should
stop and check your tires as soon as
possible, and inflate them to the proper
pressure. Driving on a significantly under-
inflated tire causes the tire to overheat and
can lead to tire failure. Under-inflation also
reduces fuel efficiency and tire tread life,
and may affect the vehicle
’s handling and
stopping ability.
Please note that the TPMS is not a
substitute for proper tire maintenance,
and it is the driver ’s responsibility to
maintain correct tire pressure, even if
under-inflation has not reached the level
to trigger illumination of the TPMS low tire
pressure telltale.
Your vehicle has also been equipped with
a TPMS malfunction indicator to indicate
when the system is not operating properly.
The TPMS malfunction indicator is com-
bined with the low tire pressure telltale.
When the system detects a malfunction,
the telltale will flash for approximately one
minute and then remain continuously
illuminated. This sequence will continue
upon subsequent vehicle start-ups as long
as the malfunction exists. When the malfunction indicator is illuminated, the
system may not be able to detect or signal
low tire pressure as intended. TPMS
malfunctions may occur for a variety of
reasons, including the installation of re-
placement or alternate tires or wheels on
the vehicle that prevent the TPMS from
functioning properly. Always check the
TPMS malfunction telltale after replacing
one or more tires or wheels on your
vehicle to ensure that the replacement or
alternate tires and wheels allow the TPMS
to continue to function properly.
Should the warning light illuminate stea-
dily after blinking for approximately one
minute, have the system inspected by
your nearest SUBARU dealer as soon as possible.
WARNING
If this light does not illuminate
briefly after the ignition switch is
turned ON or the light illuminates
steadily after blinking for approxi-
mately one minute, you should have
your Tire Pressure Monitoring Sys-
tem checked at a SUBARU dealer as
soon as possible.
If this light illuminates while driving,
never brake suddenly and keep
driving straight ahead while gradu- Instruments and controls
3-15
– CONTINUED –
Page 139 of 474

3-20Instruments and controls
&All-Wheel Drive
warning light (AT and
CVT models)
WARNING
Continued driving with the AWD
warning light flashing can lead to
powertrain damage. If the AWD
warning light flashes, promptly park
in a safe place then check whether
all four tires are the same diameter
and whether any of the tires has a
puncture or has lost air pressure for
some other reason.
NOTE
If the temporary spare tire is used, the
AWD warning light may flash. Use of
the temporary spare tire should there-
fore be restricted to the minimum time
necessary. Replace the temporary
spare tire with a conventional tire as
soon as possible.
This light flashes if the vehicle is driven
with tires of different diameters fitted on its
wheels or with the air pressure exces-
sively low in any of its tires. &
Vehicle Dynamics
Control warning light/
Vehicle Dynamics Con-
trol operation indicatorlight
!Vehicle Dynamics Control warning light
CAUTION
The Vehicle Dynamics Control sys-
tem provides its ABS control
through the electrical circuit of the
ABS system. Accordingly, if the ABS
is inoperative, the Vehicle Dynamics
Control system becomes unable to
provide ABS control. As a result, the
Vehicle Dynamics Control system
becomes inoperative, causing the
warning light to illuminate. Although
both the Vehicle Dynamics Control
and ABS systems are inoperative in
this case, the ordinary functions of
the brake system are still available.
You will be safe while driving in this
condition, but drive carefully and
have your vehicle checked at a
SUBARU dealer as soon as possi-ble. NOTE .
If the electrical circuit of the Vehicle
Dynamics Control system itself mal-
functions, the warning light only illumi-
nates. At this time, the ABS (Anti-lock
Brake System) remains fully opera-tional.. The warning light illuminates when
the electronic control system of the
ABS/Vehicle Dynamics Control systemmalfunctions.
The Vehicle Dynamics Control system is
probably inoperative under any of the
following conditions. Have your vehicle
checked at a SUBARU dealer immedi-
ately. . The warning light does not illuminate
when the ignition switch is turned to the “ ON ”position.
. The warning light illuminates while the
vehicle is running. NOTE
If the warning light behavior is as
described in the following examples,
the Vehicle Dynamics Control system
may be considered normal. . The warning light illuminates right
after the engine is started but turns off
immediately and remains off.. The warning light illuminates after
the engine has started and turns off
Page 141 of 474

3-22Instruments and controls
& Select lever/gear position in- dicator
1) Upshift/downshift indicator (AT and CVT
models)
This indicator shows the position of the
shift lever (MT models) or select lever (AT
and CVT models). ! Upshift/downshift indicator (AT and
CVT models)
When the manual mode is selected, the
gear position indicator (which shows the
current gear selection) and the upshift/
downshift indicator light up. Refer to“ Selection of manual mode ”F 7-21. !
Gear position indicator setting (MTmodels)
The gear position indicator light can be
activated or deactivated by performing the
following procedure.
1. Turn the ignition switch to the “LOCK ”
position.
2. Press the trip knob to show “
”or
“” on the trip meter display.
The display can be switched as shown in
the following illustration by pressing the
trip knob.
*1: “” or “”and “”or “”cannot
be displayed when the ignition switch is
in the “ON ”position.
*
2: MT models only
3. To change the current setting, press
the trip knob for at least 2 seconds.
: Activated
: Deactivated NOTE .
The initial setting for your vehicle of
the gear position indicator has been set
for activation “
”at the time of
shipment from the factory. . It is not possible to change the
setting of the gear position indicator
when the ignition switch is in the “ON ”
position. Change the setting when the
ignition switch is in the “LOCK ”or
“ Acc ”position.
& Turn signal indicator lights
These lights show the operation of the turn
signal or lane change signal.
If the indicator lights do not blink or blink
rapidly, the turn signal bulb may be burned
out. Replace the bulb as soon as possible.
Refer to “Replacing bulbs ”F 11-45.
& High beam indicator light
This light shows that the headlights are in
the high beam mode.
This indicator light also illuminates when
the headlight flasher is operated.
Page 144 of 474

�22 to 122 8F( �30 to 50 8C).
The indicator can give a false reading
under any of the following conditions: . When there is too much sun.
. During idling; while running at low
speeds in a traffic jam; when the engine
is restarted immediately following a shut-down. . When the actual outside temperature
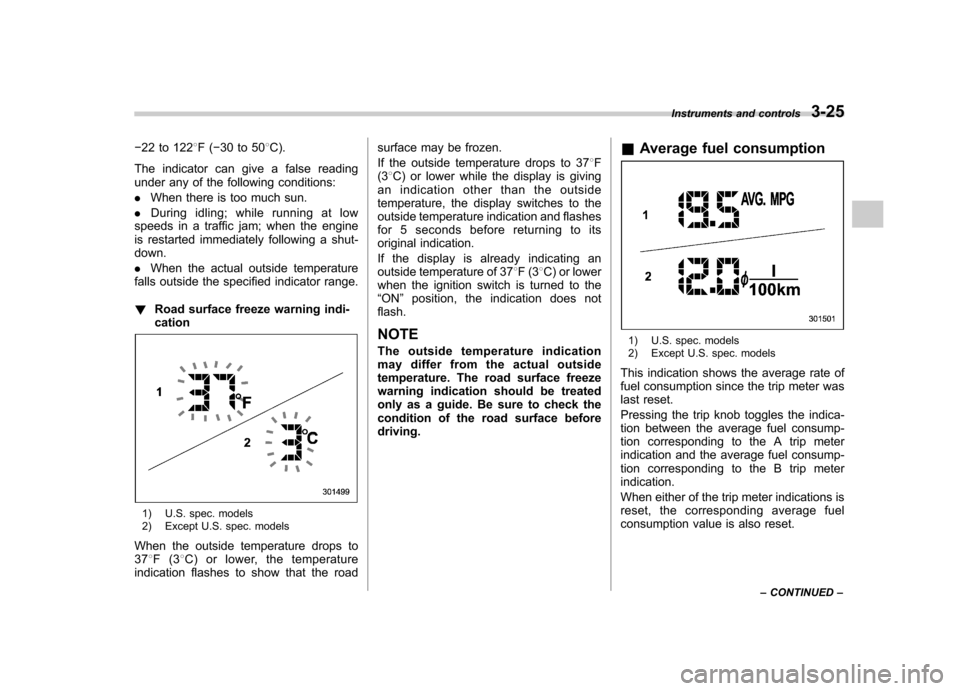
falls outside the specified indicator range. ! Road surface freeze warning indi- cation
1) U.S. spec. models
2) Except U.S. spec. models
When the outside temperature drops to 37 8F(3 8C) or lower, the temperature
indication flashes to show that the road surface may be frozen.
If the outside temperature drops to 37
8F
(3 8C) or lower while the display is giving
an indication other than the outside
temperature, the display switches to the
outside temperature indication and flashes
for 5 seconds before returning to its
original indication.
If the display is already indicating an
outside temperature of 37 8F(3 8C) or lower
when the ignition switch is turned to the“ ON ”position, the indication does not
flash. NOTE
The outside temperature indication
may differ from the actual outside
temperature. The road surface freeze
warning indication should be treated
only as a guide. Be sure to check the
condition of the road surface beforedriving. &
Average fuel consumption
1) U.S. spec. models
2) Except U.S. spec. models
This indication shows the average rate of
fuel consumption since the trip meter was
last reset.
Pressing the trip knob toggles the indica-
tion between the average fuel consump-
tion corresponding to the A trip meter
indication and the average fuel consump-
tion corresponding to the B trip meterindication.
When either of the trip meter indications is
reset, the corresponding average fuel
consumption value is also reset. Instruments and controls
3-25
– CONTINUED –