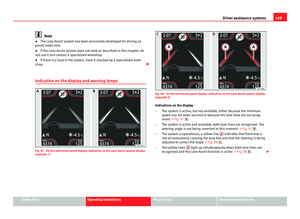
Page 121 of 289

120Lights and visibility
Lifting and returning windscreen wiper arms
● Place the wiper arms in the service position ⇒
.
● Only hold the wiper arms at the point where the blade is fixed.
CAUTION
● To prevent damage to the bonnet and the wiper arms, only leave them in
the service position.
● Before driving, always lower the wiper arms.
Rain sensor*
Fig. 66 Windscreen wip-
er lever: adjusting the
rain sensor A
Fig. 67 Rain sensor sen-
sitive surface
The rain sensor controls the frequency of the windscreen wiper intervals,
depending on the amount of rain ⇒
. The sensitivity of the rain sensor can
be adjusted manually. Manual wipe ⇒ page 118
Move the lever to the required position ⇒ Fig. 66:
Rain sensor off.
Rain sensor on; automatic wipe if necessary.
Setting sensitivity level of rain sensor
– Set control to the right: highly sensitive.
– Set control to the left: less sensitive.
When the ignition is switched off and then back on, the rain sensor stays on
and starts operating again when the windscreen wipers are in position 1
and the vehicle is travelling at more than 16 km/h (10 mph).
Rain sensor modified behaviour
Possible causes of faults and mistaken readings
on the sensitive surface
⇒ Fig. 67 of the rain sensor include:
0
1A
Page 122 of 289

121
Lights and visibility
● Damaged blades: A film of water on the damaged blades may lengthen
the activation time, reduce the washing intervals or result in a fast and con-
tinuous wipe.
● Insects: insects on the sensor may trigger the windscreen washer.
● Salt on roads: in winter, salt spread in the roads may cause an extra
long wipe when the windscreen is almost dry.
● Dirt: dry dust, wax, coating on glass (Lotus effect) or traces of detergent
(car wash) may reduce the effectiveness of the rain sensor or make it react
more slowly, later or not at all.
● Cracked windscreen: the impact of a stone will trigger a single wipe cy-
cle with the rain sensor on. Next the rain sensor detects the reduction in the
sensitive surface area and adapts accordingly. The behaviour of the sensor
will vary with the size of the damage caused by the stone.
WARNING
The rain sensor may not detect enough rain to switch on the wipers.
● If necessary, switch on the wipers manually when water on the wind-
screen obstructs visibility.
Note
● Clean the sensitive surface of the rain sensor regularly and check the
blades for damage ⇒ Fig. 67 (arrow).
● To remove wax and coatings, we recommend a window cleaner contain-
ing alcohol. Checking and topping up the windscreen washer reservoir
with water
Fig. 68 In the engine
compartment: wind-
screen washer reservoir
top
Check the water level in the windscreen washer reservoir regularly and top
up as required.
● Open the bonnet
⇒ page 209.
● The washer reservoir is marked with the symbol on the lid
⇒ Fig. 68.
● Check there is enough water in the reservoir.
● To top up, mix water with a window cleaner recommended by SEAT
⇒
.
Please follow the instructions for use found on the packaging.
● In cold weather, a special antifreeze should also be added to prevent
the water from freezing ⇒
.
Safety FirstOperating instructionsPractical TipsTechnical specifications
Page 123 of 289

122Lights and visibility
Recommended windscreen wipers
● For the hottest seasons we recommend summer G 052 184 A1 for clear
glass. Proportions of the mixture in the washer fluid tank: 1:100 (1 part con-
centrate per 100 parts water).
● All year round, G 052 164 A2 for clear glass. Approximate proportion of
the winter mixture, up to -18 °C (0 °F): 1:2 (1 part concentrate per 2 parts
water); otherwise, a 1:4 proportion of mixture in the washer fluid tank.
Reservoir capacity
The reservoir holds approximately 3 - 4 litres; in vehicles with headlight
washer, it is approximately 3 -6 litres.
WARNING
Never mix an unsuitable antifreeze or other similar additives with the
windscreen washer water. A greasy layer may be formed on the wind-
screen which will impair visibility.
● Use clean water with a window cleaner recommended by SEAT.
● If necessary, add a suitable antifreeze to the water in the reservoir.
CAUTION
● Do not mix cleaning products recommended by SEAT with other prod-
ucts. This could lead to flocculation and may block the windscreen washer
jets.
● When topping up service fluids, make absolutely certain that you fill the
fluids into the correct reservoirs. Using the wrong fluids could cause serious
malfunctions and engine damage! Rear vision mirror
Adjusting the exterior mirrors
Fig. 69 Driver door: con-
trol for the exterior mirror
Turn the knob to the appropriate position: – In these positions you can adjust the exterior mirrors (left or right) by
moving the control in the desired direction.
– The surfaces of the exterior mirrors are heated* depending on the
outside temperature, and on the equipment fitted in the vehicle.
– The exterior mirrors are retracted*.
Synchronized regulation of the exterior mirrors
● In the Settings - Convenience menu, select whether or not the exterior
mirrors should move in synchronisation ⇒ page 77.
● Turn the knob to position L.
● Adjust the left-hand exterior mirror. The right exterior mirror will be ad-
justed at the same time (synchronised).
L/R
Page 124 of 289

123
Lights and visibility
● If necessary the right exterior mirror adjustment may need correcting.
Turn the knob to position R.
● In the Easy Connect system the exterior mirrors can be adjusted using
the CAR
button and the function button SETUP.
Tilt function for front passenger exterior mirror*
The mirror can automatically tilt slightly to provide a better view of the kerb
when parking backwards. The control must be in the position R for this fea-
ture to be operational.
The mirror returns to its original position as soon as you drive forwards at
over 15 km/h (10 mph) or switch off the ignition. It also returns to its origi-
nal position if the position of the control is adjusted.
WARNING
Convex or wide-angle* exterior mirrors give a larger field of vision. How-
ever, they make objects look smaller and further away than they really
are. If you use these mirrors to estimate the distance to vehicles behind
you when changing lane, you could misjudge the distance. Risk of acci-
dent!
CAUTION
● If one of the mirror housings is knocked out of position (e.g. when park-
ing), the mirrors must first be fully retracted with the electric control. Do not
readjust the mirror housing by hand, as this will interfere with the mirror ad-
juster function.
● Before washing the vehicle in an automatic car wash, please make sure
to retract the exterior mirrors to prevent them from being damaged. Electri-
cally retractable exterior mirrors must NOT be folded in or out by hand. Al-
ways use the electrical power control.
Note
If the electrical adjustment should fail to operate, both of the mirrors can be
adjusted by hand by lightly pressing the edge of the mirror glass. Anti-dazzle rear vision mirrors
Your vehicle is fitted with an interior rear vision mirror with a
manual or automatic control for anti-dazzle position.
Fig. 70 Interior rear vi-
sion mirror with automat-
ic setting for anti-dazzle
position
Interior rear vision mirror with manual setting for anti-dazzle
position
– Position the small lever of the lower edge of the mirror to face
towards the rear.
Anti-dazzle rear vision mirror with automatic setting*
– Press the button A
. Warning lamp B will light up. Depending
on the amount of light incidence, the interior rear vision mirror
and the exterior* mirrors darken (e.g. headlight shining from
behind).
Safety FirstOperating instructionsPractical TipsTechnical specifications
Page 125 of 289
124Lights and visibility
WARNING
In the event that an automatic anti-dazzle rear vision mirror breaks, an
electrolyte fluid may leak. This could cause irritation to the skin, eyes
and respiratory organs. If you come into contact with this liquid, it must
be rinsed with large quantities of water. If necessary, get medial help.
CAUTION
In the event that an automatic anti-dazzle rear vision mirror breaks, an elec-
trolyte fluid may leak. This liquid attacks plastic surfaces. Clean the liquid
with a wet sponge as soon as possible.
Note
● If the light incident in the interior rear vision mirror is obstructed (e.g.
with the sun blind*), the anti-dazzle rear vision mirror with automatic set-
ting will not operate perfectly.
● When the interior lights are on or reverse gear engaged, the rear vision
mirrors do not darken with automatic adjustment for anti-dazzle position.
Page 126 of 289

125
Seats and storage
Seats and storage General notes
WARNING
The Safe driving chapter contains important information, tips, sugges-
tions and warnings that you should read and observe for your own safety
and the safety of your passengers ⇒ page 7.
Front seats Manual seat adjustment
Fig. 71 Front seats:
manual seat adjustment Adjusting the seat forward/backward: pull the lever and move the seat
forwards or backwards.
Adjusting the lumbar support* : press the button in the corresponding
position.
Backrest lower/raise: turn the hand wheel.
Raise/lower the seat: Pull/push the lever.
WARNING
● Adjust the front seats only when the vehicle is stationary. Failure to
do so could result in an accident.
● Be careful when adjusting the seat height. Careless or uncontrolled
adjustment can cause injuries.
● The front seat backrests must not be reclined for driving. Otherwise,
seat belts and the airbag system might not protect as they should, with
the subsequent danger of injury.
Front centre armrest
The centre armrest can be adjusted to various levels. Adjusting the centre armrest
– To adjust the tilt, lift the armrest from the starting position so
that it is engaged.
– To return the armrest to the starting position, remove the arm-
rest from the upper fixed position and lower it.
The armrest can be moved backwards and forwards.
1
2
34
Safety FirstOperating instructionsPractical TipsTechnical specifications
Page 127 of 289

126Seats and storage
Seat functions
Introduction
Additional information and warnings
● Adjusting the position of the seats ⇒ page 10
● Seat belts ⇒ page 19
● Airbag system ⇒ page 30
● Child seats (accessories) ⇒ page 47
WARNING
Inappropriate use of the seat functions can cause severe injuries.
● Assume the proper sitting position before your trip and remain in it
throughout. This also applies to the other occupants.
● Always keep hands, fingers, feet and other parts of the body away
from the operating radius and the adjustment of seats.
Seat heating
Fig. 72 In the centre
console: front seats heat-
ing switch The seat cushions can be heated electrically when the ignition is switched
on. The backrest is also heated in some versions.
The seat heating should not be engaged in any of the following conditions:
●
The seat is unoccupied.
● The seat has a covering.
● There is a child seat installed in the seat.
● The seat cushion is wet or damp.
● The indoor or outdoor temperature is greater than 25 °C (77 °F).
FunctionUsing seat heatingTo switch sys-
tem on:Press the button or . Seat heating is switched on fully.
Adjusting the
heating out-
put:Press the button or repeatedly until the desired inten-
sity level is reached.
To switch sys-
tem off:Press the button or until all warning lamps switch off.
WARNING
People who, because of medications, paralysis or chronic diseases (e.g.
diabetes) cannot perceive pain or temperature, or have a limited percep-
tion thereof, may suffer burns to the back, buttocks or legs when using
seat heating, an occurrence that may entail a very lengthy recovery peri-
od or from which it may not be possible to recover fully. Seek medical ad-
vice if you have doubts regarding your health.
● People with a limit pain and temperature threshold must never use
seat heating.
Page 128 of 289

127
Seats and storage
WARNING
If the fabric of the cushion is wet, this can adversely affect the operation
of the seat heating, increasing the risk of burns.
● Make sure the seat cushion is dry prior to using the seat heater.
● Do not sit on the seat with clothing that is wet or damp.
● Do not leave clothing that is wet or damp on the seat.
● Do not spill liquid on the seat.
CAUTION
● To avoid damaging the heating elements of the seat heating, please do
not kneel on the seat or apply sharp pressure at a single point to the seat
cushion and backrest.
● Liquids, sharps objects and insulating materials (e.g., covers or child
seats) can damage the seat heating.
● In the event of odours, switch off the seat heating immediately and have
the unit inspected by a specialised workshop.
For the sake of the environment
The seat heating should remain on only when needed. Otherwise, it is an
unnecessary fuel waste. Head restraints
Fig. 73 Front seat: ad-
justment of the head re-
straint
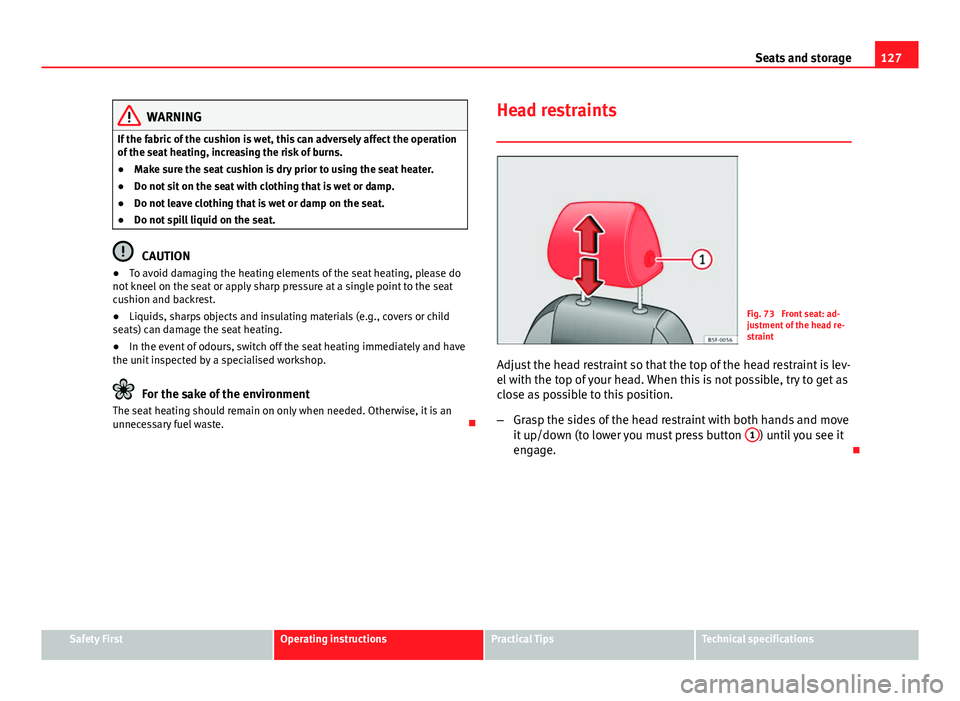
Adjust the head restraint so that the top of the head restraint is lev-
el with the top of your head. When this is not possible, try to get as
close as possible to this position.
– Grasp the sides of the head restraint with both hands and move
it up/down (to lower you must press button 1
) until you see it
engage.
Safety FirstOperating instructionsPractical TipsTechnical specifications