2012 NISSAN 370Z COUPE light
[x] Cancel search: lightPage 137 of 427
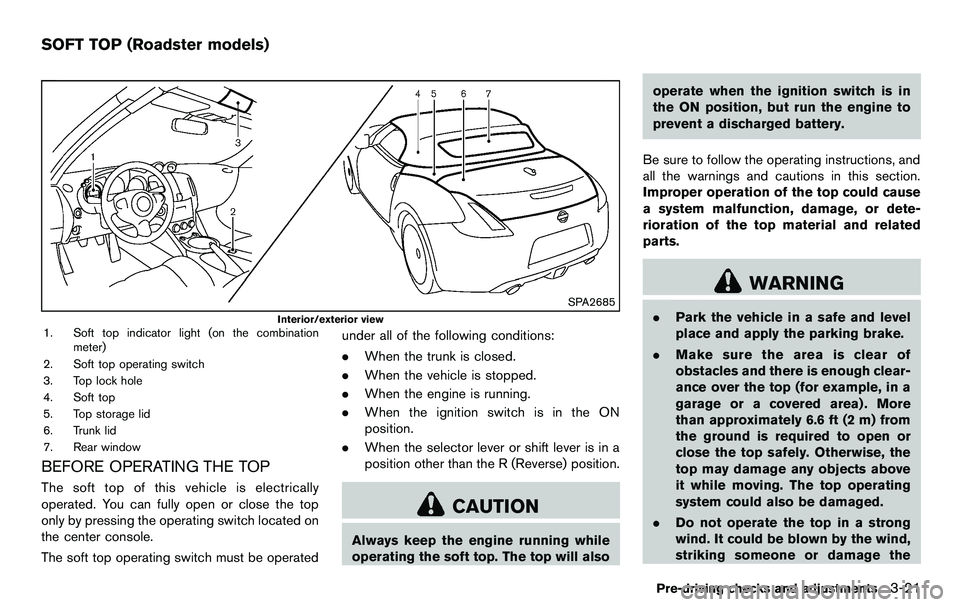
SPA2685
Interior/exterior view1. Soft top indicator light (on the combinationmeter)
2. Soft top operating switch
3. Top lock hole
4. Soft top
5. Top storage lid
6. Trunk lid
7. Rear window
BEFORE OPERATING THE TOP
The soft top of this vehicle is electrically
operated. You can fully open or close the top
only by pressing the operating switch located on
the center console.
The soft top operating switch must be operated under all of the following conditions:
.
When the trunk is closed.
. When the vehicle is stopped.
. When the engine is running.
. When the ignition switch is in the ON
position.
. When the selector lever or shift lever is in a
position other than the R (Reverse) position.
CAUTION
Always keep the engine running while
operating the soft top. The top will also operate when the ignition switch is in
the ON position, but run the engine to
prevent a discharged battery.
Be sure to follow the operating instructions, and
all the warnings and cautions in this section.
Improper operation of the top could cause
a system malfunction, damage, or dete-
rioration of the top material and related
parts.
WARNING
. Park the vehicle in a safe and level
place and apply the parking brake.
. Make sure the area is clear of
obstacles and there is enough clear-
ance over the top (for example, in a
garage or a covered area) . More
than approximately 6.6 ft (2 m) from
the ground is required to open or
close the top safely. Otherwise, the
top may damage any objects above
it while moving. The top operating
system could also be damaged.
. Do not operate the top in a strong
wind. It could be blown by the wind,
striking someone or damage the
Pre-driving checks and adjustments3-21
SOFT TOP (Roadster models)
Page 140 of 427
3-24Pre-driving checks and adjustments
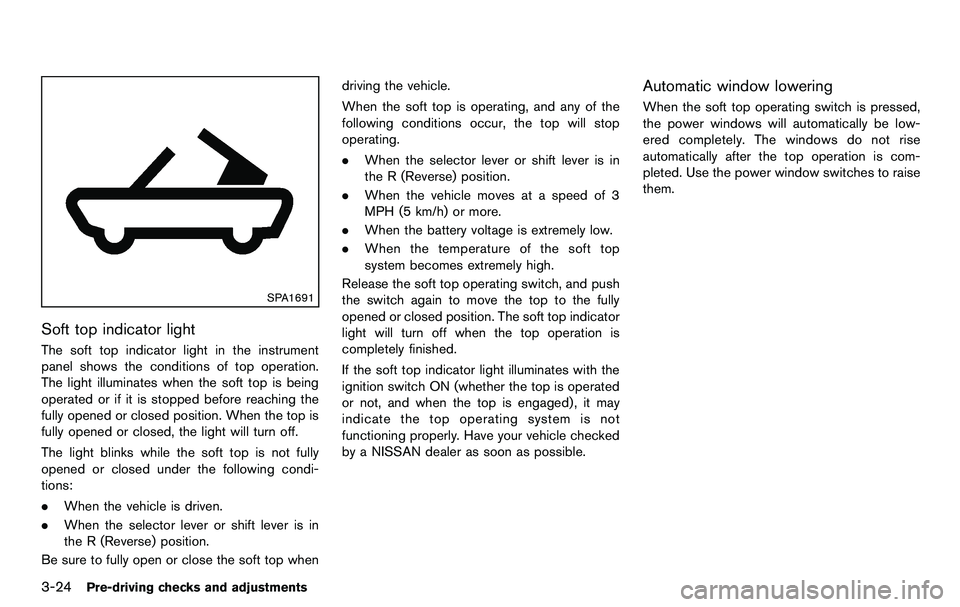
SPA1691
Soft top indicator light
The soft top indicator light in the instrument
panel shows the conditions of top operation.
The light illuminates when the soft top is being
operated or if it is stopped before reaching the
fully opened or closed position. When the top is
fully opened or closed, the light will turn off.
The light blinks while the soft top is not fully
opened or closed under the following condi-
tions:
.When the vehicle is driven.
. When the selector lever or shift lever is in
the R (Reverse) position.
Be sure to fully open or close the soft top when driving the vehicle.
When the soft top is operating, and any of the
following conditions occur, the top will stop
operating.
.
When the selector lever or shift lever is in
the R (Reverse) position.
. When the vehicle moves at a speed of 3
MPH (5 km/h) or more.
. When the battery voltage is extremely low.
. When the temperature of the soft top
system becomes extremely high.
Release the soft top operating switch, and push
the switch again to move the top to the fully
opened or closed position. The soft top indicator
light will turn off when the top operation is
completely finished.
If the soft top indicator light illuminates with the
ignition switch ON (whether the top is operated
or not, and when the top is engaged) , it may
indicate the top operating system is not
functioning properly. Have your vehicle checked
by a NISSAN dealer as soon as possible.
Automatic window lowering
When the soft top operating switch is pressed,
the power windows will automatically be low-
ered completely. The windows do not rise
automatically after the top operation is com-
pleted. Use the power window switches to raise
them.
Page 141 of 427
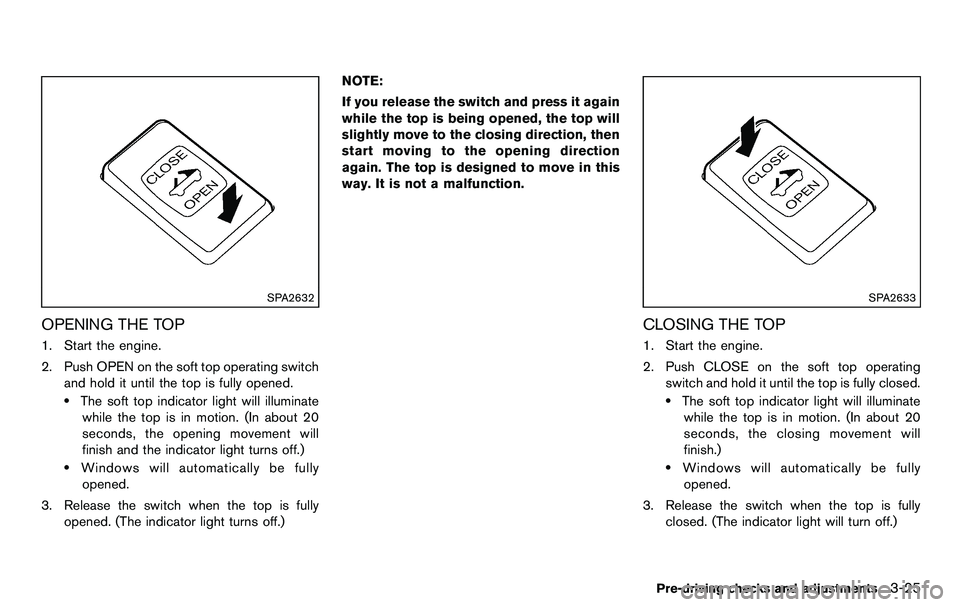
SPA2632
OPENING THE TOP
1. Start the engine.
2. Push OPEN on the soft top operating switchand hold it until the top is fully opened.
.The soft top indicator light will illuminatewhile the top is in motion. (In about 20
seconds, the opening movement will
finish and the indicator light turns off.)
.Windows will automatically be fullyopened.
3. Release the switch when the top is fully opened. (The indicator light turns off.) NOTE:
If you release the switch and press it again
while the top is being opened, the top will
slightly move to the closing direction, then
start moving to the opening direction
again. The top is designed to move in this
way. It is not a malfunction.
SPA2633
CLOSING THE TOP
1. Start the engine.
2. Push CLOSE on the soft top operating
switch and hold it until the top is fully closed.
.The soft top indicator light will illuminatewhile the top is in motion. (In about 20
seconds, the closing movement will
finish.)
.Windows will automatically be fullyopened.
3. Release the switch when the top is fully closed. (The indicator light will turn off.)
Pre-driving checks and adjustments3-25
Page 148 of 427
3-32Pre-driving checks and adjustments
locked completely, and this may
allow wind and rain to get into your
vehicle.
CARE OF THE SOFT TOP AND THE
VEHICLE BODY
To use your Roadster safely and comfortably,
you need to observe all the warnings and
cautions shown in the previous pages. Also, to
maintain a good appearance of the soft top and
the vehicle body, you need to care for them by
cleaning and/or washing properly.
CAUTION
.Do not use an automatic car wash or
a high-pressure car wash to clean
your vehicle. The top may be da-
maged and water may leak into the
inside of the vehicle.
. Store the vehicle with the top closed
if it is not to be used for long
periods. Keeping the top stowed
for long periods may cause wrinkles
on the surface of the top.
See “Cleaning exterior” (P.7-2) for detailed
instructions. .
A protective clear tape is applied to the top
storage lid painted surface where the soft
top contacts the surface. When the top is
fully closed, the tape may transmit some
light, visible from the inside of the vehicle.
This does not affect the water and air
tightness of the seal.
. The inner surface of the trunk and top
storage lids may show a fibrous, or marbled
pattern. This is the normal appearance of the
material used in these parts.
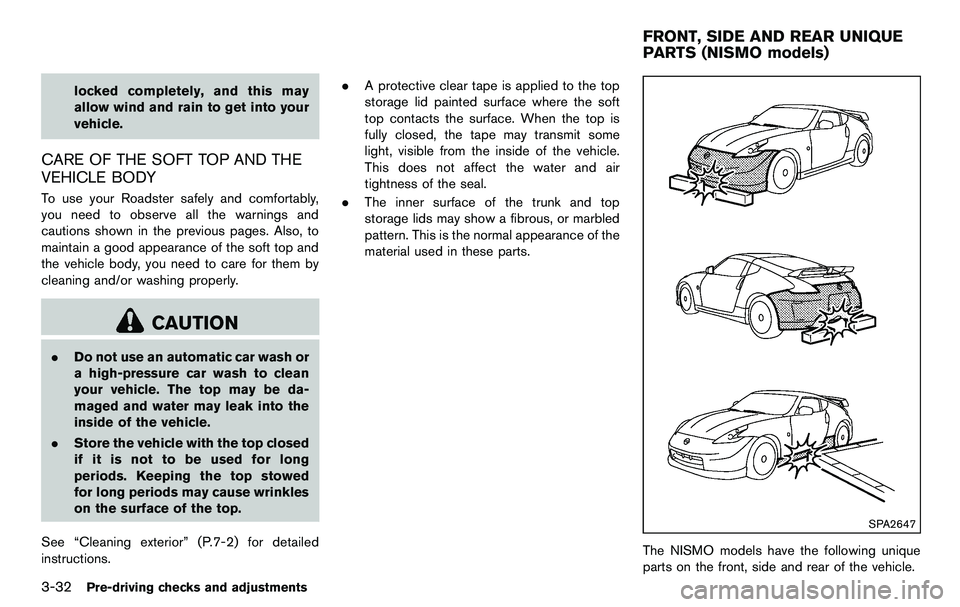
SPA2647
The NISMO models have the following unique
parts on the front, side and rear of the vehicle.
FRONT, SIDE AND REAR UNIQUE
PARTS (NISMO models)
Page 150 of 427
3-34Pre-driving checks and adjustments
SPA2581
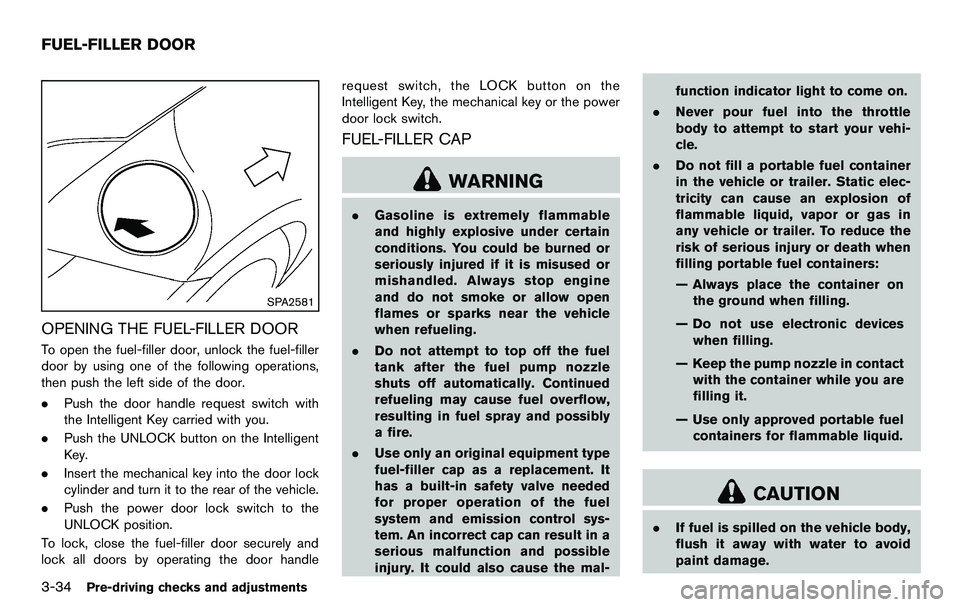
OPENING THE FUEL-FILLER DOOR
To open the fuel-filler door, unlock the fuel-filler
door by using one of the following operations,
then push the left side of the door.
.Push the door handle request switch with
the Intelligent Key carried with you.
. Push the UNLOCK button on the Intelligent
Key.
. Insert the mechanical key into the door lock
cylinder and turn it to the rear of the vehicle.
. Push the power door lock switch to the
UNLOCK position.
To lock, close the fuel-filler door securely and
lock all doors by operating the door handle request switch, the LOCK button on the
Intelligent Key, the mechanical key or the power
door lock switch.
FUEL-FILLER CAP
WARNING
.
Gasoline is extremely flammable
and highly explosive under certain
conditions. You could be burned or
seriously injured if it is misused or
mishandled. Always stop engine
and do not smoke or allow open
flames or sparks near the vehicle
when refueling.
. Do not attempt to top off the fuel
tank after the fuel pump nozzle
shuts off automatically. Continued
refueling may cause fuel overflow,
resulting in fuel spray and possibly
a fire.
. Use only an original equipment type
fuel-filler cap as a replacement. It
has a built-in safety valve needed
for proper operation of the fuel
system and emission control sys-
tem. An incorrect cap can result in a
serious malfunction and possible
injury. It could also cause the mal- function indicator light to come on.
. Never pour fuel into the throttle
body to attempt to start your vehi-
cle.
. Do not fill a portable fuel container
in the vehicle or trailer. Static elec-
tricity can cause an explosion of
flammable liquid, vapor or gas in
any vehicle or trailer. To reduce the
risk of serious injury or death when
filling portable fuel containers:
— Always place the container on
the ground when filling.
— Do not use electronic devices when filling.
— Keep the pump nozzle in contact with the container while you are
filling it.
— Use only approved portable fuel containers for flammable liquid.
CAUTION
. If fuel is spilled on the vehicle body,
flush it away with water to avoid
paint damage.
FUEL-FILLER DOOR
Page 151 of 427
.Insert the cap straight into the fuel-
filler tube, then tighten until the
fuel-filler cap clicks. Failure to tight-
en the fuel-filler cap properly may
cause the
malfunction indicator
light (MIL) to illuminate. If the
light illuminates because the fuel-
filler cap is loose or missing, tighten
or install the cap and continue to
drive the vehicle. The
light
should turn off after a few driving
trips. If the
light does not turn
off after a few driving trips, have the
vehicle inspected by a NISSAN deal-
er.
. The LOOSE FUEL CAP warning will
appear if the fuel-filler cap is not
properly tightened. It may take a few
driving trips for the message to be
displayed. Failure to tighten the
fuel-filler cap properly after the
LOOSE FUEL CAP warning appears
may cause the
Malfunction
Indicator Light (MIL) to illuminate.
SPA2837
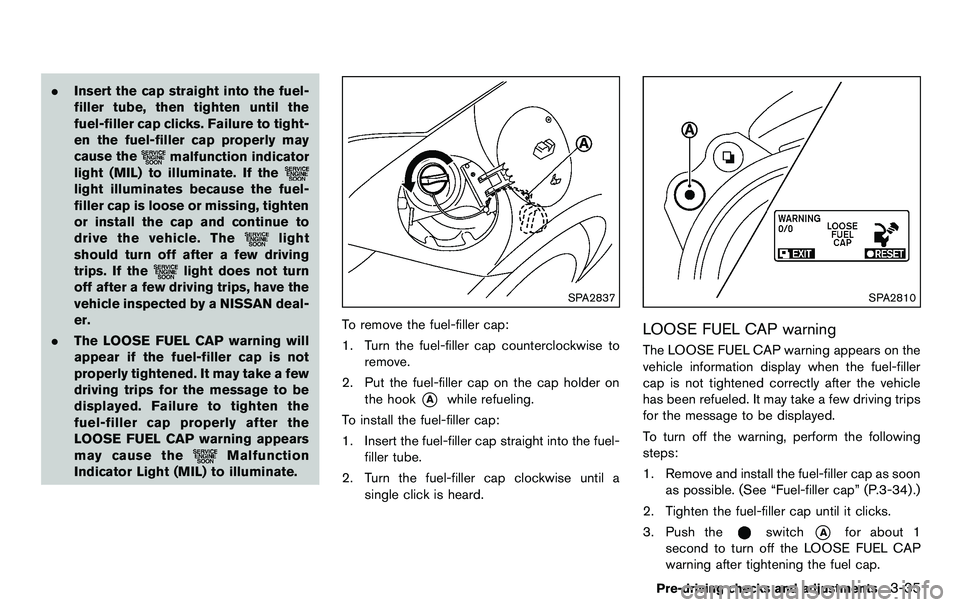
To remove the fuel-filler cap:
1. Turn the fuel-filler cap counterclockwise to remove.
2. Put the fuel-filler cap on the cap holder on the hook
*Awhile refueling.
To install the fuel-filler cap:
1. Insert the fuel-filler cap straight into the fuel- filler tube.
2. Turn the fuel-filler cap clockwise until a single click is heard.
SPA2810
LOOSE FUEL CAP warning
The LOOSE FUEL CAP warning appears on the
vehicle information display when the fuel-filler
cap is not tightened correctly after the vehicle
has been refueled. It may take a few driving trips
for the message to be displayed.
To turn off the warning, perform the following
steps:
1. Remove and install the fuel-filler cap as soonas possible. (See “Fuel-filler cap” (P.3-34) .)
2. Tighten the fuel-filler cap until it clicks.
3. Push the
switch*Afor about 1
second to turn off the LOOSE FUEL CAP
warning after tightening the fuel cap.
Pre-driving checks and adjustments3-35
Page 153 of 427

SPA2447
INSIDE MIRROR
Adjust the height and the angle of the inside
mirror to the desired position.
SPA2143
Manual anti-glare type
The night position*1will reduce glare from the
headlights of vehicles behind you at night.
Use the day position
*2when driving in daylight
hours.
WARNING
Use the night position only when ne-
cessary, because it reduces rear view
clarity.
SPA2450
Automatic anti-glare type
The inside mirror is designed so that it
automatically changes reflection according to
the intensity of the headlights of the following
vehicle.
The anti-glare system will be automatically
turned on when the ignition switch is pushed
to the ON position.
When the anti-glare system is turned on, the
indicator light
*Awill illuminate and excessive
glare from the headlights of the vehicle behind
you will be reduced.
Push the “*” switch
*Cto make the inside
rearview mirror operate normally. The indicator
Pre-driving checks and adjustments3-37
MIRRORS
Page 154 of 427

3-38Pre-driving checks and adjustments
light will turn off. Push the “I” switch*Dto turn
the system on.
Do not allow any object to cover the
sensors
*Eor apply glass cleaner on
them. Doing so will reduce the sensitivity
of the sensor, resulting in improper opera-
tion.
For the HomeLink
®Universal Transceiver opera-
tion, see “HomeLink®Universal Transceiver”
(P.2-49) .
OUTSIDE MIRRORS
WARNING
Objects viewed in the outside mirror on
the passenger side are closer than they
appear. Be careful when moving to the
right. Using only this mirror could cause
an accident. Use the inside mirror or
glance over your shoulder to properly
judge distances to other objects.
SPA2319
Adjusting outside mirrors
The outside mirror control switch is located on
the armrest.
The outside mirror will operate only when the
ignition switch is in the ACC or ON position.
Turn the switch right or left to select the right or
left side mirror
*1, then adjust using the control
switch
*2.
Defrosting outside mirrors
The outside mirrors will be heated when the rear
window defroster switch is operated.