2012 NISSAN 370Z COUPE interior lights
[x] Cancel search: interior lightsPage 65 of 427
2 Instruments and controls
Cockpit ........................................................................\
................ 2-3
Instrument panel ........................................................................\
2-4
Meters and gauges ................................................................... 2-5
Speedometer and odometer ............................................ 2-6
Tachometer ........................................................................\
... 2-6
Engine coolant temperature gauge ................................ 2-7
Fuel gauge ........................................................................\
.... 2-7
Triple meter ........................................................................\
... 2-8
Warning/indicator lights and audible reminders ............... 2-9 Checking bulbs ................................................................. 2-10
Warning lights ................................................................... 2-10
Indicator lights ................................................................... 2-14
Audible reminders ............................................................ 2-16
Vehicle information display .................................................. 2-17 Operational indicators ..................................................... 2-18
Warnings and alerts ........................................................ 2-20
Maintenance indicators ................................................... 2-21
Trip computer .................................................................... 2-22
Security systems .................................................................... 2-27 Vehicle Security System ................................................. 2-27
NISSAN Vehicle Immobilizer System .......................... 2-28
Windshield wiper and washer switch ............................... 2-29
Rear window defroster switch ............................................ 2-31
Headlight and turn signal switch ....................................... 2-31 Xenon headlights .............................................................. 2-31 Headlight switch ............................................................ 2-32
Turn signal switch .......................................................... 2-35
Fog light switch (if so equipped) .............................. 2-35
Hazard warning flasher switch ........................................... 2-35
Horn ........................................................................\
.................. 2-36
Heated seats (if so equipped) ........................................... 2-36
Climate controlled seats (if so equipped) ...................... 2-38
Vehicle Dynamic Control (VDC) OFF switch ................. 2-39
Power outlet ........................................................................\
.... 2-39
Storage ........................................................................\
............ 2-40
Instrument pocket (except for navigation system
equipped models) .......................................................... 2-40
Cup holders ..................................................................... 2-40
Glove box ........................................................................\
. 2-41
Console box .................................................................... 2-42
Rear parcel box .............................................................. 2-42
Cargo cover (if so equipped) ..................................... 2-43
Windows ........................................................................\
......... 2-44 Power windows .............................................................. 2-44
Interior lights ........................................................................\
... 2-46
Map lights ........................................................................\
2-46
Interior light control switch .......................................... 2-47
Vanity mirror lights ................................................................. 2-48
Cargo area courtesy light (Roadster models) ............... 2-48
Cargo light (Coupe models) .............................................. 2-48>
Page 110 of 427
2-46Instruments and controls
Automatic window lowering (Roadster
models)
When the soft top operating switch is pressed,
the power windows will automatically be low-
ered completely. The windows do not rise
automatically after the soft top open/close
operation is completed. Use the power window
switches to raise them.
Automatic adjusting function
CAUTION
When the battery cable is removed from
the battery terminal, do not close either
of the front doors. The automatic win-
dow adjusting function will not work
and the side roof panel may be da-
maged.
The power window has an automatic adjusting
function. When the door is being opened, the
window is automatically lowered slightly to avoid
contact between the window and the side roof
panel. When the door is closed, the window is
automatically raised slightly.
While the automatic adjusting function does not
work, the window will be controlled as follows: .
When the door is opened, the window
lowers for approximately 2 seconds.
. While the door is open, the window cannot
be raised.
If the windows do not close automatically
If the power window automatic function (closing
only) does not operate properly, perform the
following procedure to initialize the power
window system.
1. Push the ignition switch to the ON position.
2. Close the door and soft top (Roadster
models) .
3. Open the window completely by operating the power window switch.
4. Pull the power window switch and hold it to close the window, and then hold the switch
more than 3 seconds after the window is
closed completely.
5. Release the power window switch. Operate the window by the automatic function to
confirm the initialization is complete.
6. Perform steps 2 through 5 above for other windows.
If the power window automatic function does
not operate properly after performing the pro-
cedure above, have your vehicle checked by a
NISSAN dealer.
SIC4238
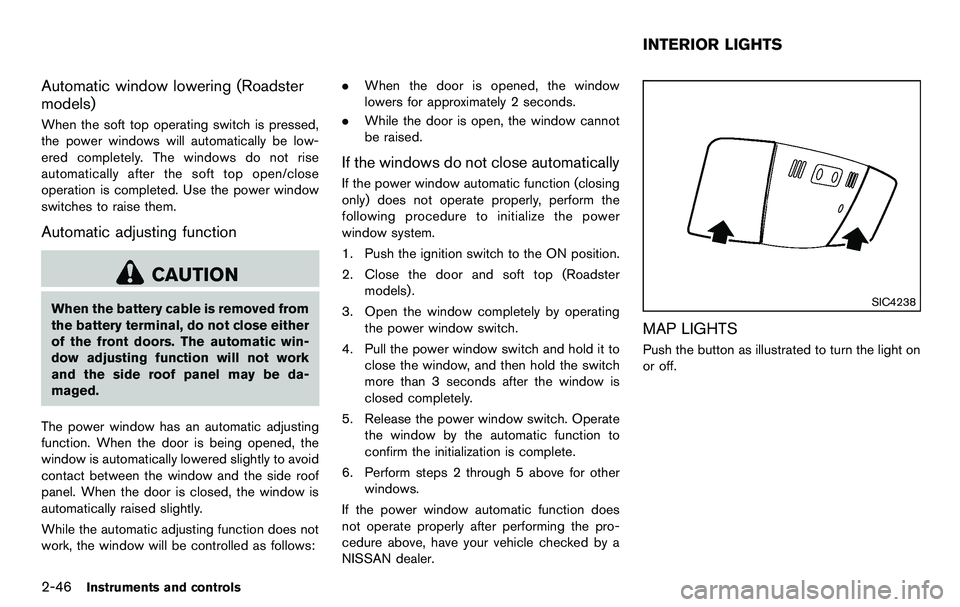
MAP LIGHTS
Push the button as illustrated to turn the light on
or off.
INTERIOR LIGHTS
Page 111 of 427
SIC4239
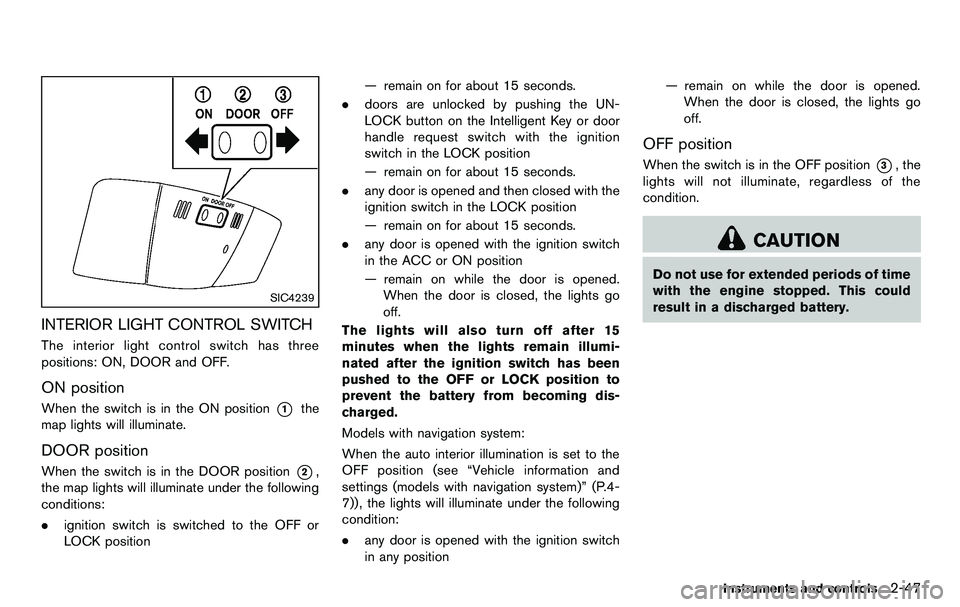
INTERIOR LIGHT CONTROL SWITCH
The interior light control switch has three
positions: ON, DOOR and OFF.
ON position
When the switch is in the ON position*1the
map lights will illuminate.
DOOR position
When the switch is in the DOOR position*2,
the map lights will illuminate under the following
conditions:
. ignition switch is switched to the OFF or
LOCK position — remain on for about 15 seconds.
. doors are unlocked by pushing the UN-
LOCK button on the Intelligent Key or door
handle request switch with the ignition
switch in the LOCK position
— remain on for about 15 seconds.
. any door is opened and then closed with the
ignition switch in the LOCK position
— remain on for about 15 seconds.
. any door is opened with the ignition switch
in the ACC or ON position
— remain on while the door is opened.
When the door is closed, the lights go
off.
The lights will also turn off after 15
minutes when the lights remain illumi-
nated after the ignition switch has been
pushed to the OFF or LOCK position to
prevent the battery from becoming dis-
charged.
Models with navigation system:
When the auto interior illumination is set to the
OFF position (see “Vehicle information and
settings (models with navigation system)” (P.4-
7)), the lights will illuminate under the following
condition:
. any door is opened with the ignition switch
in any position — remain on while the door is opened.
When the door is closed, the lights go
off.
OFF position
When the switch is in the OFF position*3, the
lights will not illuminate, regardless of the
condition.
CAUTION
Do not use for extended periods of time
with the engine stopped. This could
result in a discharged battery.
Instruments and controls2-47
Page 112 of 427
2-48Instruments and controls
SIC3869
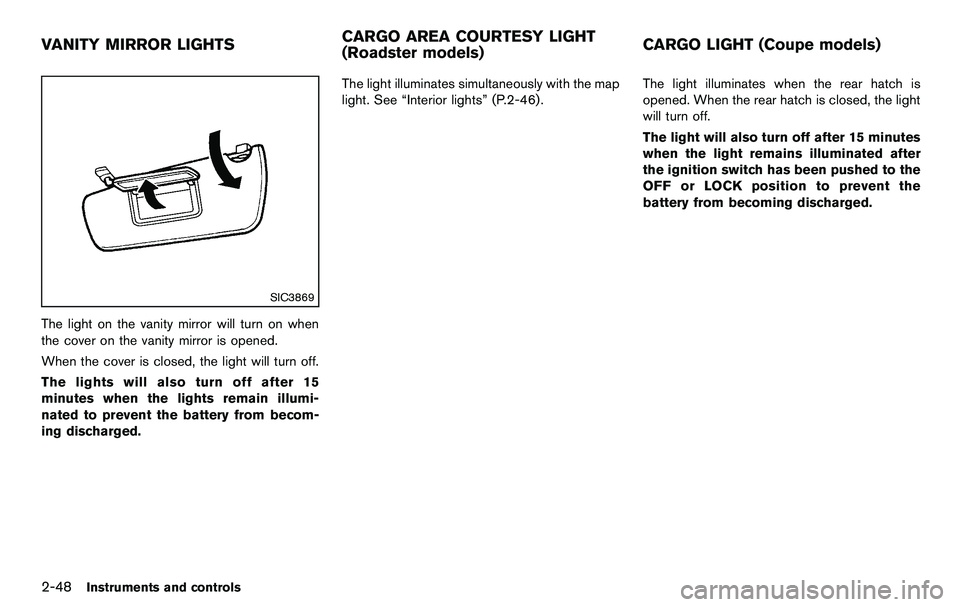
The light on the vanity mirror will turn on when
the cover on the vanity mirror is opened.
When the cover is closed, the light will turn off.
The lights will also turn off after 15
minutes when the lights remain illumi-
nated to prevent the battery from becom-
ing discharged.The light illuminates simultaneously with the map
light. See “Interior lights” (P.2-46).
The light illuminates when the rear hatch is
opened. When the rear hatch is closed, the light
will turn off.
The light will also turn off after 15 minutes
when the light remains illuminated after
the ignition switch has been pushed to the
OFF or LOCK position to prevent the
battery from becoming discharged.
VANITY MIRROR LIGHTS
CARGO AREA COURTESY LIGHT
(Roadster models)CARGO LIGHT (Coupe models)
Page 170 of 427
4-14Center display, heater, air conditioner, audio, phone and voice recognition systems
system.
Clock Format (24h):
When this item is turned to ON, the 24-hour
clock is displayed. When this item is not turned
to ON, the 12-hour clock is displayed.
Offset (hour)/(min):
Adjust the time by increasing or decreasing per
hour or per minute.
Daylight Saving Time:
Turn this item to ON for daylight saving time
application.
Time Zone:
Choose the time zone from the following
.Pacific
. Mountain
. Central
. Eastern
. Atlantic
. Newfoundland
. Hawaii
. Alaska
SAA2489
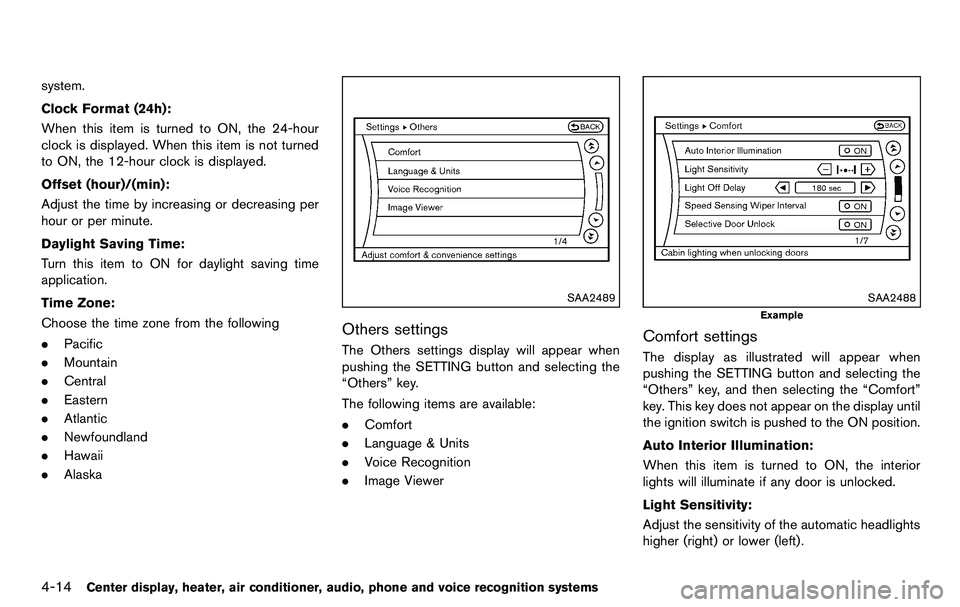
Others settings
The Others settings display will appear when
pushing the SETTING button and selecting the
“Others” key.
The following items are available:
.Comfort
. Language & Units
. Voice Recognition
. Image Viewer
SAA2488
Example
Comfort settings
The display as illustrated will appear when
pushing the SETTING button and selecting the
“Others” key, and then selecting the “Comfort”
key. This key does not appear on the display until
the ignition switch is pushed to the ON position.
Auto Interior Illumination:
When this item is turned to ON, the interior
lights will illuminate if any door is unlocked.
Light Sensitivity:
Adjust the sensitivity of the automatic headlights
higher (right) or lower (left).
Page 185 of 427
.Do not set the temperature lower than the
outside air temperature. Otherwise the
system may not work properly.
. Not recommended if windows fog up.
Dehumidified defrosting or defogging:
1. Push the “
” front defroster button. (The
indicator light on the button will come on.)
2. Turn the temperature control dial to set the desired temperature.
. To quickly remove ice from the outside of the
windows, turn the “
” fan speed control
dial and set it to the maximum position.
. As soon as possible after the windshield is
clean, push the “AUTO” button to return to
the auto mode.
. When the “
” front defroster button is
pushed, the air conditioner will automatically
be turned on at outside temperatures above
238F( −58C) to defog the windshield, and
the air recirculate mode will automatically be
turned off.
Outside air is drawn into the passenger
compartment to improve the defogging
performance.
Manual operation
Fan speed control:
Turn the “
” fan speed control dial to
manually control the fan speed.
Push the “AUTO” button to return to automatic
control of the fan speed.
Air recirculation:
Push the “
” intake air control button to
recirculate interior air inside the vehicle. The
indicator light “
” will come on.
The air recirculation mode cannot be activated
when the air conditioner is in the front defrosting
mode “
”.
Outside air circulation:
Push the “
” intake air control button to
change the air circulation from the intake air to
the outside air. The indicator light “
” will turn
off.
Automatic air intake control:
In the AUTO mode, the intake air will be
controlled automatically. To manually control
the intake air, push the “
” intake air control
button. To return to the automatic control mode,
push the “
” intake air control button for
approximately 2 seconds. The indicator lights
will flash twice, and then the intake air will be
controlled automatically. Air flow control:
Pushing the “MODE” manual air flow control
button selects the air outlet to:
: Air flows from center and side ventilators.
: Air flows from center and side ventilators and foot outlets.
: Air flows mainly from foot outlets.
: Air flows from defroster and foot outlets.
To turn the system off
Push the “OFF” button.
Center display, heater, air conditioner, audio, phone and voice recognition systems4-29
Page 353 of 427
8 Maintenance and do-it-yourself
Maintenance requirement ........................................................ 8-3Scheduled maintenance .................................................... 8-3
General maintenance ......................................................... 8-3
Where to go for service .................................................... 8-3
General maintenance ............................................................... 8-3 Explanation of maintenance items ................................... 8-3
Maintenance precautions ........................................................ 8-6
Engine compartment check locations .................................. 8-8 VQ37VHR engine model .................................................. 8-8
Engine cooling system ............................................................. 8-9
Checking engine coolant level ...................................... 8-10
Changing engine coolant ............................................... 8-10
Engine oil ........................................................................\
......... 8-11
Checking engine oil level ............................................... 8-11
Changing engine oil and filter ....................................... 8-11
Automatic transmission fluid ............................................... 8-13
Power steering fluid ............................................................... 8-13
Brake and clutch fluid ........................................................... 8-14 Brake fluid ........................................................................\
.. 8-14
Clutch fluid (Manual transmission models) ............... 8-15
Window washer fluid ............................................................ 8-15
Battery ........................................................................\
............... 8-16 Jump starting ..................................................................... 8-17 Variable voltage control system ......................................... 8-18
Drive belts ........................................................................\
....... 8-18
Spark plugs ........................................................................\
..... 8-19
Replacing spark plugs .................................................. 8-19
Air cleaner ........................................................................\
....... 8-19
Windshield wiper blades ..................................................... 8-20
Cleaning ........................................................................\
... 8-20
Replacing ........................................................................\
. 8-21
Brakes ........................................................................\
.............. 8-22 Self-adjusting brakes .................................................... 8-22
Brake pad wear warning .............................................. 8-22
Fuses ........................................................................\
................ 8-22 Engine compartment ..................................................... 8-22
Passenger compartment .............................................. 8-24
Intelligent Key battery replacement ................................... 8-25
Lights ........................................................................\
................ 8-27
Coupe ........................................................................\
....... 8-27
Roadster ........................................................................\
... 8-28
Headlights ........................................................................\
8-29
Exterior and interior lights ............................................ 8-29
Wheels and tires ................................................................... 8-31 Tire pressure ................................................................... 8-31
Tire labeling ..................................................................... 8-34
Page 381 of 427
HEADLIGHTS
Fog may temporarily form inside the lens of the
exterior lights in the rain or in a car wash. A
temperature difference between the inside and
the outside of the lens causes the fog. This is
not a malfunction. If large drops of water collect
inside the lens, contact a NISSAN dealer.
Replacing
WARNING
HIGH VOLTAGE
When xenon headlights are on, they
produce a high voltage. To prevent an
electric shock, never attempt to modify
or disassemble. Always have your xe-
non headlights replaced at a NISSAN
dealer. For additional information, see
“Headlight and turn signal switch” (P.2-
31) .
Use the same number and wattage shown in the
following chart as originally installed.
If replacement is required, see a NISSAN dealer.
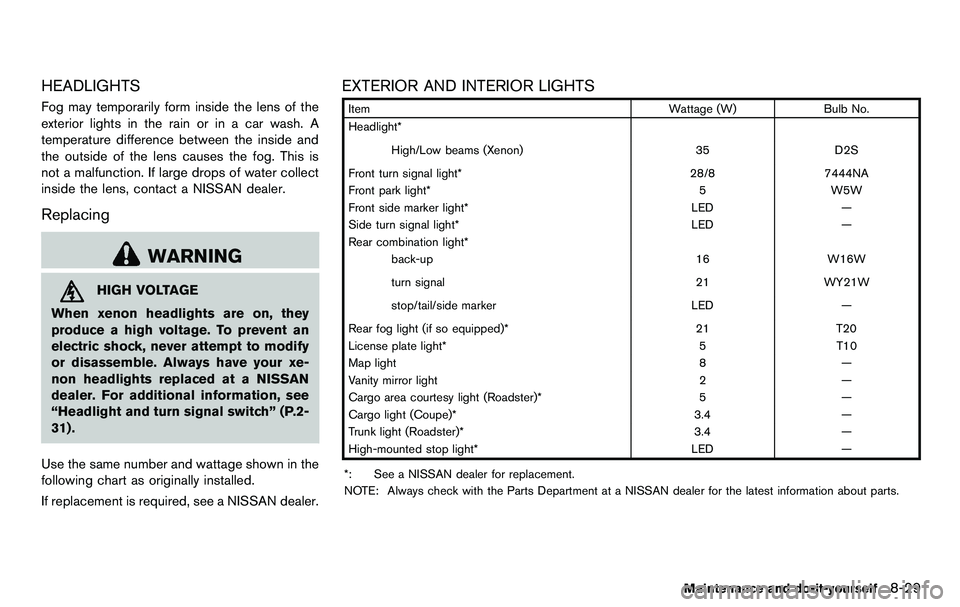
EXTERIOR AND INTERIOR LIGHTS
Item Wattage (W)Bulb No.
Headlight*
High/Low beams (Xenon) 35D2S
Front turn signal light* 28/87444NA
Front park light* 5W5W
Front side marker light* LED—
Side turn signal light* LED—
Rear combination light* back-up 16W16W
turn signal 21WY21W
stop/tail/side marker LED—
Rear fog light (if so equipped)* 21T20
License plate light* 5T10
Map light 8—
Vanity mirror light 2—
Cargo area courtesy light (Roadster)* 5—
Cargo light (Coupe)* 3.4—
Trunk light (Roadster)* 3.4—
High-mounted stop light* LED—
*: See a NISSAN dealer for replacement.
NOTE: Always check with the Parts Department at a NISSAN dealer for the latest information about parts.
Maintenance and do-it-yourself8-29