2012 MERCEDES-BENZ SLS AMG COUPE key
[x] Cancel search: keyPage 248 of 288

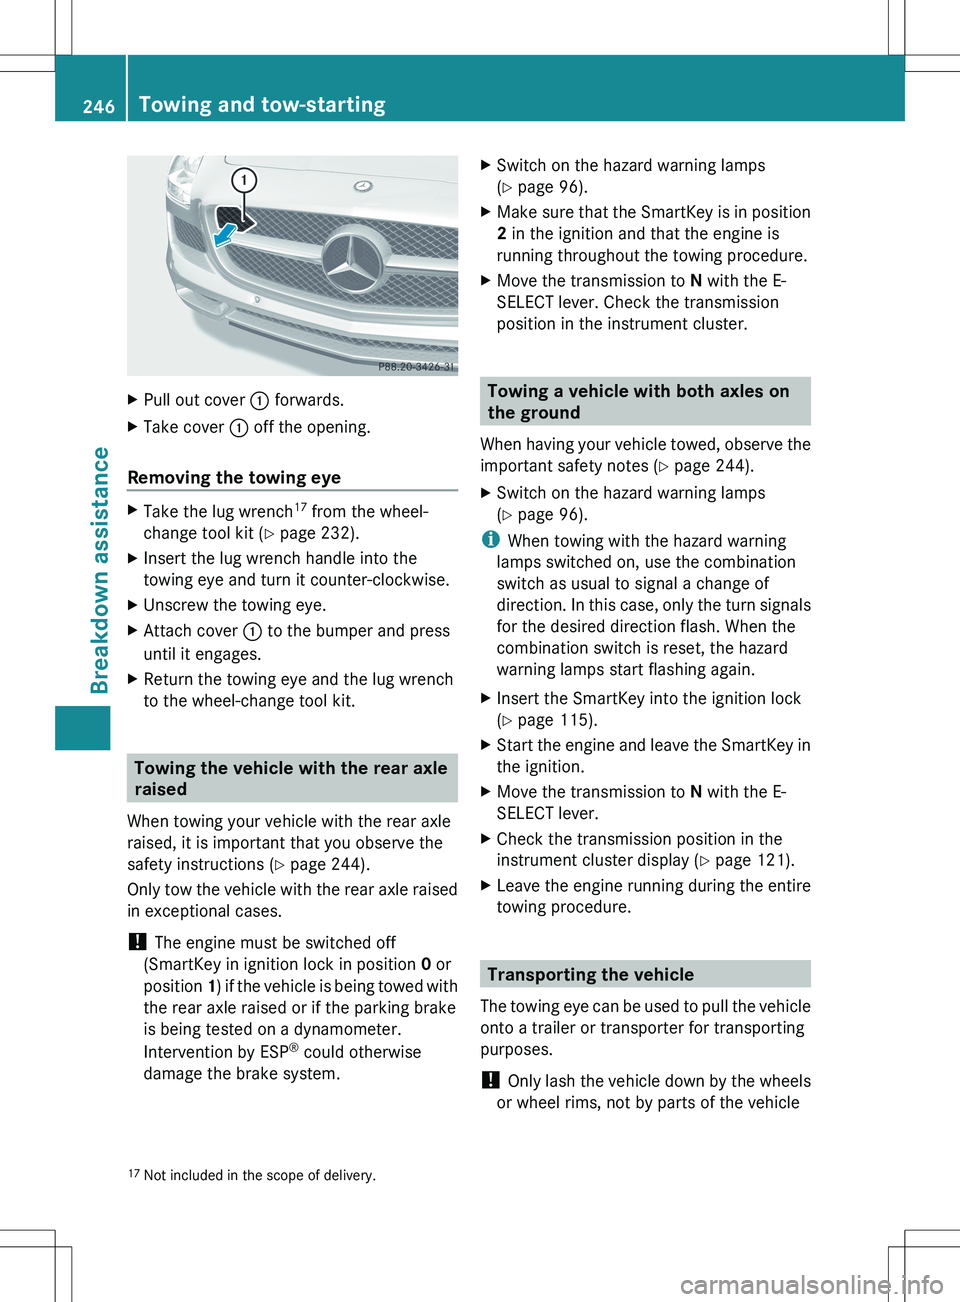
XPull out cover : forwards.XTake cover : off the opening.
Removing the towing eye
XTake the lug wrench 17
from the wheel-
change tool kit ( Y page 232).XInsert the lug wrench handle into the
towing eye and turn it counter-clockwise.XUnscrew the towing eye.XAttach cover : to the bumper and press
until it engages.XReturn the towing eye and the lug wrench
to the wheel-change tool kit.
Towing the vehicle with the rear axle
raised
When towing your vehicle with the rear axle
raised, it is important that you observe the
safety instructions ( Y page 244).
Only tow the vehicle with the rear axle raised
in exceptional cases.
! The engine must be switched off
(SmartKey in ignition lock in position 0 or
position 1) if the vehicle is being towed with
the rear axle raised or if the parking brake
is being tested on a dynamometer.
Intervention by ESP ®
could otherwise
damage the brake system.
XSwitch on the hazard warning lamps
( Y page 96).XMake sure that the SmartKey is in position
2 in the ignition and that the engine is
running throughout the towing procedure.XMove the transmission to N with the E-
SELECT lever. Check the transmission
position in the instrument cluster.
Towing a vehicle with both axles on
the ground
When having your vehicle towed, observe the
important safety notes ( Y page 244).
XSwitch on the hazard warning lamps
( Y page 96).
i
When towing with the hazard warning
lamps switched on, use the combination
switch as usual to signal a change of
direction. In this case, only the turn signals
for the desired direction flash. When the
combination switch is reset, the hazard
warning lamps start flashing again.
XInsert the SmartKey into the ignition lock
( Y page 115).XStart the engine and leave the SmartKey in
the ignition.XMove the transmission to N with the E-
SELECT lever.XCheck the transmission position in the
instrument cluster display ( Y page 121).XLeave the engine running during the entire
towing procedure.
Transporting the vehicle
The towing eye can be used to pull the vehicle
onto a trailer or transporter for transporting
purposes.
! Only lash the vehicle down by the wheels
or wheel rims, not by parts of the vehicle
17 Not included in the scope of delivery.246Towing and tow-startingBreakdown assistance
Page 249 of 288

such as axle or steering components.
Otherwise, the vehicle could be damaged.XStart the engine.XMake sure that the SmartKey is in position
2 in the ignition and that the engine is
running during the entire loading operation.XMove the transmission to N with the E-
SELECT lever. Check the transmission
position in the instrument cluster.
As soon as the vehicle is loaded:
XPrevent the vehicle from rolling away by
applying the electric parking brake.XShift the transmission to P with the button
in the center console.XTurn the SmartKey to position 0 in the
ignition lock and remove the SmartKey
from the ignition lock.XSecure the vehicle.
Fuses
Important safety notes
GWARNING
Only use fuses approved by Mercedes-Benz
with the specified amperage for the system in
question and do not attempt to repair or
bridge a blown fuse. Using other than
approved fuses or using repaired or bridged
fuses may cause an overload leading to a fire,
and/or cause damage to electrical
components and/or systems. Have the cause
determined and remedied by an authorized
Mercedes-Benz Center.
! Only use fuses that have been approved
for Mercedes-Benz vehicles and which
have the correct fuse rating for the system
concerned. Otherwise, components or
systems could be damaged.
The fuses in your vehicle serve to close down
faulty circuits. If a fuse blows, all the
components on the circuit and their functions
stop operating.
Blown fuses must be replaced with fuses of
the same rating, which you can recognize by
the color and value. The fuse ratings are listed
in the fuse allocation chart. An authorized
Mercedes-Benz Center will be happy to
advise you.
i If a fuse has blown, contact a breakdown
service or an authorized Mercedes-Benz
Center.
If the newly inserted fuse also blows, have the
cause traced and rectified at a qualified
specialist workshop, e.g. an authorized
Mercedes-Benz Center.
Before changing a fuse
XPark the vehicle and apply the electric
parking brake.XSwitch off all electrical consumers.XRemove the SmartKey from the ignition
lock.
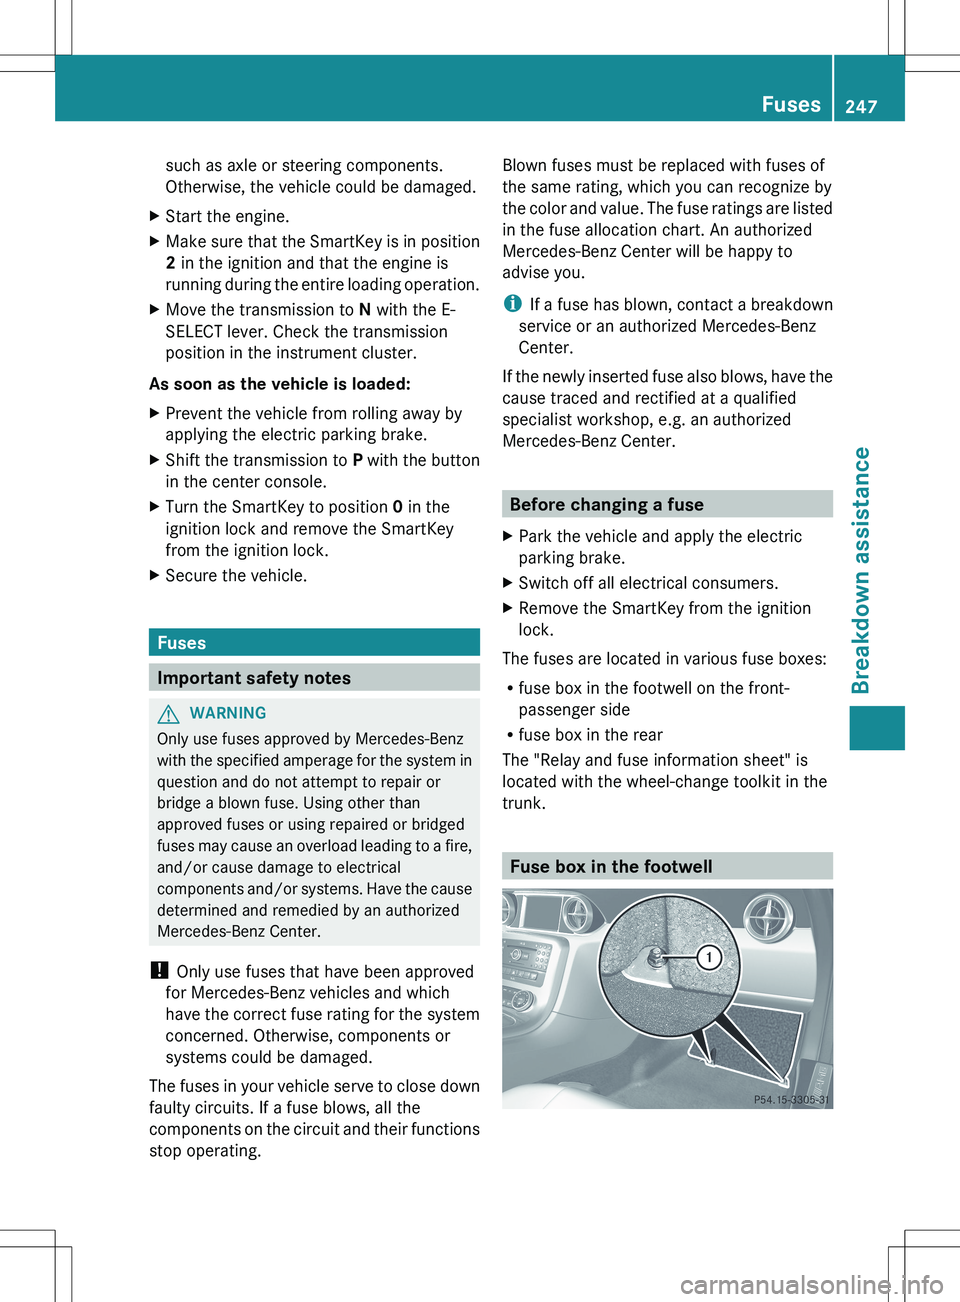
The fuses are located in various fuse boxes:
R fuse box in the footwell on the front-
passenger side
R fuse box in the rear
The "Relay and fuse information sheet" is
located with the wheel-change toolkit in the
trunk.
Fuse box in the footwell
Fuses247Breakdown assistanceZ
Page 260 of 288

iUSA only:
If the tire pressure monitor is
malfunctioning, it may take more than
10 minutes for the tire pressure warning
lamp to inform you of the malfunction by
flashing for 60 seconds and then remaining
lit.
When the malfunction has been rectified,
the tire pressure warning lamp goes out
after a few minutes of driving.
Information on tire pressures is displayed in
the multifunction display. After a few minutes
of driving, the current tire pressure of each
tire is shown in the multifunction display.
i The tire pressure values indicated by the
on-board computer may differ from those
measured at a gas station with a pressure
gauge. The tire pressures shown by the on-
board computer refer to those measured at
sea level. At high altitudes, the tire pressure
values indicated by a pressure gauge are
higher than those shown by the on-board
computer. In this case, do not reduce the
tire pressures.
i The operation of the tire pressure monitor
can be affected by interference from radio
transmitting equipment (e.g. radio
headphones, two-way radios) that may be
being operated in or near the vehicle.
i USA only:
This device complies with Part 15 of the
FCC Rules. Operation is subject to the
following two conditions:
1. This device may not cause interference,
and
2. this device must accept any interference
received, including interference that may
cause undesired operation.
Any unauthorized modification to this
device could void the user’s authority to
operate the equipment.
i Canada only:This device complies with RSS-210 of
Industry Canada. Operation is subject to
the following two conditions:
1. This device may not cause interference,
and
2. this device must accept any interference
received, including interference that may
cause undesired operation of the device.
Any unauthorized modification to this
device could void the user’s authority to
operate the equipment.
Checking tire pressure electronicallyXSelect key position 2 with the Start/Stop
button ( Y page 115).XPress the = or ; button to select the
Service menu.XPress the 9 or : button to select
TIRE PRESS. .XPress the a button.
The current tire pressure for each wheel will
be displayed in the multifunction display.
If the vehicle is parked for longer than
20 minutes and you then drive at less than
25 km/h, the Tire pressures will be
displayed after driving a few
minutes message appears.
After a teach-in period, the tire pressure
monitor automatically recognizes new wheels
or new sensors. As long as a clear allocation
of the tire pressure values to the individual
wheels is not possible, the Tire Pressure
Monitor Active display message is shown
instead of the tire pressure display. The tire
pressures are already being monitored.
Tire pressure monitor warning
messages
If the tire pressure monitor detects a
significant pressure loss on one or more tires,
a warning message is shown in the
multifunction display. A warning tone also
sounds and the tire pressure warning lamp
lights up in the instrument cluster.
258Tire pressureTires and wheels
Page 261 of 288

Each tire that is affected by a significant loss
of pressure is highlighted with a color.
If the following message appears in the
multifunction display: Correct Tire
PressureXCheck the tire pressure on all four wheels
and correct it if necessary.
i If the wheel positions on the vehicle are
interchanged, the tire pressures may be
displayed for the wrong positions for a
short time. This is rectified after a few
minutes of driving, and the tire pressures
are displayed for the correct positions.
Restarting the tire pressure monitor
When you restart the tire pressure monitor,
all existing warning messages are deleted and
the warning lamps go out. The monitor uses
the currently set tire pressures as the
specified values for monitoring.
In most cases, the tire pressure monitor will
automatically detect the new reference
values, e.g. if you have:
R changed the tire pressure
R changed the wheels or tires
R mounted new wheels or tires
If you are defining the new reference values
manually:
XUse the table on the inside of the fuel filler
flap to ensure that the tire pressure is set
correctly in all four tires for the current
operating conditions.
Also observe the notes in the section on tire
pressures ( Y page 253).XSelect key position 2 with the Start/Stop
button.XPress the = or ; button to select the
Service menu.XPress the 9 or : button to select
TIRE PRESS. .XPress the a button.
The display shows either the current tire
pressure for the individual tires or theTire pressures will be displayed
after driving a few minutes
message.XPress the : button.
The Use Current Pressures as New
Reference Values message appears in
the multifunction display.XPress the a button.
The Tire Press. Monitor Restarted
message appears in the multifunction
display.
After a few minutes of driving, the current
pressures are adopted as the new
monitoring values.
Canceling the restart
XPress the % button.
or
XPress the 9 button to leave the menu.
Loading the vehicle
Instruction labels for tires and loads
GWARNING
Do not overload the tires by exceeding the
specified load limit as indicated on the Tire
and Loading Information placard on the
driver's door B-pillar. Overloading the tires
can overheat them, possibly causing a
blowout. Overloading the tires can also result
in handling or steering problems, or brake
failure.
Two instruction labels on your vehicle show
the maximum possible load.
(1)The Tire and Loading Information placard
is on the B-pillar on the driver's side. The
Tire and Loading Information placard
shows the maximum permissible number
of occupants and the maximum
permissible vehicle load. It also contains
details of the tire sizes andLoading the vehicle259Tires and wheelsZ