Page 89 of 334

Installing and removing th
ewind screen Preparing for installation
Preparing for installation from the left side of the
vehicle (example)
0002 Wind screen
0003 Locked latch
0023 Unlocked latch
X The following conditions must be fulfilled
for installation:
R unlocking buttons Rand Lpoint in the
direction of travel.
R latch 0023facing you is unlocked.
R latch 0003facing away from you is locked.
X To unlock the latch: press unlocking
button Ror Lon the locked latch.
X To lock th elatch: push the unlocked latch
upwards by hand until it engages.
Installing
X Stop the vehicle, paying attention to road
and traffic conditions.
X Take the wind screen out of the trunk. Installatio
nfrom the left side of the vehicle
(example)
X Prepare for installation (Y page 87).
X Hold wind screen 0002at an angle and slide
it with locked latch 0003in the direction of
arrow 0022into the bracket of the opposite
roll bar.
X Press wind screen 0002on the side of the
vehicle facing you downwards in the
directio nofarrow0020until it engages.
Make sure that studs 0021and latch 0023fit
into the respective brackets.
X Check whethe rwind screen 0002is fully
inserted into all four brackets and is sitting
securely.
X If this is not the case, remove wind
screen 0002again and repeat the steps
above.
Removing
X Stop the vehicle, paying attention to road
and traffic conditions. Removing fro
mthe left side of the vehicle
(example) Roof
87Opening/closing Z
Page 90 of 334

X
Press unlocking button L0002.Meanwhile,
pull wind screen 0003on the side of the
vehicle facing you upwards and tilt it. Removing from the left side of the vehicle
(example)
X
Pull wind screen 0003out of the bracket of
the opposite roll bar in the direction of the
arrow.
X Secure wind screen 0003to the trun kfloor by
the rubber strips (Y page 244).AIRGUIDE
General notes AIRGUIDE offers protection from the wind
when driving with the roof down.
G
WARNING
You could lose control of the vehicle and
injure yourself or others if you operate
AIRGUIDE while driving.
Only fold the AIRGUIDE discs out or in when
the vehicle is stationary.
! AIRGUID Ecan only be positioned
correctly by folding it in or out. AIRGUIDE
canno tbe dismantled. Do not try to remove
AIRGUIDE from its anchorage. Otherwise,
you could damage AIRGUID Eorthe vehicle.
AIRGUIDE can be folded out or back in from
the driver's side or passenger side.
Perform operations involving AIRGUIDE
preferably on the side facing away from
traffic, after you have stopped the vehicle, paying attention to road and traffic
conditions.
Operating AIRGUIDE X
Stop the vehicle, paying attention to road
and traffic conditions. Example: folding out from the left side of the
vehicle
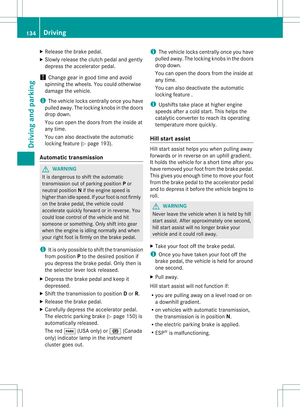
X To fold out AIRGUIDE: turn disk0002
towards the center in the direction of the
arrow as far as it will go.
X Repeatt he process with disk 0003.
X To fold in AIRGUIDE: turn disks0002
and 0003respectively back to the stop behind
the roll bar.
i Disks 0002and 0003can be used
independently of one another, for example
if you are driving without a front passenger. MAGIC SKY CONTROL
General notes MAGIC SKY CONTROL is a glass roof, the
transparency of which can be changed by
applying electrical voltage.
MAGIC SKY CONTROL can be switched
between darkened and transparent states.
i
MAGIC SKY CONTROL darkens
automatically when you turn the SmartKey
to position 0in the ignition lock or remove
the SmartKey. 88
RoofOpening/closing
Page 91 of 334

Ris
kofe lectric shock The electrical components of MAGIC SKY
CONTROL are protected by a covering behind
the overhead control panel.
The MAGIC SKY CONTROL control unit is
marked with a yellow warning sticker that
warns you of high voltage. The high-voltage
cables are orange in color. G
DANGER
The MAGIC SKY CONTROL electrical system
works at high voltage.
If the cover behind the overhead control unit
is damaged or is removed, electrical
components of MAGIC SKY CONTROL are
exposed. These may be live. If you touch these
components, you may get an electric shock
and could be seriously or even fatally injured.
For this reason, never remove the cover
behind the overhead control unit .Never touch
parts of the electrical system (control unit,
cables or cable connections).
Have all work on MAGIC SKY CONTROL
carried out at a qualified specialist workshop.
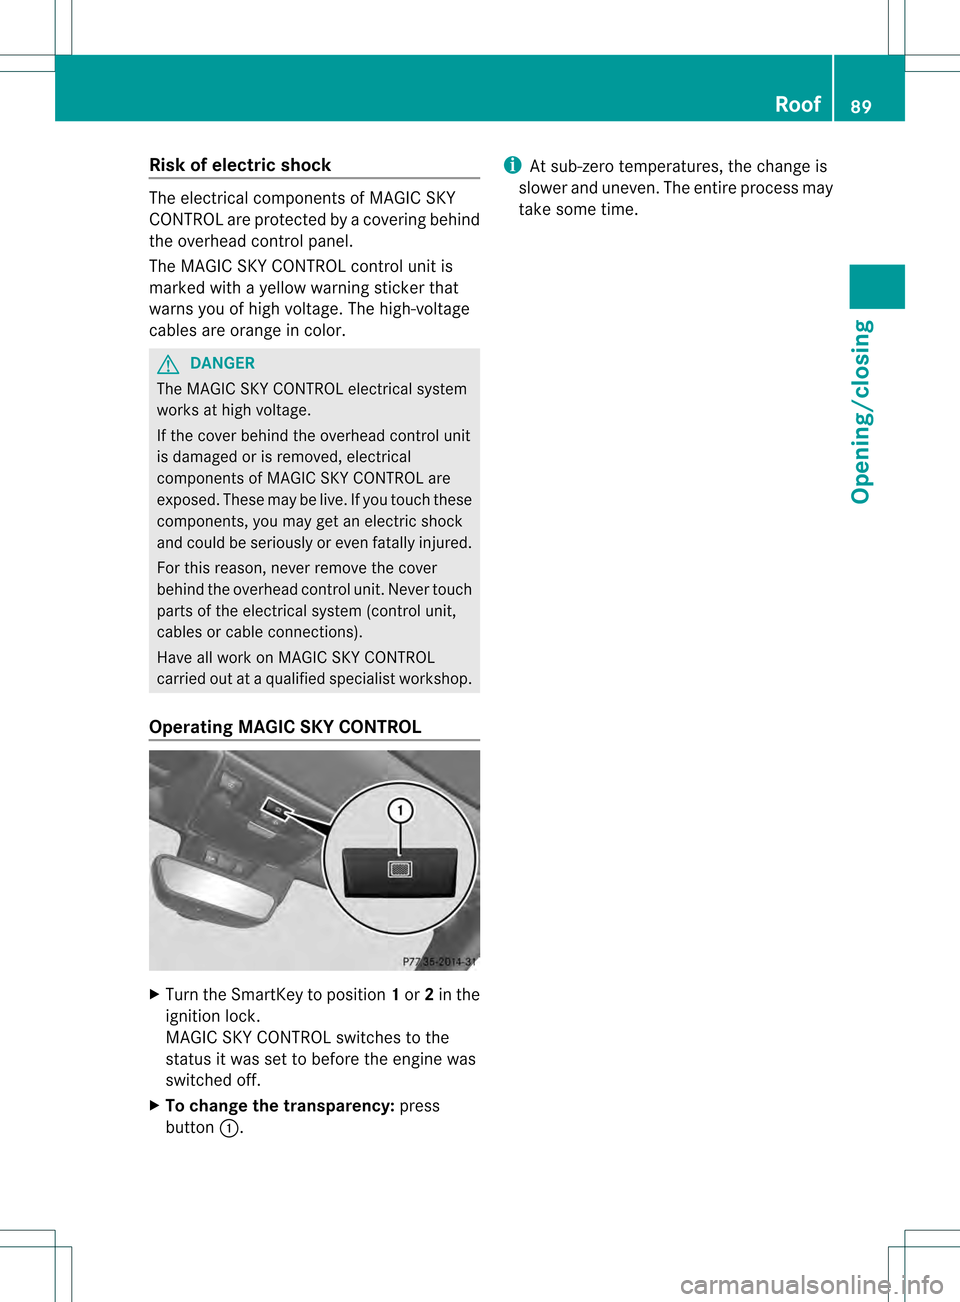
Operating MAGIC SKY CONTROL X
Turn the SmartKey to position 1or 2in the
ignition lock.
MAGIC SKY CONTROL switches to the
status it was set to before the engine was
switched off.
X To change the transparency: press
button 0002. i
At sub-zero temperatures, the change is
slower and uneven .The entire process may
take some time. Roof
89Opening/closing Z
Page 92 of 334
Page 93 of 334
Useful information
..............................92
Correcting the driver's seat posi-
tion ....................................................... 92
Seats .................................................... 93
Steering wheel .................................... 96
Mirrors ................................................. 98
Memory function .............................. 100 91Seats, steering wheel and mirrors
Page 94 of 334

Useful information
i This Operator's Manual describes all
models and all standard and optional
equipment of your vehicle available at the
time of publication of the Operator's
Manual. Country-specific differences are
possible. Please note that your vehicle may
not be equipped with all features
described. This also applies to safety-
related systems and functions.
i Please read the information on qualified
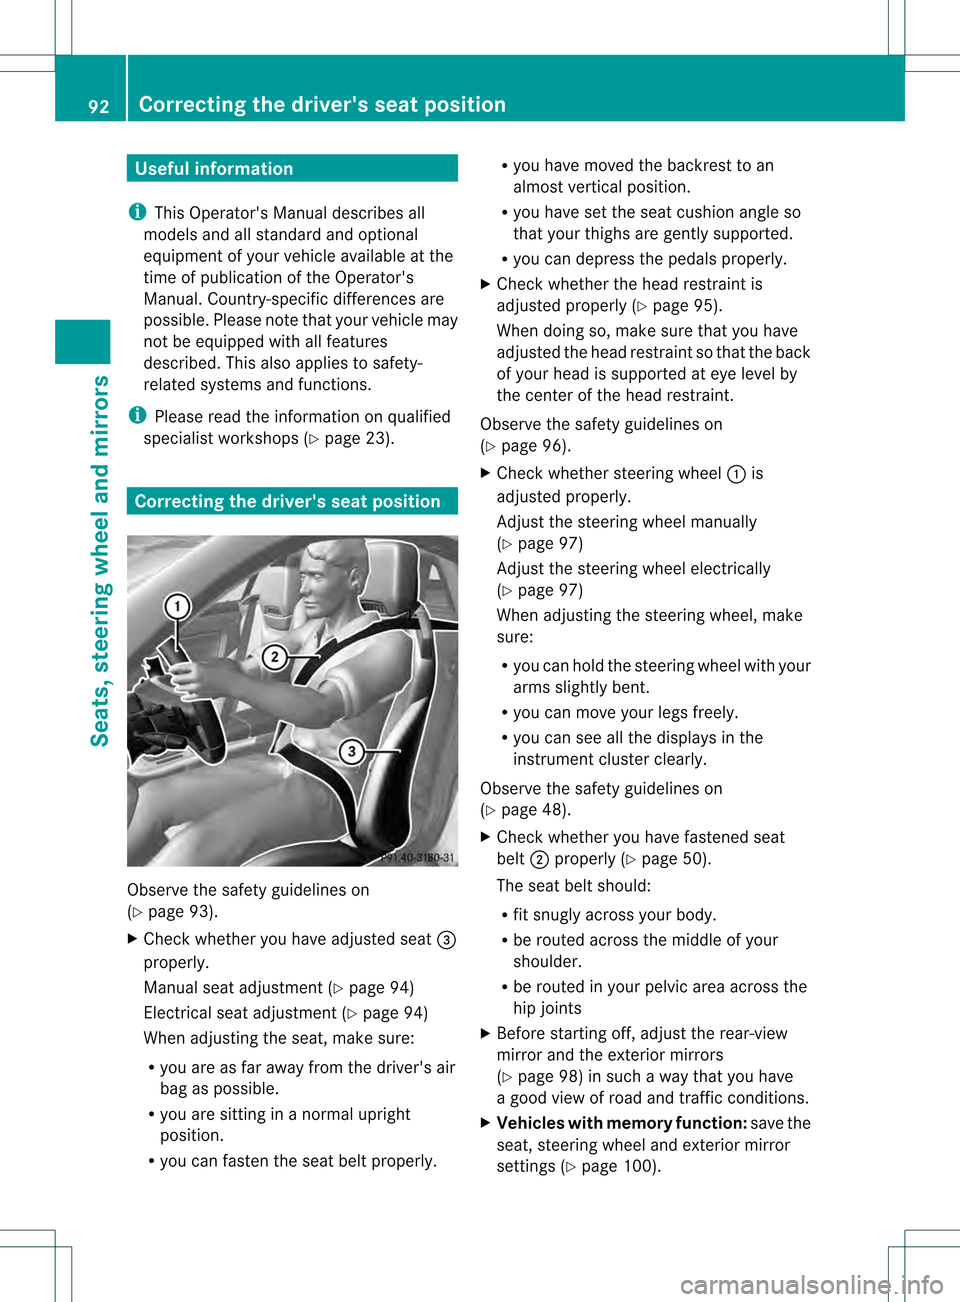
specialist workshops (Y page 23).Correcting the driver's seat position
Observe the safety guidelines on
(Y
page 93).
X Check whether you have adjusted seat 0023
properly.
Manual seat adjustment (Y page 94)
Electrical seat adjustment (Y page 94)
When adjusting the seat, make sure:
R you are as far away from the driver's air
bag as possible.
R you are sitting in a normal upright
position.
R you can fasten the seat belt properly. R
you have moved the backrest to an
almost vertical position.
R you have set the seat cushion angle so
that your thighs are gently supported.
R you can depress the pedals properly.
X Check whether the head restraint is
adjusted properly (Y page 95).
When doing so, make sure that you have
adjusted the head restraint so that the back
of your head is supported at eye level by
the center of the head restraint.
Observe the safety guidelines on
(Y page 96).
X Check whether steering wheel 0002is
adjusted properly.
Adjust the steering wheel manually
(Y page 97)
Adjust the steering wheel electrically
(Y page 97)
When adjusting the steering wheel, make
sure:
R you can hold the steering wheel with your
arms slightly bent.
R you can move your legs freely.
R you can see all the displays in the
instrumen tcluste rclearly.
Observe the safety guidelines on
(Y page 48).
X Check whether you have fastened seat
belt 0003properly (Y page 50).
The seat belt should:
R fit snugly across your body.
R be routed across the middle of your
shoulder.
R be routed in your pelvic area across the
hip joints
X Before starting off, adjust the rear-view
mirror and the exterior mirrors
(Y page 98) in such a way that you have
a good view of road and traffic conditions.
X Vehicles with memory function: save the
seat, steering wheel and exterior mirror
settings (Y page 100). 92
Correcting the driver's seat positionSeats, steering wheel and mirrors
Page 95 of 334

Seats
Important safety notes
G
WARNING
In order to avoid possible loss of vehicle
control, all seat, head restraint, steering
wheel and rear view mirror adjustments, as
well as fastening of seat belts, must be done
before setting the vehicle in motion. G
WARNING
Do not adjust the driver's seat while driving.
Adjusting the seat while driving could cause
the driver to lose control of the vehicle.
Never travel in a moving vehicle with the seat
backrest in an excessively reclined position as
this can be dangerous. You could slide under
the seat belt in a collision. If you slide under
it, the seat belt would apply force at the
abdomen or neck.T his could cause serious or
fatal injuries. The seat backrest and seat belts
provide the best restraint when the wearer is
in a position that is as upright as possible and
seat belts are properly positioned on the
body. G
WARNING
Your seat belt must be adjusted so that you
can correctly fasten your seat belt.
Observe the following points:
R adjust the seat backrest until your arms are
slightly angled when holding the steering
wheel.
R adjust the seat to a comfortable seating
position that still allows you to reach the
accelerator/brake pedal safely. The
position should be as far back as possible
with the driver still able to operate the
controls properly.
R adjust the head restraint so that it is as
close to the head as possible and the center of the head restraint supports the back of
the head at eye level.
R never place hands under the seat or near
any moving parts while a seat is being
adjusted.
Failure to do so could result in an accident
and/or serious personal injury. G
WARNING
The electrically adjustable seats can be
operated at any time. Therefore, do not leave
children unattended in the vehicle, or with
access to an unlocked vehicle. Achild's
unsupervised access to a vehicle could result
in an accident and/or serious personal injury. G
WARNING
Children 12 years old and under must be
seated and properly secured in an
appropriately sized infant restraint, child
restraint system, or booster seat
recommended for the size and weight of the
child. For additional information, see the
"Children in the vehicle" section.
Ac hild's risk of serious or fatal injuries is
significantly increased if the child restraints
are not properly secured in the vehicle and/
or the child is not properly secured in the child
restraint. G
WARNING
For your protection, drive only with properly
positioned head restraints.
Adjust the head restraint so that it is as close
to the head as possible and the center of the
head restraint supports the back of the head
at eye level. This will reduce the potential for
injury to the head and neck in the event of an
accident or similar situation.
Do not drive the vehicle without the seat head
restraints. Head restraints are intended to
help reduce injuries during an accident. Seats
93Seats, steering wheel and mirrors Z
Page 96 of 334

!
To avoid damage to the seats and the seat
heating, observe the following information:
R do not spill any liquids on the seats. If
liquid is spilled on the seats, dry them as
soon as possible.
R if the seat covers are damp or wet, do not
switch on the seat heating. The seat
heating should also not to be used to dry
the seats.
R clean the seat covers as recommended;
see the "Interior care" section.
R do not transport heavy loads on the
seats. Do not place sharp objects on the
seat cushions, e.g. knives, nails or tools.
The seats should only be occupied by
passengers, if possible.
R when the seat heating is in operation, do
not cover the seats with insulating
materials, e.g. blankets, coats, bags,
seat covers, child seats or booster seats.
! Make sure that there are no objects in the
footwell or behind the seats when resetting
the seats. There is a risk that the seats
and/or the objects could be damaged.
i The head restraints are equipped with the
NECK-PRO system (Y page 47). For this
reason, it is not possible to remove the
head restraints from the seats.
For more information, contact a qualified
specialist workshop. Adjusting the seats manually Seat fore-and-aft adjustment
X
Lift handle 0002and slide the seat forwards
or backwards.
X Release lever 0002again.
Make sure that you hear the seat engage in
position.
Backrest angle X
Relieve the pressure on the backrest.
X Pull handle 0003and adjust the backrest to
the desired angle.
X Release handle 0003again.
The backrest must audibly engage.
Seat height X
Pull handle 0023upwards or push it down
repeatedly until the seat has reached the
desired height. Adjusting the seats electrically
0002
Backrest angle
0003 Seat fore-and-aft adjustment
0023 Seat cushion angle
0022 Seat height
i You can store the seat settings using the
memory function (Y page 100).94
SeatsSeats, steering wheel and mirrors