2012 MERCEDES-BENZ SLK ROADSTER fuel cap
[x] Cancel search: fuel capPage 13 of 321
ETS
.................................................. 56
Function/notes ................................ 56
Important safety guidelines .............56
Warning lamp ................................. 228
ETS (Electronic Traction System) ....... 56
Exhaus ttail pipe (cleaning instruc-
tions) .................................................. 257
Exterior lighting see Lights
Exterior mirrors
Adjusting ......................................... 94
Anti-dazzle mode (automatic) ..........95
Folding in/ou t(automatically) .........95
Folding in/ou t(electrically) .............94
Folding in whe nlocking (on-board
computer) ...................................... 195
Out of position (troubleshooting) .....95
Parking position ............................... 95
Resetting ......................................... 95
Storing settings (memory func-
tion) ................................................. 96F
Fatigue Assist see ATTENTION ASSIST
Faul tmessage
see Display messages
Filler cap
see Fuel filler flap
Fire extinguisher ............................... 260
First-aid kit ......................................... 260
Flat tyre Changing a wheel/fitting the
spare wheel ................................... 266
MOExtended run-fla tsystem ......... 272
Preparing the vehicle .....................263
Raising the vehicle .........................268
TIREFIT kit ...................................... 263
see Emergency spare wheel
Floormat ............................................ .246
Foglamps Extended range .............................. 105
Switching on/off ........................... 101
Frequencies
Garage door opene r....................... 246
Mobile phone ................................. 301
Two-way radio ................................ 301 Front foglamps
Display message ............................ 210
Fron twindscreen
see Windscreen
Fuel
Additives ........................................ 305
Consumption statistic s.................. 183
Displaying the current consump-
tion ................................................ 183
Displaying the range ......................183
Fuel gauge ....................................... 28
Grade (petrol) ................................ 304
Important safety notes ..................303
Notes about consumption .............306
Notes for AMG vehicles .................304
Problem (malfunction) ...................145
Quality (diesel )............................... 305
Refuelling ...................................... .142
Tank content/reserve fuel .............304
Fuel filler flap Opening/closing .......143
Fuel level Calling up the range (on-board
computer) ...................................... 183
Gauge .............................................. 28
Fuel reserve
see Fuel
Fuel tank
Capacity ........................................ 304
Problem (malfunction) ...................145
Fuse allocation chart (vehicle tool
kit) ...................................................... 261
Fuses Allocation chart ............................. 282
Before changing ............................. 282
Fuse box in the boot ......................282
Fuse box in the engine compart-
ment .............................................. 282
Important safety notes ..................281 G
Garage door opener Clearing the memory .....................245
Frequencies ................................... 246
Notes ............................................. 24310
Index
Page 146 of 321
Switch off the engine before refuelling.
G
WARNING
Avoid contact with fuels.
It is hazardous to your health if your skin
comes into direct contact with fuels or you
breathe in fuel vapours. G
WARNING
Do not use petrol to refuel a diesel tank. Never
mix diesel with petrol .Doing so could damage
the fuel system and the engine. The vehicle
could also catch fire.
! Do not use petrol to refuel vehicles with a
diesel engine. Do not use diesel to refuel
vehicles with a petrol engine. Even small
amounts of the wrong fuel result in damage
to the fuel system and the engine.
! Do not switch on the ignition if you acci-
dentally refuel with the wrong fuel. Other-
wise, the fuel will enter the fuel lines. Notify
a qualified specialist workshop and have
the fuel tank and fuel lines drained com-
pletely.
! Overfilling the fuel tank could damage the
fuel system.
! Take care not to spill any fuel on painted
surfaces. You could otherwise damage the
paintwork.
! Use a filter when adding fuel from a fuel
can. The fuel lines and/or the diesel injec-
tion system could otherwise be blocked by
particles from the fuel can.
Further information on fuel and on fuel grades
can be found in the "Fuel" section
(Y page 303). Refuelling
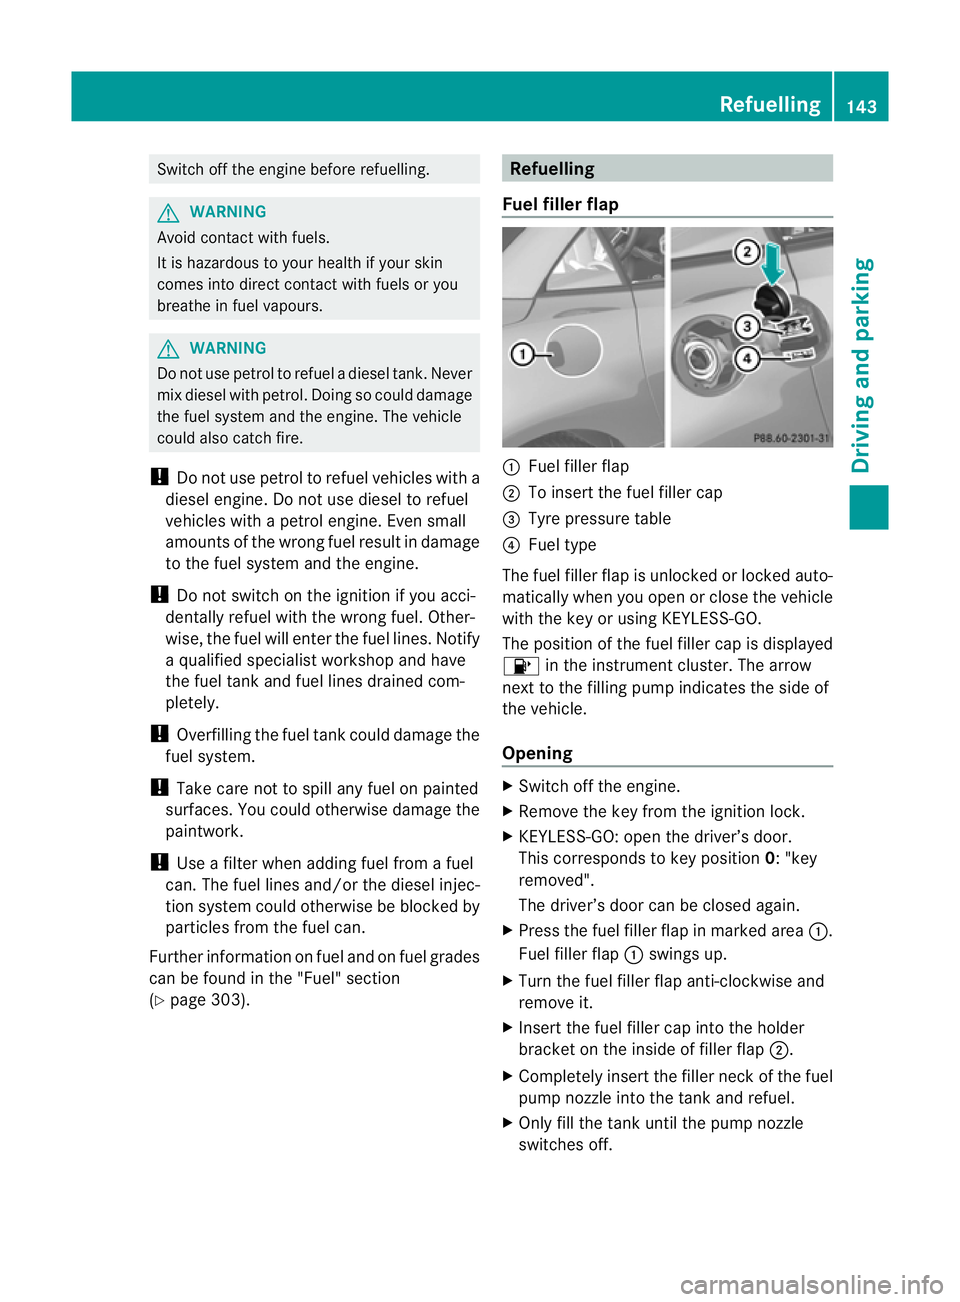
Fuel filler flap :
Fuel filler flap
; To insert the fuel filler cap
= Tyre pressure table
? Fuel type
The fuel filler flap is unlocked or locked auto-
matically when you open or close the vehicle
with the key or using KEYLESS-GO.
The position of the fuel filler cap is displayed
8 in the instrument cluster. The arrow
next to the filling pump indicates the side of
the vehicle.
Opening X
Switch off the engine.
X Remove the key from the ignition lock.
X KEYLESS-GO: open the driver’s door.
This corresponds to key position 0: "key
removed".
The driver’s door can be closed again.
X Press the fuel filler flap in marked area :.
Fuel filler flap :swings up.
X Turn the fuel filler flap anti-clockwise and
remove it.
X Insert the fuel filler cap into the holder
bracket on the inside of filler flap ;.
X Completely insert the filler neck of the fuel
pump nozzle into the tank and refuel.
X Only fill the tank until the pump nozzle
switches off. Refuelling
143Driving and parking Z
Page 147 of 321
i
Do not add any more fuel after the pump
stops filling for the first time. Otherwise,
fuel may leak out.
Closing X
Replace the cap on the fille rneck and turn
clockwise until it engages audibly.
X Close fuel filler flap :.144
RefuellingDriving and parking
Page 269 of 321
X
Stop after driving for approximately ten
minutes and check the tyre pressure with
the tyre inflation compressor.
The tyre pressure mus tnow be at least
130 kPa (1.3 bar, 19 psi). G
WARNING
If the required tyre pressure is not reached
after driving for a short period, the tyre is too
badly damaged. The tyre sealant cannot
repair the tyre in this instance. Damaged tyres
and a tyre pressure that is too low can signif-
icantly impair the vehicle's braking and driv-
ing characteristics. There is a risk of accident.
Do not continue driving. Contact a qualified
specialist workshop.
i In your vehicle, you will find a sticker with
the Mercedes-Benz Service24h telephone
number, e.g. on the B-pillar on the driver's
side.
X Correct the tyre pressure if it is still at least
130 kPa (1.3 bar, 19 psi) (for the values,
see the fuel filler flap).
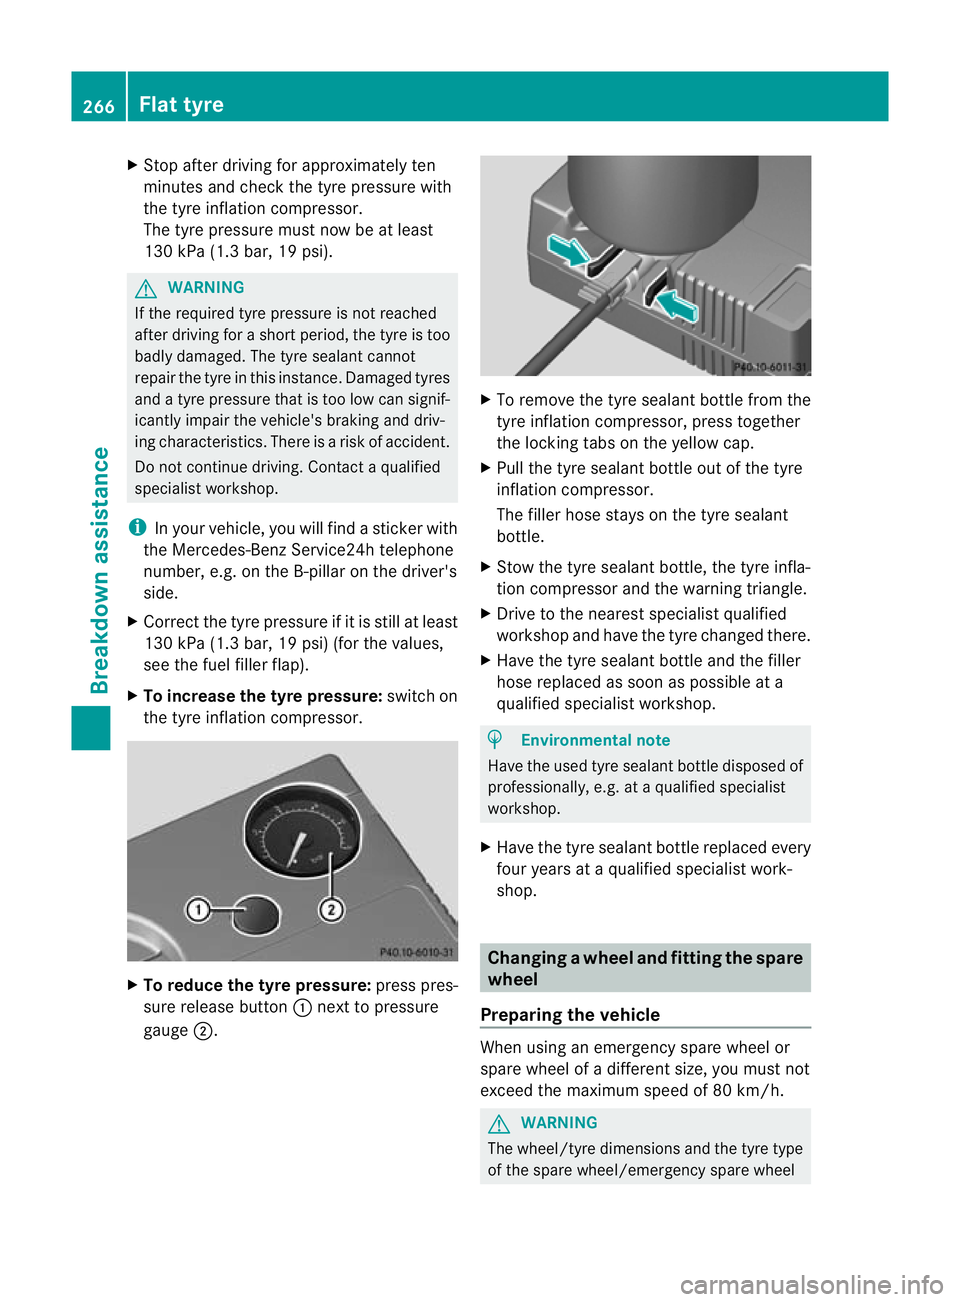
X To increase the tyre pressure: switch on
the tyre inflation compressor. X
To reduce the tyre pressure: press pres-
sure release button :next to pressure
gauge ;. X
To remove the tyre sealant bottle from the
tyre inflation compressor ,press together
the locking tabs on the yellow cap.
X Pull the tyre sealant bottle out of the tyre
inflation compressor.
The filler hose stays on the tyre sealant
bottle.
X Stow the tyre sealant bottle, the tyre infla-
tion compresso rand the warning triangle.
X Drive to the neares tspecialist qualified
workshop and have the tyre changed there.
X Have the tyre sealant bottle and the filler
hose replaced as soon as possible at a
qualified specialist workshop. H
Environmental note
Have the used tyre sealant bottle disposed of
professionally, e.g. at aqualified specialist
workshop.
X Have the tyre sealan tbottle replaced every
four years at a qualified specialist work-
shop. Changing
awheel and fitting the spare
wheel
Preparing the vehicle When using an emergency spare wheel or
spare wheel of a different size, you must not
exceed the maximum speed of 80 km/h.
G
WARNING
The wheel/tyre dimensions and the tyre type
of the spare wheel/emergency spare wheel 266
Flat tyreBreakdown assistance
Page 280 of 321
Jump-starting
G
WARNING
There is a risk of acid burns when jump-starting a vehicle due to the gases which escape from
the battery. Do not lean over the battery while the engine is being jump-started. G
WARNING
Gases escaping from the battery during jump-starting may cause minor explosions. Avoid cre-
ating sparks. Keep naked flames away from the battery, and do not smoke.
Comply with safety precautions when handling batteries. You will find these under "Battery (vehi-
cle)" in the index. G
WARNING
Non-combusted fuel can collect in the exhaust system and ignite. There is a risk of fire. Avoid
repeated and lengthy starting attempts.
! Avoid repeated and lengthy starting attempts. Otherwise, the catalytic converter could be
damaged by the non-combusted fuel.
Do not use a rapid charging device to start the vehicle. If your vehicle's battery is discharged,
the engine can be jump-started from another vehicle or from a second battery using jump
leads. Observe the following points:
R the battery is not accessible in all vehicles. if the other vehicle's battery is not accessible,
jump-start the vehicle using a second battery or ajump-starting device.
R you may only jump-start the vehicle when the engine and catalyti cconverter are cold.
R do not start the engine if the battery is frozen. let the battery thaw first.
R jump-starting may only be performed from batteries with a nominal voltage of 12 V.
R only use jump leads that have a sufficient cross-section and insulated terminal clamps.
R If the battery is fully discharged, leave the battery that is being used to jump-start connected
for a few minutes before attempting to start.T his charges the empty battery a little.
R Make sure that the two vehicles do not touch.
Make sure that:
R the jump leads are not damaged.
R bare parts of the terminal clamp do not come into contact with other metal parts while the
jump leads are connected to the battery.
R the jump leads cannot come into contact with parts such as the V-belt pulley or the fan.
These parts move when the engine is started and while it is running.
X Secure the vehicle by applying the electric parking brake.
X Manual transmission: engage neutral.
X Automatic transmission: move the selector lever toP.
X Switch off all electrical consumers (e.g. radio, blower, etc.).
X Open the bonnet (Y page 248). Jump-starting
277Breakdown assistance Z
Page 293 of 321
Follow recommended tyre inflation pressures
and check the pressure of all the tyres includ-
ing the spare wheel:
R at least every two weeks
R if the load changes
R before beginning a long journey
R for changed operating conditions, e.g. off-
road driving
If necessary, correct the tyre pressure.
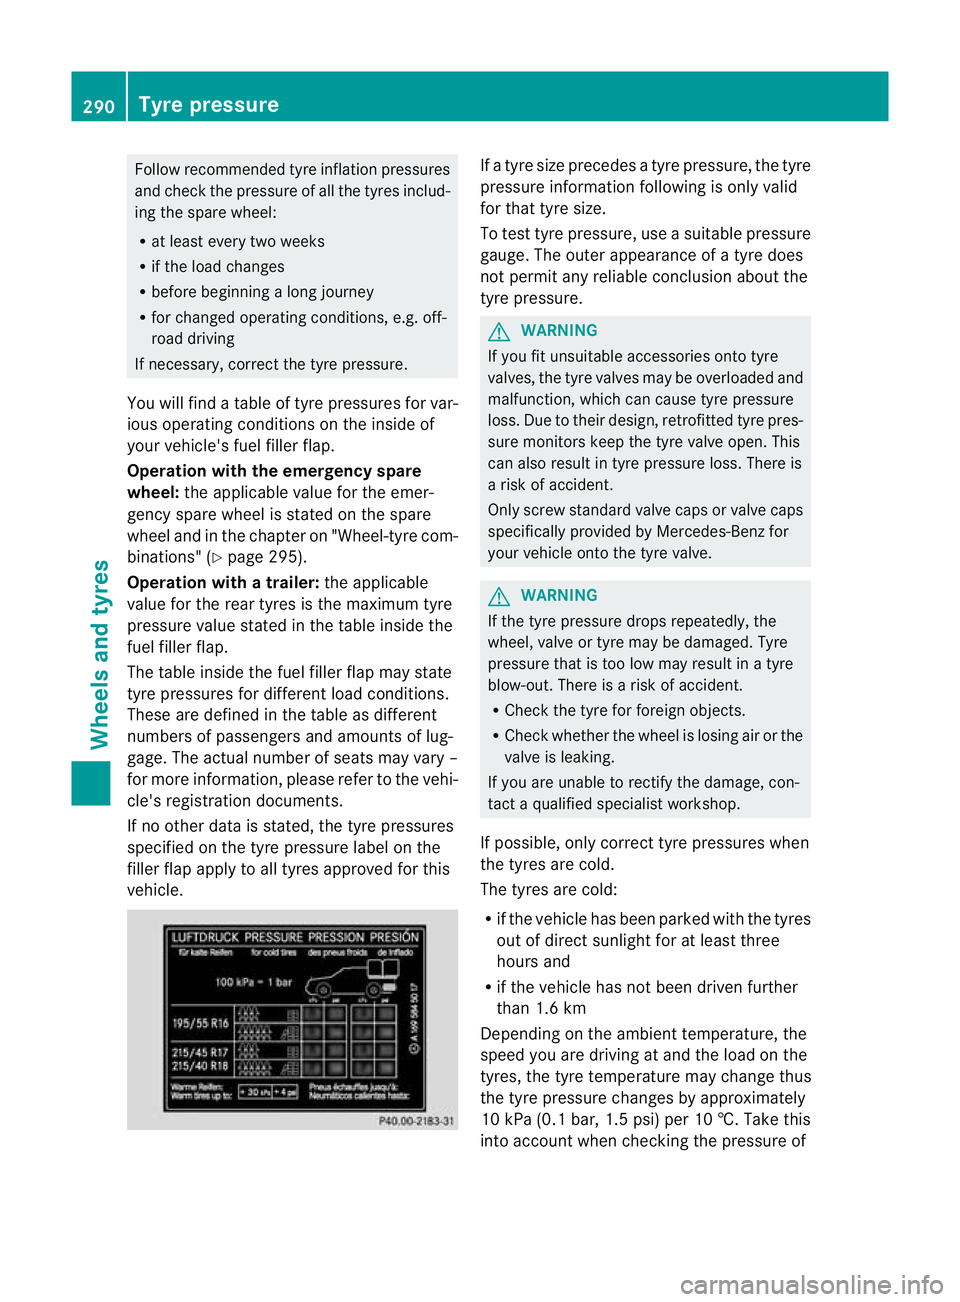
You will find a table of tyre pressures for var-
ious operating conditions on the inside of
your vehicle's fuel filler flap.
Operation with the emergency spare
wheel: the applicable value for the emer-
gency spare wheel is stated on the spare
wheel and in the chapter on "Wheel-tyre com-
binations" (Y page 295).
Operation with a trailer: the applicable
value for the rear tyres is the maximum tyre
pressure value stated in the table inside the
fuel filler flap.
The table inside the fuel filler flap may state
tyre pressures for different load conditions.
These are defined in the table as different
numbers of passengers and amounts of lug-
gage. The actual number of seats may vary –
for more information, please refe rto the vehi-
cle's registration documents.
If no other data is stated, the tyre pressures
specified on the tyre pressure label on the
filler flap apply to all tyres approved for this
vehicle. If a tyre size precedes a tyre pressure, the tyre
pressure information following is only valid
for that tyre size.
To test tyre pressure, use a suitable pressure
gauge. The outer appearance of a tyre does
not permit any reliable conclusion about the
tyre pressure. G
WARNING
If you fit unsuitable accessories onto tyre
valves, the tyre valves may be overloaded and
malfunction, which can cause tyre pressure
loss. Due to their design, retrofitted tyre pres-
sure monitors keep the tyre valve open. This
can also result in tyre pressure loss. There is
a risk of accident.
Only screw standard valve caps or valve caps
specifically provided by Mercedes-Benz for
your vehicle onto the tyre valve. G
WARNING
If the tyre pressure drops repeatedly, the
wheel, valve or tyre may be damaged. Tyre
pressure that is too low may result in a tyre
blow-out. There is a risk of accident.
R Check the tyre for foreign objects.
R Check whether the wheel is losing air or the
valve is leaking.
If you are unable to rectify the damage, con-
tact a qualified specialist workshop.
If possible, only correc ttyre pressures when
the tyres are cold.
The tyres are cold:
R if the vehicle has been parked with the tyres
out of direc tsunlight for at least three
hours and
R if the vehicle has no tbeen driven further
than 1.6 km
Depending on the ambient temperature, the
speed you are driving at and the load on the
tyres, the tyre temperature may change thus
the tyre pressure changes by approximately
10 kPa (0.1 bar, 1.5 psi) per 10 †. Take this
into accoun twhen checking the pressure of 290
Tyre pressureWheels and tyres
Page 306 of 321
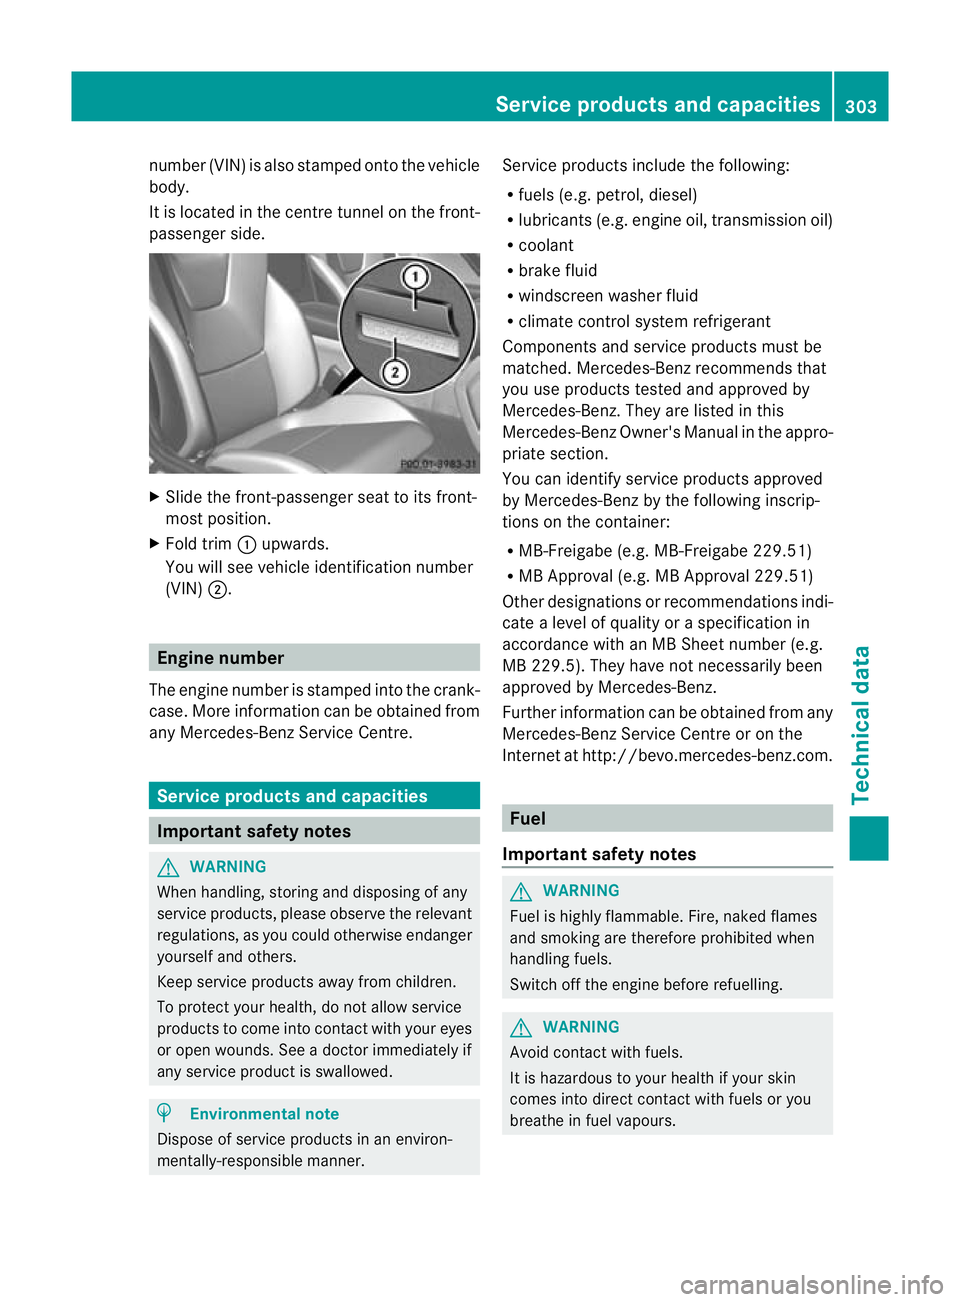
numbe
r(VIN) is also stamped onto the vehicle
body.
It is located in the centre tunnel on the front-
passenger side. X
Slide the front-passenger seat to its front-
most position.
X Fold trim :upwards.
You will see vehicle identification number
(VIN) ;. Engine number
The engine number is stamped into the crank-
case. More information can be obtained from
any Mercedes-Benz Service Centre. Service products and capacities
Important safety notes
G
WARNING
When handling, storing and disposing of any
service products, please observe the relevant
regulations, as you could otherwise endanger
yourself and others.
Keep service products away from children.
To protect yourh ealth, do not allow service
products to come into contact with your eyes
or open wounds. See a doctor immediately if
any service product is swallowed. H
Environmental note
Dispose of service products in an environ-
mentally-responsible manner. Service products include the following:
R
fuels (e.g. petrol, diesel)
R lubricants (e.g. engine oil, transmission oil)
R coolant
R brake fluid
R windscreen washer fluid
R climate control system refrigerant
Components and service products must be
matched. Mercedes-Benz recommends that
you use products tested and approved by
Mercedes-Benz .They are listed in this
Mercedes-Ben zOwner's Manual in the appro-
priate section.
You can identify service products approved
by Mercedes-Ben zby the following inscrip-
tions on the container:
R MB-Freigabe (e.g. MB-Freigabe 229.51)
R MB Approval (e.g. MB Approval 229.51)
Other designations or recommendations indi-
cate a level of quality or a specification in
accordance with an MB Sheet number (e.g.
MB 229.5). The yhave no tnecessarily been
approved by Mercedes-Benz.
Further information can be obtained from any
Mercedes-Benz Service Centre or on the
Internet at http://bevo.mercedes-benz.com. Fuel
Important safety notes G
WARNING
Fuel is highly flammable. Fire, naked flames
and smoking are therefore prohibited when
handling fuels.
Switch off the engine before refuelling. G
WARNING
Avoid contact with fuels.
It is hazardous to your health if your skin
comes into direct contact with fuels or you
breathe in fuel vapours. Service products and capacities
303Technical data Z
Page 307 of 321
Tank capacity
Total capacity
60.0 l
Of whic
hreserve Approx-
imately 8.0 l Total capacit
yfor SLK 55
AMG 70.0 l
Of which reserve for SLK
55 AMG
Approx-
imately 9.0 l Petrol (EN 228, E DIN 51626-1)
Fuel grade
!
Do not use diesel to refuel vehicles with a
petrol engine. Even asmall quantity of die-
sel will damage the fuel injection system.
! Only refuel using unleaded, premium-
grade petrol with at least 95 RON/
85 MON that conforms to European stand-
ard EN 228 or E DIN 51626-1 or an equiv-
alent specification.
! Do not use the following:
R E85 (petrol with 85% ethanol)
R E100 (100% ethanol)
R M15 (petrol with 15% methanol)
R M85 (petrol with 85% methanol)
R M100 (100% methanol)
R Petrol with metallic additives
R Diesel
Do not mix fuels such as this with petrol
and do not use any additives. Doing so may
cause engine damage. This does not
include additives for the removal and pre-
vention of residue build-up .Petrol must
only be mixed with additives recommended
by Mercedes-Benz .More information about
recommended additives can be obtained
from any Mercedes-Benz Service Centre.
Usually you will find information about the
fuel grade on the pump. If you cannot find the
label on the petrol pump, ask the filling sta-
tion staff. i
E10 fuel contains up to 10 % bioethanol.
Your vehicle is suitable for use with E10
fuel. You can refuel your vehicle using E10
fuel.
i If the recommended fuel is not available,
but only as a temporary measure, you may
also use unleaded petrol with an octane
rating of 91 RON/82.5 MON. This may
reduce engine performance and increase
fuel consumption. Avoid driving at full
throttle.
The quality of the fuel available in some
countries may not be sufficient .Residue
could build up as a result. In such cases,
and in consultation with aMercedes-Benz
Service Centre, the petrol may be mixed
with the additive recommended by
Mercedes-Benz( part no.
A000989254510). You must observe the
notes and mixing ratios specified on the
container.
Information on refuelling (Y page 142).
AMG vehicles
! Only refuel using super unleaded petrol
with at least 98 RON/88 MON that con-
forms to European standard EN 228 or an
equivalent specification.
You can otherwise impair engine output or
damage the engine.
! Premium-grade unleaded petrol with an
octane rating of 95 RON/85 MON may be
used as a temporary measure if the recom-
mended fuel is not available. This may
reduce engine performance and increase
fuel consumption .As much as possible,
avoid driving at full throttle.
! Regular unleaded petrol with an octane
rating of 91 RON/82.5 MON may also be
used as a temporary measure if the recom-
mended fuel is not available.
Doing so results in noticeably higher fuel
consumption, and the engine power output
is noticeably reduced. Avoid driving at full
throttle. 304
Service products and capacitiesTechnical data