2012 MERCEDES-BENZ SLK ROADSTER bonnet
[x] Cancel search: bonnetPage 8 of 321
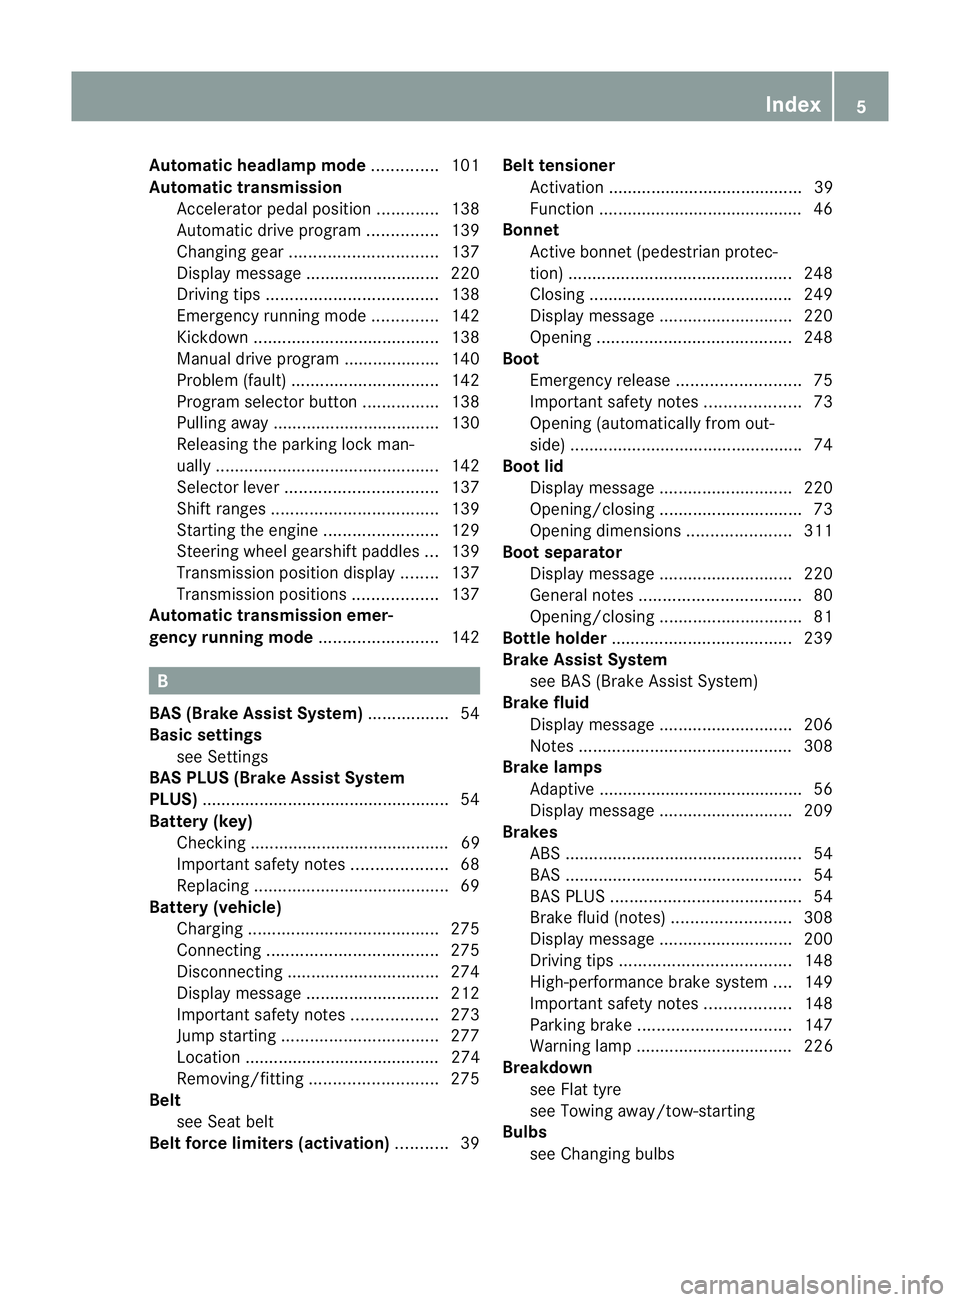
Automatic headlamp mode
..............101
Automatic transmission Accelerator pedal position .............138
Automatic drive program ...............139
Changing gea r............................... 137
Display message ............................ 220
Driving tips .................................... 138
Emergency running mode ..............142
Kickdow n....................................... 138
Manual drive program ....................140
Problem (fault) ............................... 142
Progra mselecto rbutton ................ 138
Pulling away ................................... 130
Releasing the parking lock man-
ually ............................................... 142
Selector leve r................................ 137
Shift range s................................... 139
Starting the engine ........................129
Steering wheel gearshift paddle s... 139
Transmission position displa y........ 137
Transmission positions ..................137
Automatic transmission emer-
gency running mode .........................142 B
BAS (Brake Assist System) .................54
Basic settings see Settings
BAS PLUS (Brake Assist System
PLUS) .................................................... 54
Battery (key) Checking .......................................... 69
Important safety notes ....................68
Replacing ......................................... 69
Battery (vehicle)
Charging ........................................ 275
Connecting .................................... 275
Disconnecting ................................ 274
Display message ............................ 212
Important safety notes ..................273
Jump starting ................................. 277
Location ......................................... 274
Removing/fitting ........................... 275
Belt
see Seat belt
Belt force limiters (activation) ...........39Belt tensioner
Activation ......................................... 39
Function .......................................... .46
Bonnet
Active bonne t(pedestrian protec-
tion )............................................... 248
Closing .......................................... .249
Display message ............................ 220
Opening ......................................... 248
Boot
Emergency release ..........................75
Important safety notes ....................73
Opening (automatically from out-
side) ................................................ .74
Boo tlid
Display message ............................ 220
Opening/closing .............................. 73
Opening dimensions ......................311
Boot separator
Display message ............................ 220
General notes .................................. 80
Opening/closing .............................. 81
Bottle holder ...................................... 239
Brake Assist System see BAS (Brake Assist System)
Brake fluid
Display message ............................ 206
Notes ............................................. 308
Brake lamps
Adaptive .......................................... .56
Display message ............................ 209
Brakes
ABS .................................................. 54
BAS .................................................. 54
BAS PLUS ........................................ 54
Brake fluid (notes) .........................308
Display message ............................ 200
Driving tips .................................... 148
High-performance brake system ....149
Important safety notes ..................148
Parking brake ................................ 147
Warning lamp ................................. 226
Breakdown
see Flat tyre
see Towing away/tow-starting
Bulbs
see Changing bulbs Index
5
Page 29 of 321
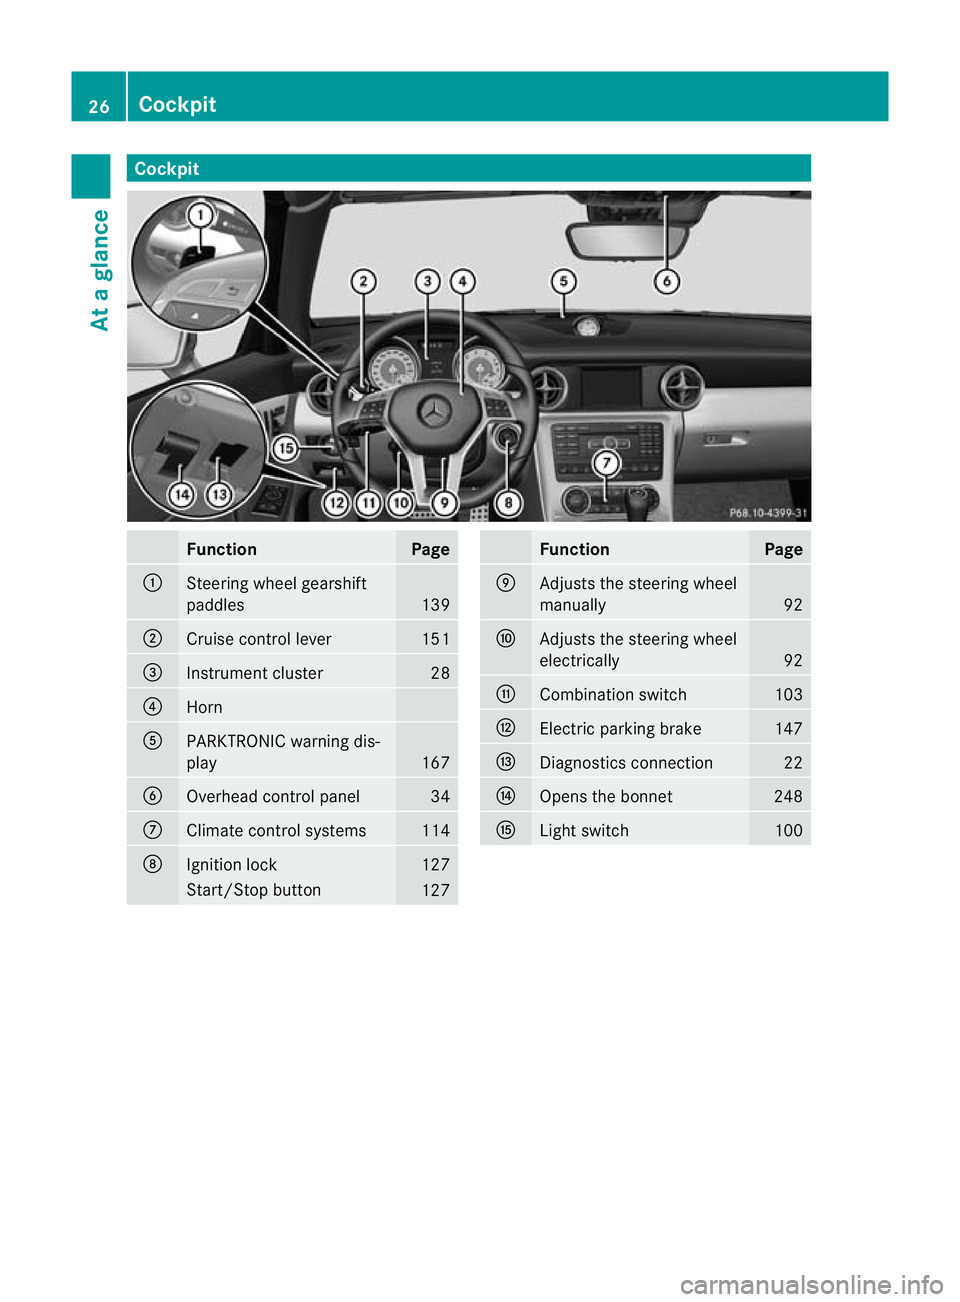
Cockpit
Function Page
:
Steering wheel gearshift
paddles
139
;
Cruise control lever 151
=
Instrument cluster 28
?
Horn
A
PARKTRONIC warning dis-
play
167
B
Overhead control panel 34
C
Climate control systems 114
D
Ignition lock 127
Start/Stop button
127 Function Page
E
Adjusts the steering wheel
manually 92
F
Adjusts the steering wheel
electrically 92
G
Combination switch 103
H
Electric parking brake 147
I
Diagnostics connection 22
J
Opens the bonnet 248
K
Ligh
tswitch 10026
CockpitAt a glance
Page 30 of 321
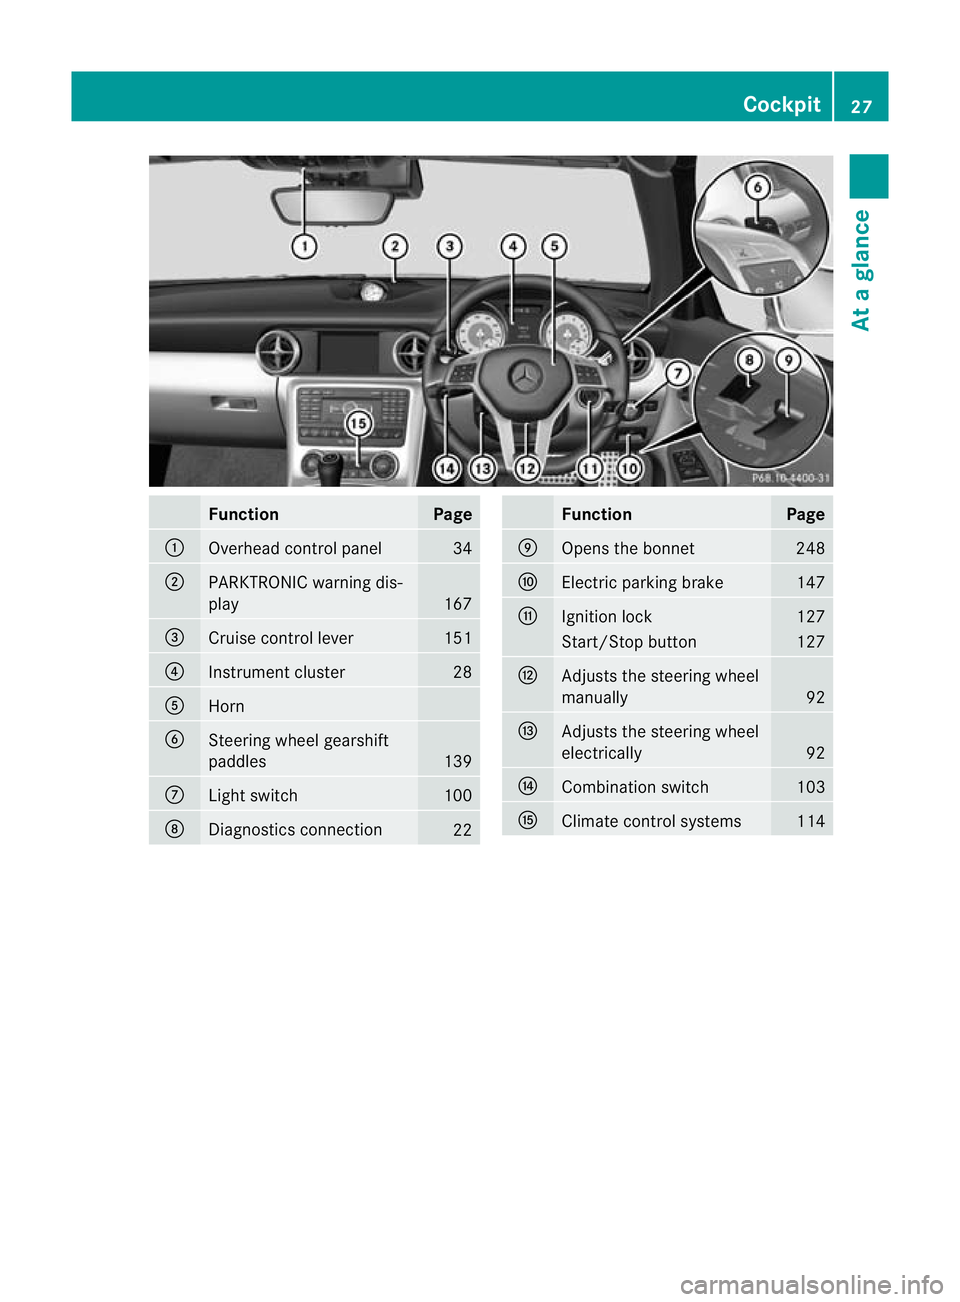
Function Page
:
Overhead control panel 34
;
PARKTRONIC warning dis-
play
167
=
Cruise control lever 151
?
Instrument cluster 28
A
Horn
B
Steering wheel gearshift
paddles
139
C
Ligh
tswitch 100
D
Diagnostics connection
22 Function Page
E
Opens the bonnet 248
F
Electric parking brake 147
G
Ignitio
nlock 127
Start/Stop button 127
H
Adjusts the steering wheel
manually
92
I
Adjusts the steering wheel
electrically
92
J
Combination switch 103
K
Climate control systems 114Cockpit
27At a glance
Page 43 of 321
How the airbag system works is deter-
mined by the severity of the collision detec-
ted, especially the vehicle deceleration or
acceleration, and the apparent type of acci-
dent:
R
head-on collision
R side impact
R rea rimpact
R overturn
The rate of vehicle deceleratio noraccelera-
tion and the direction of the force are essen-
tially determined by:
R the distribution of forces during the colli-
sion
R the collisio nangle
R the deformation characteristics of the vehi-
cle
R the characteristics of the object with which
the vehicle has collided
Factors which can only be see nand measured
after a collision has occurred do not play a
decisive role in the deployment of an airbag,
nor do they provide an indicatio nofairbag
deployment.
The vehicle may be deformed significantly,
e.g. the bonnet or the wing, without an airbag
being deployed. This is the case if only parts
which are relatively easily deformed are affec-
ted and the rate of deceleration is not high.
Conversely, airbags may be deployed even
though the vehicle suffers only minor defor-
mation. This is the case if, for example, very
rigid vehicle parts such as longitudinal body
members are hit, and sufficien tdeceleration
occurs as a result. Airbags
Important safety notes Airbag deployment slows down and restricts
the movement of the vehicle occupant.
If the airbags are deployed, you will hear a
bang and a small amount of powder may also
be released. Only in rare cases will the bang affect your hearing. The powder that is
released generally does not constitute a
health hazard. The
6SRS warning lamp
lights up.
The airbag installation locations are identified
by the AIRBAG symbol. G
WARNING
Airbags provide additional protection; they
are not, however, a substitute for seat belts.
Observe the following notes to reduce the risk
of serious or even fatal injury caused by airbag
deployment:
R all vehicle occupants –inparticular, preg-
nant women – must wear their seat belt
correctly at all times and lean back against
the backrest, which should be positioned
as close to the vertical as possible. The
head restraint must support the back of the
head at about eye level.
R always secure childre nless than
1.50mt all or unde r12years of age in suit-
able child restraint systems.
R all vehicle occupants must select a seat
position that is as far away from the airbag
as possible. The driver's seat position must
allow the vehicle to be driven safely. The
driver's chest should be as far away from
the centre of the driver's airbag cover as
possible.
R move the front-passenger seat as far back
as possible. This is especially important if
you have secured a child in a child restraint
system on the front-passenger seat.
R vehicle occupants –inparticular, children
–m ust no tlean their heads into the area of
the window in which the sidebag/headbag
is deployed.
R rearward-facing child restraint systems
must not be fitted to the front-passenger
seat unless the front-passenger fron tair-
bag has been disabled. The front-passenger
front airbag is disabled if a child restraint
system with transponders for automatic
child seat recognition is fitted to the front-
passenger seat. The 4PASSENGER 40
Occupant safetySafety
Page 64 of 321
R
a narrow vehicle travelling in front, e.g. a
motorbike
R a vehicle travelling in front on a different
line G
WARNING
PRE-SAFE ®
Brake does not react:
R to people or animals
R to oncoming vehicles
R to crossing traffic
R when cornering
As a result, PRE-SAFE ®
Brake may not give
warnings or intervene in critical situations.
There is a ris kofanaccident. Always pay
careful attention to the traffi csituation and be
ready to brake.
In order to maintain the appropriate distance
to the vehicle in front and thus prevent a col-
lision, you must apply the brakes yourself.
X To activate/deactivate: activate or deac-
tivate PRE-SAFE ®
Brake in the on-board
computer (Y page 189).
The Ä symbol appears in the multifunc-
tion display as long as the HOL Dfunction
is not activated (Y page 165).
On vehicles with parking guidance, the
Ä symbol is displayed when Pis
engaged or you are driving faste rthan
35 km/h.
Vehicles with COMAND and navigation sys-
tem: the radar sensor system is switched off
automatically in the vicinity of radio telescope
facilities (Y page 312).
Vehicles without COMAND and a navigation
system and vehicles for Australia: the radar
sensor system and on-board computer must
be switched off in the vicinity of radio tele-
scope facilities (Y page 194).
For PRE-SAFE ®
Brake to assist you when driv-
ing, the radar sensor system must be
switched on (Y page 194) and be opera-
tional.
Following damage to the front end of the vehi-
cle, have the configuration and operation of the radar sensors checked at a qualified spe-
cialist workshop. This also applies to colli-
sions at slow speeds where there is no visible
damage to the front of the vehicle. Anti-theft systems
Immobiliser
The immobiliser prevents your vehicle from
being started without the correct key.
X To activate with the key: remove the key
from the ignition lock.
X To activate with KEYLESS-GO: switch the
ignition off and open the driver's door.
X To deactivate: switch on the ignition.
i The immobiliser is always deactivated
when you start the engine. ATA (Anti-Theft Alarm system)
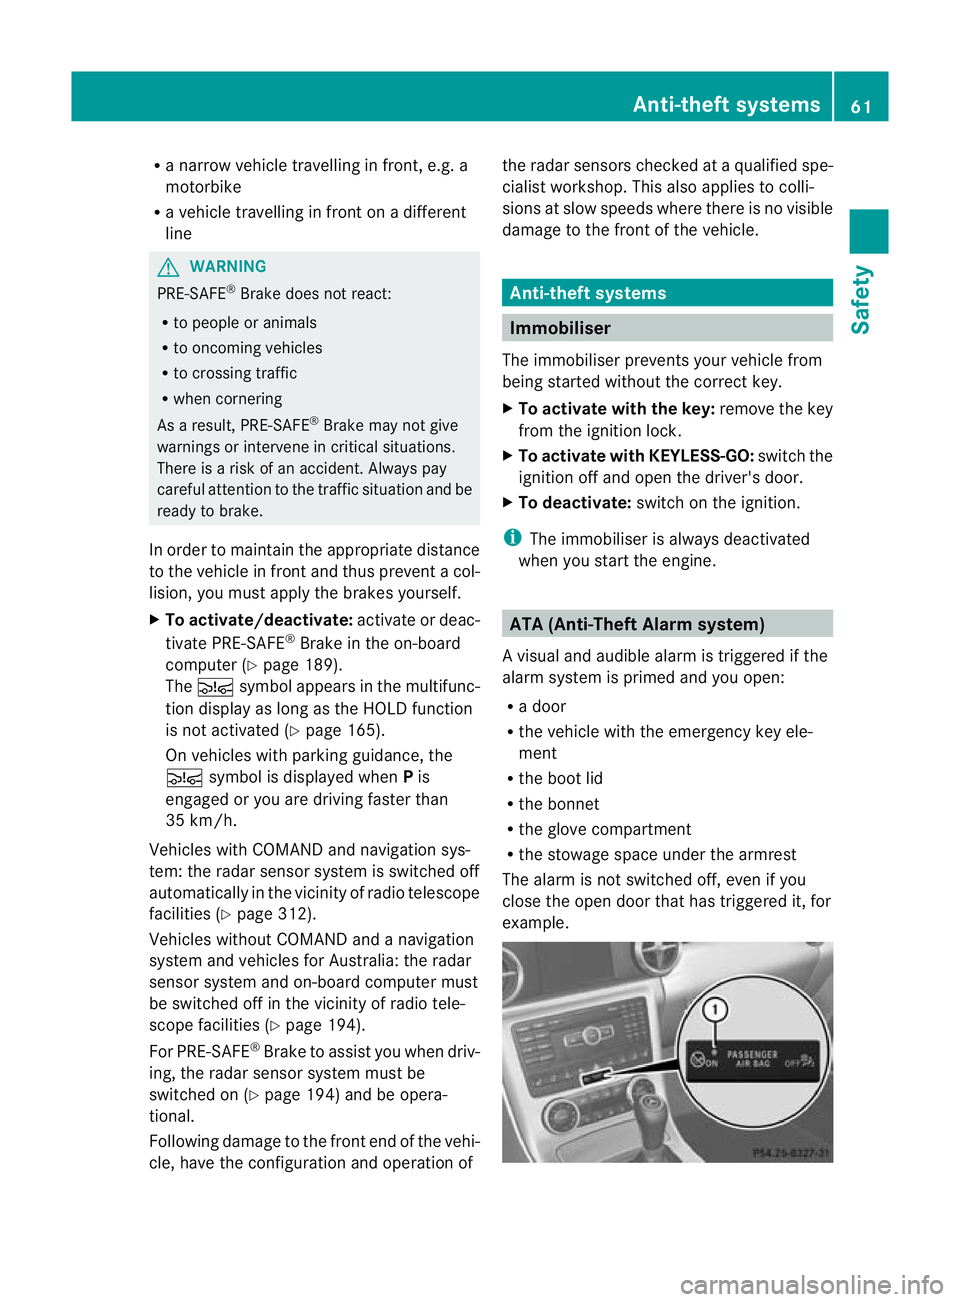
Av isual and audible alarm is triggered if the
alarm system is primed and you open:
R a door
R the vehicle with the emergency key ele-
ment
R the boot lid
R the bonnet
R the glove compartment
R the stowage space under the armrest
The alarm is not switched off, even if you
close the open door that has triggered it, for
example. Anti-theft systems
61Safety Z
Page 111 of 321
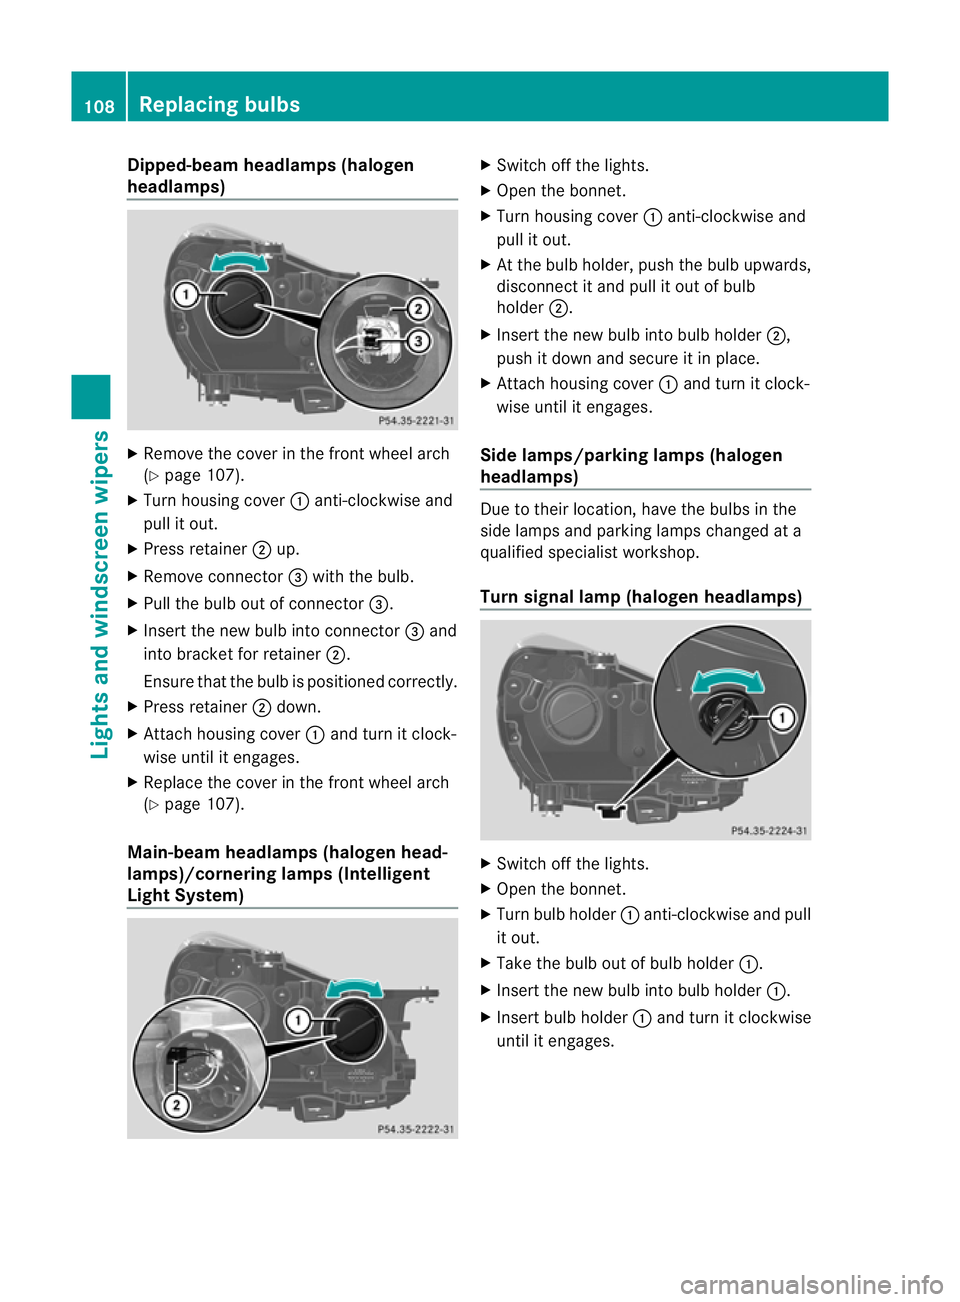
Dipped-beam headlamps (halogen
headlamps)
X
Remove the cover in the front wheel arch
(Y page 107).
X Tur nhousing cover :anti-clockwise and
pull it out.
X Press retainer ;up.
X Remove connector =with the bulb.
X Pull the bulb out of connector =.
X Insert the new bulb into connector =and
into bracket for retainer ;.
Ensure that the bulb is positioned correctly.
X Press retainer ;down.
X Attach housing cover :and turn it clock-
wise until it engages.
X Replace the cover in the front wheel arch
(Y page 107).
Main-beam headlamps (halogen head-
lamps)/cornering lamps (Intelligent
Light System) X
Switch off the lights.
X Open the bonnet.
X Turn housing cover :anti-clockwise and
pull it out.
X At the bulb holder, push the bulb upwards,
disconnect it and pull it out of bulb
holder ;.
X Insert the new bulb into bulb holder ;,
push it down and secure it in place.
X Attach housing cover :and turn it clock-
wise until it engages.
Side lamps/parking lamps( halogen
headlamps) Due to their location, have the bulbs in the
side lamps and parking lamps changed at a
qualified specialist workshop.
Turn signal lamp (halogen headlamps) X
Switch off the lights.
X Open the bonnet.
X Turn bulb holder :anti-clockwise and pull
it out.
X Take the bulb out of bulb holder :.
X Insert the new bulb into bulb holder :.
X Insert bulb holder :and turn it clockwise
until it engages. 108
Replacing bulbsLights and windscreen wipers
Page 113 of 321
X
Turn the key to position 1or 2in the ignition
lock.
X Turn the combination switch to the corre-
sponding position.
! Vehicles with a rain sensor: if the wind-
screen becomes dirty in dry weather con-
ditions, the windscreen wipers may be acti-
vated inadvertently. This could damage the
windscreen wiper blades or scratch the
windscreen.
For this reason, you should always switch
off the windscreen wipers in dry weather.
In the ÄorÅ position, the appropriate
wiping frequency is set automatically accord-
ing to the intensity of the rain. In the Å
position, the rain sensor is more sensitive
than in the Äposition, causing the wind-
screen wiper to wipe more frequently. Replacing the wiper blades
Important safety notes G
WARNING
The wiper arms could start moving and cause
an injury if you leave the windscreen wipers
switched on.
Remove the key from the ignition lock before
replacing the wiper blades.
! To avoid damaging the windscreen wiper
blades, make sure that you touch only the
wiper arm of the windscreen wiper.
Important safety notes G
WARNING
The wiper arms could start moving and cause
an injury if you leave the windscreen wipers
switched on.
Remove the key from the ignition lock before
replacing the wiper blades. !
To avoid damaging the windscreen wiper
blades, make sure that you touch only the
wiper arm of the windscreen wiper.
! Never open the bonnet if a windscreen
wiper arm has been folded away from the
windscreen.
Never fold a windscreen wiper arm without
a wiper blade back onto the windscreen.
Hold the windscreen wiper arm firmly when
you change the wiper blade. If you release
the windscreen wiper arm without a wiper
blade and it falls onto the windscreen, the
windscreen may be damaged by the force
of the impact.
Mercedes-Benz recommends that you have
the wiper blades changed at aqualified
specialist workshop.
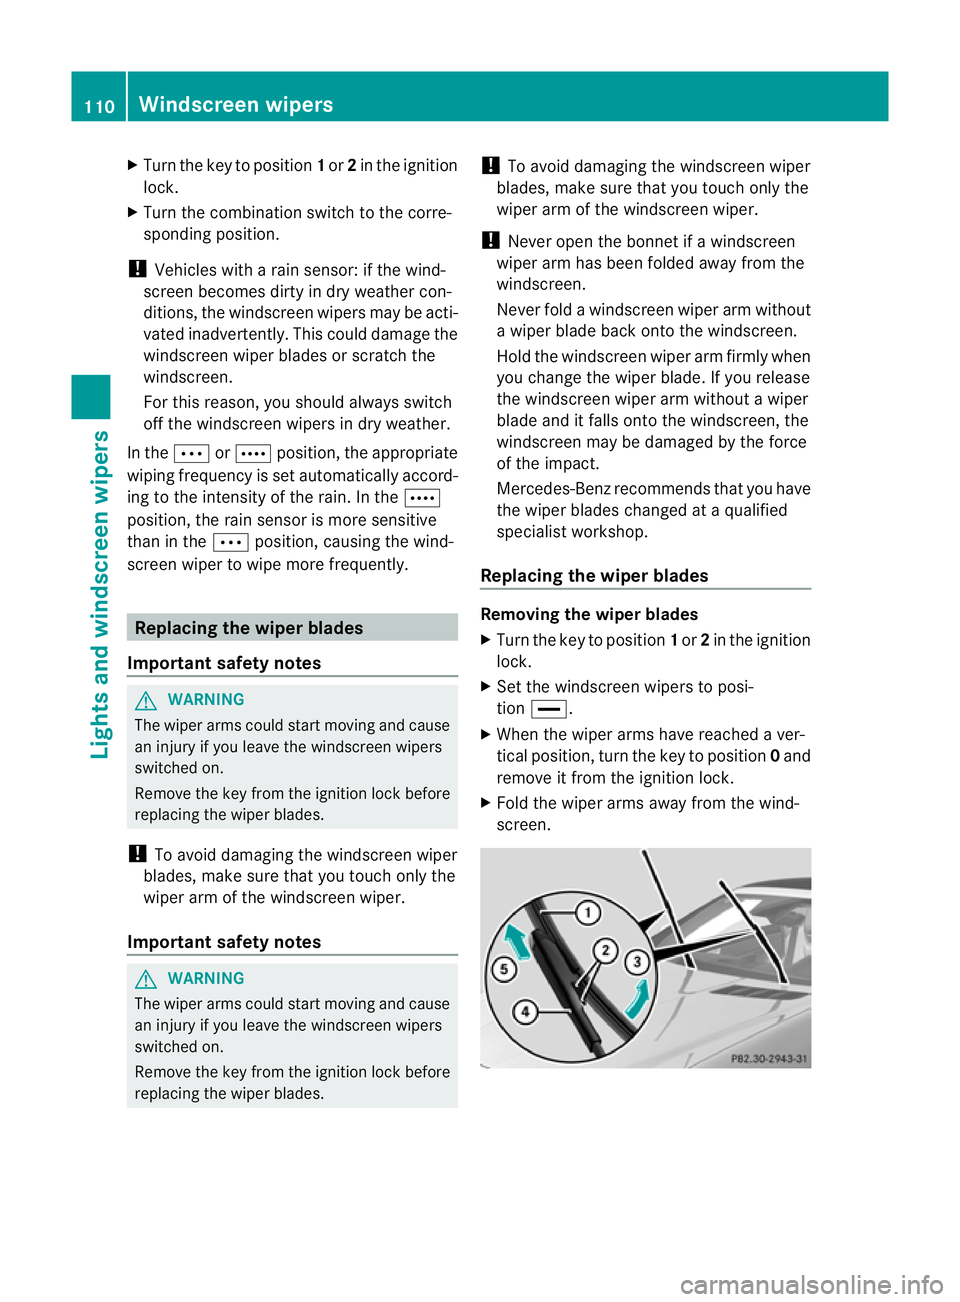
Replacing the wiper blades Removing the wiper blades
X
Turn the key to position 1or 2in the ignition
lock.
X Se tthe windscreen wipers to posi-
tion °.
X When the wiper arms have reached a ver-
tical position, turn the key to position 0and
remove it from the ignition lock.
X Fold the wiper arms away from the wind-
screen. 110
Windscreen wipersLights and windscreen wipers
Page 125 of 321
X
Convenience closing feature: press and
hold the gbutton until the side win-
dows are closed.
The indicator lamp in the gbutton lights
up. Air-recirculation mode is activated.
X Convenience opening feature: press and
hold the gbutton until the side win-
dows are opened. The side windows move
back to their original positions.
The indicator lamp in the gbutton goes
out .Air-recirculation mode is deactivated.
i If you open the side windows manually
after closing them with the convenience
closing feature, they will remain in this posi-
tion when opened using the convenience
opening feature. Activating/deactivating the residual
heat function
It is possible to make use of the residual heat
of the engine to continue heating the station-
ary vehicle for up to 30 minutes after the
engine has been switched off .The heating
time depends on the temperature that has
been set.
Depending on the equipment level, the con-
trol panel has either the Ìbutton or the
Á button.
i The blower will run at a low speed regard-
less of the airflow setting.
i If you activate the residual heat function
at high temperatures, only the ventilation
will be activated. The blower runs at
medium speed.
X Turn the key to position 0in the ignition
lock or remove it.
X To switch on: press theÌorÁ but-
ton.
The indicator lamp in the ÌorÁ
button lights up. X
To deactivate: press theÌorÁ
button.
The indicator lamp in the ÌorÁ
button goes out.
i Residual heat is deactivated automati-
cally:
R after about 30 minutes
R when the ignition is switched on
R if the battery voltage drops
R if the coolant temperature is too low Adjusting the air vents
Important safety notes
G
WARNING
Very hot or very cold air can flow from the air
vents.T his could cause burns or frostbite to
bare skin in the immediate vicinity of the
vents.K eep bare skin away from these air
outlets. If necessary, direct the airflow away
to a different area of the vehicle interior.
In order to ensure the direct flow of fresh air
through the air vents into the vehicle interior,
please observe the following notes:
R keep the air inlet grille on the bonnet and
in the engine compartment on the front-
passenger side free of blockages, such as
ice, snow or leaves.
R never cover the vents or ventilation grilles
in the vehicle interior.
i You can move the adjuster sfor the air
vents vertically or horizontally, to set the
direction of the airflow.
i Optimal climate control function is ach-
ieved by opening the air vents fully and set-
ting the adjusters to the middle position. 122
Adjusting the air ventsClimate control