2012 MERCEDES-BENZ SLK ROADSTER door lock
[x] Cancel search: door lockPage 75 of 321
vehicle. Deactivate the interior motion sensor
(Y
page 62) before you lock the vehicle with
the key. The doors can then be opened from
the inside after the vehicle has been locked
from the outside with the key. X
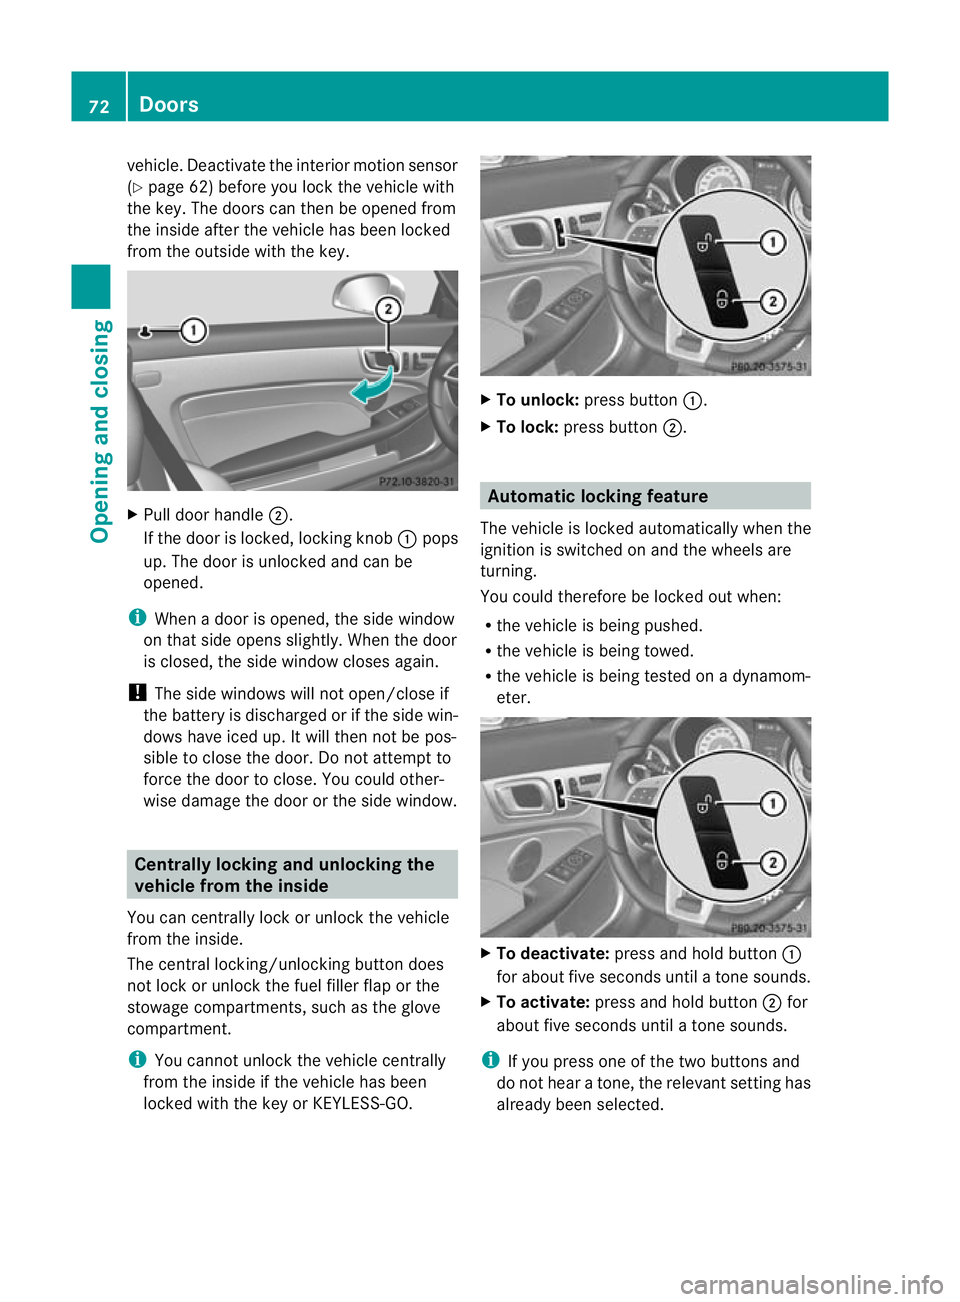
Pull door handle ;.
If the door is locked, locking knob :pops
up. The door is unlocked and can be
opened.
i When a door is opened, the side window
on that side opens slightly .When the door
is closed, the side window closes again.
! The side windows will not open/close if
the battery is discharged or if the side win-
dows have iced up. It will then not be pos-
sible to close the door. Do not attempt to
force the door to close. You could other-
wise damage the door or the side window. Centrally locking and unlocking the
vehicle from the inside
You can centrally lock or unlock the vehicle
from the inside.
The central locking/unlocking button does
not lock or unlock the fuel filler flap or the
stowage compartments, such as the glove
compartment.
i You cannot unlock the vehicle centrally
from the inside if the vehicle has been
locked with the key or KEYLESS-GO. X
To unlock: press button :.
X To lock: press button ;. Automatic locking feature
The vehicle is locked automatically when the
ignition is switched on and the wheels are
turning.
You could therefore be locked out when:
R the vehicle is being pushed.
R the vehicle is being towed.
R the vehicle is being tested on a dynamom-
eter. X
To deactivate: press and hold button :
for about five seconds until a tone sounds.
X To activate: press and hold button ;for
about five seconds until a tone sounds.
i If you press one of the two buttons and
do not hear a tone, the relevant setting has
already been selected. 72
DoorsOpening and closing
Page 76 of 321
You can also switch the automatic locking
function on and off using the on-board com-
puter (Y page 193). Unlocking the driver's door (emer-
gency key element)
If the vehicle can no longer be unlocked with
the key, use the emergency key element.
If you use the emergenc ykey element to
unlock and open the driver's door, the anti-
thef talarm system will be triggered
(Y page 61).
X Take the emergency key elemen tout of the
key (Y page 68).
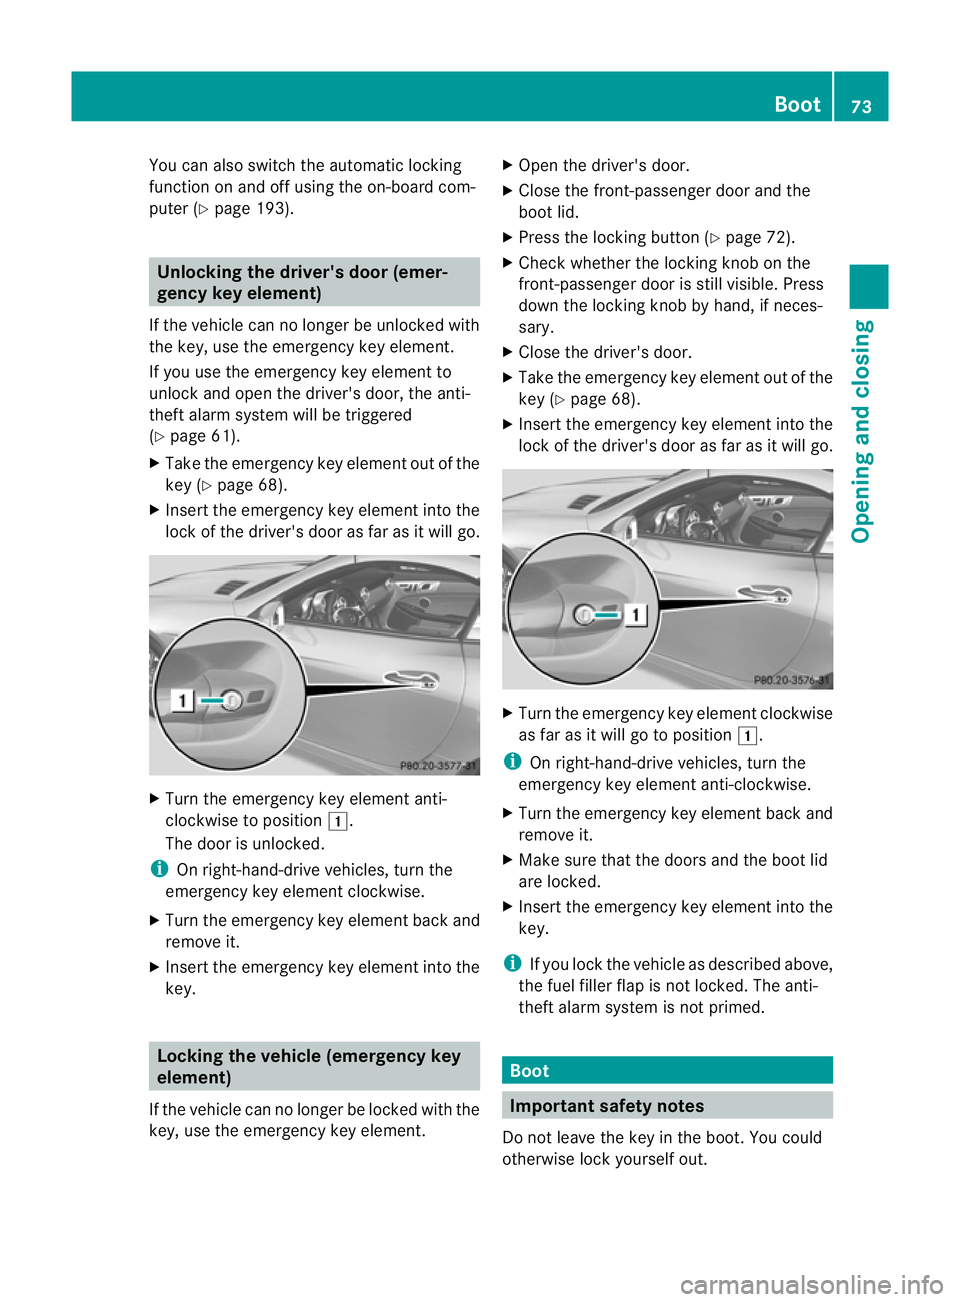
X Inser tthe emergency key element into the
lock of the driver's door as far as it will go. X
Turn the emergency key element anti-
clockwise to position 1.
The door is unlocked.
i On right-hand-drive vehicles, turn the
emergency key element clockwise.
X Turn the emergency key element back and
remove it.
X Insert the emergency key element into the
key. Locking the vehicle (emergency key
element)
If the vehicle can no longer be locked with the
key, use the emergency key element. X
Open the driver's door.
X Close the front-passenger door and the
boot lid.
X Press the locking button (Y page 72).
X Check whether the locking knob on the
front-passenger door is still visible. Press
down the locking knob by hand, if neces-
sary.
X Close the driver's door.
X Take the emergency key element out of the
key (Y page 68).
X Insert the emergency key element into the
lock of the driver's door as far as it will go. X
Turn the emergency key element clockwise
as far as it will go to position 1.
i On right-hand-drive vehicles, turn the
emergency key element anti-clockwise.
X Turn the emergency key element back and
remove it.
X Make sure that the doors and the boot lid
are locked.
X Insert the emergency key element into the
key.
i If you lock the vehicle as described above,
the fuel filler flap is not locked. The anti-
theft alarm system is not primed. Boot
Important safety notes
Do not leave the key in the boot. You could
otherwise lock yourself out. Boot
73Opening and closing Z
Page 77 of 321
G
WARNING
Exhaust fumes could enter the vehicle interior
if the engine is running and the boot lid is
open. This could poison you.T herefore, you
should make sure that the boot lid is always
closed when the engine is running.
! The boot lid swings upwards when
opened. Therefore, make sure that there is
sufficient clearance above the boot lid.
i You will find details on the boot lid open-
ing dimensions in the Technical data sec-
tion (Y page 311).
The boot lid can be:
R opened and closed manually from outside
R opened automatically from outside
R unlocked with the emergency key element Opening/closing manually
Opening You can only unlock the boot lid when the
vehicle is stationary and the roof is fully
opened or closed.
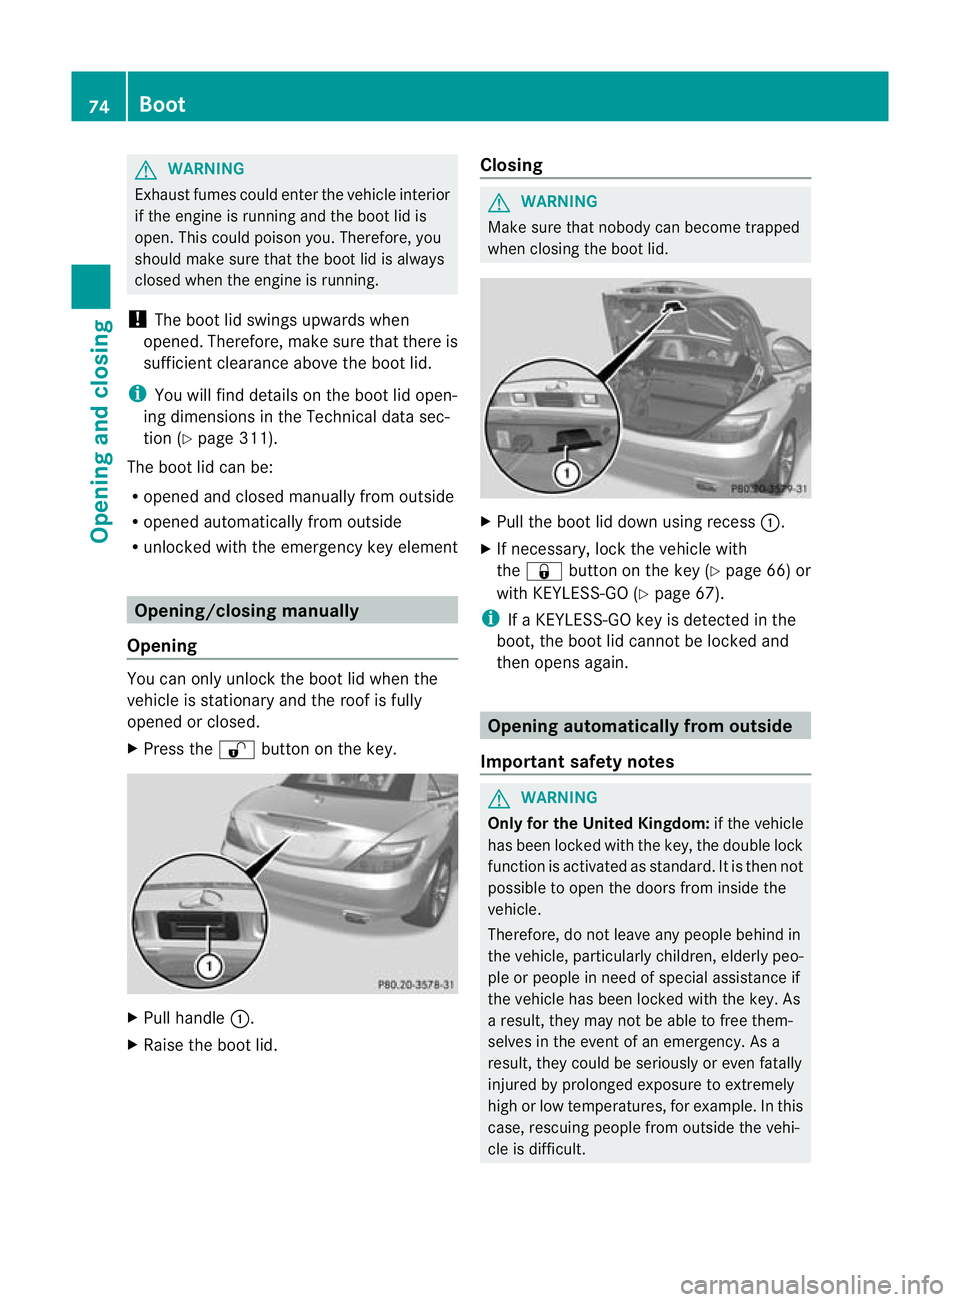
X
Press the %button on the key. X
Pull handle :.
X Raise the boot lid. Closing G
WARNING
Make sure that nobody can become trapped
when closing the boot lid. X
Pull the boot lid down using recess :.
X If necessary, lock the vehicle with
the & button on the key (Y page 66) or
with KEYLESS-GO (Y page 67).
i If a KEYLESS-GO key is detected in the
boot, the boot lid cannot be locked and
then opens again. Opening automatically from outside
Important safety notes G
WARNING
Only for the United Kingdom: if the vehicle
has been locked with the key, the double lock
function is activated as standard. It is then not
possible to open the doors from inside the
vehicle.
Therefore, do not leave any people behind in
the vehicle, particularly children, elderly peo-
ple or people in need of special assistance if
the vehicle has been locked with the key. As
a result, they may not be able to free them-
selves in the event of an emergency. As a
result, they could be seriously or even fatally
injured by prolonged exposure to extremely
high or low temperatures, for example. In this
case, rescuing people from outside the vehi-
cle is difficult. 74
BootOpening and closing
Page 78 of 321
Deactivate the interior motion sensor before
you lock the vehicle with the key .The doors
can then be opened from the inside after the
vehicle has been locked from the outside with
the key.
! The boot lid swings upwards when
opened. Therefore, make sure that there is
sufficient clearance above the boot lid.
i You will find details on the boot lid open-
ing dimensions in the Technical data sec-
tion (Y page 311).
Opening You can open the boot lid automatically using
the key or the handle in the boot lid.
X
Press and hold the Fbutton on the key
until the boot lid opens.
or
X If the boot is unlocked, pull on the boot lid
handle and let it go again immediately. Unlocking the boot (emergency key
element)
! The boot lid swings upwards when
opened. Therefore, make sure that there is
sufficient clearance above the boot lid.
If the boot cannot be unlocked with the key
or KEYLESS-GO, use the emergency key ele-
ment.
If you use the emergency key element to
unlock and open the boot lid, the anti-theft
alarm system will be triggered (Y page 61).
X Take the emergency key element out of the
key (Y page 68).
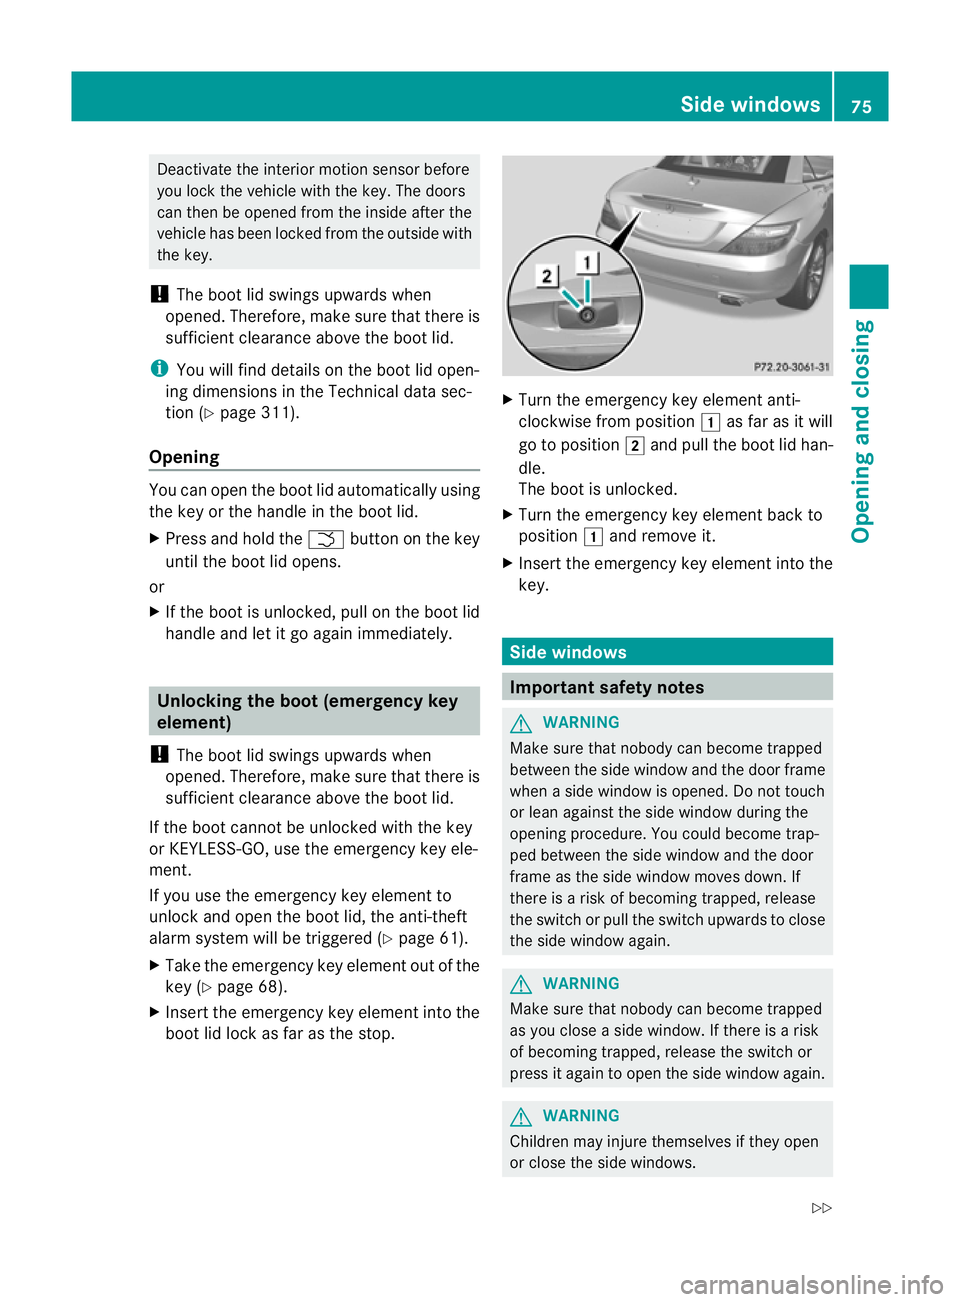
X Insert the emergency key element into the
boot lid lock as far as the stop. X
Turn the emergency key element anti-
clockwise from position 1as far as it will
go to position 2and pull the boot lid han-
dle.
The boot is unlocked.
X Turn the emergency key element back to
position 1and remove it.
X Insert the emergency key element into the
key. Side windows
Important safety notes
G
WARNING
Make sure that nobody can become trapped
between the side window and the door frame
when a side window is opened. Do not touch
or lean against the side window during the
opening procedure. You could become trap-
ped between the side window and the door
frame as the side window moves down. If
there is a risk of becoming trapped, release
the switch or pull the switch upwards to close
the side window again. G
WARNING
Make sure that nobody can become trapped
as you close a side window. If there is a risk
of becoming trapped, release the switch or
press it again to open the side window again. G
WARNING
Children may injure themselves if they open
or close the side windows. Side windows
75Opening and closing
Z
Page 79 of 321
Never leave children unsupervised in the vehi-
cle. Always take the key with you when leaving
the vehicle, even if you are only leaving it for
a short time.
G
WARNING
Do not leave children unsupervised in the
vehicle, even if they are secured in a child
restraint system. The children could:
R be seriously or even fatally injured on parts
of the vehicle
R be seriously or even fatally injured by pro-
longed exposure to extremely high or
extremely low temperatures
If children open a door, they could:
R seriously or even fatally injure other people
R get out of the vehicle and injure them-
selves, or be seriously or even fatally
injured by a passing vehicle Opening and closing the side win-
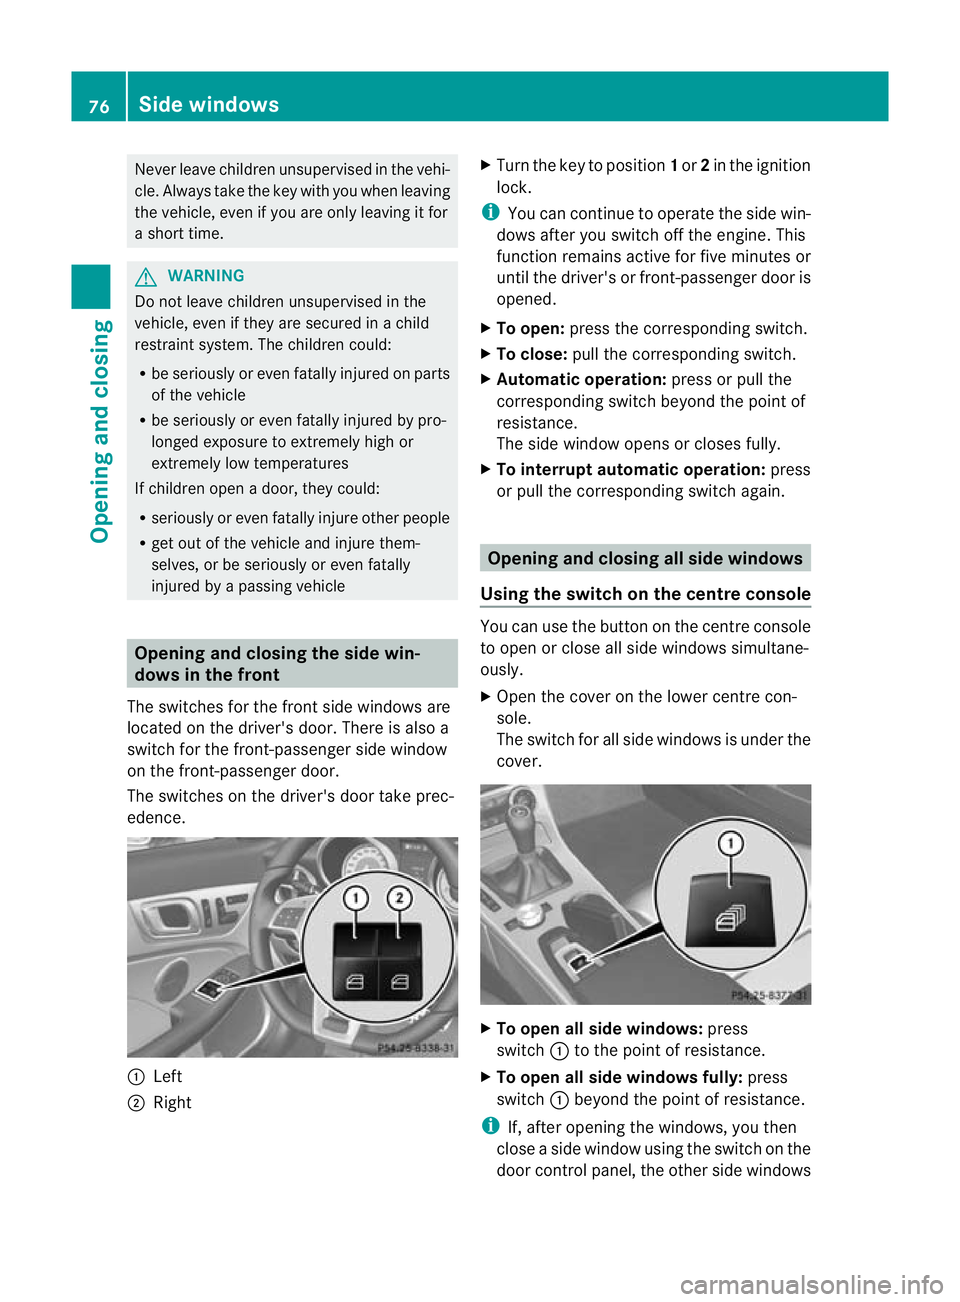
dows in the front
The switches for the front side windows are
located on the driver's door. There is also a
switch for the front-passenger side window
on the front-passenger door.
The switches on the driver's door take prec-
edence. :
Left
; Right X
Turn the key to position 1or 2in the ignition
lock.
i You can continue to operate the side win-
dows after you switch off the engine. This
function remains active for five minutes or
until the driver's or front-passenger door is
opened.
X To open: press the corresponding switch.
X To close: pull the corresponding switch.
X Automatic operation: press or pull the
corresponding switch beyond the point of
resistance.
The side window opens or closes fully.
X To interrupt automatic operation: press
or pull the corresponding switch again. Opening and closing all side windows
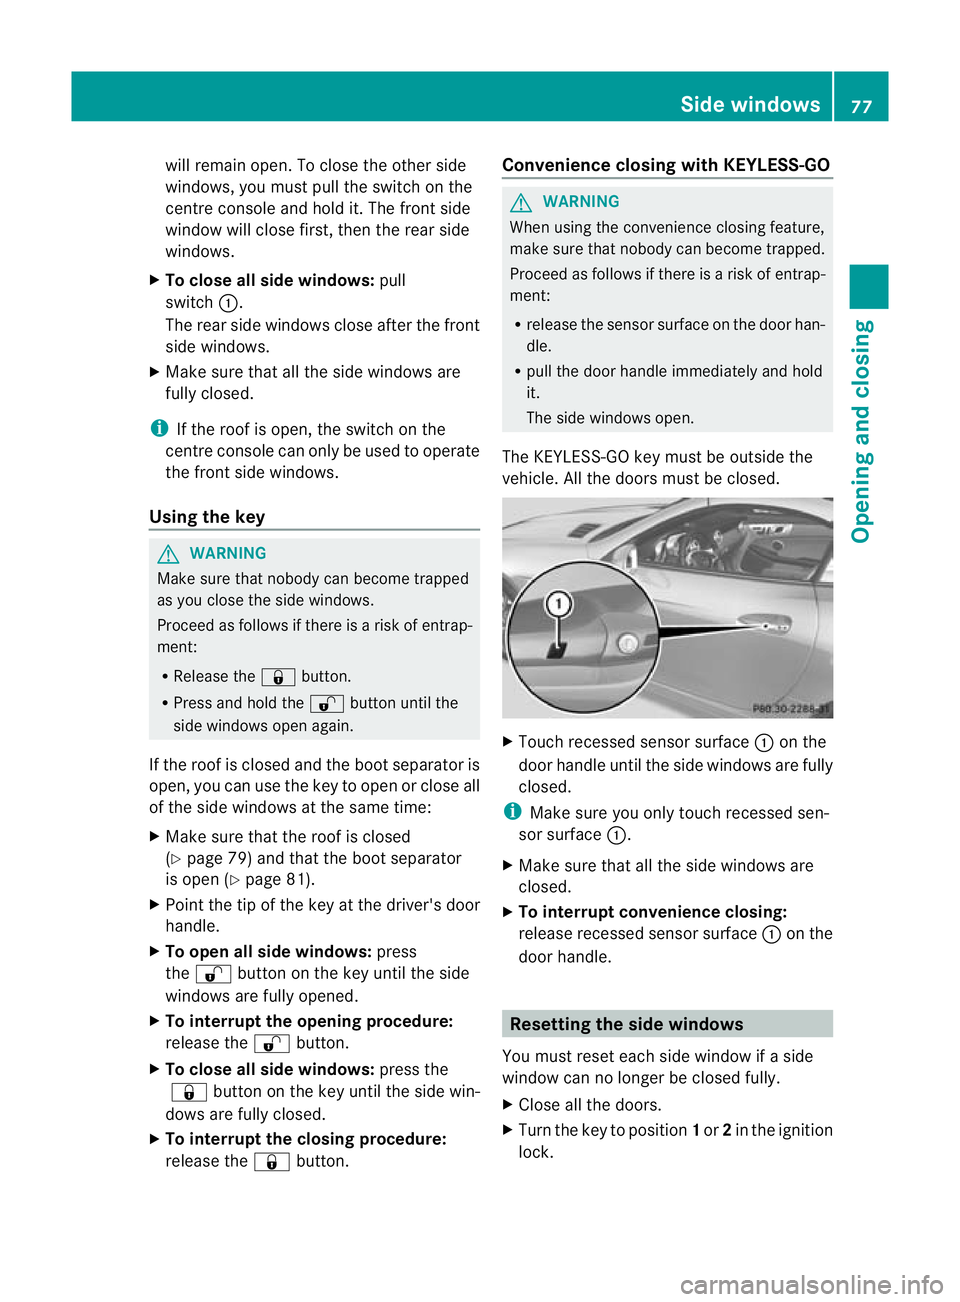
Using the switch on the centre console You can use the button on the centre console
to open or close all side windows simultane-
ously.
X Open the cover on the lower centre con-
sole.
The switch for all side windows is under the
cover. X
To open all side windows: press
switch :to the point of resistance.
X To open all side windows fully: press
switch :beyond the point of resistance.
i If, after opening the windows, you then
close a side window using the switch on the
door control panel, the other side windows 76
Side windowsOpening and closing
Page 80 of 321
will remain open
.To close the other side
windows, you must pull the switch on the
centre console and hold it. The front side
window will close first, then the rear side
windows.
X To close all side windows: pull
switch :.
The rear side windows close after the front
side windows.
X Make sure that all the side windows are
fully closed.
i If the roof is open, the switch on the
centre console can only be used to operate
the front side windows.
Using the key G
WARNING
Make sure that nobody can become trapped
as you close the side windows.
Proceed as follows if there is a risk of entrap-
ment:
R Release the &button.
R Press and hold the %button until the
side windows open again.
If the roof is closed and the boot separator is
open, you can use the key to open or close all
of the side windows at the same time:
X Make sure that the roof is closed
(Y page 79) and that the boot separator
is open (Y page 81).
X Point the tip of the key at the driver's door
handle.
X To open all side windows: press
the % button on the key until the side
windows are fully opened.
X To interrupt the opening procedure:
release the %button.
X To close all side windows: press the
& button on the key until the side win-
dows are fully closed.
X To interrupt the closing procedure:
release the &button. Convenience closing with KEYLESS-GO G
WARNING
When using the convenience closing feature,
make sure that nobody can become trapped.
Proceed as follows if there is a risk of entrap-
ment:
R release the sensor surface on the door han-
dle.
R pull the door handle immediately and hold
it.
The side windows open.
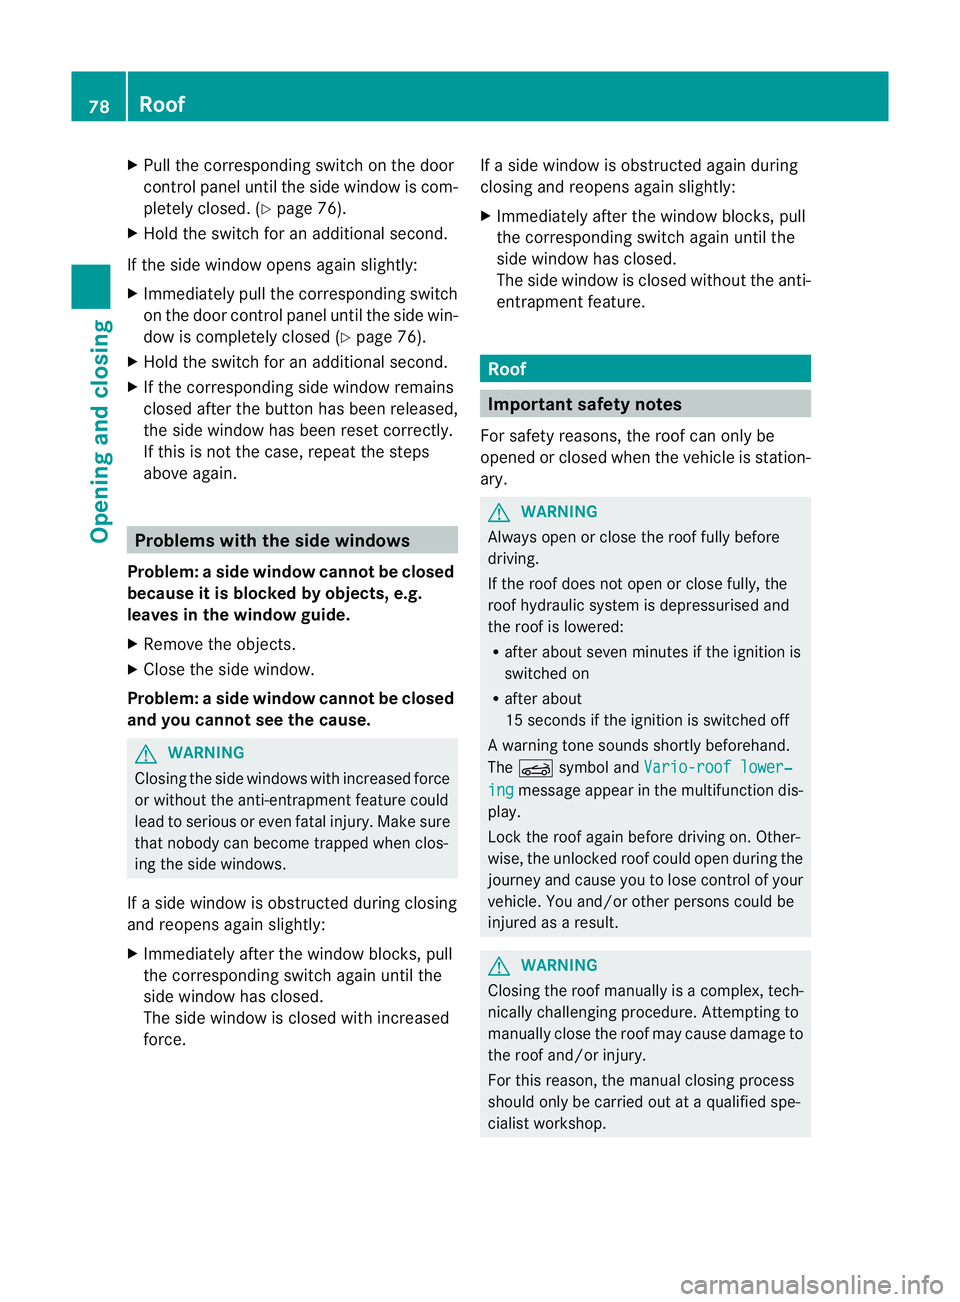
The KEYLESS-GO key must be outside the
vehicle. All the doors must be closed. X
Touch recessed sensor surface :on the
door handle until the side windows are fully
closed.
i Make sure you only touch recessed sen-
sor surface :.
X Make sure that all the side windows are
closed.
X To interrupt convenience closing:
release recessed sensor surface :on the
door handle. Resetting the side windows
You must reset each side window if a side
window can no longer be closed fully.
X Close all the doors.
X Turn the key to position 1or 2in the ignition
lock. Side windows
77Opening and closing Z
Page 81 of 321
X
Pull the corresponding switch on the door
control panel until the side window is com-
pletely closed. (Y page 76).
X Hold the switch for an additional second.
If the side window opens again slightly:
X Immediately pull the corresponding switch
on the door control panel until the side win-
dow is completely closed (Y page 76).
X Hold the switch for an additional second.
X If the corresponding side window remains
closed after the button has been released,
the side window has been reset correctly.
If this is not the case, repeat the steps
above again. Problems with the side windows
Problem: aside window cannot be closed
because it is blocked by objects, e.g.
leaves in the window guide.
X Remove the objects.
X Close the side window.
Problem :aside window cannot be closed
and you cannot see the cause. G
WARNING
Closing the side windows with increased force
or without the anti-entrapment feature could
lead to serious or even fatal injury. Make sure
that nobody can become trapped when clos-
ing the side windows.
If a side window is obstructed during closing
and reopens again slightly:
X Immediately afte rthe window blocks, pull
the corresponding switch again until the
side window has closed.
The side window is closed with increased
force. If a side window is obstructed again during
closing and reopens again slightly:
X
Immediately after the window blocks, pull
the corresponding switch again until the
side window has closed.
The side window is closed without the anti-
entrapment feature. Roof
Important safety notes
For safety reasons, the roof can only be
opened or closed when the vehicle is station-
ary. G
WARNING
Always open or close the roof fully before
driving.
If the roof does not open or close fully, the
roof hydraulic system is depressurised and
the roof is lowered:
R after about seven minutes if the ignition is
switched on
R after about
15 seconds if the ignition is switched off
Aw arning tone sounds shortly beforehand.
The K symbol and Vario-roof lower‐ ing message appear in the multifunction dis-
play.
Lock the roof again before driving on. Other-
wise, the unlocked roo fcould open during the
journey and cause you to lose control of your
vehicle. You and/or other persons could be
injured as a result. G
WARNING
Closing the roof manually is a complex, tech-
nically challenging procedure. Attempting to
manually close the roof may cause damage to
the roof and/or injury.
For this reason, the manual closing process
should only be carried out at a qualified spe-
cialist workshop. 78
RoofOpening and closing
Page 83 of 321
parts such as the boot lid, the hinged roof or
the roof linkage.
If there is a risk of entrapment, immediately
release the %or& button on the key.
The roof folding mechanism stops immedi-
ately.
Opening and closing i
The key must be close to the driver's door
handle.
X Close the boot separator (Y page 81).
X Close the boot lid.
X Point the tip of the key at the driver's door
handle.
X To open: press and hold the %button
on the key until the roof is fully opened.
The roof and the rear side windows open.
The fron tside windows close.
X To interrupt the opening procedure:
release the %button.
X To open the front side windows: press
and hold the %button on the key again.
X To close: press and hold the &button
on the key until the roof is fully closed.
The roof and the side windows close.
X To interrupt the closing procedure:
release the &button.
i The key cannot be used to open the roof
if the roof is closed and the boot separator
is open .Instead, all of the side windows
open or close simultaneously (Y page 76).
Additionally, the Close boot separator message appears in the multifunctio
ndis-
play. Locking the roof again
The roof is not locked if:
R the K symbol and Vario-roof in operation message appear in the multi-
function display
R the K symbol and Open/close vario-
roof completely message appear and
you hear a warning tone
R you hear a warning tone for up to ten sec-
onds when pulling away or while driving.
You can lock the roof again if it is not locked
fully.
X Stop the vehicle immediately, paying atten-
tion to road and traffic conditions.
X Make sure that the key is in position 2in
the ignition lock.
X Press the roof switch (Y page 79). Boot separator
General notes The boot separator can be used to cover lug-
gage and loads in the boot.
!
To avoid damaging the roof or luggage
when folding back the roof, you should:
R only load the boot to below the boot sep-
arator
R not place any objects on or in front of the
boot separator
R not place any objects on the cover
behind the roll bars
R not allow the load to push up the boot
separator 80
RoofOpening and closing