2012 MERCEDES-BENZ SL ROADSTER navigation system
[x] Cancel search: navigation systemPage 416 of 637
Searching for an address book entry
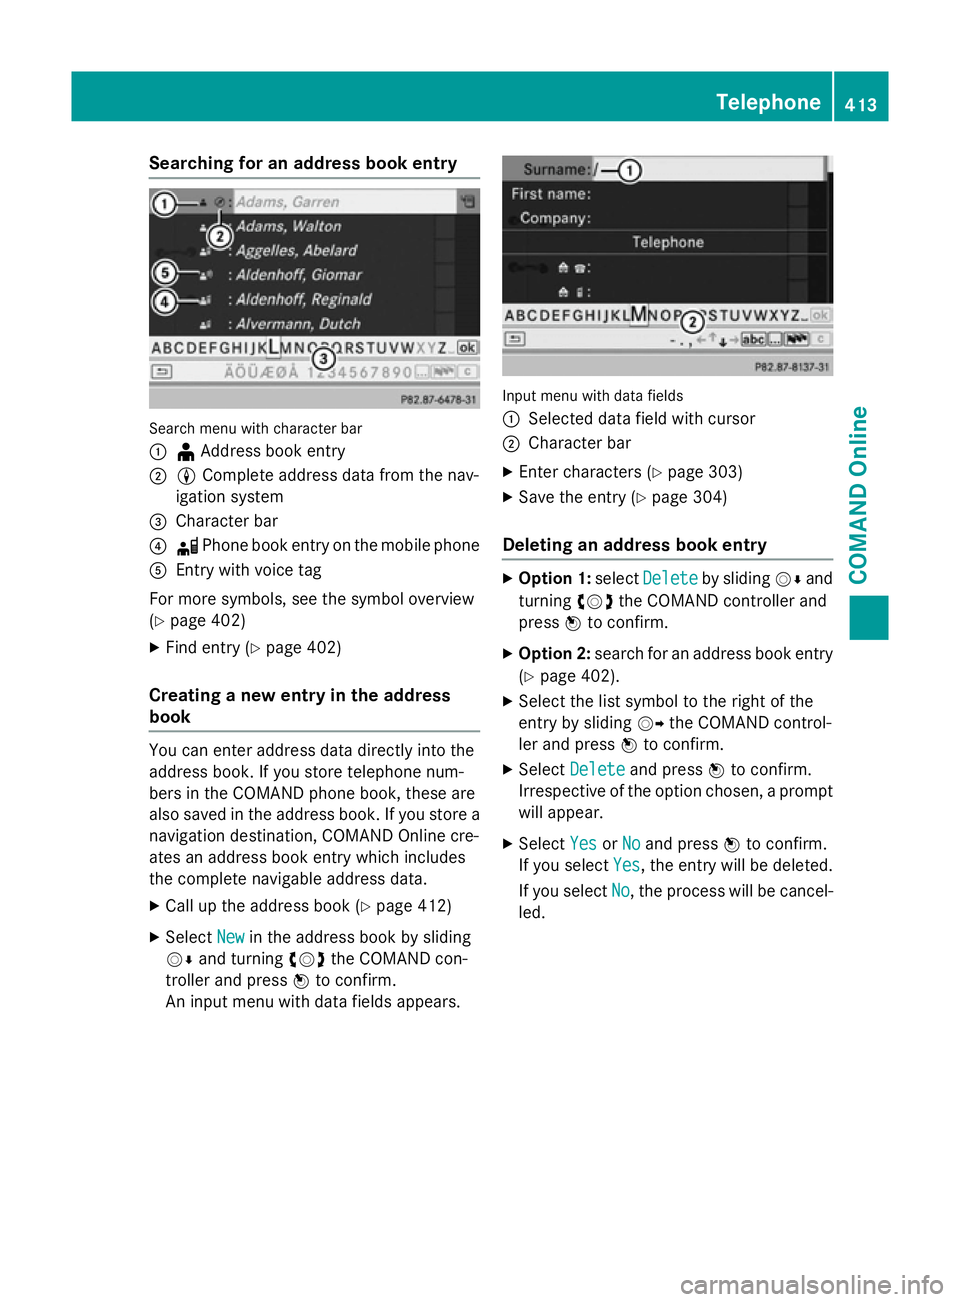
Search menu with character bar
:
¥Address book entry
; L Complete address data from the nav-
igation system
= Character bar
? d Phone book entry on the mobile phone
A Entry with voice tag
For more symbols, see the symbol overview
(Y page 402)
X Find entry (Y page 402)
Creating a new entry in the address
book You can enter address data directly into the
address book. If you store telephone num-
bers in the COMAND phone book, these are
also saved in the address book. If you store a
navigation destination, COMAND Online cre-
ates an address book entry which includes
the complete navigable address data.
X Call up the address book (Y page 412)
X Select New
New in the address book by sliding
VÆ and turning cVdthe COMAND con-
troller and press Wto confirm.
An input menu with data fields appears. Input menu with data fields
:
Selected data field with cursor
; Character bar
X Enter characters (Y page 303)
X Save the entry (Y page 304)
Deleting an address book entry X
Option 1: selectDelete Delete by sliding VÆand
turning cVdthe COMAND controller and
press Wto confirm.
X Option 2: search for an address book entry
(Y page 402).
X Select the list symbol to the right of the
entry by sliding VYthe COMAND control-
ler and press Wto confirm.
X Select Delete Delete and press Wto confirm.
Irrespective of the option chosen, a prompt
will appear.
X Select Yes
YesorNo
No and press Wto confirm.
If you select Yes
Yes, the entry will be deleted.
If you select No
No, the process will be cancel-
led. Telephone
413COMAND Online Z
Page 419 of 637
X
Enter the destination address
(Y page 326)
X Start route guidance.
The navigable address is added to the
address book entry automatically.
i This will provide you with an address book
entry that is suitable for navigation. Once
you have altered the address data in the
address entry menu, the altered address in
the navigation system will be used the next
time the system is started instead of the
postal address. Therefore always ensure
that the destination address is indeed the
required destination when navigation
starts from the address book.
Voice tags Introduction
You can enter voice tags via LINGUATRONIC
(see the separate operating instructions).
Once you have assigned a voice tag to an
address book entry, you can vocally call up
this entry and dial a phone number, for exam-
ple. You can add one voice tag per address
book entry.
Adding or changing a voice tag
X Search for an address book entry with or
without a voice tag (¦) (Y page 413).
X Select the list symbol to the right of the
entry by sliding VYthe COMAND control-
ler and press Wto confirm.
X Select Voice
Voice tag tagand press Wto confirm.
X Select Add
Add orChange
Change and press Wto con-
firm.
Subsequent operation is voice-controlled.
LINGUATRONIC guides you through the
dialogues.
Deleting a voice tag
X Search for an address book entry with a
voice tag (Y page 413).
X Select the list symbol to the right of the
entry by sliding VYthe COMAND control-
ler and press Wto confirm. X
Select Voice
Voice tag tagand press Wto confirm.
X Select Delete
Delete and press Wto confirm.
A deletion prompt appears.
X Select Yes
Yes orNo
No and press the 9button to
confirm.
If you select Yes Yes, COMAND Online deletes
the voice tag.
If you select No No, the process will be cancel-
led.
Listening to a voice tag X Search for an address book entry with a
voice tag (Y page 413).
X Select the list symbol to the right of the
entry by sliding VYthe COMAND control-
ler and press Wto confirm.
X Select Voice Voice tag tagand press Wto confirm.
X Select Listen
Listen and press Wto confirm.
You hear the voice tag.
Importing phone book entries This function allows you to store phone book
entries from the mobile phone in the address
book.
Possible sources are:
R the mobile phone
R the memory card
R the USB device
R the Bluetooth ®
interface
Imported phone book entries are indicated in
the phone book by different symbols
(Y page 402).
X Search for an entry in the phone book on
the mobile phone d(Ypage 402).
X Select the list symbol to the right of the
entry by sliding VYthe COMAND control-
ler and press Wto confirm.
X Select Save entry
Save entry and pressWto con-
firm.
The Data saved Data saved message appears. The
phone book entry is now saved as an
address book entry. 416
TelephoneCOMAND Online
Page 471 of 637
audio signal from the currently activated
audio or video source.
i Telephone conversations and navigation
announcements are not interrupted.
A display message appears in the display in all
audio operating modes.
Interrupting a traffic announcement
During a traffic announcement:
X On COMAND Onlin eor on the multifunction
steering wheel, briefly press the 8but-
ton.
or
X Press the 9,:or9 button on the
multifunction steering wheel.
COMAND Online switches back to the
audio source that was selected before the
announcement. Any subsequent new
announcements will continue to interrupt
the audio source.
Radio text/radio text plus Messages in the display
The function is available in FM mode and in
DAB radio mode.
Radio text/radio text plus consists of addi-
tionally transmitted data, e.g. information on
the current programme, which is displayed in the COMAND display.
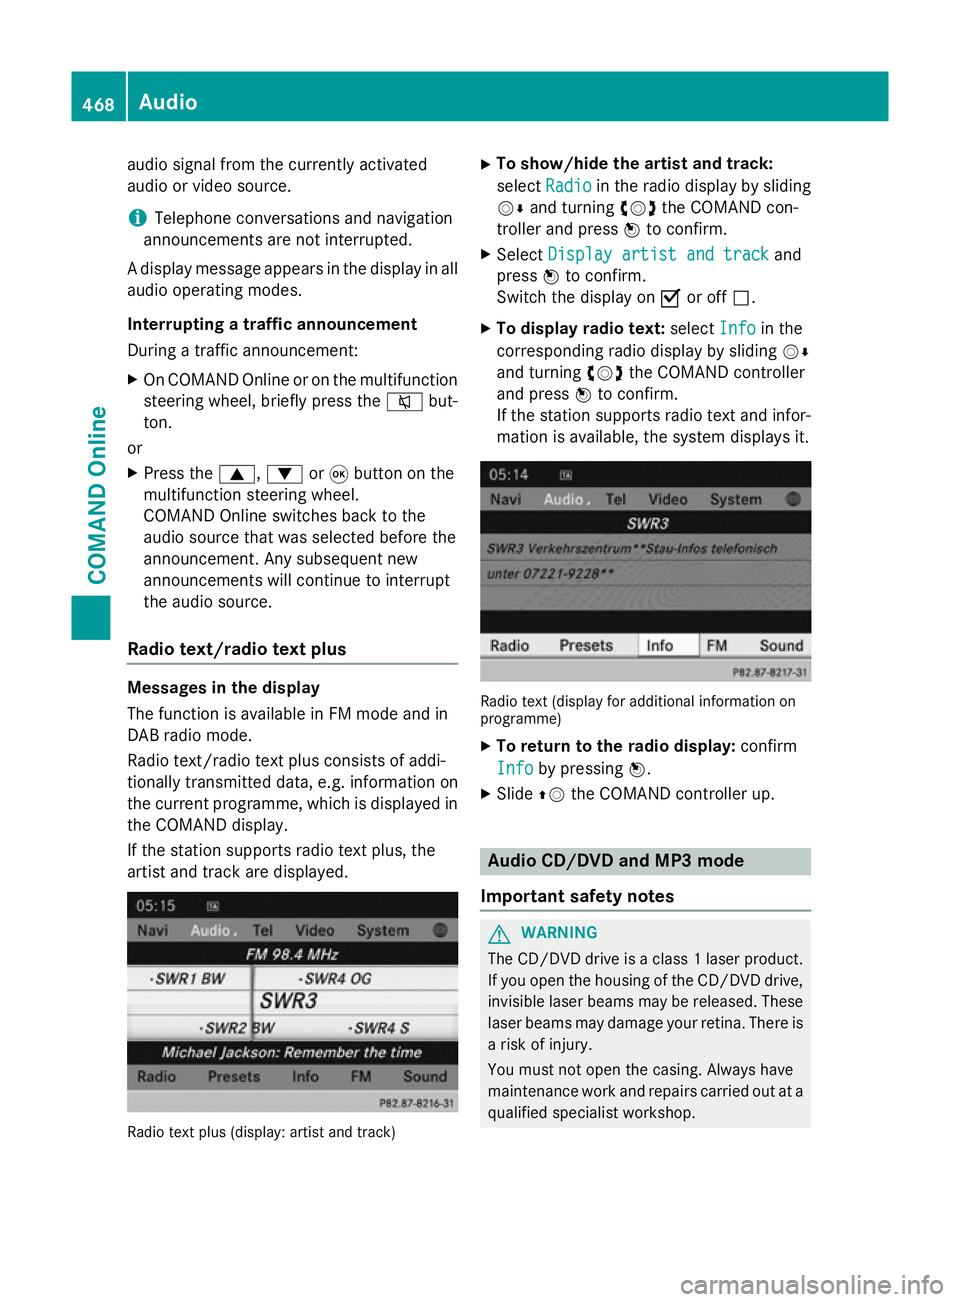
If the station supports radio text plus, the
artist and track are displayed. Radio text plus (display: artist and track) X
To show/hide the artist and track:
select Radio Radio in the radio display by sliding
VÆ and turning cVdthe COMAND con-
troller and press Wto confirm.
X Select Display artist and track
Display artist and track and
press Wto confirm.
Switch the display on Oor off ª.
X To display radio text: selectInfo
Info in the
corresponding radio display by sliding VÆ
and turning cVdthe COMAND controller
and press Wto confirm.
If the station supports radio text and infor- mation is available, the system displays it. Radio text (display for additional information on
programme)
X To return to the radio display: confirm
Info
Info by pressing W.
X Slide ZVthe COMAND controller up. Audio CD/DVD and MP3 mode
Important safety notes G
WARNING
The CD/DVD drive is a class 1 laser product. If you open the housing of the CD/DVD drive,
invisible laser beams may be released. These laser beams may damage your retina. There is
a risk of injury.
You must not open the casing. Always have
maintenance work and repairs carried out at a
qualified specialist workshop. 468
AudioCOMAND Online
Page 503 of 637
Special considerations when using MP3
players
Up to 8 directory levels with up to 1,000
tracks per directory are supported.
Do not use USB extension leads or adapters. They can impair functionality.
i DRM (Digital Rights Management) protec-
ted files are not supported by the Media
Interface. Audio AUX mode
Notes on audio AUX mode The varying volumes of external audio sour-
ces can mean that system messages (e.g.
traffic and navigation announcements) are
played at a noticeably increased volume. If
necessary, deactivate the system messages
or adjust their volume manually.
You can connect an external audio source
(AUX) to COMAND Online.
Depending on the vehicle model series the
connection is made via a jack in the storage
compartment in the centre console or via the
USB port (Y page 472).
If COMAND Online is equipped with a Media
Interface, external audio sources are connec-
ted using the cable set provided. The cable
set then replaces the audio AUX socket. The
connections for the Media Interface are loca- ted in the stowage compartment in the centre
console.
i You can find more information on the
Internet at http://www.mercedes-
benz.com/connect and in the "Media
Interface mode" section (Y page 494).
Switching to audio AUX mode Switching on with the function button
The external device is connected to the audio
AUX input.
X Press the hfunction button one or more
times. By pressing the function button repeatedly,
you can change the operating mode in the
following order:
R audio CD/DVD/MP3 (disc)
R memory card mode
R MUSIC REGISTER
R USB memory
R Media Interface or audio AUX mode
R operation with Bluetooth ®
audio
Switching on with the audio menu
When you connect an external audio source,
audio AUX is not selected automatically.
X Select Audio
Audio in the main function bar by
sliding ZVand turning cVdthe COMAND
controller and press Wto confirm.
If AUX mode was the last mode selected, it
will now be active.
If another audio source is switched on, you
can now switch to audio AUX mode in the
audio menu.
X Select Audio
Audio usingZVand press Wto
confirm.
The audio menu appears.
X Select Aux Auxby turning cVdand press Wto
confirm.
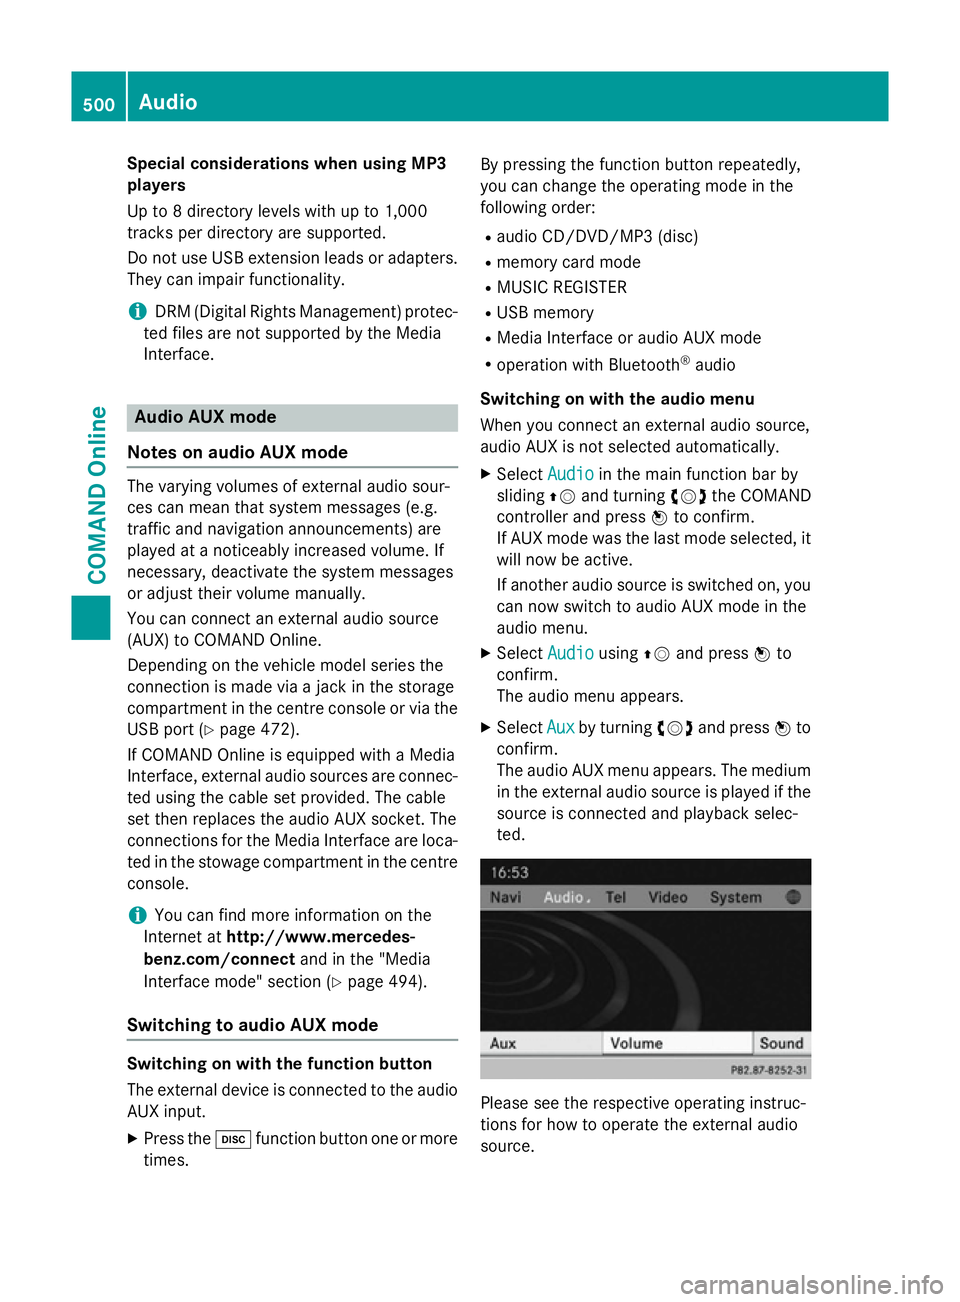
The audio AUX menu appears. The medium in the external audio source is played if the
source is connected and playback selec-
ted. Please see the respective operating instruc-
tions for how to operate the external audio
source.500
AudioCOMAND Online
Page 519 of 637
Subtitles and camera angle
These functions are not available on all DVDs.
The number of subtitle languages and camera
angles available depends on the content of
the DVD. It may also be possible to access the settings from the DVD menu.
X Show the DVD menu (Y page 514).
X Select DVD-Video DVD-Video in the menu by turning
cVd the COMAND controller and press W
to confirm.
X Select DVD functions
DVD functions and pressWto
confirm.
X Select Subtitles
Subtitles orCamera angle
Camera angle and
press Wto confirm.
In both cases, a menu appears. The #dot in
front of an entry indicates the current set-
ting.
X Select a setting by turning cVdthe
COMAND controller and press Wto con-
firm.
Interactive content DVDs may contain interactive content (e.g. a
video game). In a video game, for example,
you may be able to influence events by select- ing and triggering actions. The type and num- ber of actions depend on the DVD.
X Select an action by sliding ZVÆorXVY the
COMAND controller and press Wto exe-
cute it.
A menu appears and the first entry, Select Select,
is highlighted.
X Press Wthe COMAND controller. Video AUX operation
Connecting external video sources External video sources may have different
volumes, which can mean that system mes-
sages such as traffic announcements and
navigation system announcements are much louder. If necessary, deactivate the system
messages or adjust their volume manually. If your vehicle is equipped with the Media
Interface, you can connect an external video
source.
You require an additional audio/video cable
set to connect an external video source to the
Media Interface.
For more details, please contact a Mercedes- Benz Service Centre or visit http://
www.mercedes-benz.com/connect . Then,
follow the instructions in the "Media Inter-
face" section.
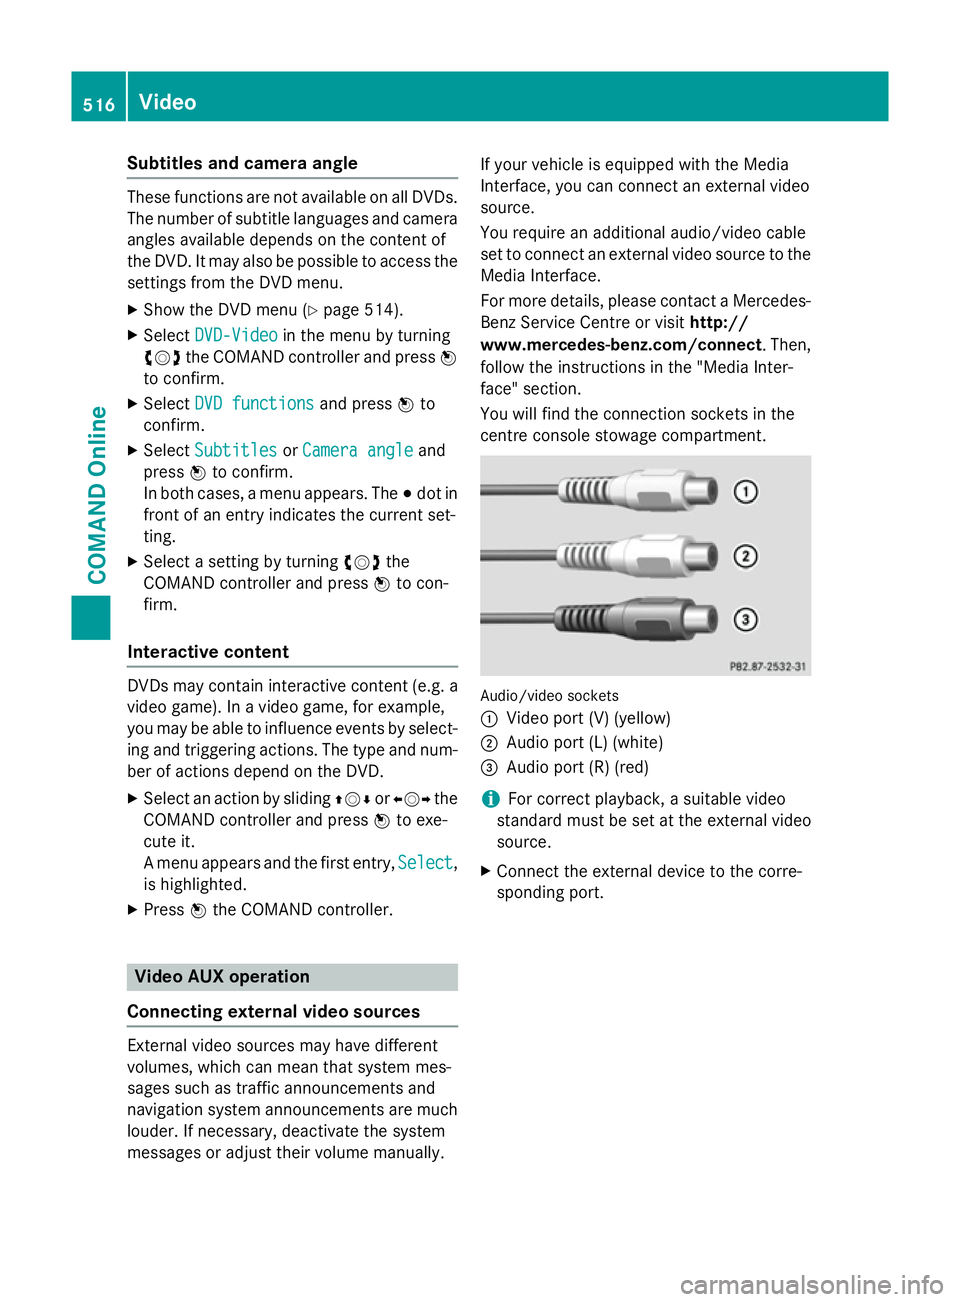
You will find the connection sockets in the
centre console stowage compartment. Audio/video sockets
:
Video port (V) (yellow)
; Audio port (L) (white)
= Audio port (R) (red)
i For correct playback, a suitable video
standard must be set at the external video
source.
X Connect the external device to the corre-
sponding port. 516
VideoCOMAND Online