2012 MERCEDES-BENZ SL ROADSTER fuse box location
[x] Cancel search: fuse box locationPage 17 of 637

Preparing the vehicle ..................... 606
Raising the vehicle .........................6 07
Removing a wheel .......................... 608
Securing the vehicle against roll-
ing away ........................................ 606
Flat tyre
MOExtended tyres ......................... 578
Preparing the vehicle ..................... 578
TIREFIT kit ...................................... 579
see Emergency spare wheel
Floormat ............................................. 558
Foglamps
Extended range .............................. 132
Frequencies
Garage door opene r....................... 555
Mobile phone ................................. 620
Two-way radio ................................ 620
Frequency
Adjusting for radio stations ............ 466
Front-passenger seat
Adjusting from the driver's seat ..... 114
Fuel
Additives ........................................ 625
Consumption information .............. 625
Consumption statistics .................. 231
Displaying consumption ................. 317
Displaying the current consump-
tion ................................................ 232
Displaying the range ...................... 232
Driving tips .................................... 178
E10 ................................................ 624
Fuel gaug e....................................... 40
Grade (petrol) ................................ 624
Important safety notes .................. 623
Notes for AMG vehicles ................. 624
Problem (malfunction) ................... 175
Refuelling ....................................... 173
Tank content/reserve fue l............. 623
Fuel filler flap
Opening ......................................... 174
Fuel level
Calling up the range (on-board
computer) ...................................... 232
Gaug e.............................................. 40
Fuel reserve
see Fuel
Fuel tank
Capacity ........................................ 623 Problem (malfunction) ................... 175
Fuse allocation chart (vehicle tool
kit) ...................................................... 577
Fuses
Allocation chart ............................. 592
Before changing ............................. 592
Dashboard fuse box ....................... 592
Fuse box in the engine compart-
ment .............................................. 593
Fuse box in the rear compartment .. 593
Important safety notes .................. 592 G
Garage door opener Clearing the memory ..................... 555
Frequencies ................................... 555
General notes ................................ 553
Important safety notes .................. 553
Opening/closing the garage doo r..5 55
Programming (button in the rear-
view mirror) ................................... 553
Gear indicator (on-board com-
puter) ................................................. .244
Gearshift program
SETUP (on-board computer) .......... 244
Genuine Mercedes-Benz parts ........... 31
Glass roof (sunblind) ......................... 109
Glove compartment .......................... 544
Google™ local search
Importing a destination/route ....... 443
Popular searches ........................... 444
Search .......................................... .442
Search history ............................... 444
Selecting a search position ............ 442
Using as the destination ................ 443
GPS reception ................................... .323
Gracenote® Media Database ........... 476 H
Handbrake see Parking brake
HANDS-FREE ACCESS .......................... 96
Hands-free microphone, switching
on/off ................................................. 398 14
Index
Page 580 of 637

Fire extinguisher
G
WARNING
When you brake heavily or change direction
suddenly, the fire extinguisher can be thrown around the vehicle interior if the roller box is
left open. There is a risk of accident and injury
to you or the passenger. Keep the shutter of
the roller box closed whilst the vehicle is in
motion. :
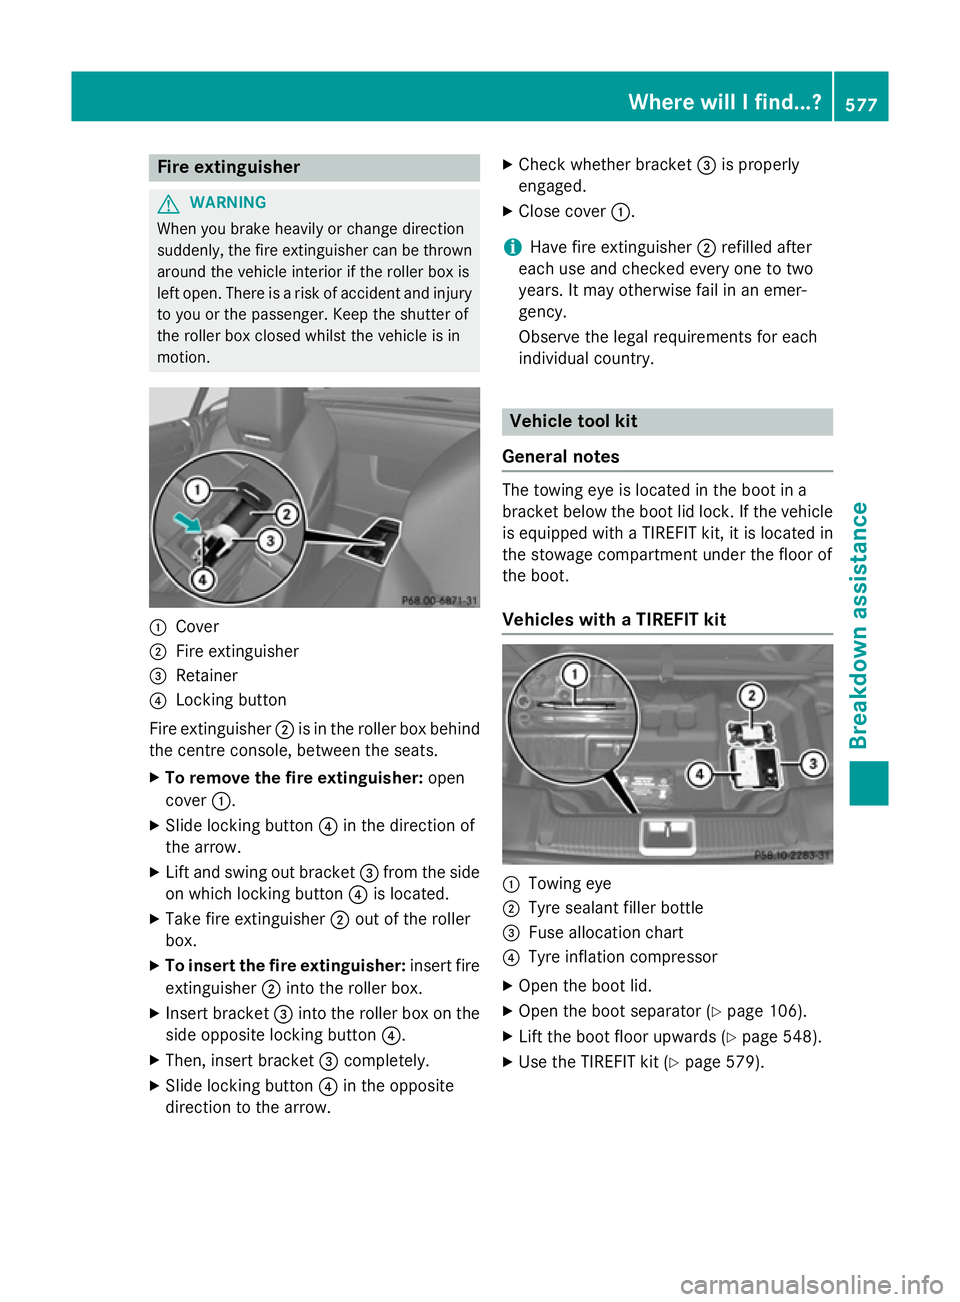
Cover
; Fire extinguisher
= Retainer
? Locking button
Fire extinguisher ;is in the roller box behind
the centre console, between the seats.
X To remove the fire extinguisher: open
cover :.
X Slide locking button ?in the direction of
the arrow.
X Lift and swing out bracket =from the side
on which locking button ?is located.
X Take fire extinguisher ;out of the roller
box.
X To insert the fire extinguisher: insert fire
extinguisher ;into the roller box.
X Insert bracket =into the roller box on the
side opposite locking button ?.
X Then, insert bracket =completely.
X Slide locking button ?in the opposite
direction to the arrow. X
Check whether bracket =is properly
engaged.
X Close cover :.
i Have fire extinguisher
;refilled after
each use and checked every one to two
years. It may otherwise fail in an emer-
gency.
Observe the legal requirements for each
individual country. Vehicle tool kit
General notes The towing eye is located in the boot in a
bracket below the boot lid lock. If the vehicle
is equipped with a TIREFIT kit, it is located in
the stowage compartment under the floor of
the boot.
Vehicles with a TIREFIT kit :
Towing eye
; Tyre sealant filler bottle
= Fuse allocation chart
? Tyre inflation compressor
X Open the boot lid.
X Open the boot separator (Y page 106).
X Lift the boot floor upwards (Y page 548).
X Use the TIREFIT kit (Y page 579). Where will I find...?
577Breakdown assistance Z
Page 595 of 637

i
You can find information on "Jump-start-
ing" under (Y page 586). Electrical fuses
Important safety notes
G
WARNING
If you manipulate, bridge or replace a faulty
fuse with a fuse of a higher amperage, the
electric cables could be overloaded. This may result in a fire. There is a risk of an accident
and injury.
Always replace faulty fuses with specified new fuses of the correct amperage.
! Only use fuses that have been approved
for Mercedes-Benz vehicles and which
have the correct fuse rating for the system concerned. Otherwise, components or sys-
tems could be damaged.
The fuses in your vehicle serve to disconnect
faulty circuits. If a fuse blows, all the compo- nents on the circuit and their functions will
fail.
Blown fuses must be replaced with fuses of
the same rating, which you can recognise by
the colour and fuse rating. The fuse ratings
are listed in the fuse allocation chart.
If the newly inserted fuse also blows, have the
cause traced and rectified at a qualified spe-
cialist workshop, e.g. a Mercedes-Benz Ser-
vice Centre. Before replacing a fuse
X Secure the vehicle against rolling away
(Y page 175).
X Switch off all electrical consumers.
X Turn the key to position 0in the ignition
lock and remove it (Y page 155).
or
X On vehicles with KEYLESS-GO, make sure
the ignition is switched off (Y page 155).All indicator lamps in the instrument cluster
must be off.
The fuses are located in various fuse boxes:
R fuse box in the engine compartment on the
right-hand side of the vehicle, when viewed
in the direction of travel
R dashboard fuse box
R fuse box in the rear compartment on the
right-hand side of the vehicle, when viewed
in the direction of travel
The fuse allocation chart is located in the
vehicle tool kit in the stowage compartment
under the boot floor (Y page 577). Dashboard fuse box
i Observe the "Important safety notes" sec-
tion (Y page 592).
! Do not use a pointed object such as a
screwdriver to open the cover in the dash-
board. You could damage the dashboard or
the cover.
! Make sure that no moisture can enter the
fuse box when the cover is open.
! When closing the cover, make sure that it
is lying correctly on the fuse box. Moisture
seeping in or dirt could otherwise impair
the operation of the fuses. X
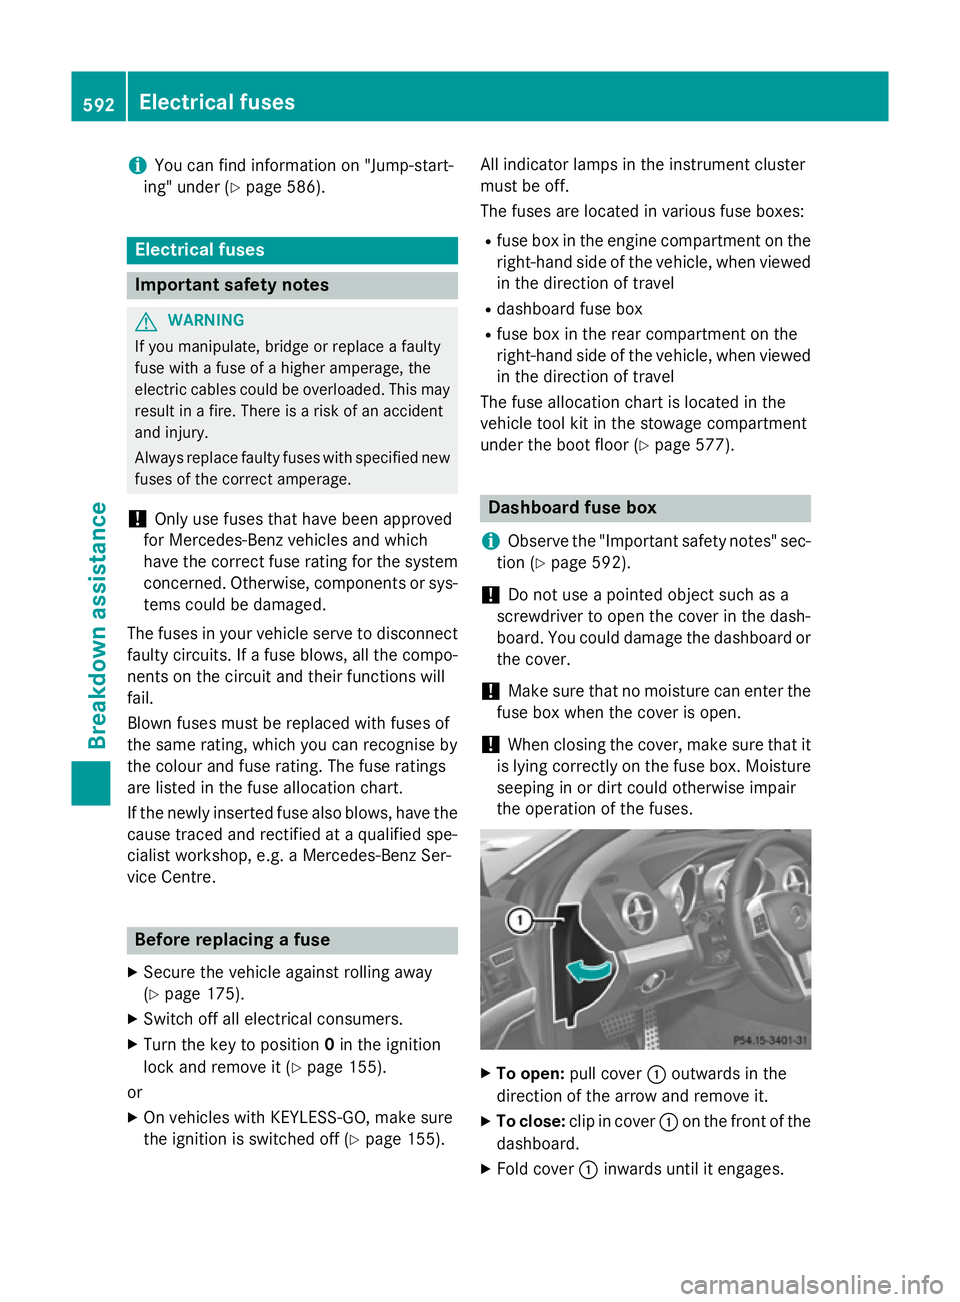
To open: pull cover :outwards in the
direction of the arrow and remove it.
X To close: clip in cover :on the front of the
dashboard.
X Fold cover :inwards until it engages. 592
Electrical fusesBreakdown assistance