2012 MERCEDES-BENZ SL ROADSTER bluetooth
[x] Cancel search: bluetoothPage 503 of 637

Special considerations when using MP3
players
Up to 8 directory levels with up to 1,000
tracks per directory are supported.
Do not use USB extension leads or adapters. They can impair functionality.
i DRM (Digital Rights Management) protec-
ted files are not supported by the Media
Interface. Audio AUX mode
Notes on audio AUX mode The varying volumes of external audio sour-
ces can mean that system messages (e.g.
traffic and navigation announcements) are
played at a noticeably increased volume. If
necessary, deactivate the system messages
or adjust their volume manually.
You can connect an external audio source
(AUX) to COMAND Online.
Depending on the vehicle model series the
connection is made via a jack in the storage
compartment in the centre console or via the
USB port (Y page 472).
If COMAND Online is equipped with a Media
Interface, external audio sources are connec-
ted using the cable set provided. The cable
set then replaces the audio AUX socket. The
connections for the Media Interface are loca- ted in the stowage compartment in the centre
console.
i You can find more information on the
Internet at http://www.mercedes-
benz.com/connect and in the "Media
Interface mode" section (Y page 494).
Switching to audio AUX mode Switching on with the function button
The external device is connected to the audio
AUX input.
X Press the hfunction button one or more
times. By pressing the function button repeatedly,
you can change the operating mode in the
following order:
R audio CD/DVD/MP3 (disc)
R memory card mode
R MUSIC REGISTER
R USB memory
R Media Interface or audio AUX mode
R operation with Bluetooth ®
audio
Switching on with the audio menu
When you connect an external audio source,
audio AUX is not selected automatically.
X Select Audio
Audio in the main function bar by
sliding ZVand turning cVdthe COMAND
controller and press Wto confirm.
If AUX mode was the last mode selected, it
will now be active.
If another audio source is switched on, you
can now switch to audio AUX mode in the
audio menu.
X Select Audio
Audio usingZVand press Wto
confirm.
The audio menu appears.
X Select Aux Auxby turning cVdand press Wto
confirm.
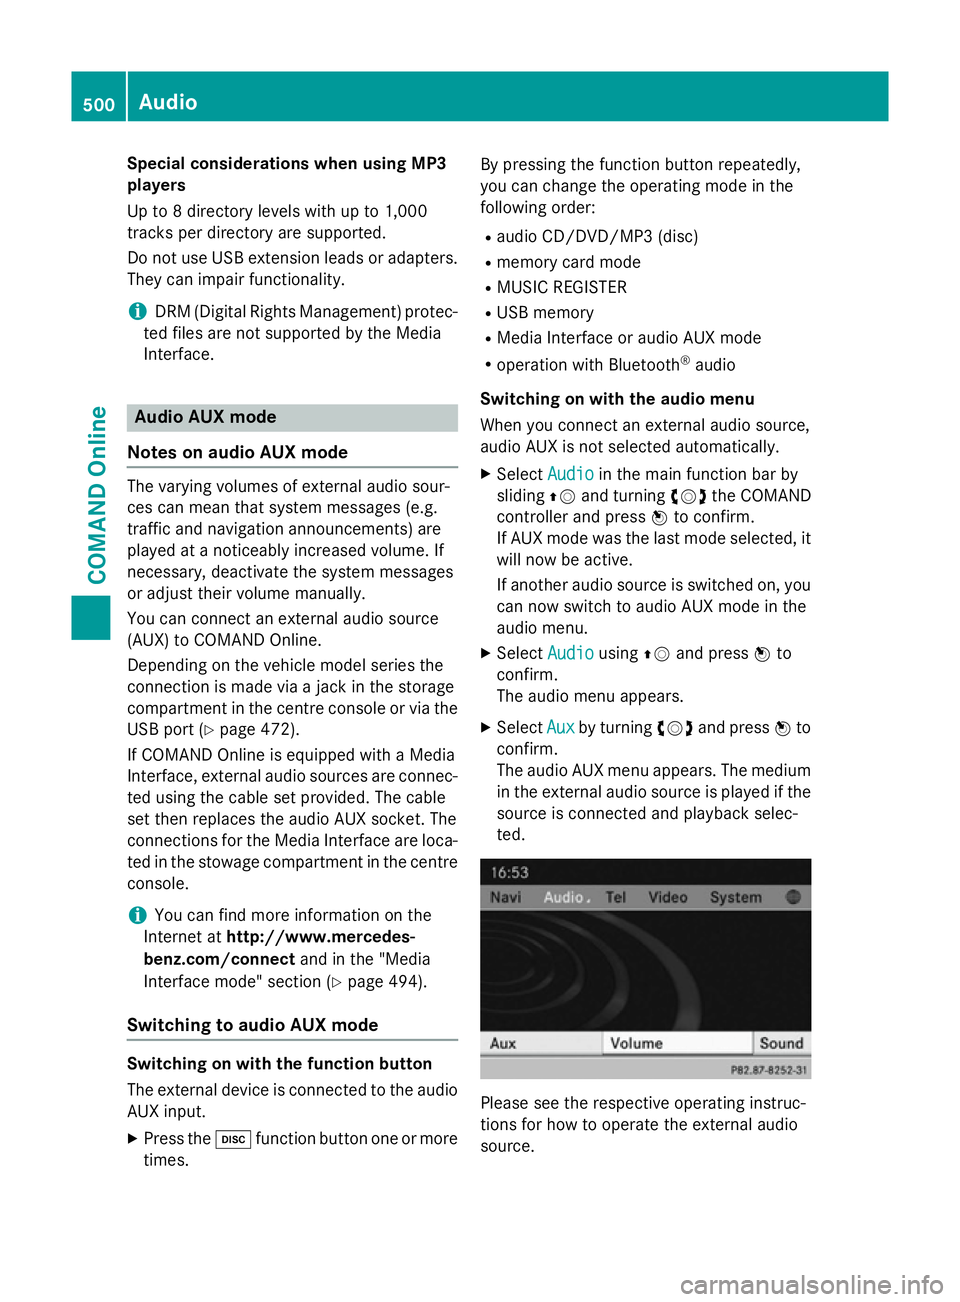
The audio AUX menu appears. The medium in the external audio source is played if the
source is connected and playback selec-
ted. Please see the respective operating instruc-
tions for how to operate the external audio
source.500
AudioCOMAND Online
Page 515 of 637

Switching to video DVD mode
Switching on automatically
X Single DVD drive: insert a video DVD.
COMAND loads the medium inserted and
starts to play it.
X DVD changer: insert a video DVD.
X Press h.
or
X Press the %back button.
COMAND Online loads the medium inser-
ted and starts to play it.
Switching on with the function button X Press the hfunction button.
COMAND Online switches to the disc oper-
ating mode previously set.
By pressing the function button repeatedly,
you can change the operating mode in the
following order:
R audio CD/DVD/video DVD/MP3 in the
DVD changer or single DVD drive (disc
mode)
R memory card mode
R MUSIC REGISTER
R USB memory
R Media Interface or audio AUX mode
R operation with Bluetooth ®
audio
X DVD changer: selectMedia
Media by sliding VÆ
and turning cVdthe COMAND controller
and press Wto confirm.
Single DVD drive: selectMedia Media by sliding
VÆ and turning cVdthe COMAND con-
troller and press Wto confirm.
X Select a ývideo DVD from the media list
(Y page 514).
Switching on with the video menu X Select Video
Videoin the main function bar by
sliding ZVand turning cVdthe COMAND
controller and press Wto confirm.
If video DVD mode was the last mode selec-
ted, it will now be active. If another video source is switched on, you
can now switch to video DVD mode in the
video menu.
X Select Video Videoby sliding ZVthe COMAND
controller and press Wto confirm.
The video menu appears.
X Select DVD-V DVD-Vand press Wto confirm.
Showing/hiding the control menu X
To show: in video DVD mode, slide ZVÆ
the COMAND controller.
X To hide: slideZVÆ the COMAND control-
ler.
or
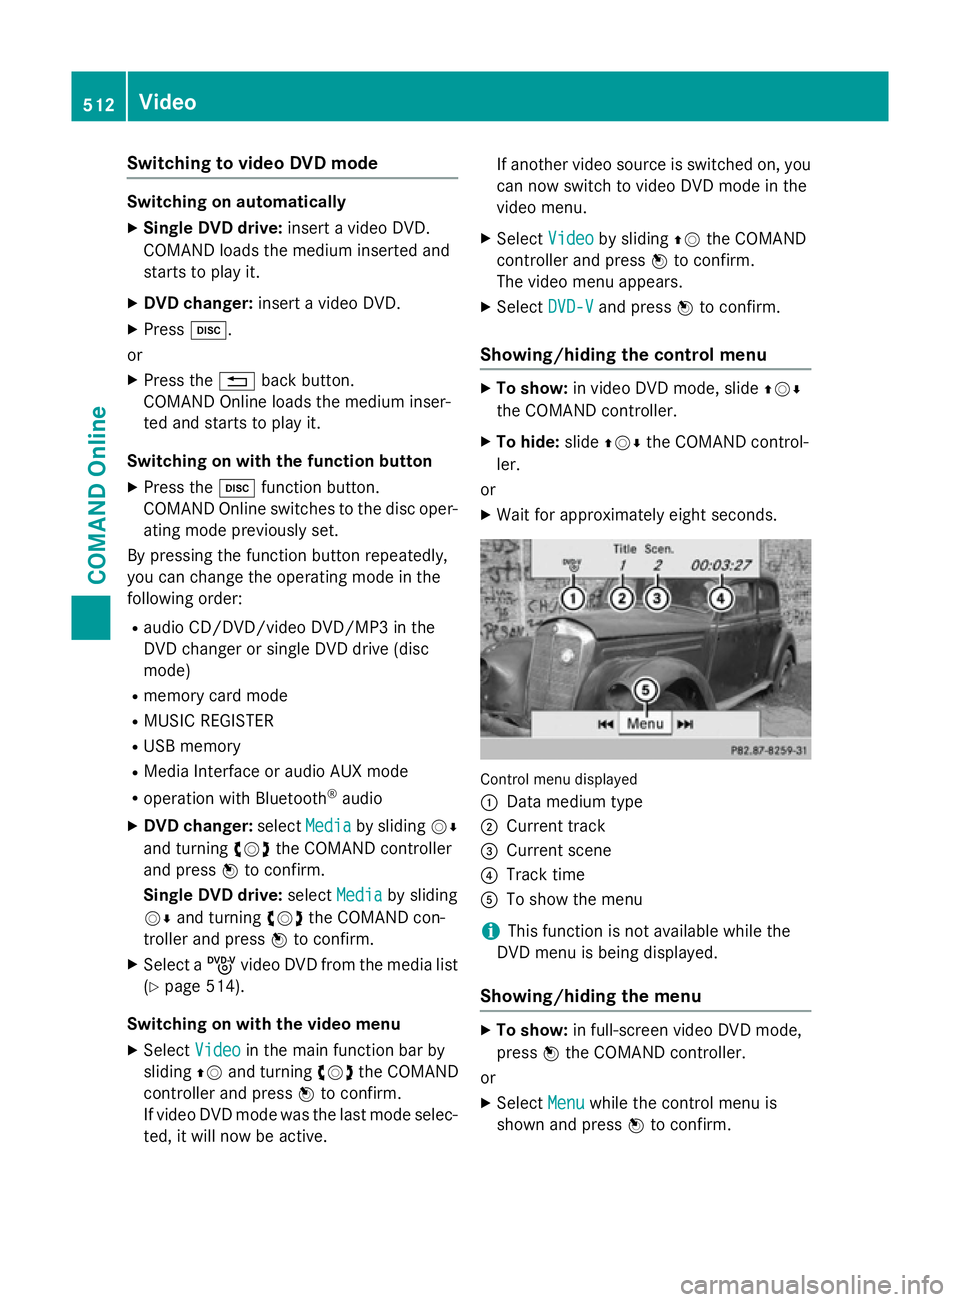
X Wait for approximately eight seconds. Control menu displayed
:
Data medium type
; Current track
= Current scene
? Track time
A To show the menu
i This function is not available while the
DVD menu is being displayed.
Showing/hiding the menu X
To show: in full-screen video DVD mode,
press Wthe COMAND controller.
or
X Select Menu
Menu while the control menu is
shown and press Wto confirm. 512
VideoCOMAND Online
Page 554 of 637

Socket under the armrest
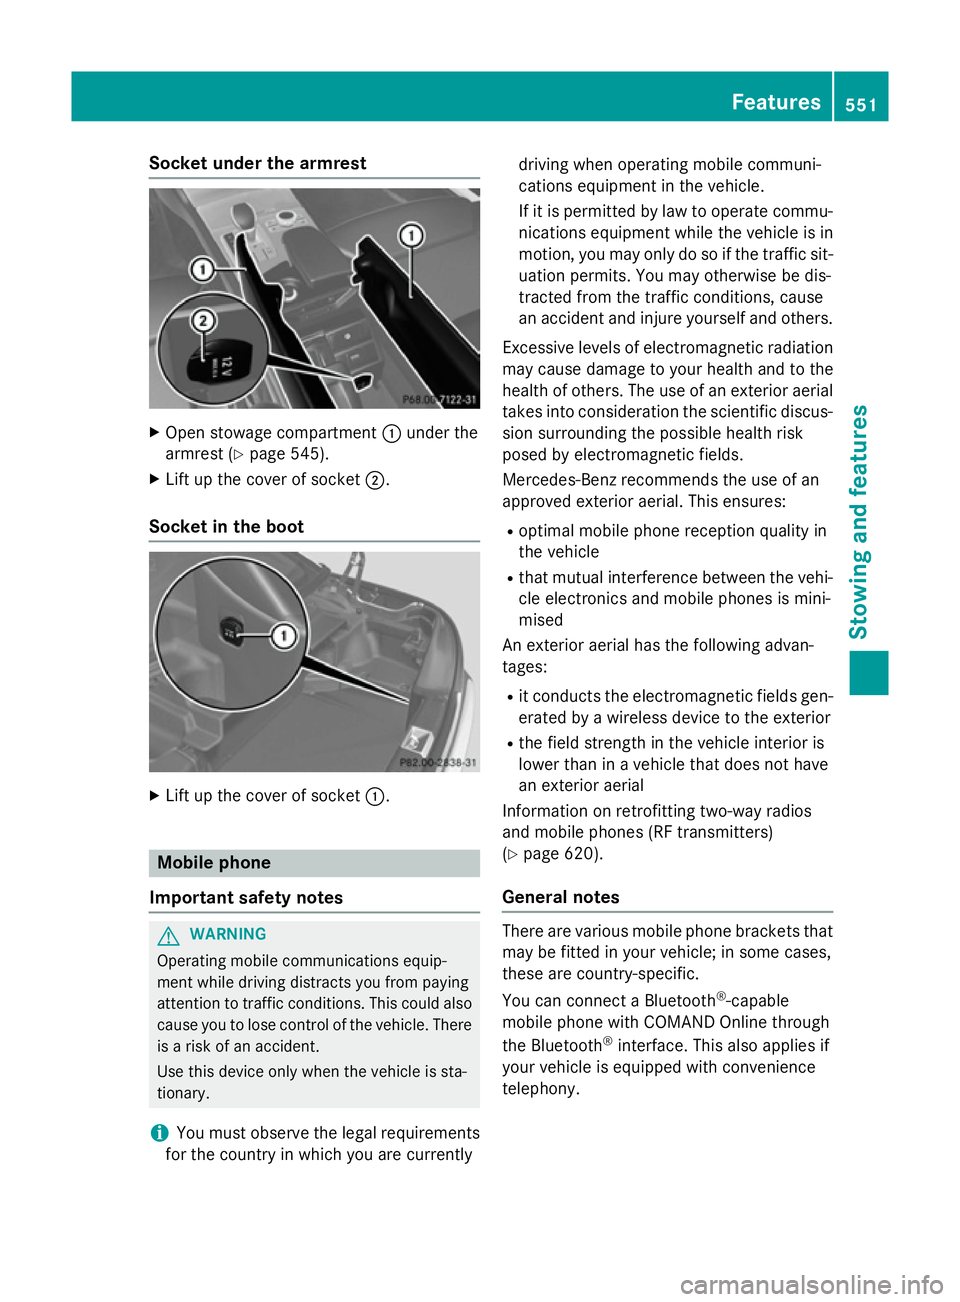
X
Open stowage compartment :under the
armrest (Y page 545).
X Lift up the cover of socket ;.
Socket in the boot X
Lift up the cover of socket :.Mobile phone
Important safety notes G
WARNING
Operating mobile communications equip-
ment while driving distracts you from paying
attention to traffic conditions. This could also cause you to lose control of the vehicle. There
is a risk of an accident.
Use this device only when the vehicle is sta-
tionary.
i You must observe the legal requirements
for the country in which you are currently driving when operating mobile communi-
cations equipment in the vehicle.
If it is permitted by law to operate commu-
nications equipment while the vehicle is in
motion, you may only do so if the traffic sit-
uation permits. You may otherwise be dis-
tracted from the traffic conditions, cause
an accident and injure yourself and others.
Excessive levels of electromagnetic radiation
may cause damage to your health and to the
health of others. The use of an exterior aerial takes into consideration the scientific discus-
sion surrounding the possible health risk
posed by electromagnetic fields.
Mercedes-Benz recommends the use of an
approved exterior aerial. This ensures:
R optimal mobile phone reception quality in
the vehicle
R that mutual interference between the vehi-
cle electronics and mobile phones is mini-
mised
An exterior aerial has the following advan-
tages:
R it conducts the electromagnetic fields gen-
erated by a wireless device to the exterior
R the field strength in the vehicle interior is
lower than in a vehicle that does not have
an exterior aerial
Information on retrofitting two-way radios
and mobile phones (RF transmitters)
(Y page 620).
General notes There are various mobile phone brackets that
may be fitted in your vehicle; in some cases,
these are country-specific.
You can connect a Bluetooth ®
-capable
mobile phone with COMAND Online through
the Bluetooth ®
interface. This also applies if
your vehicle is equipped with convenience
telephony. Features
551Stowing and features Z
Page 555 of 637

More information on suitable mobile phones,
mobile phone brackets and on connecting
Bluetooth ®
-capable mobile phones with
COMAND Online can be obtained:
R at your Mercedes-Benz Service Centre
R on the Internet at http://www.mercedes-
benz.com/connect
i The functions and services available when
you use the phone depend on your mobile
phone model and service provider.
Using a mobile phone If the mobile phone is inserted in the mobile
phone bracket, the mobile phone will be
charged and connected with the exterior aer-
ial.
X Open the telephone compartment
(Y page 545).
X Place the mobile phone bracket into the
pre-installed fitting; see the separate instal-
lation instructions for the mobile phone fit-
ting.
X Insert the mobile phone into the mobile
phone bracket; see the separate installa-
tion instructions for the mobile phone fit-
ting.
Operating the mobile phone You can operate the telephone using the
6 and~ buttons on the multifunction
steering wheel. You can operate other mobile
phone functions via the on-board computer
(Y page 235).
When you remove the key from the ignition
lock, the mobile phone is disconnected from
the hands-free system. Active calls will first
be transferred to the mobile phone directly. Charge maintenance socket
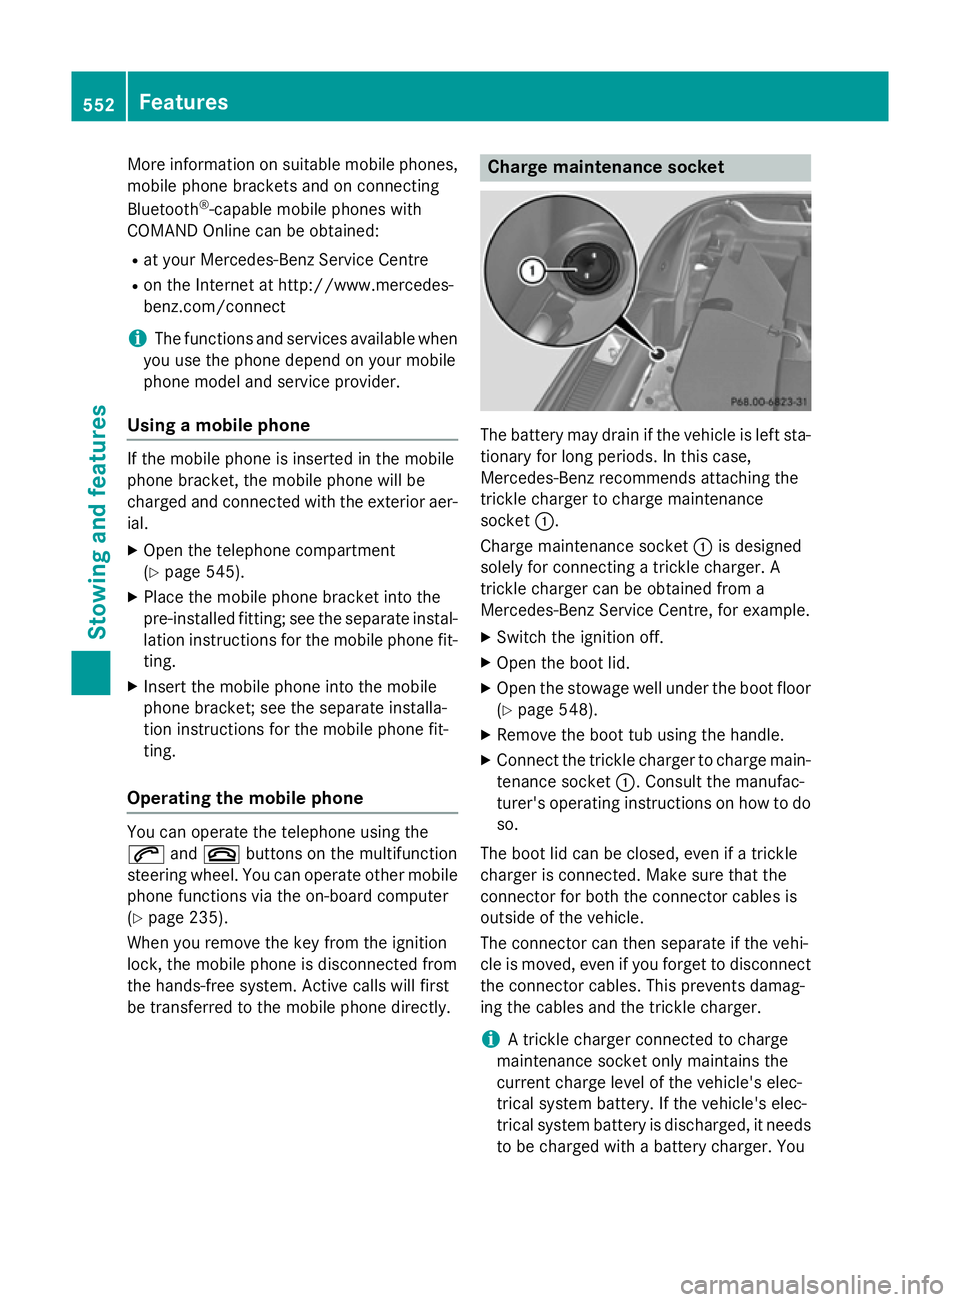
The battery may drain if the vehicle is left sta-
tionary for long periods. In this case,
Mercedes-Benz recommends attaching the
trickle charger to charge maintenance
socket :.
Charge maintenance socket :is designed
solely for connecting a trickle charger. A
trickle charger can be obtained from a
Mercedes-Benz Service Centre, for example.
X Switch the ignition off.
X Open the boot lid.
X Open the stowage well under the boot floor
(Y page 548).
X Remove the boot tub using the handle.
X Connect the trickle charger to charge main-
tenance socket :. Consult the manufac-
turer's operating instructions on how to do
so.
The boot lid can be closed, even if a trickle
charger is connected. Make sure that the
connector for both the connector cables is
outside of the vehicle.
The connector can then separate if the vehi-
cle is moved, even if you forget to disconnect
the connector cables. This prevents damag-
ing the cables and the trickle charger.
i A trickle charger connected to charge
maintenance socket only maintains the
current charge level of the vehicle's elec-
trical system battery. If the vehicle's elec-
trical system battery is discharged, it needs
to be charged with a battery charger. You 552
FeaturesStowing and features