2012 MERCEDES-BENZ SL ROADSTER navigation system
[x] Cancel search: navigation systemPage 297 of 637
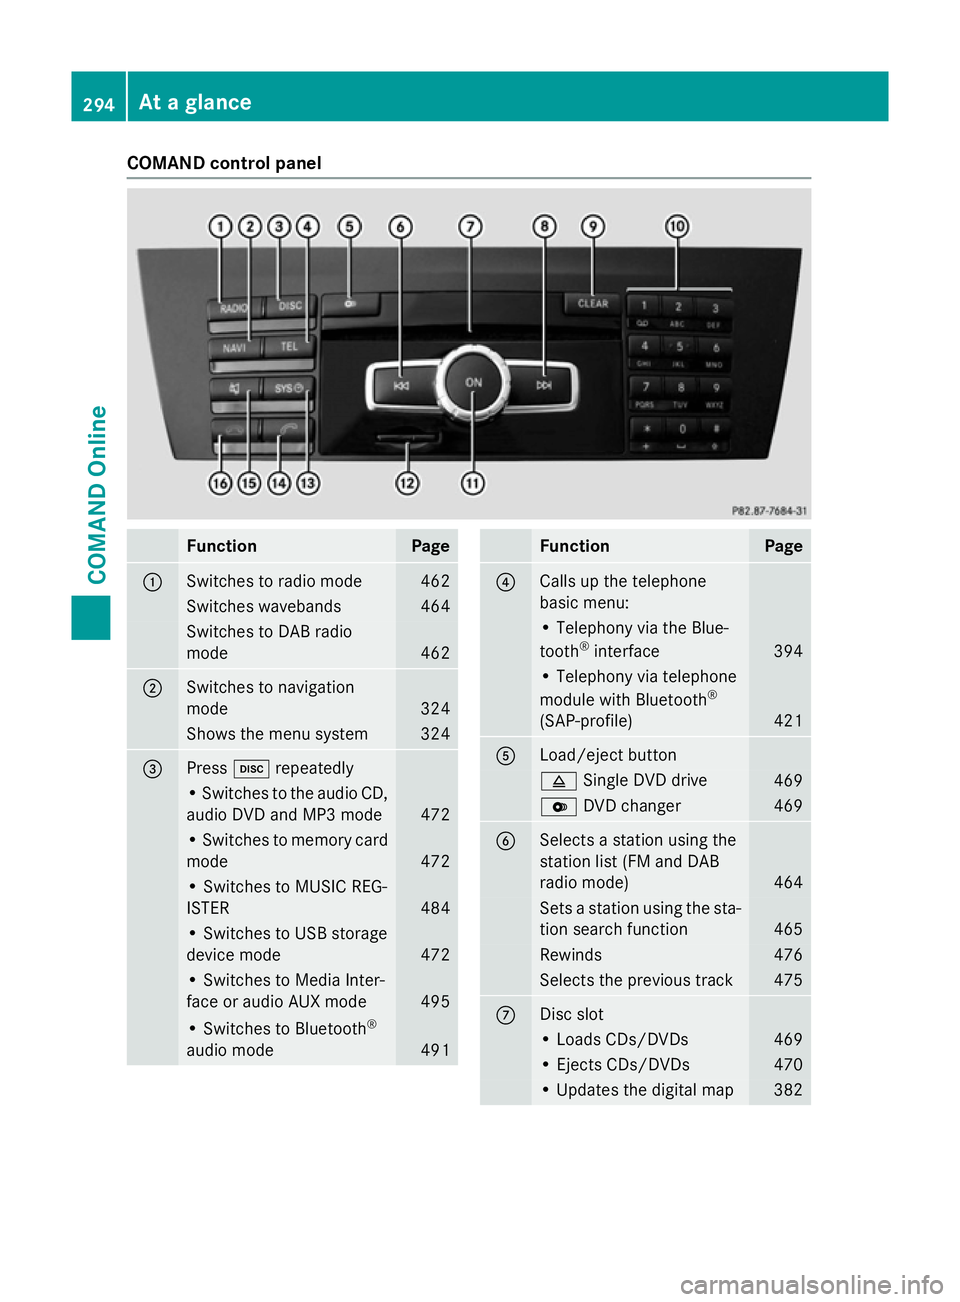
COMAND control panel
Function Page
:
Switches to radio mode 462
Switches wavebands 464
Switches to DAB radio
mode
462
;
Switches to navigation
mode
324
Shows the menu system 324
=
Press
hrepeatedly • Switches to the audio CD,
audio DVD and MP3 mode 472
• Switches to memory card
mode 472
• Switches to MUSIC REG-
ISTER
484
• Switches to USB storage
device mode
472
• Switches to Media Inter-
face or audio AUX mode
495
• Switches to Bluetooth
®
audio mode 491 Function Page
?
Calls up the telephone
basic menu:
• Telephony via the Blue-
tooth
®
interface 394
• Telephony via telephone
module with Bluetooth
®
(SAP-profile) 421
A
Load/eject button
8
Single DVD drive 469
V
DVD changer 469
B
Selects a station using the
station list (FM and DAB
radio mode)
464
Sets a station using the sta-
tion search function 465
Rewinds 476
Selects the previous track 475
C
Disc slot
• Loads CDs/DVDs 469
• Ejects CDs/DVDs 470
• Updates the digital map 382294
At a glanceCOMAND Online
Page 298 of 637
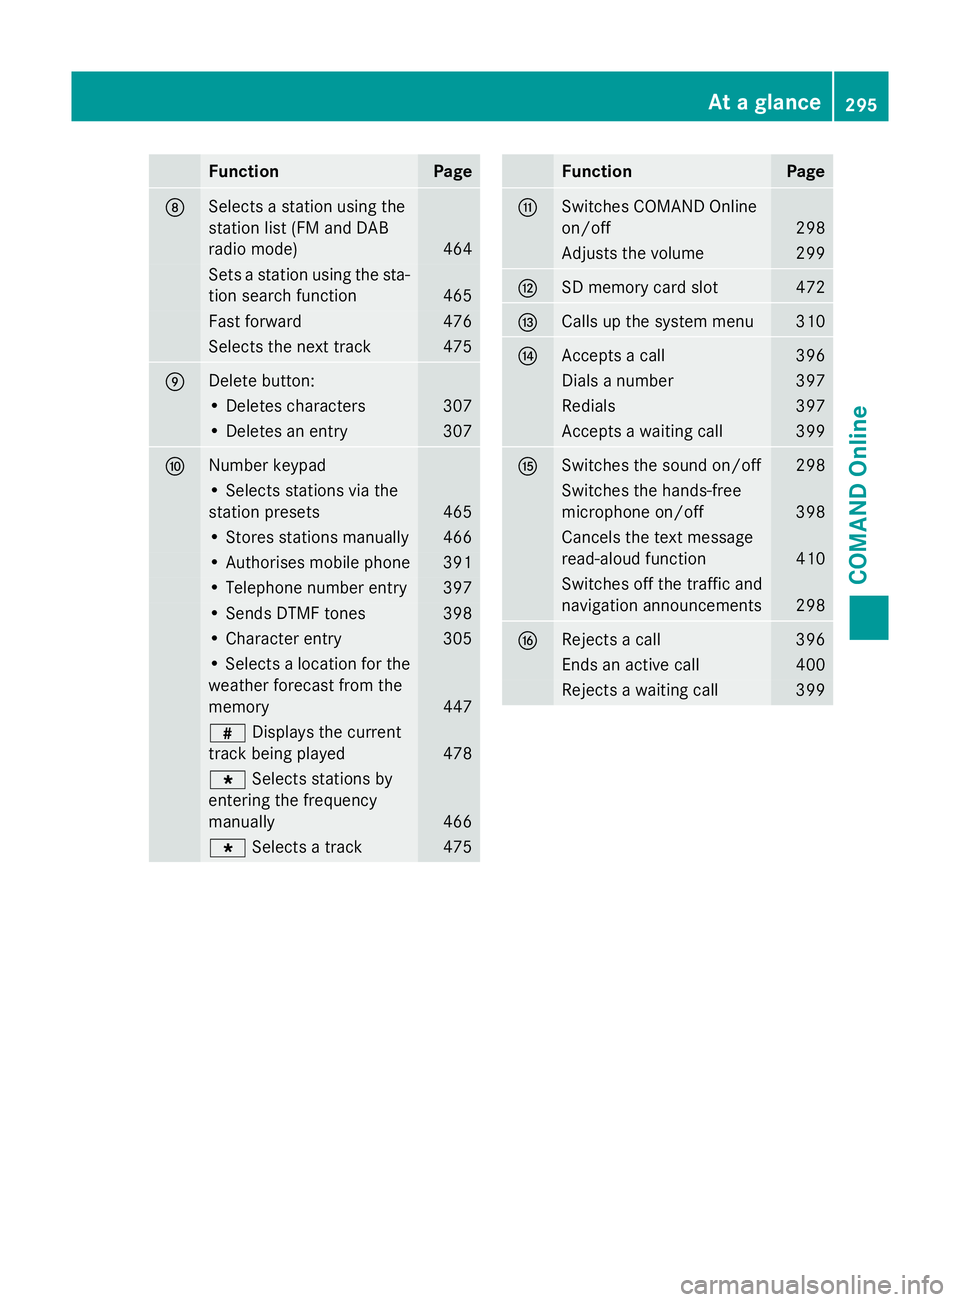
Function Page
D
Selects a station using the
station list (FM and DAB
radio mode) 464
Sets a station using the sta-
tion search function 465
Fast forward 476
Selects the next track 475
E
Delete button:
• Deletes characters 307
• Deletes an entry 307
F
Number keypad
• Selects stations via the
station presets 465
• Stores stations manually 466
• Authorises mobile phone 391
• Telephone number entry 397
• Sends DTMF tones 398
• Character entry 305
• Selects a location for the
weather forecast from the
memory 447
z
Displays the current
track being played 478
g
Selects stations by
entering the frequency
manually 466
g
Selects a track 475 Function Page
G
Switches COMAND Online
on/off
298
Adjusts the volume 299
H
SD memory card slot 472
I
Calls up the system menu 310
J
Accepts a call 396
Dials a number 397
Redials 397
Accepts a waiting call 399
K
Switches the sound on/off 298
Switches the hands-free
microphone on/off
398
Cancels the text message
read-aloud function
410
Switches off the traffic and
navigation announcements 298
L
Rejects a call 396
Ends an active call 400
Rejects a waiting call 399At a glance
295COMAND Online Z
Page 300 of 637

X
To exit the menu: briefly press the%
back button.
COMAND Online changes to the next
higher menu level in the current operating
mode.
X To call up the basic display: press and
hold the %back button.
COMAND Online changes to the basic dis-
play of the current operating mode.
Delete button
X To delete individual characters: briefly
press the jbutton.
X To delete an entire entry: press and hold
the j button.
Seat function button
You can use button Tto call up the fol-
lowing seat functions:
R multicontour seat (with 4-way lumbar sup-
port)
R active multicontour seat (dynamic seat and
massage function)
R balance (seat heating distribution)
More information on the seat functions
(Y page 318).
Favourites button
You can assign predefined functions to the
favourites button ;and call them up by
pressing the button (Y page 313). Operating COMAND Online
Selecting a main function Address entry menu
:
Main function bar
Situation: switching from navigation mode
(address entry menu) to the system settings.
X To switch on navigation mode: press the
Ø function button.
X To show the menu: pressWthe COMAND
controller.
X Select Destination Destination by slidingVÆand
turning cVdthe COMAND controller and
press Wto confirm.
X Select Address entry
Address entry and pressWto
confirm.
The address entry menu appears.
X Slide ZVthe COMAND controller and
switch to main function bar :.
X Select System System in the main function bar by
turning cVdthe COMAND controller and
press Wto confirm.
The system menu appears. At a glance
297COMAND Online Z
Page 301 of 637
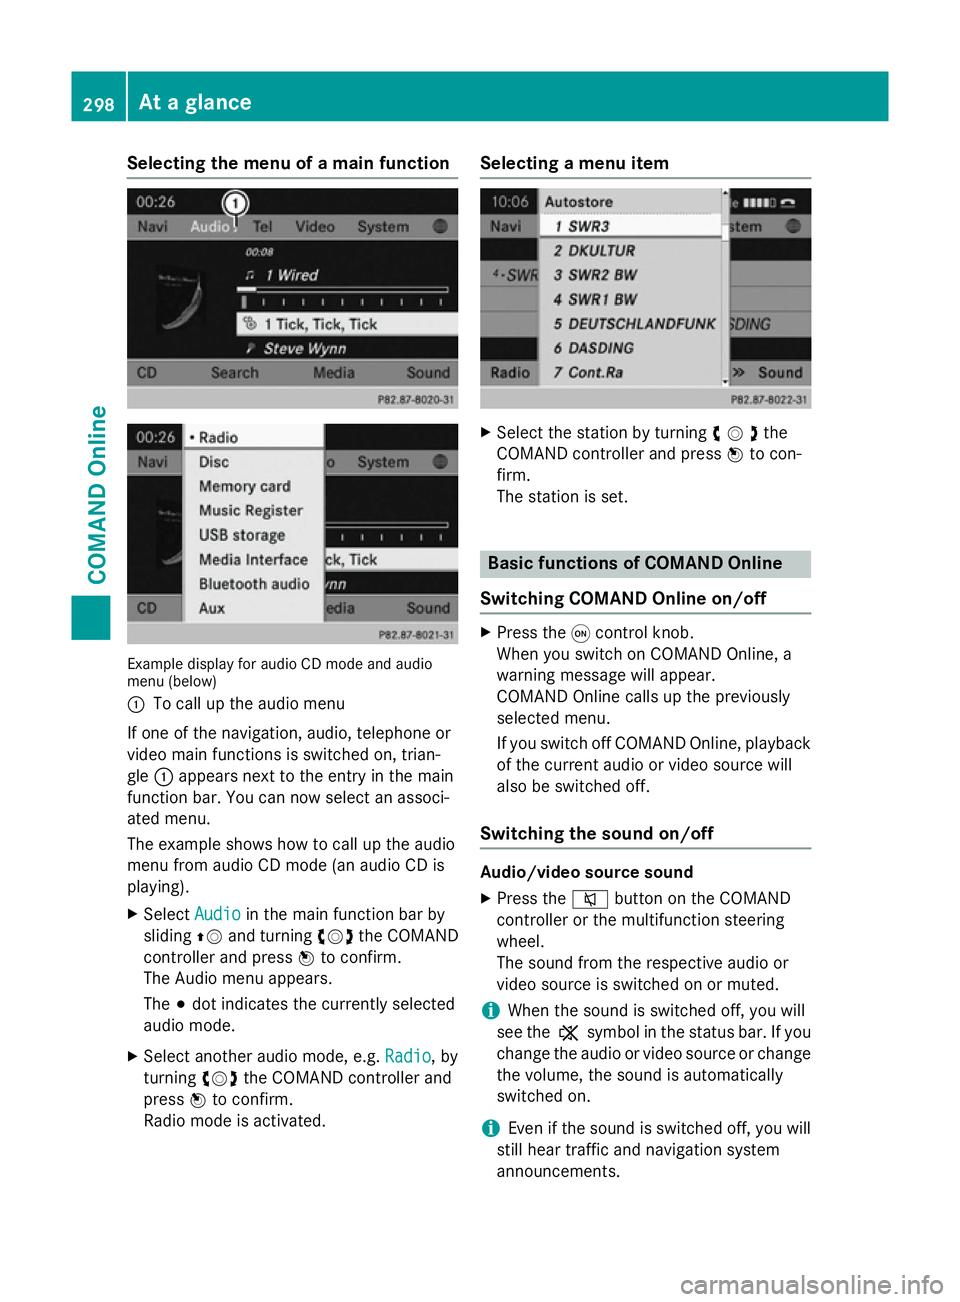
Selecting the menu of a main function
Example display for audio CD mode and audio
menu (below)
: To call up the audio menu
If one of the navigation, audio, telephone or
video main functions is switched on, trian-
gle :appears next to the entry in the main
function bar. You can now select an associ-
ated menu.
The example shows how to call up the audio
menu from audio CD mode (an audio CD is
playing).
X Select Audio
Audio in the main function bar by
sliding ZVand turning cVdthe COMAND
controller and press Wto confirm.
The Audio menu appears.
The #dot indicates the currently selected
audio mode.
X Select another audio mode, e.g. Radio Radio, by
turning cVdthe COMAND controller and
press Wto confirm.
Radio mode is activated. Selecting a menu item
X
Select the station by turning cVdthe
COMAND controller and press Wto con-
firm.
The station is set. Basic functions of COMAND Online
Switching COMAND Online on/off X
Press the qcontrol knob.
When you switch on COMAND Online, a
warning message will appear.
COMAND Online calls up the previously
selected menu.
If you switch off COMAND Online, playback of the current audio or video source will
also be switched off.
Switching the sound on/off Audio/video source sound
X Press the 8button on the COMAND
controller or the multifunction steering
wheel.
The sound from the respective audio or
video source is switched on or muted.
i When the sound is switched off, you will
see the ,symbol in the status bar. If you
change the audio or video source or change
the volume, the sound is automatically
switched on.
i Even if the sound is switched off, you will
still hear traffic and navigation system
announcements. 298
At a glanceCOMAND Online
Page 313 of 637
X
Select Google Local Search
Google Local Search with the
remote control.
Using a menu you can select a category for the destination.
X Select At current position
At current position, for exam-
ple.
Using a menu you can determine the type
of search enquiry.
X Select Enter Enter search
search term:
term:, for example.
An input field appears.
X Enter the destination with the remote con-
trol and confirm the entry with b.
You see the results list from Google.
X Select the exact destination with the
remote control.
An additional menu appears.
X Select Navigate to
Navigate to.
X A window appears on the driver's side with
the message: Accept the navigation Accept the navigation
data from Mercedes-Benz Apps?
data from Mercedes-Benz Apps? System settings
Features of your COMAND Online
This Supplement describes all the standard
and optional equipment for your COMAND
Online system, as available at the time of
going to print. Country-specific differences
are possible. Please note that your
COMAND Online system may not be equip-
ped with all the features described. Display settings
Setting the brightness The brightness detected by the display light
sensor affects the setting options for this
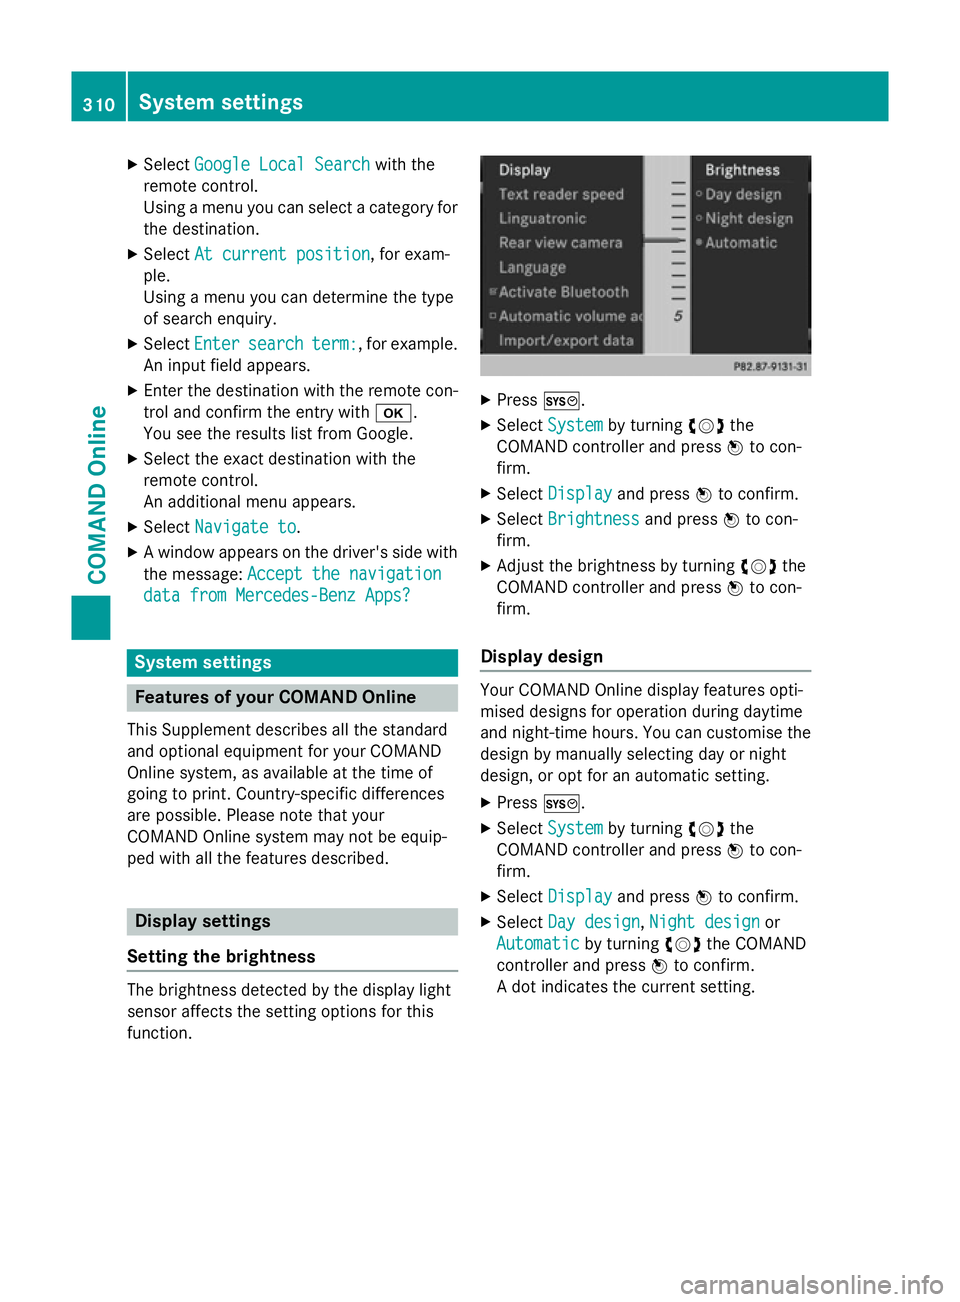
function. X
Press W.
X Select System System by turning cVdthe
COMAND controller and press Wto con-
firm.
X Select Display
Display and press Wto confirm.
X Select Brightness
Brightness and pressWto con-
firm.
X Adjust the brightness by turning cVdthe
COMAND controller and press Wto con-
firm.
Display design Your COMAND Online display features opti-
mised designs for operation during daytime
and night-time hours. You can customise the
design by manually selecting day or night
design, or opt for an automatic setting.
X Press W.
X Select System
System by turning cVdthe
COMAND controller and press Wto con-
firm.
X Select Display Display and press Wto confirm.
X Select Day design
Day design ,Night design
Night design or
Automatic
Automatic by turningcVdthe COMAND
controller and press Wto confirm.
A dot indicates the current setting. 310
System settingsCOMAND Online
Page 314 of 637
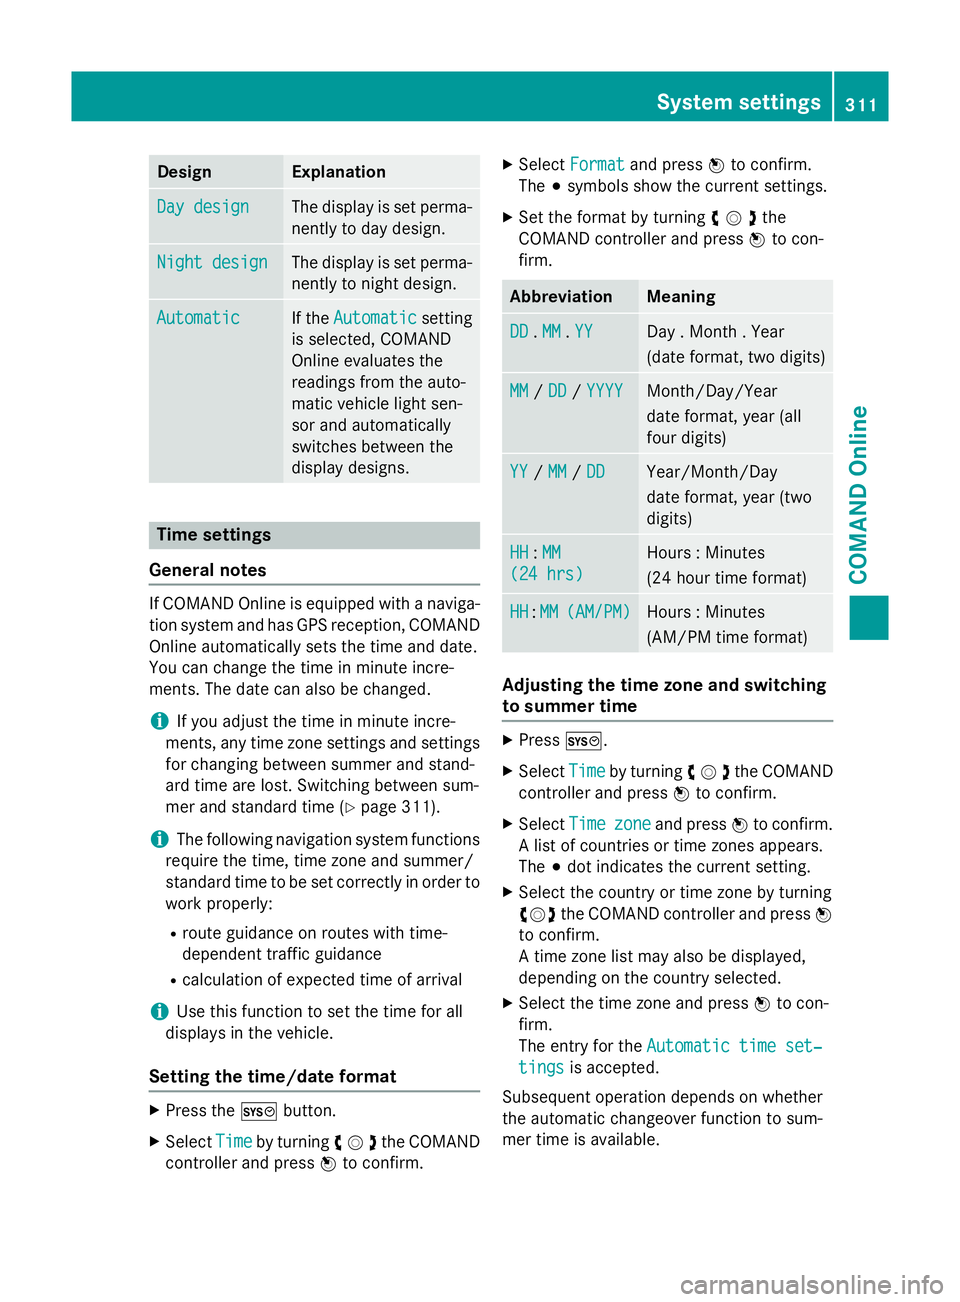
Design Explanation
Day design
Day design The display is set perma-
nently to day design. Night design
Night design The display is set perma-
nently to night design. Automatic
Automatic If the
Automatic
Automatic setting
is selected, COMAND
Online evaluates the
readings from the auto-
matic vehicle light sen-
sor and automatically
switches between the
display designs. Time settings
General notes If COMAND Online is equipped with a naviga-
tion system and has GPS reception, COMAND
Online automatically sets the time and date.
You can change the time in minute incre-
ments. The date can also be changed.
i If you adjust the time in minute incre-
ments, any time zone settings and settings
for changing between summer and stand-
ard time are lost. Switching between sum-
mer and standard time (Y page 311).
i The following navigation system functions
require the time, time zone and summer/
standard time to be set correctly in order to
work properly:
R route guidance on routes with time-
dependent traffic guidance
R calculation of expected time of arrival
i Use this function to set the time for all
displays in the vehicle.
Setting the time/date format X
Press the Wbutton.
X Select Time Timeby turning cVdthe COMAND
controller and press Wto confirm. X
Select Format
Format and press Wto confirm.
The #symbols show the current settings.
X Set the format by turning cVdthe
COMAND controller and press Wto con-
firm. Abbreviation Meaning
DD
DD
.MM
MM .YY
YY Day . Month . Year
(date format, two digits)
MM MM
/DD
DD /YYYY
YYYY Month/Day/Year
date format, year (all
four digits)
YY YY
/MM
MM /DD
DD Year/Month/Day
date format, year (two
digits) HH HH
:MM
MM
(24 hrs)
(24 hrs) Hours : Minutes
(24 hour time format)
HH HH
:MM
MM (AM/PM)
(AM/PM) Hours : Minutes
(AM/PM time format)
Adjusting the time zone and switching
to summer time
X
Press W.
X Select Time Timeby turning cVdthe COMAND
controller and press Wto confirm.
X Select Time Timezone zoneand press Wto confirm.
A list of countries or time zones appears.
The #dot indicates the current setting.
X Select the country or time zone by turning
cVd the COMAND controller and press W
to confirm.
A time zone list may also be displayed,
depending on the country selected.
X Select the time zone and press Wto con-
firm.
The entry for the Automatic time set‐
Automatic time set‐
tings tings is accepted.
Subsequent operation depends on whether
the automatic changeover function to sum-
mer time is available. System settings
311COMAND Online Z
Page 316 of 637
improve voice recognition. See the separate
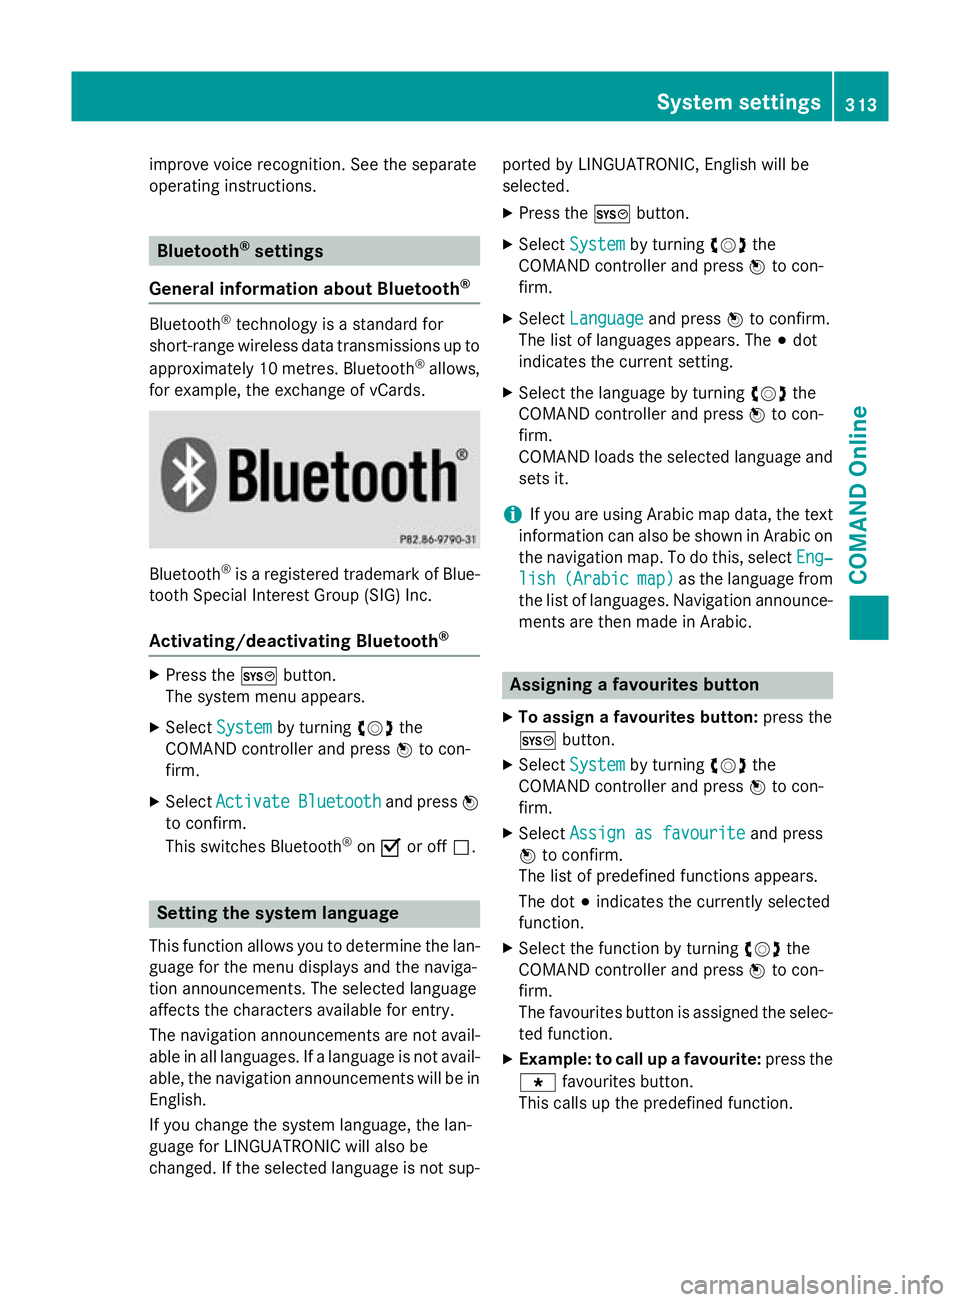
operating instructions. Bluetooth
®
settings
General information about Bluetooth ®Bluetooth
®
technology is a standard for
short-range wireless data transmissions up to
approximately 10 metres. Bluetooth ®
allows,
for example, the exchange of vCards. Bluetooth
®
is a registered trademark of Blue-
tooth Special Interest Group (SIG) Inc.
Activating/deactivating Bluetooth ®X
Press the Wbutton.
The system menu appears.
X Select System
System by turning cVdthe
COMAND controller and press Wto con-
firm.
X Select Activate
Activate Bluetooth
Bluetooth and pressW
to confirm.
This switches Bluetooth ®
on O or off ª. Setting the system language
This function allows you to determine the lan-
guage for the menu displays and the naviga-
tion announcements. The selected language
affects the characters available for entry.
The navigation announcements are not avail-
able in all languages. If a language is not avail- able, the navigation announcements will be in English.
If you change the system language, the lan-
guage for LINGUATRONIC will also be
changed. If the selected language is not sup- ported by LINGUATRONIC, English will be
selected.
X Press the Wbutton.
X Select System System by turning cVdthe
COMAND controller and press Wto con-
firm.
X Select Language
Language and pressWto confirm.
The list of languages appears. The #dot
indicates the current setting.
X Select the language by turning cVdthe
COMAND controller and press Wto con-
firm.
COMAND loads the selected language and
sets it.
i If you are using Arabic map data, the text
information can also be shown in Arabic on
the navigation map. To do this, select Eng‐ Eng‐
lish
lish (Arabic
(Arabic map)
map)as the language from
the list of languages. Navigation announce-
ments are then made in Arabic. Assigning a favourites button
X To assign a favourites button: press the
W button.
X Select System
System by turning cVdthe
COMAND controller and press Wto con-
firm.
X Select Assign as favourite
Assign as favourite and press
W to confirm.
The list of predefined functions appears.
The dot #indicates the currently selected
function.
X Select the function by turning cVdthe
COMAND controller and press Wto con-
firm.
The favourites button is assigned the selec-
ted function.
X Example: to call up a favourite: press the
g favourites button.
This calls up the predefined function. System settings
313COMAND Online Z
Page 319 of 637
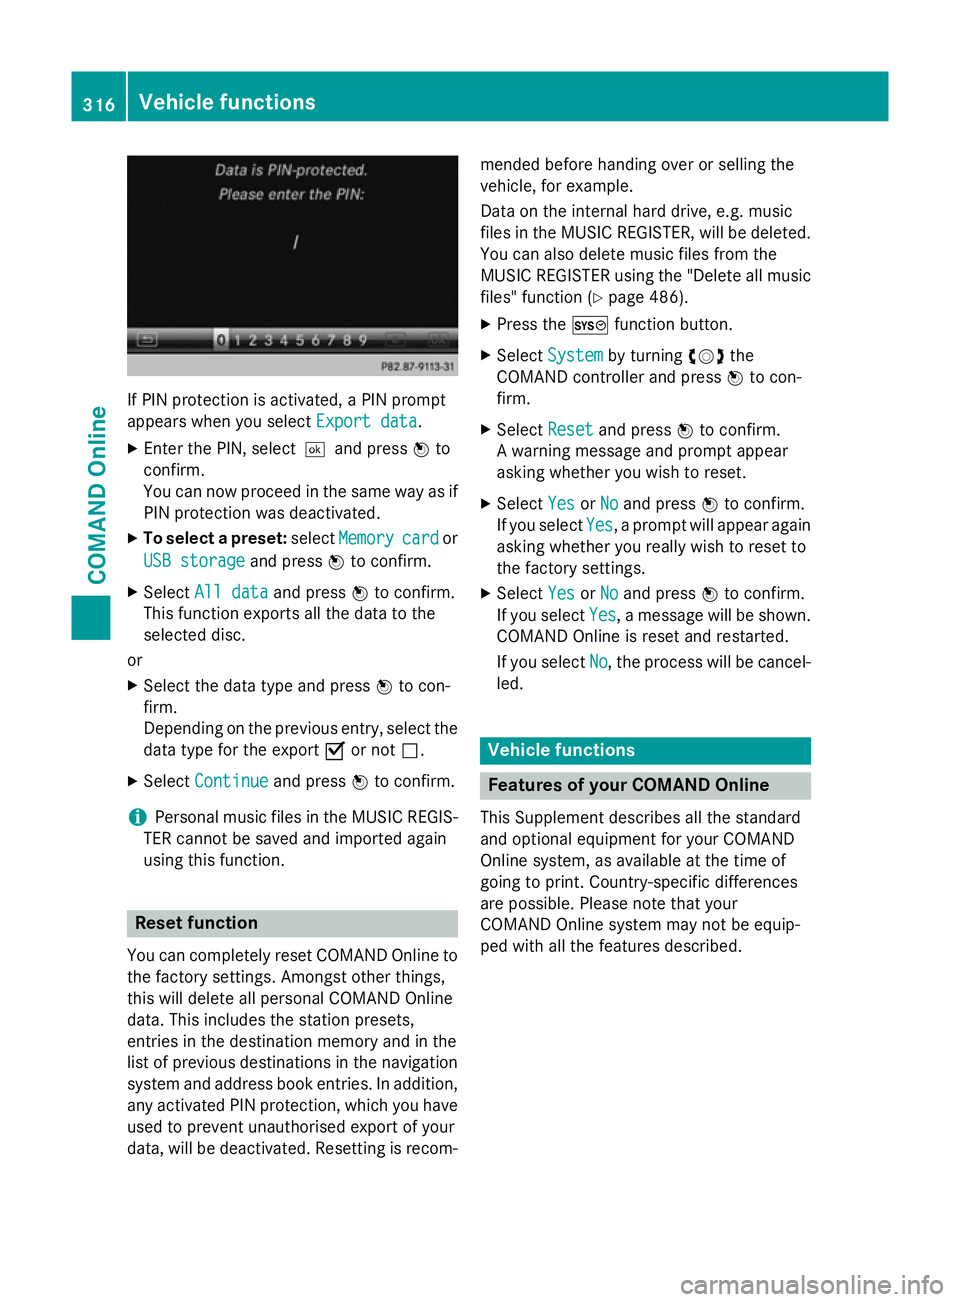
If PIN protection is activated, a PIN prompt
appears when you select Export data
Export data.
X Enter the PIN, select ¬and pressWto
confirm.
You can now proceed in the same way as if
PIN protection was deactivated.
X To select a preset: selectMemory
Memory card cardor
USB storage
USB storage and pressWto confirm.
X Select All data
All data and pressWto confirm.
This function exports all the data to the
selected disc.
or
X Select the data type and press Wto con-
firm.
Depending on the previous entry, select the
data type for the export Oor not ª.
X Select Continue
Continue and pressWto confirm.
i Personal music files in the MUSIC REGIS-
TER cannot be saved and imported again
using this function. Reset function
You can completely reset COMAND Online to
the factory settings. Amongst other things,
this will delete all personal COMAND Online
data. This includes the station presets,
entries in the destination memory and in the
list of previous destinations in the navigation system and address book entries. In addition, any activated PIN protection, which you have
used to prevent unauthorised export of your
data, will be deactivated. Resetting is recom- mended before handing over or selling the
vehicle, for example.
Data on the internal hard drive, e.g. music
files in the MUSIC REGISTER, will be deleted.
You can also delete music files from the
MUSIC REGISTER using the "Delete all music
files" function (Y page 486).
X Press the Wfunction button.
X Select System
System by turning cVdthe
COMAND controller and press Wto con-
firm.
X Select Reset Resetand press Wto confirm.
A warning message and prompt appear
asking whether you wish to reset.
X Select Yes
Yes orNo No and press Wto confirm.
If you select Yes
Yes, a prompt will appear again
asking whether you really wish to reset to
the factory settings.
X Select Yes
Yes orNo No and press Wto confirm.
If you select Yes
Yes, a message will be shown.
COMAND Online is reset and restarted.
If you select No
No, the process will be cancel-
led. Vehicle functions
Features of your COMAND Online
This Supplement describes all the standard
and optional equipment for your COMAND
Online system, as available at the time of
going to print. Country-specific differences
are possible. Please note that your
COMAND Online system may not be equip-
ped with all the features described. 316
Vehicle functionsCOMAND Online