2012 MERCEDES-BENZ G-CLASS SUV warning lights
[x] Cancel search: warning lightsPage 123 of 357

4
° Continuous wipe, slow
5 ¯ Continuous wipe, fast
B í Single wipe
C î To wipe with washe rfluid
X Turn the key to position 1or 2in the ignition
lock.
X Turn the combination switch to the corre-
sponding position.
Intermittent wiping is interrupted if you stop
and open a front door. This protects people
getting into and out of the vehicle fro mbeing
sprayed with water.
In the ÄorÅ position, the appropriate
wiping frequency is set automatically accord-
ing to the intensity of the rain. In the Å
position, the rain sensor is more sensitive
than in the Äposition, causing the wind-
screen wipers to wipe more frequently.
i When the windscreen wipers are
switched on and you stop the vehicle, the
windscreen wipers wipe more slowly. Switching the rear window wiper on/
off
Combination switch
:
è Switch
2 b To wipe with washer fluid
3 ITo switch on intermittent wiping
4 0To switch off intermittent wiping
5 b To wipe with washer fluid X
Turn the key to position 1or 2in the ignition
lock.
X Turn switch :on the combination switch
to the corresponding position.
When the rear window wiper is switched on,
the symbol appears in the instrument clus-
ter.
i The rear window wiper comes on auto-
matically if you shift the selector lever to
R while the windscreen wipers are on. Replacing the wiper blades
Important safety notes G
WARNING
The wiper arms could start moving and cause
an injury if you leave the windscreen wipers
switched on.
Remove the key from the ignition lock before
replacing the wiper blades.
! To avoid damaging the windscreen wiper
blades, make sure that you touch only the
wiper arm of the windscreen wiper.
! Never open the bonnet if a windscreen
wiper arm has been folded away from the
windscreen.
Never fold a windscreen wiper arm without
a wiper blade back onto the windscreen/
rear window.
Hold the windscreen wiper arm firmly when
you change the wiper blade. If you release
the windscreen wiper arm without a wiper
blade and it falls onto the windscreen, the
windscreen may be damaged by the force
of the impact.
Mercedes-Benzr ecommends that you have
the wiper blades changed at aqualified
specialist workshop. 120
Windscreen wipersLights and windscreen wipers
Page 136 of 357
back on as soon as ther
eis sufficient volt-
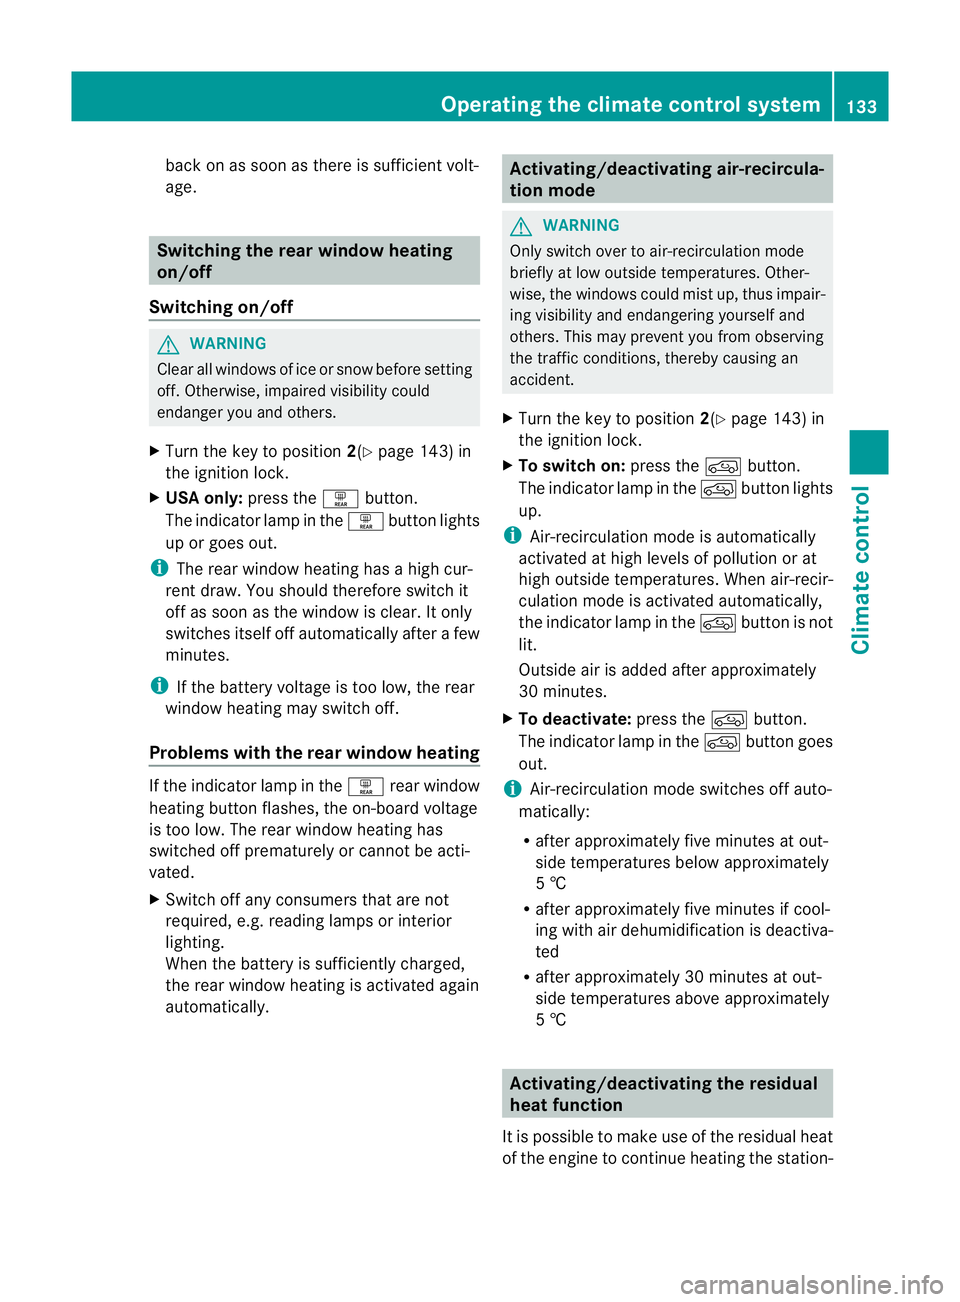
age. Switching the rear window heating
on/off
Switching on/off G
WARNING
Cleara ll windows of ice or snow before setting
off .O therwise, impaired visibility could
endanger you and others.
X Turn the key to position 2(Ypage 143) in
the ignition lock.
X USA only: press theªbutton.
The indicator lamp in the ªbutton lights
up or goes out.
i The rea rwindow heating has ahigh cur-
ren tdraw.Y ou should therefore switch it
off as soon as the window is clear. It only
switches itself off automatically after a few
minutes.
i If the battery voltage is too low, the rear
window heating may switch off.
Problems with the rear window heating If the indicator lamp in the
ªrear window
heating button flashes, the on-board voltage
is too low. The rear window heating has
switched off prematurely or cannot be acti-
vated.
X Switch off any consumers that are not
required, e.g. reading lamps or interior
lighting.
When the battery is sufficiently charged,
the rear window heating is activated again
automatically. Activating/deactivating air-recircula-
tion mode
G
WARNING
Only switch over to air-recirculation mode
briefly at low outside temperatures. Other-
wise, the windows could mist up, thus impair-
ing visibility and endangering yourself and
others. This may prevent you from observing
the traffic conditions, thereby causing an
accident.
X Turn the key to position 2(Ypage 143) in
the ignition lock.
X To switch on: press thedbutton.
The indicator lamp in the dbutton lights
up.
i Air-recirculation mode is automatically
activated at high levels of pollution or at
high outside temperatures. When air-recir-
culation mode is activated automatically,
the indicator lamp in the dbutton is not
lit.
Outside air is added after approximately
30 minutes.
X To deactivate: press thedbutton.
The indicator lamp in the dbutton goes
out.
i Air-recirculation mode switches off auto-
matically:
R after approximately five minutes at out-
side temperatures below approximately
5 †
R after approximately five minutes if cool-
ing with air dehumidification is deactiva-
ted
R after approximately 30 minutes at out-
side temperatures above approximately
5 † Activating/deactivating the residual
heat function
It is possible to make use of the residual heat
of the engine to continue heating the station- Operating the climate control system
133Climate control Z
Page 137 of 357

ary vehicle for up to 30 minutes after the
engine has been switched off
.The heating
time depends on the coolant temperature and
on the interior temperature that has been set.
i The blower will run at a low speed regard-
less of the airflow setting.
i If you activate the residual heat function
at high temperatures, only the ventilation
will be activated.
X Turn the key to position 0(Ypage 143) in
the ignition lock or remove it.
X To activate: press theÁbutton.
The indicator lamp in the Ábutton lights
up.
X To deactivate: press theÁbutton.
The indicator lamp in the Ábutton goes
out.
i Residual heat is deactivated automati-
cally:
R after approximately 30 minutes
R when the ignition is switched on
R if the battery voltage drops
R if the coolant temperature is too low Auxiliary heating
Important safety notes G
WARNING
Exhaust fumes are produced when the auxili-
ary heating is in operation. Inhaling these
exhaust fumes can be poisonous. You should
therefore switch off the auxiliary heating in
confined spaces without an extraction sys-
tem, e.g. a garage. G
WARNING
When operating the auxiliary heating parts of
the vehicle can get very hot. Make sure that
the exhaust system does not under any cir-
cumstances come into contact with easily
ignitable material such as dry grass or fuels.
The material could otherwise ignite and set the vehicle alight. Choose your parking spot
accordingly.
Operating the auxiliary heating is thus pro-
hibited at filling stations or when your vehicle
is being refuelled. You must therefore switch
off the auxiliary heating at filling stations.
! Operating the auxiliary heating/ventila-
tion draws on the vehicle battery. After you
have heated or ventilated the vehicle a
maximum of two times, drive for a longer
distance.
i Switch the auxiliary heating on regularly
once a month for approximately ten
minutes.
The auxiliary heating heats the air in the vehi-
cle interior without using the heat of the run-
ning engine. The auxiliary heating is operated
directly using the vehicle's fuel. For this rea-
son, the tank content must be at least at
reserve fuel level to ensure that the auxiliary
heating functions.
The auxiliary heating/ventilation automati-
cally adjusts to changes in temperature and
weather conditions. For this reason, the aux-
iliary heating could switch from ventilation
mode to heating mode or from heating mode
to ventilation mode.
You cannot use the auxiliary ventilation to
cool the vehicle interior to a temperature
lower than the outside temperature.
Before switching on X
Turn the key to position 2(Ypage 143) in
the ignition lock.
X Set the temperature.
The auxiliary heating/ventilation can be acti-
vated even when climate control is set to
manual. Optimum comfort can be attained
when the system is set to automatic mode.
Set the temperature to 22 †.
The auxiliary heating/ventilation can be acti-
vated or deactivated using the remote control
or the button on the centre console. 134
Operating the climate control systemClimate control
Page 147 of 357
Starting the engine
Important safety notes G
WARNING
Combustion engines emit poisonous exhaust
gases such as carbon monoxide. Inhaling
these exhaust gases leads to poisoning. There
is a risk of fatal injury. Therefore never leave
the engine running in enclosed spaces with-
out sufficient ventilation.
! Do not depress the accelerator pedal
when starting the engine.
Starting procedure X
Shift the automatic transmission to posi-
tion P.
The transmission position display in the
multifunction display shows P.
i You can also start the engine when the
automatic transmission is in position N.
i For further information about the auto-
matic transmission, see (Y page 149).
i If you depress the brake when starting the
engine, pedal travel is unusually long and
there is less pedal resistance.
X Make sure that the parking brake is
applied.
X To start a petrol engine: turn the key to
position 3in the ignition lock
(Y page 143) and release it as soon as the
engine is running.
X To startad iesel engine: turn the key to
position 2in the ignition lock
(Y page 143).
The % preglow indicator lamp in the
instrumen tcluster lights up.
X When the %preglow indicator lamp
goes out, tur nthe key to position
3(Y page 143)and release it as soon as the
engine is running.
i You can start the engine without preglow
if the engine is warm. i
You can also use the touch-start function.
To do this, turn the key to position 3
(Y page 143) and release it immediately.
The engine then starts automatically. Pulling away
Automatic transmission G
WARNING
If the engine speed is above the idling speed
and you engage transmission position Dor
R, the vehicle could pull away suddenly. There
is a risk of an accident.
When engaging transmission position Dor R,
always firmly depress the brake pedal and do
not simultaneously accelerate.
! Only shift the automatic transmission to
reverse gear Ror park position Pwhen the
vehicle is stationary. Otherwise, the auto-
matic transmission could be damaged.
! If a warning tone sounds and the
Release park. brake message appears
in the multifunction display, the parking
brake is still applied. Release the parking
brake.
X Depress the brake pedal and keep it
depressed.
X Shift the automatic transmission to posi-
tion Dor R.
i Before driving off, wait until the gear
change is fully completed.
X Release the parking brake (Y page 164).
X Release the brake pedal.
X Carefully depress the accelerator pedal.
i It is only possible to shift the automatic
transmission from position Pto a different
position if you depress the brake pedal.
Only then is the selector lever lock
released.
i The vehicle locks centrally once you have
pulled away.T he locking knobs in the doors
drop down. 144
DrivingDriving and parking
Page 173 of 357
R
Chec kthat items of luggage and loads are
stowed safely and are well secured
(Y page 271).
R To avoid damaging the vehicle, make sure
there is always sufficient ground clearance.
R Always keep the engine running and in gear
when driving on a downhill gradient.
R Always keep the engine running and in gear
when driving on a slope.
R Drive slowly and evenly, if necessary at
walking pace.
R Ensure that the wheels are in contact with
the ground at all times.
R Drive with extreme care on unknown off-
road routes where visibility is poor. For
safety reasons, get out of the vehicle first
and survey the off-road route.
R Check the depth of water before fording
rivers and streams.
R When fording, do not stop and do not
switch off the engine.
R Look out for obstacles such as rocks, holes,
tree stumps and furrows.
R Always keep the doors, the rear door or
tailgate (G-Class Cabriolet), the side win-
dows and the sliding sunroof closed while
the vehicle is in motion.
R Switch off cruise control and variable
SPEEDTRONIC.
R Do not stray from marked routes or paths.
R Adapt your speed to the terrain. The
rougher, steeper or more ruts on the ter-
rain, the slower your speed should be.
R Drive slowly and at a constant speed
through the water. Ensure that a bow wave
does not form as you drive.
R On sand, drive quickly to overcome the roll-
ing resistance. Otherwise, the vehicle could
dig itself into the sand.
R Do not jump with the vehicle as this will
interrupt the vehicle's propulsion. R
Avoid high engine speeds. Drive at appro-
priate engine speeds.
R Always check the vehicle for damage after
off-road driving.
i Information about retrofitting special all-
terrain tyres is available from any qualified
specialist workshop.
i Do not use the HOLD function when driv-
ing off-road, on steep uphill or downhill gra-
dients or on slippery or loose surfaces. The
HOLD function cannot hold the vehicle on
such surfaces.
Checklist before driving off-road !
If the engine oil warning lamp lights up
during the journey, stop the vehicle in a
safe place as soon as is possible. Check the
engine oil level. The warning given by the
engine oil warning light must not be
ignored. Continuing your journey when the
symbol is shown may result in engine dam-
age.
X Engine oil level: check the engine oil and
top it up if necessary.
Only then does the engine receive enough
oil when the vehicle is standing on a steep
incline.
X G3 50 BlueTEC: have the AdBlue ®
level
checked at a qualified specialist workshop
(Y page 160).
X Tyre-change tool kit: check that the jack
is working and make sure you have the
wheelbrace, a robust tow cable and a fold-
ing spade in the vehicle.
X Wheels and tyres: check the tyre tread
depth and tyre pressure.
X Check for damage and remove any foreign
objects, e.g. small stones, from the
wheels/tyres.
X Replace any missing valve caps.
X Replace dented or damaged wheels.
X Carry a sound spare wheel. 170
Driving tipsDriving and parking
Page 181 of 357
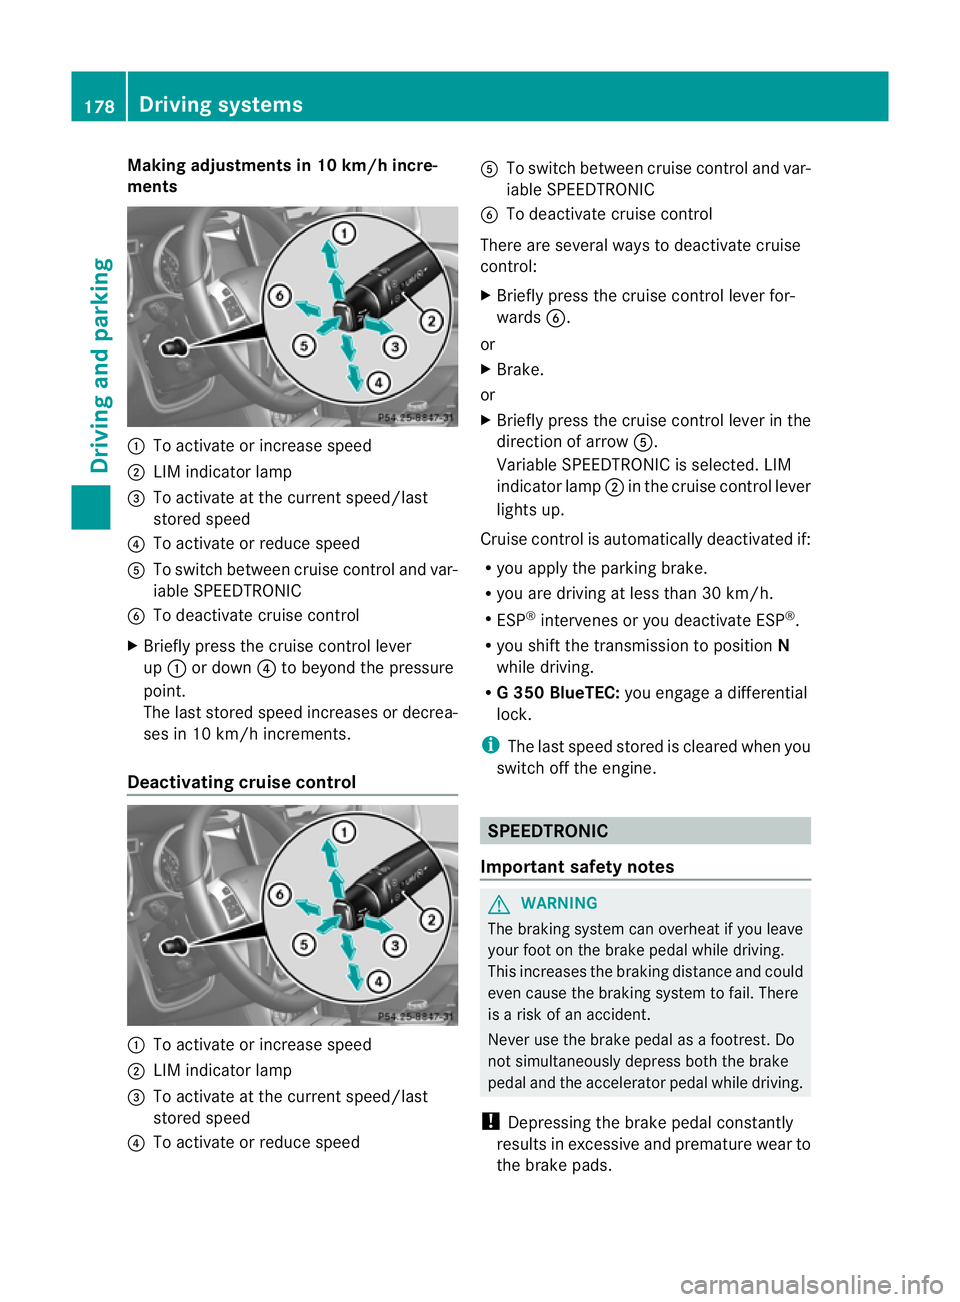
Making adjustments in 10 km/h incre-
ments
:
To activate or increase speed
; LIM indicator lamp
= To activate at the current speed/last
stored speed
? To activate or reduce speed
A To switch between cruise control and var-
iable SPEEDTRONIC
B To deactivate cruise control
X Briefly press the cruise control lever
up : or down ?to beyond the pressure
point.
The lasts tored speed increases or decrea-
ses in 10 km/h increments.
Deactivating cruise control :
To activate or increase speed
; LIM indicator lamp
= To activate at the current speed/last
stored speed
? To activate or reduce speed A
To switch between cruise control and var-
iable SPEEDTRONIC
B To deactivate cruise control
There are several ways to deactivate cruise
control:
X Briefly press the cruise control lever for-
wards B.
or
X Brake.
or
X Briefly press the cruise control lever in the
directio nofarrowA.
Variable SPEEDTRONIC is selected. LIM
indicator lamp ;in the cruise control lever
lights up.
Cruise control is automatically deactivated if:
R you apply the parking brake.
R you are driving at less than 30 km/h.
R ESP ®
intervenes or you deactivate ESP ®
.
R you shift the transmission to position N
while driving.
R G3 50 BlueTEC: you engage a differential
lock.
i The last speed stored is cleared when you
switch off the engine. SPEEDTRONIC
Important safety notes G
WARNING
The braking system can overheat if you leave
your foot on the brake pedal while driving.
This increases the braking distance and could
even cause the braking system to fail. There
is a risk of an accident.
Never use the brake pedal as a footrest .Do
not simultaneously depress both the brake
pedal and the accelerato rpedal while driving.
! Depressing the brake pedal constantly
results in excessive and premature wear to
the brake pads. 178
Driving systemsDriving and parking
Page 183 of 357
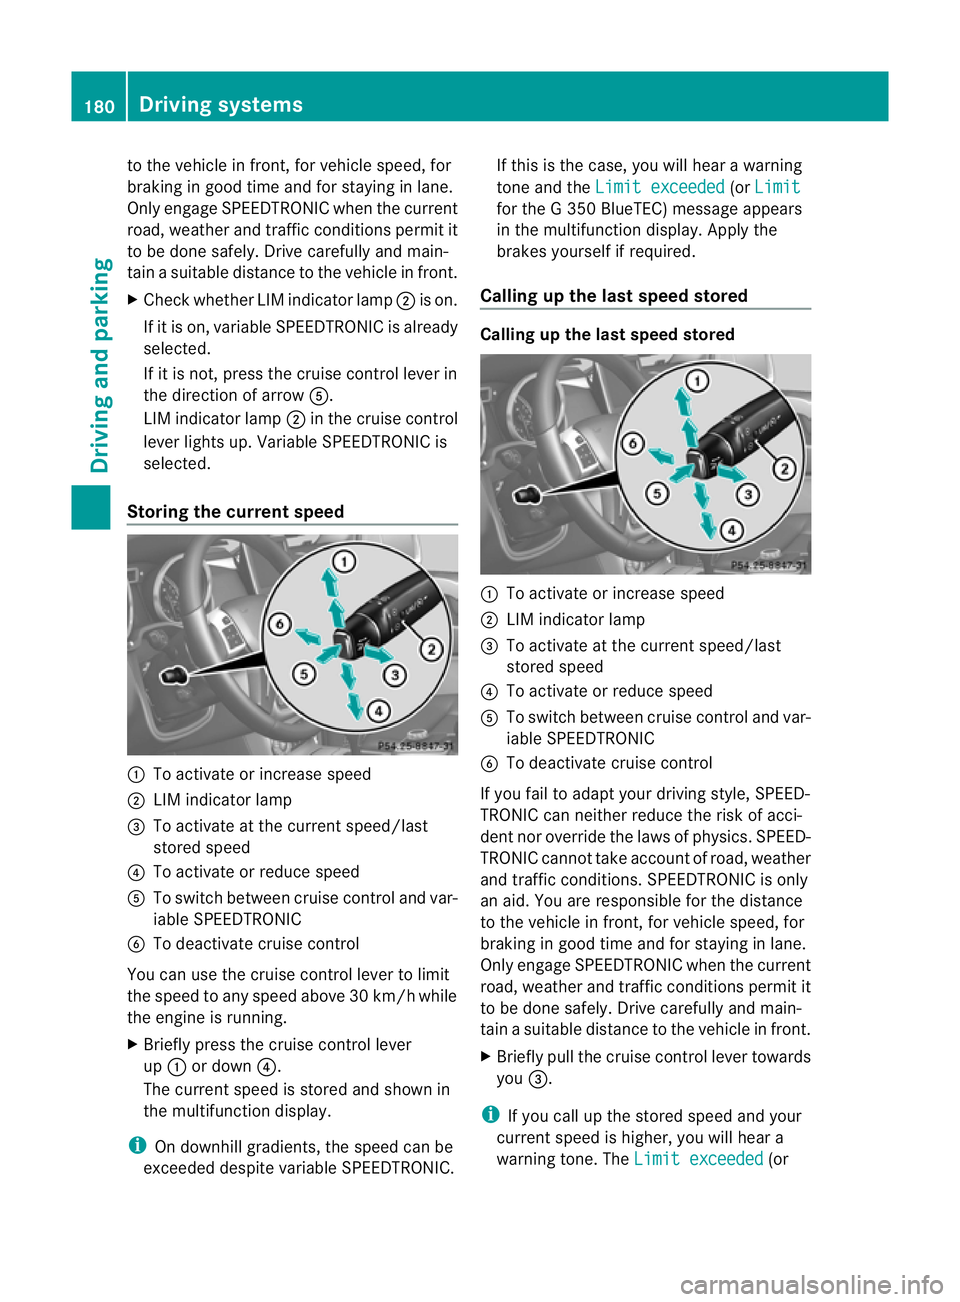
to the vehicle in front, for vehicle speed, for
braking in good time and for staying in lane.
Only engage SPEEDTRONIC when the current
road, weather and traffi
cconditions permit it
to be done safely. Drive carefully and main-
tain a suitable distance to the vehicle in front.
X Check whether LIM indicator lamp ;is on.
If it is on, variable SPEEDTRONIC is already
selected.
If it is not, press the cruise control lever in
the direction of arrow A.
LIM indicator lamp ;in the cruise control
lever lights up. Variable SPEEDTRONIC is
selected.
Storing the current speed :
To activate or increase speed
; LIM indicator lamp
= To activate at the current speed/last
stored speed
? To activate or reduce speed
A To switch between cruise control and var-
iable SPEEDTRONIC
B To deactivate cruise control
You can use the cruise control lever to limit
the speed to any speed above 30 km/hw hile
the engine is running.
X Briefly press the cruise control lever
up : or down ?.
The current speed is stored and shown in
the multifunction display.
i On downhill gradients, the speed can be
exceeded despite variable SPEEDTRONIC. If this is the case, you will hear a warning
tone and the
Limit exceeded (or
Limit for the G 350 BlueTEC) message appears
in the multifunction display. Apply the
brakes yourself if required.
Calling up the last speed stored Calling up the last speed stored
:
To activate or increase speed
; LIM indicator lamp
= To activate at the current speed/last
stored speed
? To activate or reduce speed
A To switch between cruise control and var-
iable SPEEDTRONIC
B To deactivate cruise control
If you fail to adapt your driving style, SPEED-
TRONIC can neither reduce the risk of acci-
dent nor override the laws of physics. SPEED-
TRONIC cannot take account of road, weather
and traffic conditions. SPEEDTRONIC is only
an aid. You are responsible for the distance
to the vehicle in front, for vehicle speed, for
braking in good time and for staying in lane.
Only engage SPEEDTRONIC when the current
road, weather and traffic conditions permit it
to be done safely. Drive carefully and main-
tain a suitable distance to the vehicle in front.
X Briefly pull the cruise control lever towards
you =.
i If you call up the stored speed and your
current speed is higher, you will hear a
warning tone. The Limit exceeded (or180
Driving systemsDriving and parking
Page 193 of 357

DISTRONIC PLUS has not yet detected the
vehicle in front on the edge of the carriage-
way, because of its narrow width
.The dis-
tance to the vehicle in front will be too short.
Obstructions and stationary vehicles DISTRONIC PLUS does not brake for obsta-
cles or stationary vehicles. If, for example, the
detected vehicle turns a corner and reveals
an obstacle or stationary vehicle, DISTRONIC
PLUS will not brake for these.
Crossing vehicles
DISTRONIC PLUS may detect vehicles that
are crossing your lane by mistake. Activating
DISTRONIC PLUS at traffic lights with cross-
ing traffic, for example, could cause your vehi-
cle to pull away unintentionally. Blind Spot Assist
Important safety notes G
WARNING
Blind Spot Assist does not react to:
R vehicles overtaken too closely on the side,
placing them in the blind spot area
R vehicles approaching and driving by with a
speed difference of more than approx-
imately 11 km/h
As a result, Blind Spot Assist may not give
warnings in such situations. There is a risk of
an accident.
Always observe the traffic conditions care-
fully, and maintain a safe lateral distance.
Blind Spot Assist is only an aid. It may fail to
detect some vehicles and is no substitute for
attentive driving.
In particular, the detection of obstacles can
be impaired if there is:
R dirt on the sensors or anything else cover-
ing the sensors
R visibility is poor, e.g. due to fog, heavy rain
or snow
R there is a narrow vehicle travelling in front,
e.g. a motorcycle or bicycle
R the road has very wide lanes
R the road has narrow lanes
R you are not driving in the middle of the lane
R there are barriers or other road boundaries
General notes Blind Spot Assist uses a radar sensor system
to monitor both the left and right sides of your
vehicle. It supports you from speeds of
30 km/h. A warning display in the exterior
mirrors draws your attention to vehicles
detected in the monitored area. If you then
switch on the corresponding turn signal to
change lane, you will also receive an optical
and audible collision warning. For this pur-
pose, Blind Spot Assist uses sensors in the
rear bumper.190
Driving systemsDriving and parking