2012 MERCEDES-BENZ G-CLASS SUV engine oil
[x] Cancel search: engine oilPage 163 of 357
AdBlue
®
Important notes on use To function properly, BlueTEC exhaust gas
aftertreatment 1
mus tbe operated with the
reducing agent AdBlue ®
.
When the supply of AdBlue ®
is almost used
up, the Refill AdBlue See Owner's Man‐
ual message is shown in the multifunction
display. Awarning tone also sounds.
If the Refill AdBlue No start in: .. km message is shown in the multifunction dis-
play, you can still driv ethe vehicle over the
distance shown. Awarning tone also sounds.
If the AdBlue ®
is no ttopped up, you will sub-
sequently be unable to start the engine.
After receiving the warning message, it is
preferable to fill the AdBlue ®
tank with
10 litres of AdBlue ®
.Int his way, you can
ensure that the AdBlue ®
supply lasts until the
next regular service date.
Further information about BlueTEC exhaust
gas aftertreatment and about AdBlue ®
can
be obtained from any Mercedes-Ben zService
Centre.
Topping up AdBlue ®!
Only use AdBlue ®
in accordance with
ISO 22241. Do not mix any additives with
AdBlue ®
, and do not dilute AdBlue ®
with
water. This may destroy the BlueTEC
exhaust gas aftertreatmen tsystem.
! In order to fill the AdBlue ®
tank, the vehi-
cle mus tbe parked on a level surface. The
AdBlue ®
tank can only be filled as intended
with the vehicle parked on a level surface.
Fluctuations in capacity will thus be avoi-
ded. Filling a vehicle standing on an uneven
surface is not permitted. There is a danger
of overfilling, which can cause damage to
BlueTEC exhaust gas aftertreatmen tcom-
ponents. !
Do not fill the AdBlue ®
container with a
pump nozzle.
! If there are steep gradients while driving
off-road, a sufficient filling level in the
AdBlue ®
tank must be ensured. Make sure
for this reason that there is a minimum fill
level of ten litres before driving off-road.
! Surfaces which have come into contact
with AdBlue ®
while refilling should be
rinsed immediately with water, or remove
AdBlue ®
with a moist cloth and cold water.
If AdBlue ®
has already crystallised, use a
sponge and cold water to clean the area.
AdBlue ®
residue crystallises after a certain
amount of time and soils the affected sur-
faces.
! AdBlue ®
is not a fuel additive and must
not be added to the fuel tank.IfA dBlue®
is
added to the fuel tank, this can lead to
engine damage.
If you open the AdBlue ®
tank cap, small
amounts of ammonia vapour may be
released.
Ammonia vapours have a pungen todour and
are particularly irritating to:
R skin
R mucous membranes
R eyes
You may experience a burning sensation in
your eyes, nose and throat, as well as cough-
ing and watering of the eyes.
Do not inhale any ammonia vapours that may
be released. Fill the AdBlue ®
tank only in well-
ventilated areas.
1 BlueTEC vehicles only. 160
RefuellingDriving and parking
Page 167 of 357
boosting effect. You will require considerably
more effor
tto steer and brake. There is a risk
of an accident.
Do not switch off the ignition while driving.
Vehicles with automatic transmission X
Shift the transmission to position P.
X Turn the key to position 0in the ignition
lock (Y page 143) and remove it.
The immobiliser is activated.
X Apply the parking brake firmly.
X Turn the steering wheel until the steering
wheel lock engages.
i If you switch the engine off with the trans-
mission in position Ror D, the automatic
transmission shifts to Nautomatically.
If you then open one of the front doors or
remove the key from the ignition, the auto-
matic transmission shifts to P.
If you shift the automatic transmission to
N before switching off the engine, the auto-
matic transmission remains in Neven if a
door is opened.
i The key can only be removed if the auto-
matic transmission is in position P.Parking brake
i
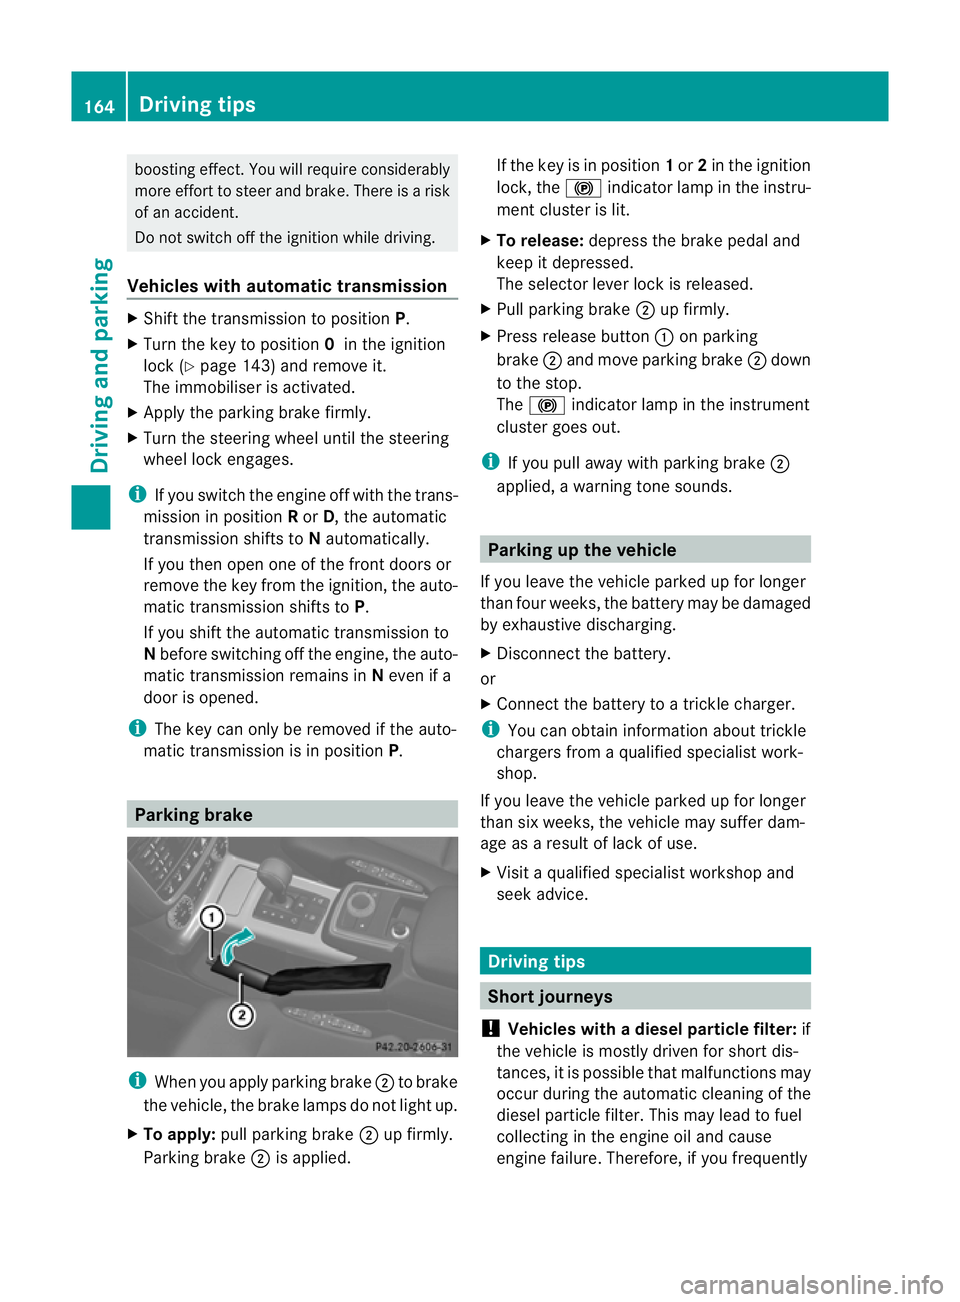
When you apply parking brake ;to brake
the vehicle, the brake lamps do not light up.
X To apply: pull parking brake ;up firmly.
Parking brake ;is applied. If the key is in position
1or 2in the ignition
lock, the !indicator lamp in the instru-
ment cluster is lit.
X To release: depress the brake pedal and
keep it depressed.
The selector lever lock is released.
X Pull parking brake ;up firmly.
X Press release button :on parking
brake ;and move parking brake ;down
to the stop.
The ! indicator lamp in the instrument
cluster goes out.
i If you pull away with parking brake ;
applied, a warning tone sounds. Parking up the vehicle
If you leave the vehicle parked up for longer
than four weeks, the battery may be damaged
by exhaustive discharging.
X Disconnect the battery.
or
X Connect the battery to a trickle charger.
i You can obtain information about trickle
chargers from a qualified specialist work-
shop.
If you leave the vehicle parked up for longer
than six weeks, the vehicle may suffer dam-
age as a result of lack of use.
X Visit a qualified specialist workshop and
seek advice. Driving tips
Short journeys
! Vehicles with adiesel particle filter: if
the vehicle is mostly driven for short dis-
tances, it is possible that malfunctions may
occur during the automatic cleaning of the
diesel particle filter. This may lead to fuel
collecting in the engine oil and cause
engine failure. Therefore, if you frequently 164
Driving tipsDriving and parking
Page 173 of 357
R
Chec kthat items of luggage and loads are
stowed safely and are well secured
(Y page 271).
R To avoid damaging the vehicle, make sure
there is always sufficient ground clearance.
R Always keep the engine running and in gear
when driving on a downhill gradient.
R Always keep the engine running and in gear
when driving on a slope.
R Drive slowly and evenly, if necessary at
walking pace.
R Ensure that the wheels are in contact with
the ground at all times.
R Drive with extreme care on unknown off-
road routes where visibility is poor. For
safety reasons, get out of the vehicle first
and survey the off-road route.
R Check the depth of water before fording
rivers and streams.
R When fording, do not stop and do not
switch off the engine.
R Look out for obstacles such as rocks, holes,
tree stumps and furrows.
R Always keep the doors, the rear door or
tailgate (G-Class Cabriolet), the side win-
dows and the sliding sunroof closed while
the vehicle is in motion.
R Switch off cruise control and variable
SPEEDTRONIC.
R Do not stray from marked routes or paths.
R Adapt your speed to the terrain. The
rougher, steeper or more ruts on the ter-
rain, the slower your speed should be.
R Drive slowly and at a constant speed
through the water. Ensure that a bow wave
does not form as you drive.
R On sand, drive quickly to overcome the roll-
ing resistance. Otherwise, the vehicle could
dig itself into the sand.
R Do not jump with the vehicle as this will
interrupt the vehicle's propulsion. R
Avoid high engine speeds. Drive at appro-
priate engine speeds.
R Always check the vehicle for damage after
off-road driving.
i Information about retrofitting special all-
terrain tyres is available from any qualified
specialist workshop.
i Do not use the HOLD function when driv-
ing off-road, on steep uphill or downhill gra-
dients or on slippery or loose surfaces. The
HOLD function cannot hold the vehicle on
such surfaces.
Checklist before driving off-road !
If the engine oil warning lamp lights up
during the journey, stop the vehicle in a
safe place as soon as is possible. Check the
engine oil level. The warning given by the
engine oil warning light must not be
ignored. Continuing your journey when the
symbol is shown may result in engine dam-
age.
X Engine oil level: check the engine oil and
top it up if necessary.
Only then does the engine receive enough
oil when the vehicle is standing on a steep
incline.
X G3 50 BlueTEC: have the AdBlue ®
level
checked at a qualified specialist workshop
(Y page 160).
X Tyre-change tool kit: check that the jack
is working and make sure you have the
wheelbrace, a robust tow cable and a fold-
ing spade in the vehicle.
X Wheels and tyres: check the tyre tread
depth and tyre pressure.
X Check for damage and remove any foreign
objects, e.g. small stones, from the
wheels/tyres.
X Replace any missing valve caps.
X Replace dented or damaged wheels.
X Carry a sound spare wheel. 170
Driving tipsDriving and parking
Page 228 of 357

Switching the fold-in mirrors when lock-
ing function on/off
When you activate the
Auto. fold in mir‐
rors function, the exterior mirrors are folded
in when the vehicle is locked. When you
unlock the vehicle and then open a door, the
exterior mirrors fold out again.
X Press the =or; button on the steer-
ing wheel to select the Settings menu.
X Press the :or9 button to select the
CONVENIENCE submenu.
X Press ato confirm.
X Press :or9 to select the Auto. fold in mirrors function.
If the Auto. fold in mirrors function is
activated, the vehicle's exterior mirror is
displayed in red in the multifunction dis-
play.
X Press the abutton to save the setting. :
To fold the exterior mirrors in or out
If you have switched the Auto. fold-infunction on and you fold the exterior mirrors
in using button :, they will not fold out auto-
matically (Y page 99).
You can then only fold out the exterior mirrors
using button :. Resetting to factory settings
X Press the =or; button on the steer-
ing wheel to select the Settings menu.
X Press the :or9 button to select the
Factory settings submenu.X
Press ato confirm.
The Reset all settings? message
appears.
X Press the :or9 button to select
No or
Yes .
X Press the abutton to confirm the selec-
tion.
If you have selected Yes , the multifunction
display shows a confirmation message.
For safety reasons, not all functions are reset:
the Limit speed (winter tyres) function
in permanent SPEEDTRONIC can only be set
in the Vehicle submenu. If you want to reset
the Daytime driving lights in the
Light submenu, you must turn the key to position
1(Y
page 143) in the ignition lock. AMG menu in AMG vehicles
AMG displays :
Digital speedometer
; Gear indicator
= Upshift indicator
? Engine oil temperature
A Coolant temperature
B Status indicator for ECO start/stop func-
tion (Y page 145)
X Press =or; on the steering wheel
to select the AMG menu.
Upshift indicator UP =
indicates that the
engine has reached the overrevving range
when in the manual gearshift program.
Upshift indicator UP =
fades out other mes-
sages until you have shifted up.
If the engine oil temperature is below 80 †,
the oil temperature is shown in blue. Avoid Menus and submenus
225On-board computer and displays Z
Page 242 of 357
Display messages Possible causes/consequences and
M Solutions
# The battery is no
tbeing charged.
Aw arning tone also sounds.
Possible causes:
R faulty alternator
R torn poly-V-belt
R a malfunction in the electronics
X Stop the vehicle immediately, paying attentio ntoroad and traf-
fic conditions, and switch off the engine.
X Open the bonnet.
X Check whether the poly-V-belt is torn.
If the poly-V-belt is torn:
! Do not continue driving. The engine could otherwise overheat.
X Consult a qualified specialist workshop.
If the poly-V-belt is OK:
X Visit a qualified specialist workshop. 4
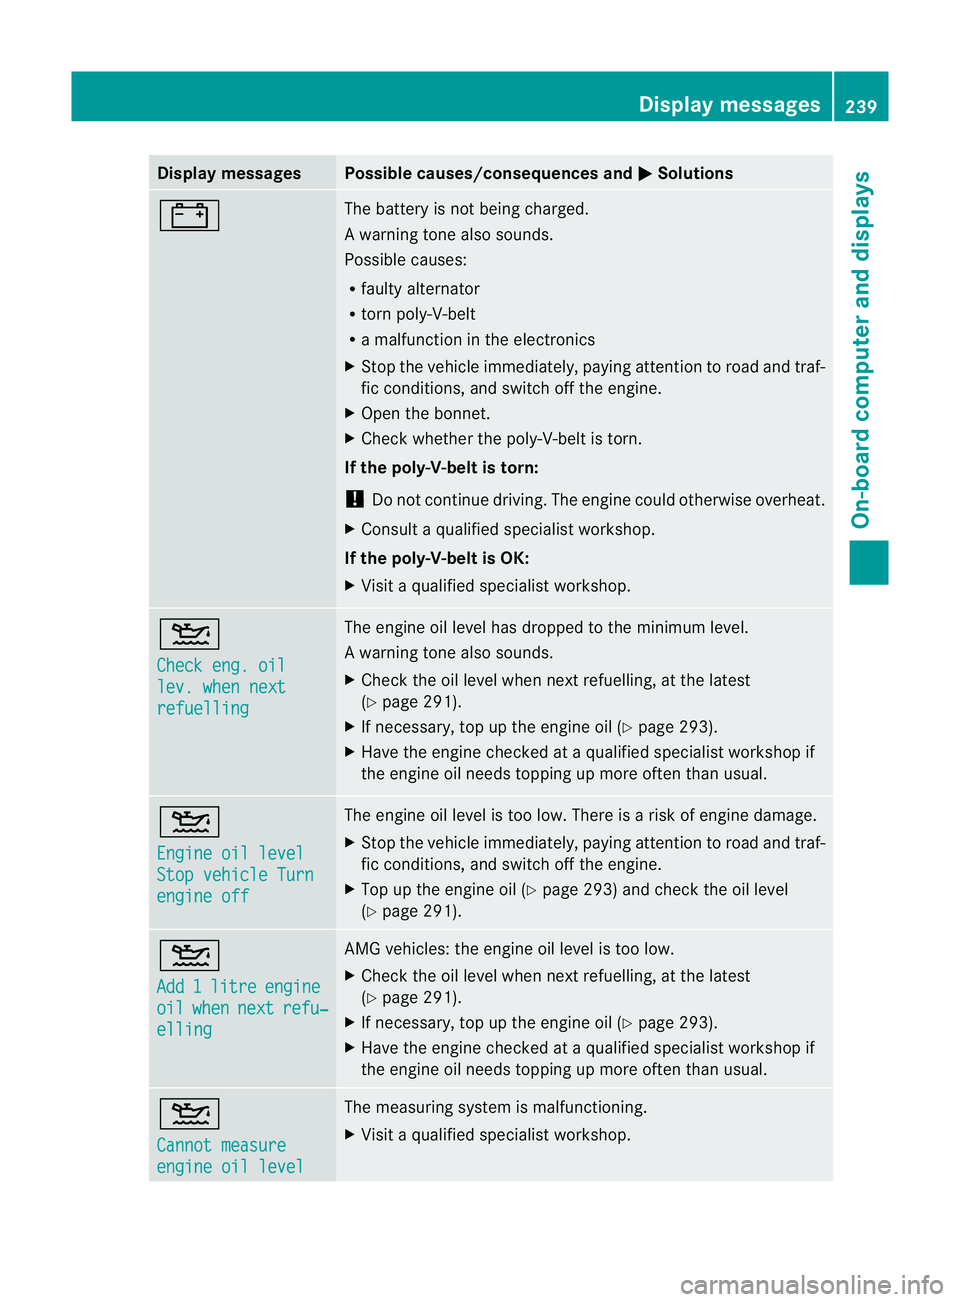
Check eng. oil
lev. when next
refuelling The engine oil level has dropped to the minimum level.
Aw
arning tone also sounds.
X Chec kthe oil level when next refuelling, at the latest
(Y page 291).
X If necessary, top up the engine oil (Y page 293).
X Have the engine checked at a qualified specialist workshop if
the engine oil needs topping up more often than usual. 4
Engine oil level
Stop vehicle Turn
engine off The engine oil level is too low. There is a risk of engine damage.
X
Stop the vehicle immediately, paying attention to road and traf-
fic conditions, and switch off the engine.
X Top up the engine oil (Y page 293) and check the oil level
(Y page 291). 4
Add
1 litre engine
oil when next refu‐
elling AMG vehicles: the engine oil level is too low.
X
Check the oil level when next refuelling, at the latest
(Y page 291).
X If necessary, top up the engine oil (Y page 293).
X Have the engine checked at a qualified specialist workshop if
the engine oil needs topping up more often than usual. 4
Cannot measure
engine oil level The measuring system is malfunctioning.
X Visit a qualified specialist workshop. Display messages
239On-board computer and displays Z
Page 293 of 357
Useful information
i This Owner's Manual describes all mod-
els, series and optional equipment for your
vehicle that were available at the time of
going to press. Country-specific differen-
ces are possible. Note that your vehicle
may not be fitted with all features descri-
bed. This is also the case for systems and
functions relevant to safety.
i Read the information on qualified special-
ist workshops: (Y page 22). Engine compartment
Bonnet
Important safety notes G
WARNING
Do not pull the release lever while the vehicle
is in motion. If you do so, the bonnet may open
up and block your view. G
WARNING
There is a risk of injury if the bonnet is open,
even if the engine is not running.
Some engine components can become very
hot.
To avoid the risk of burns, only touch those
components described in the Owner's Manual
and observe the relevan tsafety notes. G
WARNING
The radiator fan between the radiator and the
engine can start automatically, even if the key
has been removed from th eignition lock. For
this reason, you must not reach into the fan
rotation area. You could otherwise be injured. Vehicles with
apetrol engine: The elec-
tronic ignitio nsystem uses high voltage. For
this reason, you mus tnever touch ignition
system components (ignition coil, ignition
cables, spark plug connectors or test socket)
while:
R the engine is running
R the engine is being started
R the ignition is switched on and the engine
is being cranked by hand
You could otherwise suffer an electric shock
and be seriously or even fatally injured.
Vehicles with adiesel engine: The elec-
tronic injection control uses high voltage. For
this reason, you must never touch injection
system components while:
R the engine is running
R the engine is being started
R the ignition is switched on
You could otherwise suffer an electric shock
and be seriously or even fatally injured. G
WARNING
The windscreen wipers and wiper linkage
could be set in motion.
When the bonnet is open, you or others could
be injured by the wiper linkage.
Make sure that the windscreen wipers are
switched off and that the key has been pulled
out of the ignition lock before opening the
bonnet.
! Make sure that the windscreen wipers are
not folded away from the windscreen .Oth-
erwise, you could damage the windscreen
wipers or the bonnet. 290
Engine compartmentMaintenance and care
Page 294 of 357
Opens the bonnet
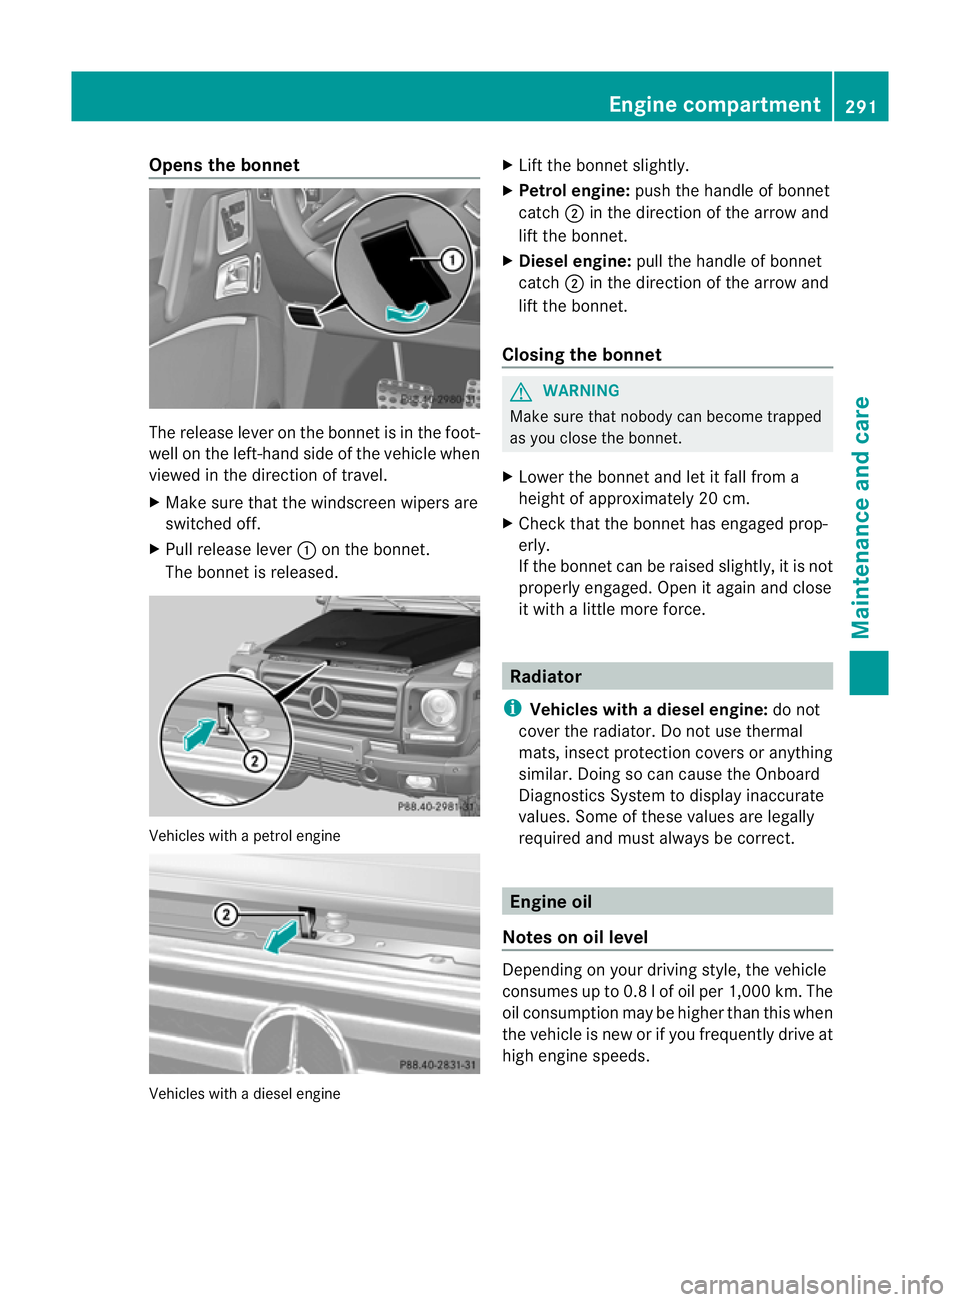
The release lever on the bonnet is in the foot-
well on the left-hand side of the vehicle when
viewed in the direction of travel.
X Make sure that the windscreen wipers are
switched off.
X Pull release lever :on the bonnet.
The bonnet is released. Vehicles with a petrol engine
Vehicles with a diesel engine X
Lift the bonnet slightly.
X Petrol engine: push the handle of bonnet
catch ;in the direction of the arrow and
lift the bonnet.
X Diesel engine: pull the handle of bonnet
catch ;in the direction of the arrow and
lift the bonnet.
Closing the bonnet G
WARNING
Make sure that nobody can become trapped
as you close the bonnet.
X Lower the bonnet and let it fall from a
height of approximately 20 cm.
X Check that the bonnet has engaged prop-
erly.
If the bonnet can be raised slightly, it is not
properly engaged. Open it again and close
it with a little more force. Radiator
i Vehicles with adiesel engine: do not
cover the radiator. Do not use thermal
mats, insect protection covers or anything
similar. Doing so can cause the Onboard
Diagnostics System to display inaccurate
values. Some of these values are legally
required and must always be correct. Engine oil
Notes on oil level Depending on your driving style, the vehicle
consumes up to 0.
8lof oil per 1,000 km. The
oil consumption may be higher than this when
the vehicle is new or if you frequently drive at
high engine speeds. Engine compartment
291Maintenance and care Z
Page 295 of 357
Checking the oil level using the oil dip-
stick
Example
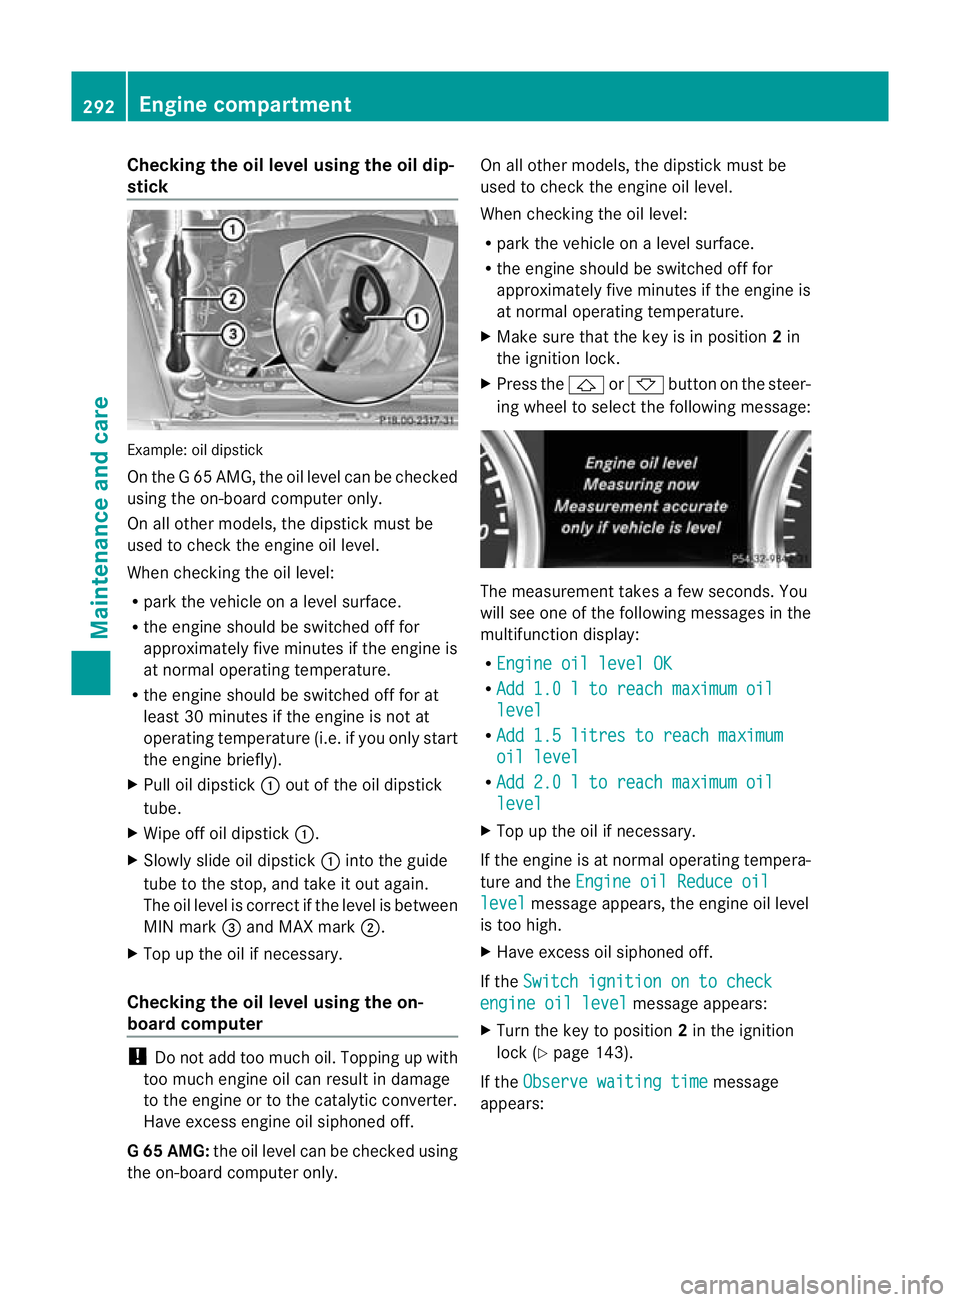
:oil dipstick
On the G 65 AMG, the oil level can be checked
using the on-board computer only.
On all other models, the dipstick must be
used to chec kthe engine oil level.
When checking the oil level:
R park the vehicle on a level surface.
R the engine should be switched off for
approximately five minutes if the engine is
at normal operating temperature.
R the engine should be switched off for at
least 30 minutes if the engine is not at
operating temperature (i.e. if you only start
the engine briefly).
X Pull oil dipstick :out of the oil dipstick
tube.
X Wipe off oil dipstick :.
X Slowly slide oil dipstick :into the guide
tube to the stop, and take it out again.
The oil level is correct if the level is between
MIN mark =and MAX mark ;.
X Top up the oil if necessary.
Checking the oil level using the on-
board computer !
Do not add too much oil. Topping up with
too much engine oil can result in damage
to the engine or to the catalytic converter.
Have excess engine oil siphoned off.
G6 5 AMG: the oil level can be checked using
the on-board computer only. On all other models, the dipstic
kmust be
used to chec kthe engine oil level.
When checking the oil level:
R park the vehicle on a level surface.
R the engine should be switched off for
approximately five minutes if the engine is
at normal operating temperature.
X Make sure that the key is in position 2in
the ignition lock.
X Press the &or* button on the steer-
ing wheel to select the following message: The measurement takes a few seconds. You
will see one of the following messages in the
multifunction display:
R Engine oil level OK R
Add 1.0 l to reach maximum oil level
R
Add 1.5 litres to reach maximum oil level
R
Add 2.0 l to reach maximum oil level
X
Top up the oil if necessary.
If the engine is at normal operating tempera-
ture and the Engine oil Reduce oil level message appears, the engine oil level
is too high.
X Have excess oil siphoned off.
If the Switch ignition on to check engine oil level message appears:
X Turn the key to position 2in the ignition
lock (Y page 143).
If the Observe waiting time message
appears: 292
Engine compartmentMaintenance and care