2012 MERCEDES-BENZ E-CLASS ESTATE stop start
[x] Cancel search: stop startPage 103 of 457
Change the positio
nofthe sliding sunroof
or open a side window slightly to reduce or
eliminate these noises.
Your vehicle may be fitted with a sliding sun-
roof or a panorama sliding sunroof. In this
section, the term "sliding sunroof" refers to
both types of sliding sunroof. Operating the sliding sunroof
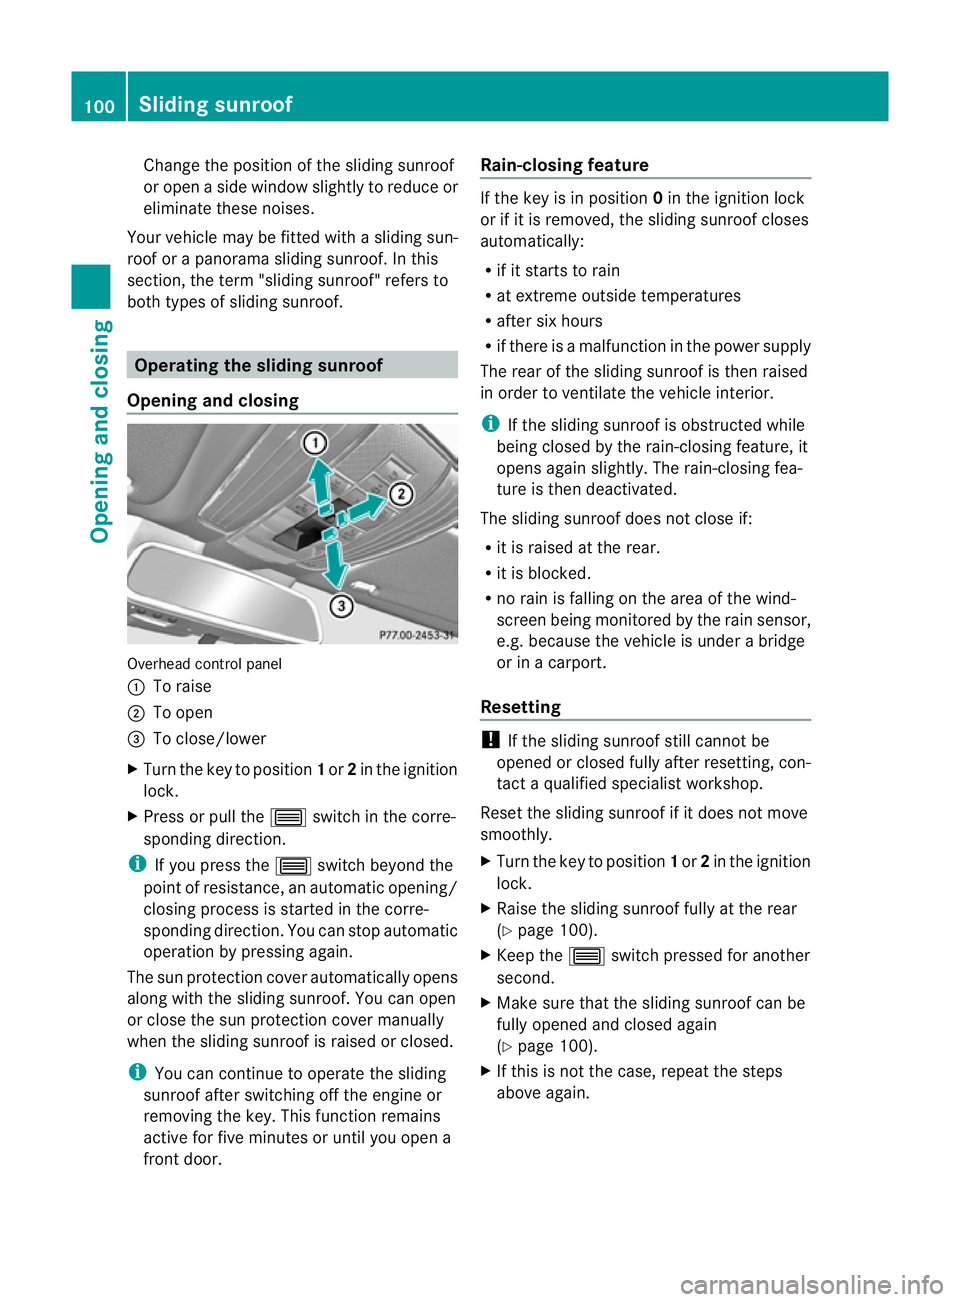
Opening and closing Overhead control panel
:
To raise
; To open
= To close/lower
X Turn the key to position 1or 2in the ignition
lock.
X Press or pull the 3switch in the corre-
sponding direction.
i If you press the 3switch beyond the
point of resistance, an automatic opening/
closing process is started in the corre-
sponding direction. You can stop automatic
operation by pressing again.
The sun protection cover automatically opens
along with the sliding sunroof. You can open
or close the sun protection cover manually
when the sliding sunroof is raised or closed.
i You can continue to operate the sliding
sunroof after switching off the engine or
removing the key. This function remains
active for five minutes or until you open a
front door. Rain-closing feature If the key is in position
0in the ignition lock
or if it is removed, the sliding sunroof closes
automatically:
R if it starts to rain
R at extreme outside temperatures
R after six hours
R if there is a malfunction in the power supply
The rear of the sliding sunroof is then raised
in order to ventilate the vehicle interior.
i If the sliding sunroof is obstructed while
being closed by the rain-closing feature, it
opens again slightly. The rain-closing fea-
ture is then deactivated.
The sliding sunroof does not close if:
R it is raised at the rear.
R it is blocked.
R no rain is falling on the area of the wind-
screen being monitored by the rain sensor,
e.g. because the vehicle is under a bridge
or in a carport.
Resetting !
If the sliding sunroof still cannot be
opened or closed fully after resetting, con-
tact a qualified specialist workshop.
Reset the sliding sunroof if it does not move
smoothly.
X Turn the key to position 1or 2in the ignition
lock.
X Raise the sliding sunroof fully at the rear
(Y page 100).
X Keep the 3switch pressed for another
second.
X Make sure that the sliding sunroof can be
fully opened and closed again
(Y page 100).
X If this is not the case, repeat the steps
above again. 100
Sliding sunroofOpening and closing
Page 104 of 457
Operating the panorama sliding sun-
roof
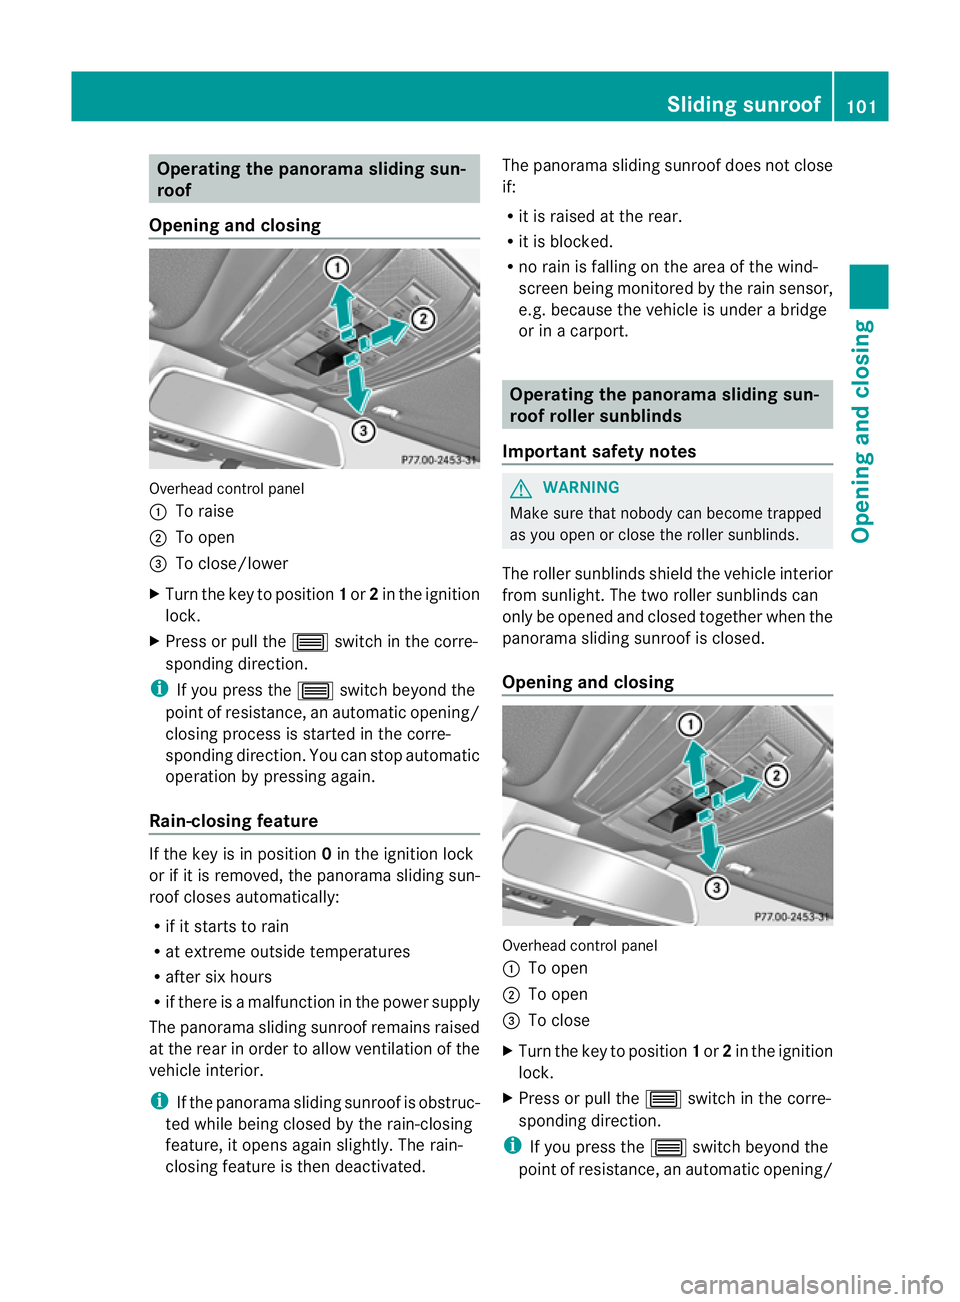
Opening and closing Overhead control panel
:
To raise
; To open
= To close/lower
X Turn the key to position 1or 2in the ignition
lock.
X Press or pull the 3switch in the corre-
sponding direction.
i If you press the 3switch beyond the
point of resistance, an automatic opening/
closing process is started in the corre-
sponding direction. You can stop automatic
operation by pressing again.
Rain-closing feature If the key is in position
0in the ignition lock
or if it is removed, the panorama sliding sun-
roof closes automatically:
R if it starts to rain
R at extreme outside temperatures
R after six hours
R if there is a malfunction in the power supply
The panorama sliding sunroof remains raised
at the rear in order to allow ventilation of the
vehicle interior.
i If the panorama sliding sunroof is obstruc-
ted while being closed by the rain-closing
feature, it opens again slightly. The rain-
closing feature is then deactivated. The panorama sliding sunroof does not close
if:
R
it is raised at the rear.
R it is blocked.
R no rain is falling on the area of the wind-
screen being monitored by the rain sensor,
e.g. because the vehicle is under a bridge
or in a carport. Operating the panorama sliding sun-
roof roller sunblinds
Important safety notes G
WARNING
Make sure that nobody can become trapped
as you open or close the roller sunblinds.
The roller sunblinds shield the vehicle interior
from sunlight. The two roller sunblinds can
only be opened and closed together when the
panorama sliding sunroof is closed.
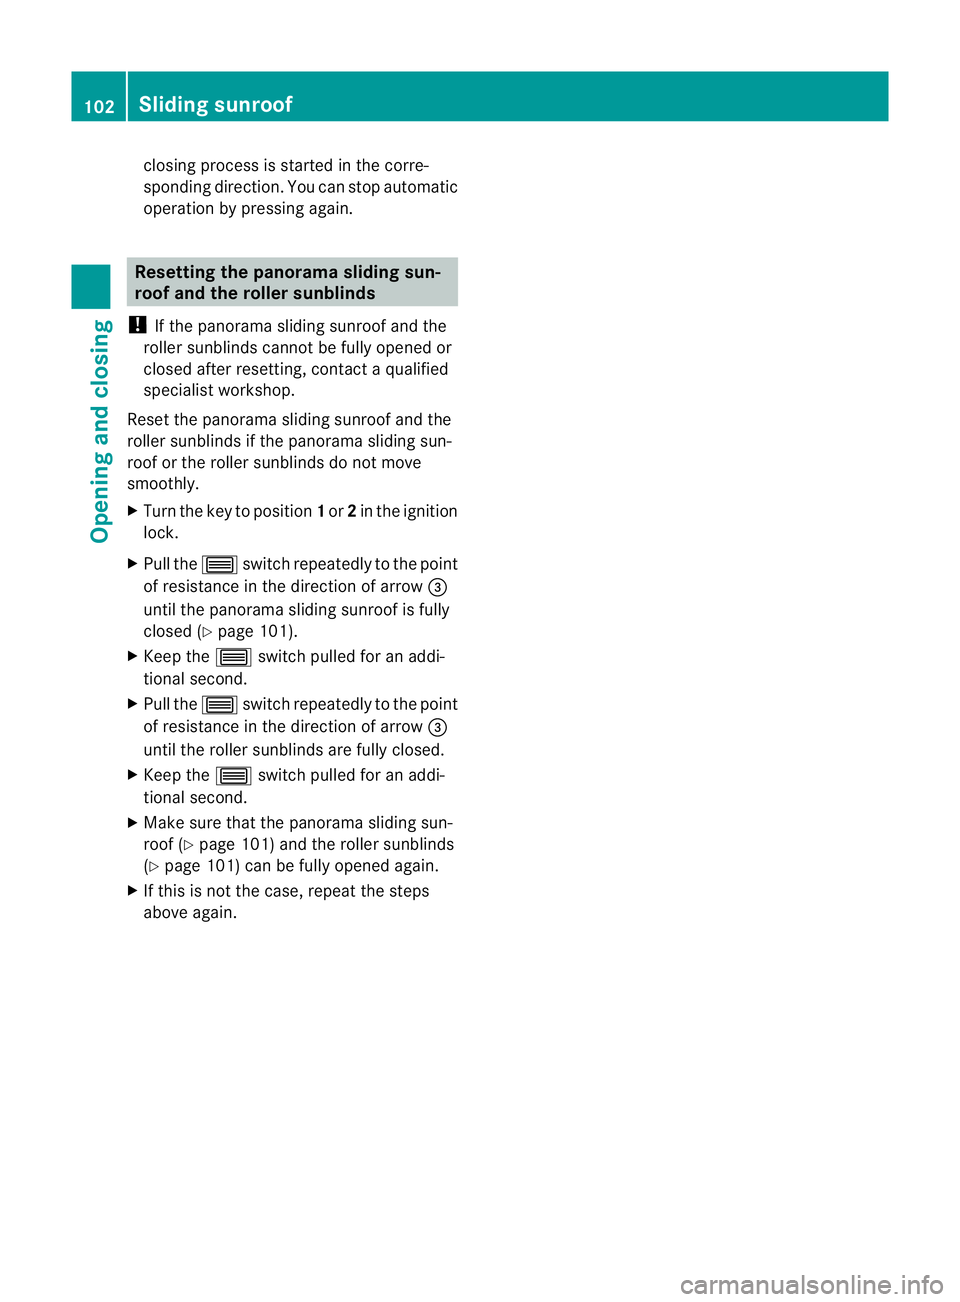
Opening and closing Overhead control panel
:
To open
; To open
= To close
X Turn the key to position 1or 2in the ignition
lock.
X Press or pull the 3switch in the corre-
sponding direction.
i If you press the 3switch beyond the
point of resistance, an automatic opening/ Sliding sunroof
101Opening and closing Z
Page 105 of 457
closing process is started in the corre-
sponding direction. You can stop automatic
operation by pressing again.
Resetting the panorama sliding sun-
roo
fand the roller sunblinds
! If the panorama sliding sunroof and the
roller sunblinds cannot be fully opened or
closed after resetting, contact a qualified
specialist workshop.
Reset the panorama sliding sunroof and the
roller sunblinds if the panorama sliding sun-
roof or the roller sunblinds do not move
smoothly.
X Turn the key to position 1or 2in the ignition
lock.
X Pull the 3switch repeatedly to the point
of resistance in the direction of arrow =
until the panorama sliding sunroof is fully
closed (Y page 101).
X Keep the 3switch pulled for an addi-
tional second.
X Pull the 3switch repeatedly to the point
of resistance in the direction of arrow =
until the roller sunblinds are fully closed.
X Keep the 3switch pulled for an addi-
tional second.
X Make sure that the panorama sliding sun-
roof (Y page 101) and the roller sunblinds
(Y page 101) can be fully opened again.
X If this is not the case, repeat the steps
above again. 102
Sliding sunroofOpening and closing
Page 121 of 457
Vehicles with KEYLESS-GO: when you switch
off the ignition and open the driver's door, the
steering wheel heating is switched off.
i
The steering wheel heating does not
switch off automatically.
Problems with the steering wheel heat-
ing If steering wheel heating indicator lamp
=is
flashing, the steering wheel heating has
switched off automatically. The vehicle's
electrical system voltage is too low because
too many electrical consumers are switched
on.
X Switch off electrical consumers that you do
not need, such as the rear window heating
or interior lighting.
Once the battery is sufficiently charged, the
steering wheel heating will switch back on
automatically. EASY-ENTRY/EXIT feature
Important safety notes G
WARNING
Make sure that nobody can become trapped
when you activate the EASY-ENTRY/EXIT fea-
ture.
If there is a risk of someone becoming trap-
ped, stop the adjustment procedure. To halt
the procedure:
R press the steering column adjustment but-
ton.
R briefly press one of the memory function
position buttons.
The steering column stops moving immedi-
ately.
Do not keep the memory function position
button pressed down, otherwise the memory
function will start and the steering wheel and
seat will begin to move.
Never leave children unsupervised in the vehi-
cle. They could open the driver's door and thereby unintentionally activate the EASY-
ENTRY feature and become trapped.
The EASY-ENTRY/EXIT feature makes getting
in and out of yourv ehicle easier.
You can activate and deactivate the EASY-
ENTRY/EXIT feature in the on-board com-
puter (Y page 263).
Position of the steering wheel when the
EASY-ENTRY/EXIT feature is active The steering wheel tilts upwards if you:
R
remove the key from the ignition lock
R open the driver's door and KEYLESS-GO is
in position 1
R open the driver's door and the key is in
position 0or 1in the ignition lock
i The steering wheel only moves upwards if
it has not already reached the upper end
stop.
Position of the steering wheel for driv-
ing The steering wheel is moved to the previously
set position if:
R the driver's door is closed and
R you insert the key intot he ignition lock
or
R you press the Start/Stop button once on
vehicles with KEYLESS-GO.
If you close the driver's door with the key
inserted into the ignition lock, the steering
wheel is automatically moved to the previ-
ously set position.
The last position of the steering wheel is
stored when you switch off the ignition or
when you store the settingw ith the memory
function (Y page 121).
Crash-responsive EASY-EXIT feature If the crash-responsive EASY-EXIT feature is
triggered in an accident, the steering column
will move upwards when the driver's door is 118
Steering wheelSeats, steering wheel and mirrors
Page 143 of 457
X
Remove the key from the ignition lock.
X Fold wiper arm :away from the rear win-
dow until it engages.
X Position wiper blade ;at a right angle to
wiper arm :.
X Hold wiper arm :and press wiper
blade ;in the direction of the arrow until
it releases.
X Remove wiper blade ;.
Fitting awiper blade
X Place new wiper blade ;onto wiper
arm :.
X Hold wiper arm :and press wiper
blade ;in the opposite direction to the
arrow until it engages.
X Make sure that wiper blade ;is seated
correctly.
X Position wiper blade ;parallel to wiper
arm :.
X Fold wiper arm :back onto the rear win-
dow. Problems with the windscreen wipers
The windscreen wipers are obstructed X
For safety reasons, you should remove the
key from the ignition lock.
or
X Switch off the engine using the Start/Stop
button and open the driver's door.
X Remove the cause of the obstruction.
X Switch the windscreen wipers back on.
The windscreen wipers are inoperative The windscreen wiper drive is malfunctioning.
X
Selec tanothe rwiper speed on the combi-
nation switch.
X Have the windscreen wipers checked at a
qualified specialist workshop. 140
Windscreen wipersLights and windscreen wipers
Page 164 of 457
There is a risk of an accident.
Wear suitable footwear to ensure correct
usage of the pedals.
G
WARNING
If you switch off the ignition while driving,
safety-relevan tfunctions are only available
with limitations, or no tatall. This could affect,
for example, the power steering and the brake
boosting effect .You will require considerably
more effort to steer and brake. There is a risk
of an accident.
Do not switch off the ignition while driving. G
WARNING
If the parking brake has not been fully
released when driving, the parking brake can:
R overheat and cause a fire
R lose its hold function.
There is a risk of fire and an accident .Release
the parking brake fully before driving off. G
WARNING
Vehicles with HYBRID :ensure tha tyou read
the "HYBRID" supplement. You may otherwise
fail to recognise dangers.
! Warm up the engine quickly. Do not use
the engine's full performance until it has
reached operating temperature.
Only set the automatic transmission to the
respective drive positions when the vehicle
is stationary.
Where possible, avoid spinning the drive
wheels when pulling away on slippery
roads. Otherwise, you could damage the
drive train.
! AMG vehicles: at low engine oil temper-
atures (below +20 †), the maximum
engine speed is restricted in order to pro-
tect the engine. To protect the engine and
maintain smooth engine operation, avoid
driving at full throttle when the engine is
cold. Key positions
Key g
To remove the key
1 Power supply for some consumers, such
as the windscreen wipers
2 Ignition (power supply for all consumers)
and drive position
3 To start the engine
i If the key does not belong to the vehicle,
it can still be turned in the ignition lock.
However, the ignition will not be switched
on. The engine cannot be started.
KEYLESS-GO General notes
R
Do not keep the KEYLESS-GO key together
with:
- electronic devices, e.g. a mobile phone
or another key
- metallic objects, e.g. coins or metal film
R Do not keep the KEYLESS-GO key together
in metallic objects, e.g. a metal case.
This can affect the functionality of KEY-
LESS-GO.
Vehicles with KEYLESS-GO are equipped with
a key featuring an integrated KEYLESS-GO
start function and a detachable Start/Stop
button.
The Start/Stop button must be inserted in the
ignition lock and the key must be in the vehi-
cle. Driving
161Driving and parking Z
Page 165 of 457
Pressing the Start/Stop button several times
in succession corresponds to the different
key positions in the ignition lock. This is only
the case if you are not depressing the brake
pedal.
If you depress the brake pedal and press the
Start/Stop button, the engine starts immedi-
ately.
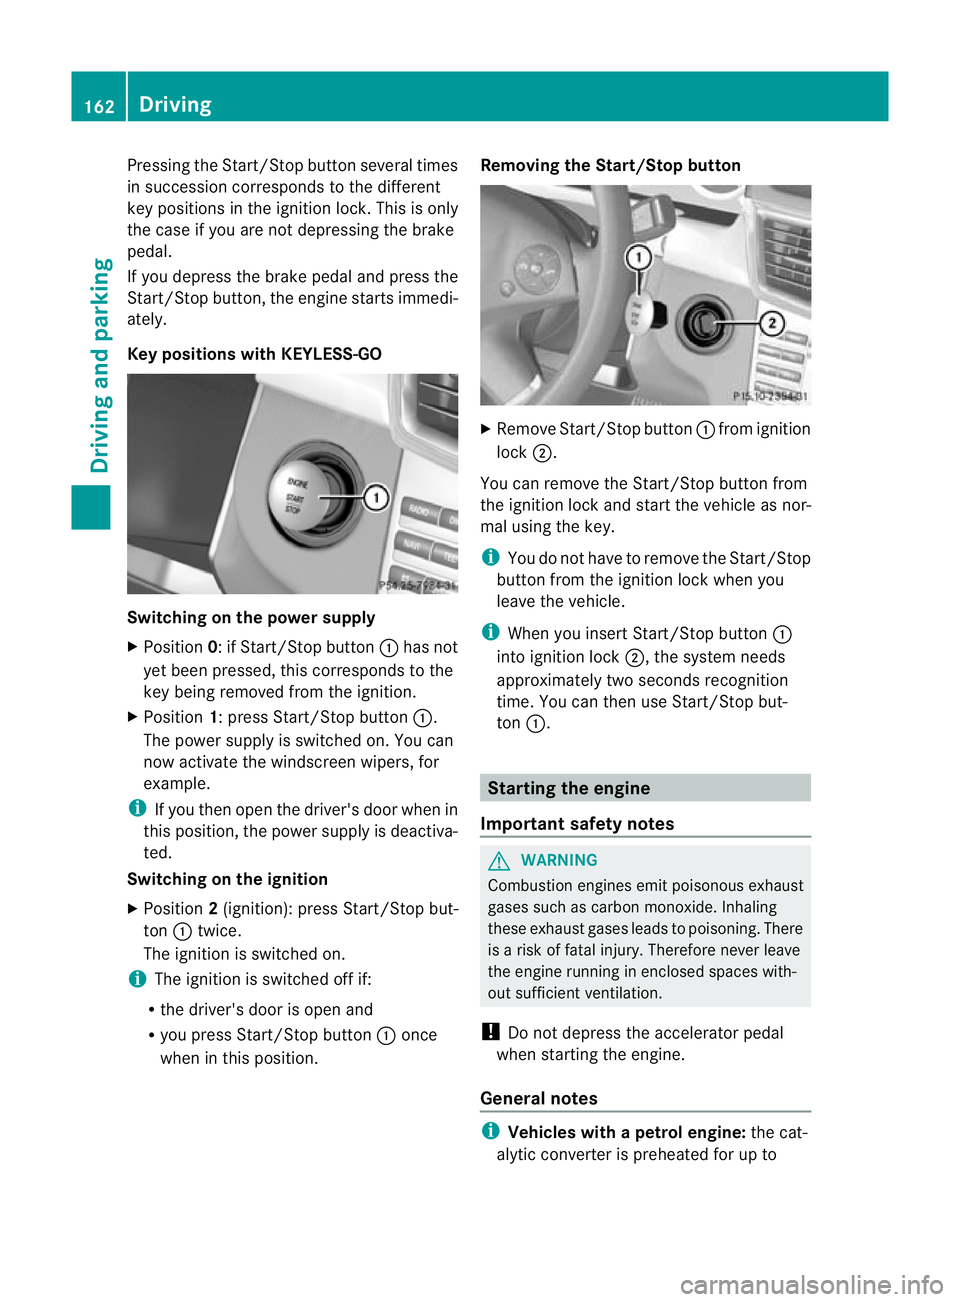
Key positions with KEYLESS-GO
Switching on the power supply
X
Position 0: if Start/Stop button :has not
yet been pressed, this corresponds to the
key being removed from the ignition.
X Position 1: press Start/Stop button :.
The power supply is switched on. You can
now activate the windscreen wipers, for
example.
i If you then open the driver's door when in
this position, the power supply is deactiva-
ted.
Switching on the ignition
X Position 2(ignition): press Start/Stop but-
ton :twice.
The ignition is switched on.
i The ignition is switched off if:
R the driver's door is open and
R you press Start/Stop button :once
when in this position. Removing the Start/Stop button
X
Remove Start/Stop button :from ignition
lock ;.
You can remove the Start/Stop button from
the ignition lock and start the vehicle as nor-
mal using the key.
i You do not have to remove the Start/Stop
button from the ignition lock when you
leave the vehicle.
i When you insert Start/Stop button :
into ignition lock ;, the system needs
approximately two seconds recognition
time. You can then use Start/Stop but-
ton :. Starting the engine
Important safety notes G
WARNING
Combustion engines emit poisonous exhaust
gases such as carbon monoxide. Inhaling
these exhaust gases leads to poisoning. There
is a risk of fatal injury. Therefore never leave
the engine running in enclosed spaces with-
out sufficient ventilation.
! Do not depress the accelerator pedal
when starting the engine.
General notes i
Vehicles with apetrol engine: the cat-
alytic converter is preheated for up to 162
DrivingDriving and parking
Page 166 of 457
30seconds after a cold start. The sound of
the engine may change during this time.
Manual transmission X
Depress the brake pedal and keep it
depressed.
X Fully depress the clutch pedal.
X Shift to neutral N.
i You can only start the engine whe nthe
clutch pedal is fully depressed.
Automatic transmission X
Shift the transmission to position P.
The transmission position displayint he
multifunction display shows P.
i You can also start the engine when the
transmission is in position N.
Starting procedure with the key i
To start the engine using the key instead
of KEYLESS-GO, pull the Start/Stop button
out of the ignition lock.
X To start a petrol engine: turn the key to
position 3in the ignition lock
(Y page 161) and release it as soon as the
engine is running.
X To startad iesel engine: turn the key to
position 2in the ignition lock
(Y page 161).
The % preglow indicator lamp in the
instrumen tcluster lights up.
X When the %erlischt, den Schlüssel auf
Stellung 3(Ypage 161) and release it as
soon as the engine is running.
i You can start the engine without preglow
if the engine is warm.
i Vehicles with automatic transmis-
sion: you can also use the touch-star tfunc-
tion .To do this, turn the key to position
3(Y page 161) and release it immediately.
The engine then starts automatically. Using KEYLESS-GO to startt
he engine G
WARNING
You rvehicle can be started using a valid KEY-
LESS-GO key. For this reason, children should
never be left unsupervised in the vehicle.
Always take the key with you when leaving the
vehicle, even if you are only leaving it for a
short time.
i The Start/Stop button can be used to
start the vehicle manually without inserting
the key into the ignition lock. The key must
be in the vehicle and the Start/Stop button
must be inserted in the ignition lock. This
mode for starting the engine operates inde-
pendently of the ECO start/stop automatic
engine start function.
X Depress the brake pedal and keep it
depressed.
X To star tapetrol engine: press the Start/
Stop button (Y page 161) once.
The engine starts.
X To start adiesel engine: press the Start/
Stop button (Y page 161) once.
Preglow is activated and the engine starts. Pulling away
Manual transmission !
Change gear in good time and avoid spin-
ning the wheels. Otherwise, you could dam-
age the vehicle.
X Depress the brake pedal and keep it
depressed.
X Fully depress the clutch pedal.
X Shift to either first gear or reverse gear R.
X Release the parking brake (Y page 184).
X Release the brake pedal.
X Slowly release the clutch pedal and gently
depress the accelerato rpedal.
i Follow the shift recommendations in the
multifunction display for an economical
driving style (Y page 170). Driving
163Driving and parking Z