2012 MERCEDES-BENZ CLS COUPE washer fluid
[x] Cancel search: washer fluidPage 19 of 373

Remote control
Auxiliary heating/ventilation .......... 133
Changing the batterie s(au xiliary
heating) ......................................... 135
Garage door opene r....................... 287
Programming (garage door
opener) .......................................... 287
Replacing the battery (auxiliary
heatin gremote control) .................... 135
Reserve (fue ltank)
see Fuel
Reserve fuel
Display message ............................ 242
Warning lamp ................................. 267
Residual heat (climate control) ........132
Restrain tsystem
see SRS (Supplemental Restraint
System)
Rev counter ........................................ 210
Reverse gear (selector lever) ...........148
Reversing camera Cleaning instructions .....................305
Function/notes ............................. 190
Switching on/off ........................... 191
Reversing lamp
Changing bulbs .............................. 120
Reversing lamp (display message) ..239
Roller sunblind Rea rwindow .................................. 282
Roof carrier ........................................ 278
Roof lining and carpets (cleaning
instructions) ...................................... 307
Roof load (maximum) ........................366 S
Safety Childre ninthe vehicle ..................... 52
Child restraint systems ....................52
Safety system
see Driving safety system
Seat
Seat backres tdisplay message .....255
Seat belt
Adjusting the driver's and front-
passenger sea tbelt ......................... 50
Adjusting the height ......................... 50
Belt force limiter .............................. 51Belt tensioner
.................................. 51
Cleaning ......................................... 307
Display message ............................ 235
Fastening ......................................... 49
Important safety guidelines .............48
Rea rseat belt status indicator .........51
Releasing ......................................... 50
Switching bel tadjustment on/off
(on-board computer) ......................227
Warning lamp ................................. 259
Warning lamp (function) ................... 51
Seats
Adjusting (electrically). ....................98
Adjusting lumba rsuppor t.............. 101
Adjusting the 4-way lumba rsup-
por t................................................ 101
Adjusting the head restraint ............98
Cleaning the cover .........................306
Correct driver's sea tposition ........... 96
Important safety notes ....................97
Seat heating problem ....................102
Seat ventilation problem ................102
Storing settings (memory func-
tion) ............................................... 107
Switching sea theating on/off .......101
Switching the sea tventilation on/
off .................................................. 102
Selector lever
Cleaning ......................................... 306
Sensors (cleaning instructions) .......304
Service see ASSYST PLUS
Service Centre
see Qualified specialist workshop
Service menu (on-board computer) .220
Service products Brake fluid ..................................... 365
Coolant (engine) ............................ 365
Engine oil ....................................... 363
Fuel ................................................ 360
Important safety notes ..................359
Washer fluid .................................. .366
Settings
Factory (on-board computer) .........227
On-board computer .......................221
Settin gthe air distribution ...............129
Settin gthe airflow ............................ 129
SETUP (on-board computer) .............228 16
Index
Page 23 of 373
Reserv
efuel ................................... 267
Seat bel t........................................ 259
SRS ................................................ 266
Tyr ep ressure monitor ...................270
Warning triangle ................................ 310
Washer fluid Display message ............................ 256
Whee lboltt ightening torque ...........340
Whee lchock ...................................... 337
Wheels Changing/replacing .......................336
Changing awheel .......................... 336
Checking ........................................ 329
Cleaning ......................................... 303
Cleaning (warning) .........................337
Emergency spare wheel .................351
Fitting anew wheel ........................ 340
Fitting awheel ............................... 337
Important safety notes ..................328
Removing awheel .......................... 339
Storing ........................................... 337
Tightening torqu e........................... 340
Whee lsize/tyre size ...................... 341
Windowbag
Operation ........................................ .46
Windows
Cleaning ......................................... 304
see Side windows
Windscreen
Demisting ...................................... 130
Windscreen washe rfluid
see Windscreen washer system
Windscreen washer system
Notes ............................................. 366
Topping up ..................................... 299
Windscreen wipers
Problem (malfunction) ...................122
Replacing the wiper blades ............121
Switching on/off ........................... 121
Winte roperation
Important safety notes ..................330
Radiator cover ............................... 297
Slippery road surfaces ...................165
Snow chains .................................. 331
Winte rtyres
Limiting the spee d(on-board com-
puter) ............................................. 224
M+S tyres ...................................... 330Wiper blades
Cleaning ......................................... 304
Important safety notes ..................121
Replacing ....................................... 121
Wooden trim (cleaning instruc-
tions) .................................................. 306
Workshop see Qualified specialist workshop 20
Index
Page 124 of 373
X
Insert bulbh older=into the lamp and turn
it clockwise.
X Reinsert the lamp cluster.
X Tighten four nuts :.
X Push in connector ;until it engages.
X Insert the side panelling. Windscreen wipers
Switching the windscreen wipers on/
off G
WARNING
The windscree nwill not longer be wiped prop-
erly if the wiper blades are worn .This could
prevent you from observing the traffic condi-
tions, thereby causing an accident. Replace
the wiper blades twice ayear, ideally in spring
and autumn.
! Do not operate the windscreen wipers
when the windscreen is dry, as this could
damage the wiper blades. Moreover, dust
that has collected on the windscreen can
scratcht he glass if wiping takes place when
the windscreen is dry.
If it is necessary to switch on the wind-
screen wipers in dry weather conditions,
always operate them using washer fluid.
! If the windscreen wipers leave smears on
the windscreen after the vehicle has been
washed in an automatic car wash, this may
be due to wax or other residue. Cleant he
windscreen with washer fluid after an auto-
matic car wash.
! Intermittent wiping with rain sensor: due
to optical influences and the windscreen
becoming dirty in dry weather conditions,
the windscreen wipers may be activated
inadvertently. This could damage the wind-
screen wiper blades or scratcht he wind-
screen.
For this reason, you should always switch
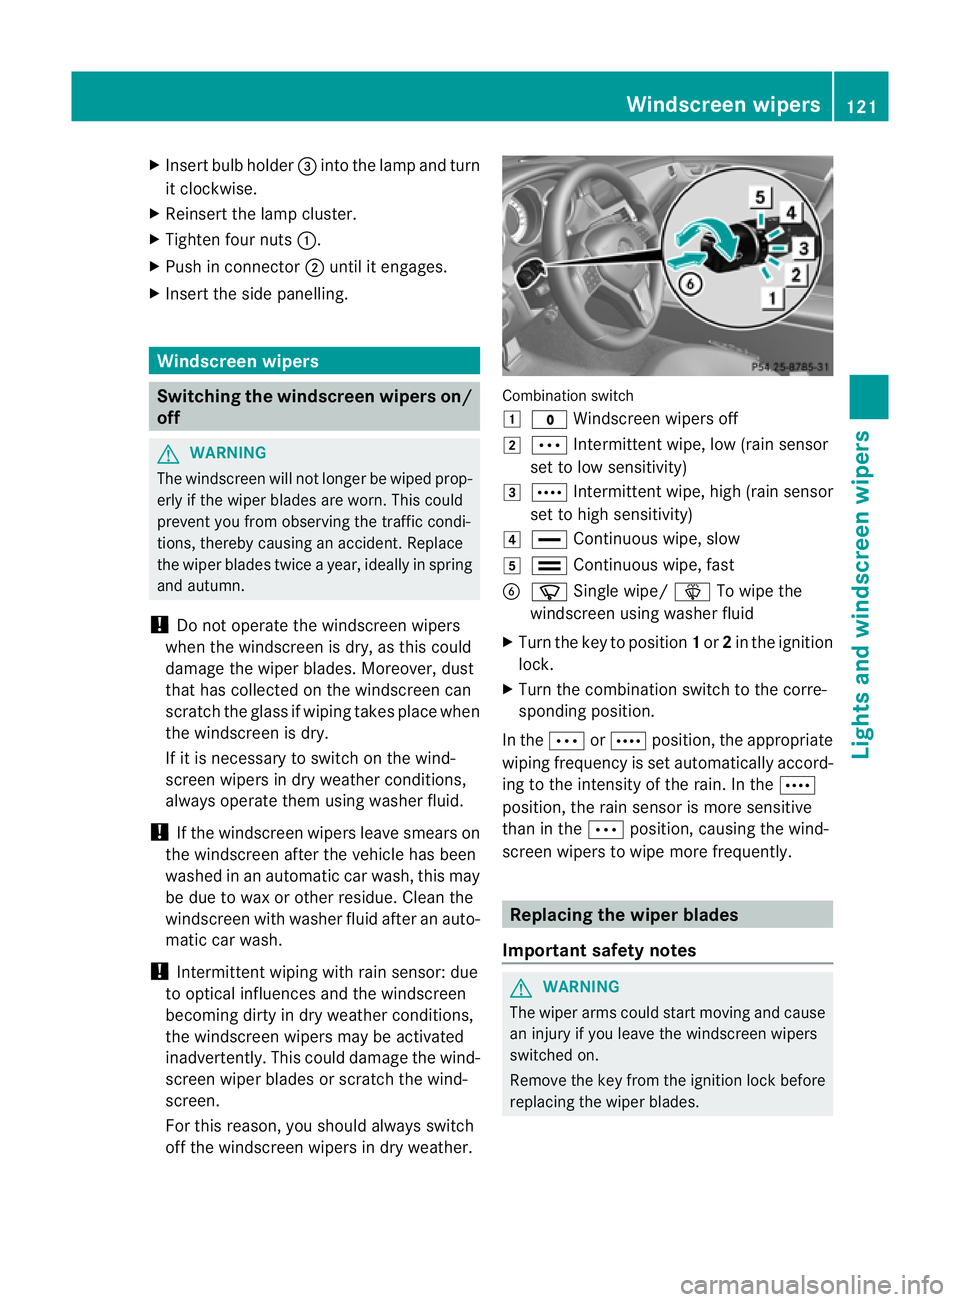
off the windscreen wipers in dry weather. Combination switch
1
$ Windscreen wipers off
2 Ä Intermittent wipe, low (rain sensor
set to low sensitivity)
3 Å Intermittent wipe, high (rain sensor
set to high sensitivity)
4 ° Continuous wipe, slow
5 ¯ Continuous wipe, fast
B í Single wipe/ îTo wipe the
windscreen using washer fluid
X Turn the key to position 1or 2in the ignition
lock.
X Turn the combination switch to the corre-
sponding position.
In the ÄorÅ position, the appropriate
wiping frequency is set automatically accord-
ing to the intensity of the rain. In the Å
position, the rain sensor is more sensitive
than in the Äposition, causing the wind-
screen wipers to wipe more frequently. Replacing the wiper blades
Important safety notes G
WARNING
The wiper arms could start moving and cause
an injury if you leave the windscreen wipers
switched on.
Remove the key from the ignition lock before
replacing the wiper blades. Windscreen wipers
121Lights and windscreen wipers Z
Page 259 of 373
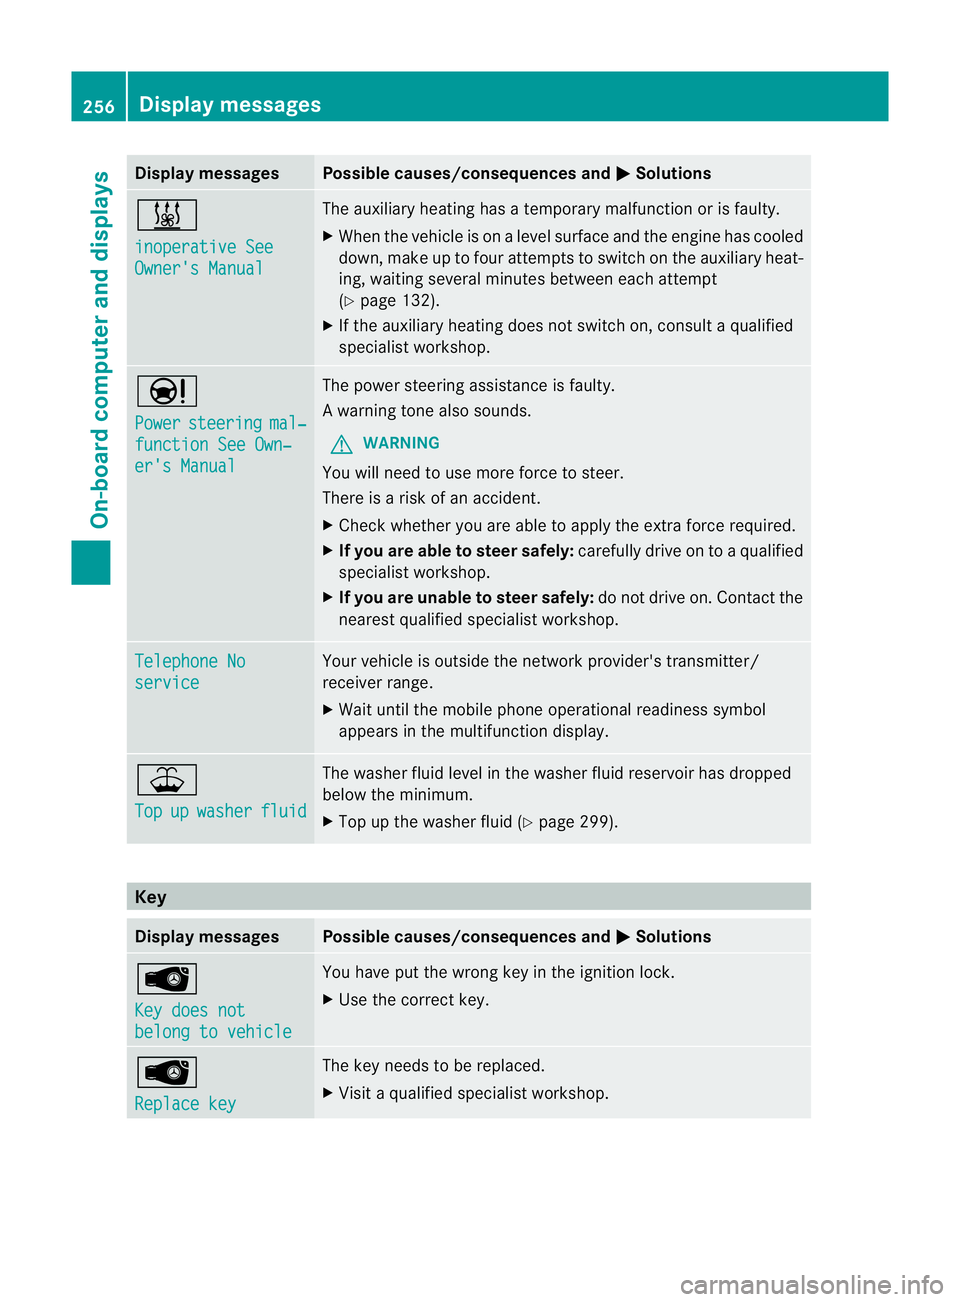
Display messages Possible causes/consequences and
M Solutions
&
inoperative See
Owner'
sManual The auxiliar
yheatin ghasatem porar ymalfunction or is faulty.
X Whe nthe vehicle is on alevel surface and the engin ehas cooled
down, make up to four attempts to switch on the auxiliary heat-
ing, waiting several minutes between each attempt
(Y page 132).
X If the auxiliary heating does not switch on, consult aqualified
specialist workshop. Ð
Power
steering mal‐
functio
nSee Own‐ er's Manual The power steering assistanc
eisfaulty.
Aw arning tone also sounds.
G WARNING
You will need to use mor eforce to steer.
Ther eisar iskofana ccident.
X Check whethe ryou are able to apply the extraf orce required.
X If you are able to steer safely: carefully drive on toaqualified
specialist workshop.
X If you are unable to steer safely: do not drive on. Contact the
nearest qualified specialist workshop. Telephone No
service Your vehicle is outside the network provider's transmitter/
receiver range.
X
Wait until the mobile phone operational readiness symbol
appears in the multifunction display. ¥
Top
up washer fluid The washer fluid level in the washer fluid reservoir has dropped
below the minimum.
X
Top up the washer fluid (Y page 299).Key
Display messages Possible causes/consequences and
M Solutions
Â
Key does not
belong to vehicle You have put the wrong key in the ignition lock.
X
Use the correc tkey. Â
Replace key The key needs to be replaced.
X
Visit aqualified specialist workshop. 256
Display messagesOn-board computer and displays
Page 302 of 373
X
Replac ecap : on th efiller neck and turn
clockwise.
Mak esuret hatthe cap locks securel yinto
place.
X Chec kthe oil level again with the oil dip-
stick (Y page 298).
For further information on engine oil, see
(Y page 363). Other service products
Checking the coolant level G
WARNING
The cooling system is pressurised. Therefore,
only unscrew the cap once the engine has
cooled down. The coolant temperature gauge
must display less than 70 †.Otherwise, you
could be scalded if hot coolant escapes. X
Park the vehicl eonalevel surface.
Onl ycheck the coolant level if the vehicle
is on alevel surface and the engine has
coole ddown.
X Turn the key to position 2in the ignition
lock (Y page 141).
On vehicles with KEYLESS-GO, press the
Start/Stop button twice (Y page 141).
X Check the coolant temperatur edisplay in
the instrument cluster.
Th ec oolant temperatur emustbeb elow
70 †.
X Turn the key to position 0(Y page 141) in
the ignition lock. X
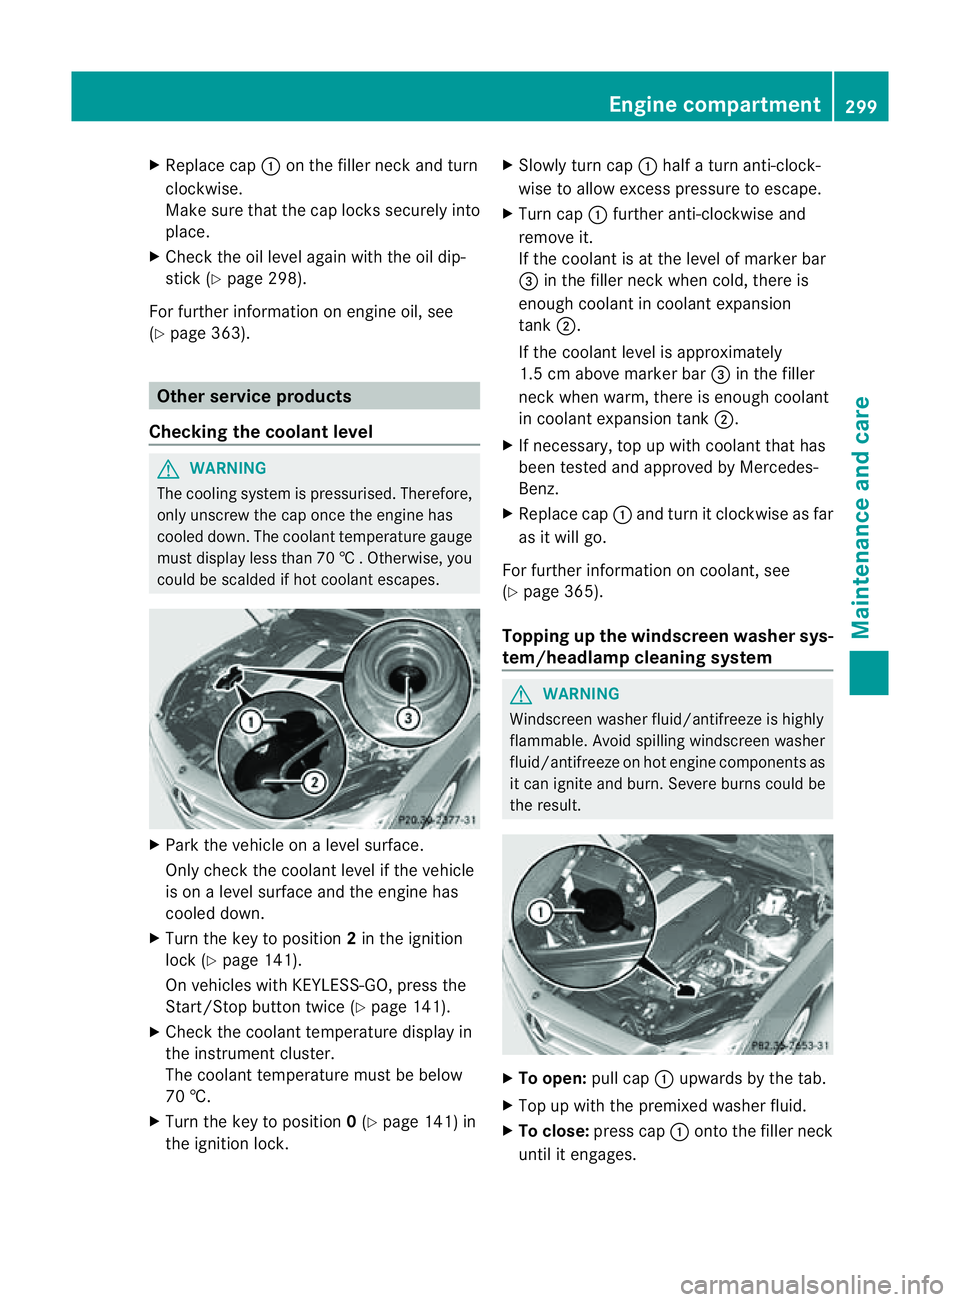
Slowl yturnc ap : half aturna nti-clock-
wise to allow exces spressure to escape.
X Turn cap :further anti-clockwis eand
remove it.
If th ecoolan tisatt heleve lofm arkerbar
= in th efille rneck when cold, ther eis
enough coolant in coolant expansion
tank ;.
If the coolant level is approximately
1.5 cm above marker bar =in the filler
neckw hen warm, there is enough coolant
in coolant expansion tank ;.
X If necessary, top up with coolant that has
been tested and approved by Mercedes-
Benz.
X Replace cap :and turn it clockwise as far
as it will go.
For further information on coolant, see
(Y page 365).
Topping up the windscreen washer sys-
tem/headlam pcleaning system G
WARNING
Windscreen washer fluid/antifreez eishighly
flammable. Avoid spilling windscreen washer
fluid/antifreez eonhot engin ecomponent sas
it can ignit eand burn. Severe burns could be
the result. X
To open: pull cap:upwards by the tab.
X Top up with the premixed washer fluid.
X To close: press cap :ontothe filler neck
until it engages. Engine compartment
299Maintenance and care Z
Page 303 of 373
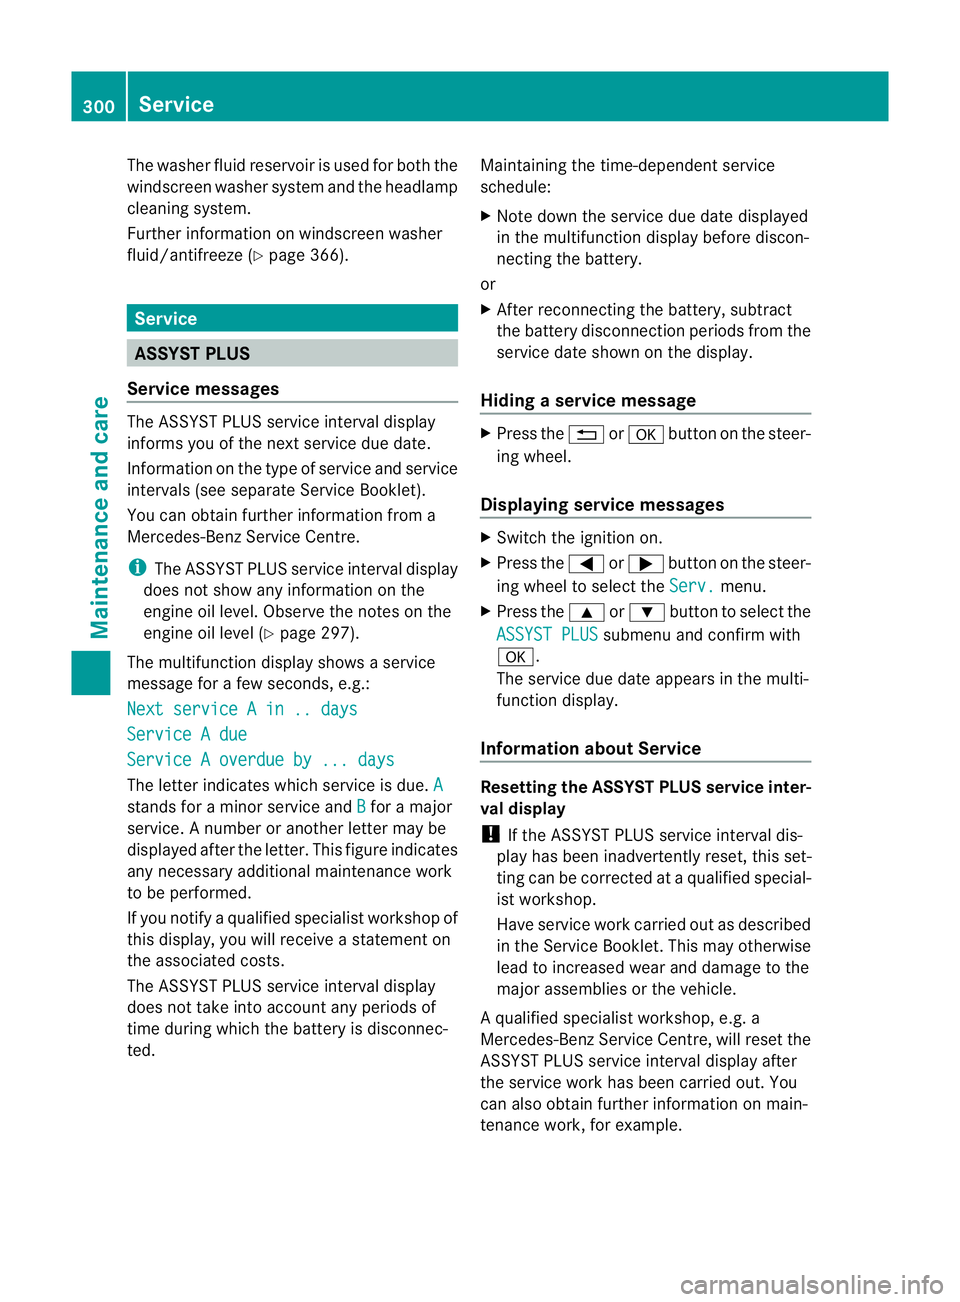
The washer fluid reservoir is used for both the
windscreen washer system and the headlamp
cleaning system.
Further information on windscreen washer
fluid/antifreeze (Y page 366).Service
ASSYST PLUS
Service messages The ASSYST PLUS service interval display
inform syou of the next service due date.
Information on the type of service and service
intervals (see separate Servic eBooklet).
You can obtain further information from a
Mercedes-Benz Servic eCentre.
i The ASSYST PLUS service interval display
does not show any information on the
engine oil level. Observe the notes on the
engine oil level (Y page 297).
The multifunction display shows aservice
message for afew seconds, e.g.:
Next service Ain..days Service
Adue Service
Aoverdue by ... days The letter indicates which service is due.
Astands for
aminor service and B for
am ajor
service. Anumber or another letter may be
displayed after the letter .This figure indicates
any necessary additional maintenancew ork
to be performed.
If you notify aqualified specialist workshop of
this display, you will receive astatementon
the associated costs.
Th eA SSYS TPLUSs ervice interval display
does not take intoa ccountany periods of
time during which the battery is disconnec-
ted. Maintaining the time-dependent service
schedule:
X Note down the servic eduedate displayed
in the multifunctio ndisplay befor ediscon-
nectin gthe battery.
or
X After reconnecting the battery, subtract
the battery disconnection periods fro mthe
service date shown on the display.
Hiding aservice message X
Pres sthe % ora button on th esteer-
ing wheel.
Displaying service messages X
Switch th eignitio non.
X Press the =or; button on the steer-
ing whee ltoselect the Serv. menu.
X Press the 9or: button to select the
ASSYST PLUS submenu and confirm with
a.
The servic eduedate appear sinthe multi-
functio ndisplay.
Information about Service Resetting th
eASSYST PLUS service inter-
val display
! If the ASSYS TPLUS service interval dis-
play has been inadvertently reset ,this set-
tin gc an be corrected at aqualified special-
ist workshop.
Have service work carried out as described
in the Servic eBooklet. This may otherwise
lead to increased wear and damage to the
major assemblies or the vehicle.
Aq ualified specialist workshop, e.g. a
Mercedes-Ben zService Centre, will reset the
ASSYST PLUS servic einterval display after
the servic ework has been carried out. You
can also obtain further information on main-
tenance work, for example. 300
ServiceMaintenance and care
Page 363 of 373
Service products includ
ethe following:
R fuels (e.g. petrol ,diesel)
R lubricants (e.g. engine oil, transmissio noil)
R coolant
R brak efluid
R windscreen washer fluid
R climate control system refrigerant
Component sand service products must be
matched .Mercedes-Ben zrecommends that
you use products tested and approved by
Mercedes-Benz. They are listed in this
Mercedes-Ben zOwner's Manual in th eappro-
priat esection.
You can identif yservice product sapproved
by Mercedes-Ben zbythefollowing inscrip-
tion sont hecontainer:
R MB-Freigabe (e.g. MB-Freigabe 229.51)
R MB Approval (e.g. MB Approval 229.51)
Other designation sorrecommendation sind i-
cat eal evel of qualit yoras pecification in
accordance wit hanMBSheet Number (e.g.
MB 229.5). The yhave no tnecessarily been
approved by Mercedes-Benz.
Further information can be obtained from any
Mercedes-Benz Service Centr eoronthe
Internet at http://bevo.mercedes-benz.com. Fuel
Important safety notes G
WARNING
Fuel is highly flammable. Fire, naked flames
and smokin gare therefor eprohibited when
handlin gfuels.
Switc hoff th eenginea nd th eauxiliary heating
before refuelling. G
WARNING
Avoid contact wit hfuels.
It is hazardous to your healt hifyour skin
comes int odirect contact wit hfuel sory ou
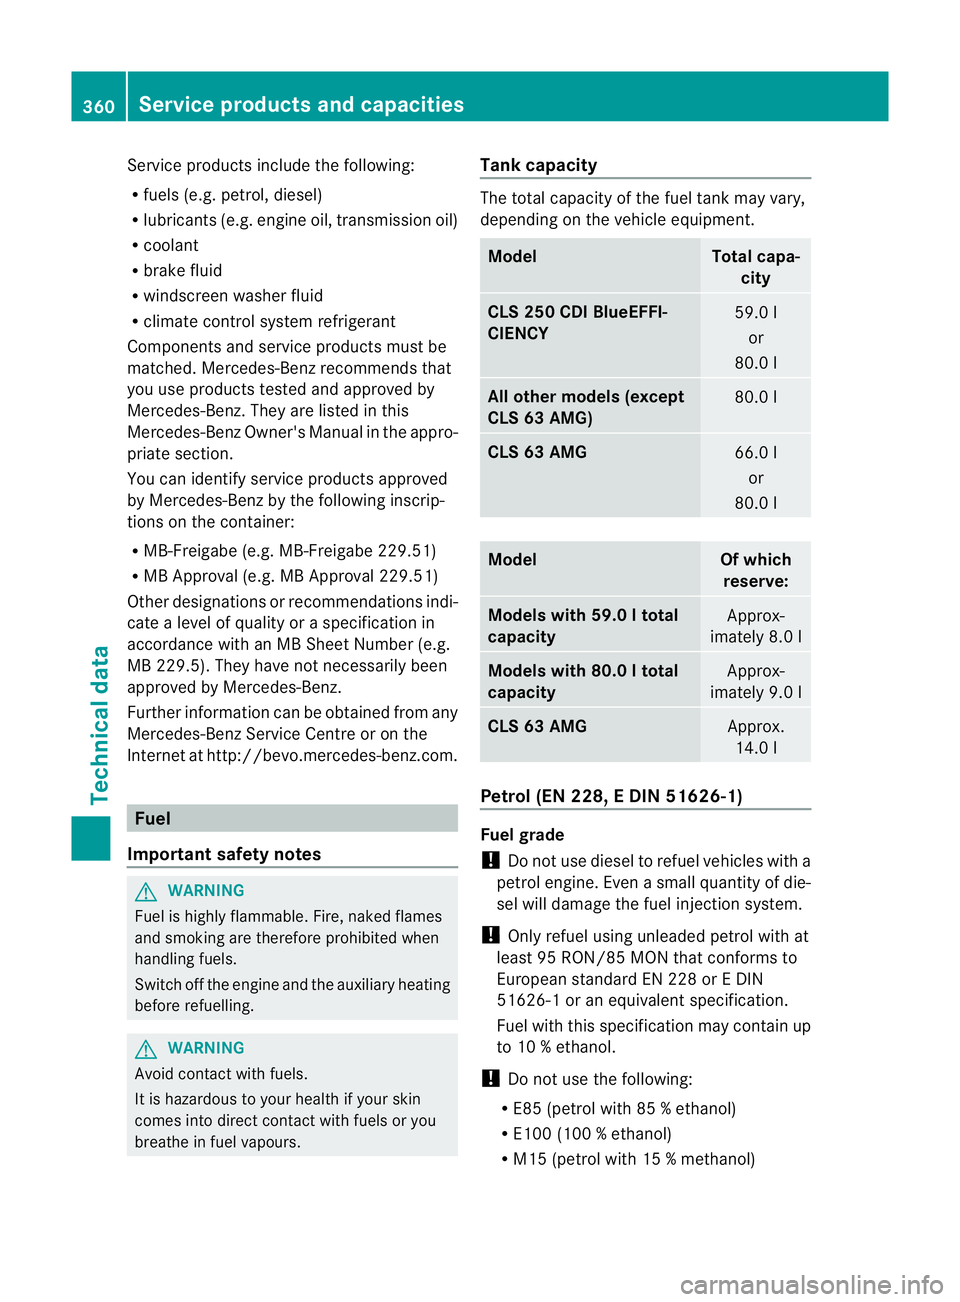
breath einfuel vapours. Tank capacity The total capacit
yofthe fuel tan kmay vary,
dependin gonthevehicle equipment. Model Total capa-
city CLS 250 CDI BlueEFFI-
CIENCY
59.0 l
or
80.0 l All other models (except
CLS 63 AMG)
80.0 l
CLS 63 AMG
66.0 l
or
80.0 l Model Of which
reserve: Models with 59.
0ltotal
capacity Approx-
imately 8. 0l Models with 80.
0ltotal
capacity Approx-
imately 9. 0l CLS 63 AMG
Approx.
14.0 l Petrol (EN 228,
EDIN 51626-1) Fuel grade
!
Do no tuse diesel to refuel vehicles with a
petrol engine. Even asmall quantity of die-
sel willd amage the fuel injection system.
! Only refue lusing unleaded petrol with at
least 95 RON/85 MON that conforms to
European standard EN 228 or EDIN
51626-1 or an equivalent specification.
Fuel with this specification may contain up
to 10 %ethanol.
! Do not use the following:
R E85 (petrol with 85 %ethanol)
R E100 (100 %ethanol)
R M15 (petrol with 15 %methanol) 360
Service products and capacitiesTechnical data
Page 369 of 373
The coolant is checked at every maintenance
interval at aqualified specialist workshop.
i When the vehicle is first delivered, it is fil-
led with acoolant mixture that ensures
adequate antifreeze and corrosion protec-
tion. Windscreen and headlam
pcleaning
system
Important safet ynotes G
WARNING
Windscreen washer fluid/antifreez eishighly
flammable. Avoid spilling windscreen washer
fluid/antifreez eonhot engin ecomponent sas
it can ignit eand burn. Severe burns could be
the result.
! Only use washer fluid that is suitable for
plastic lamp lenses, e.g. MB SummerFit or
MB WinterFit. Unsuitable washer fluid
could damage the plastic lense softhe
headlamps.
! Do not use distilled or de-ionised water in
the washer fluid reservoir. Otherwise, the
level sensor may be damaged.
! Only the washer fluids SummerFit and
WinterFit can be mixed. Otherwise, the
spraying nozzles could become blocked.
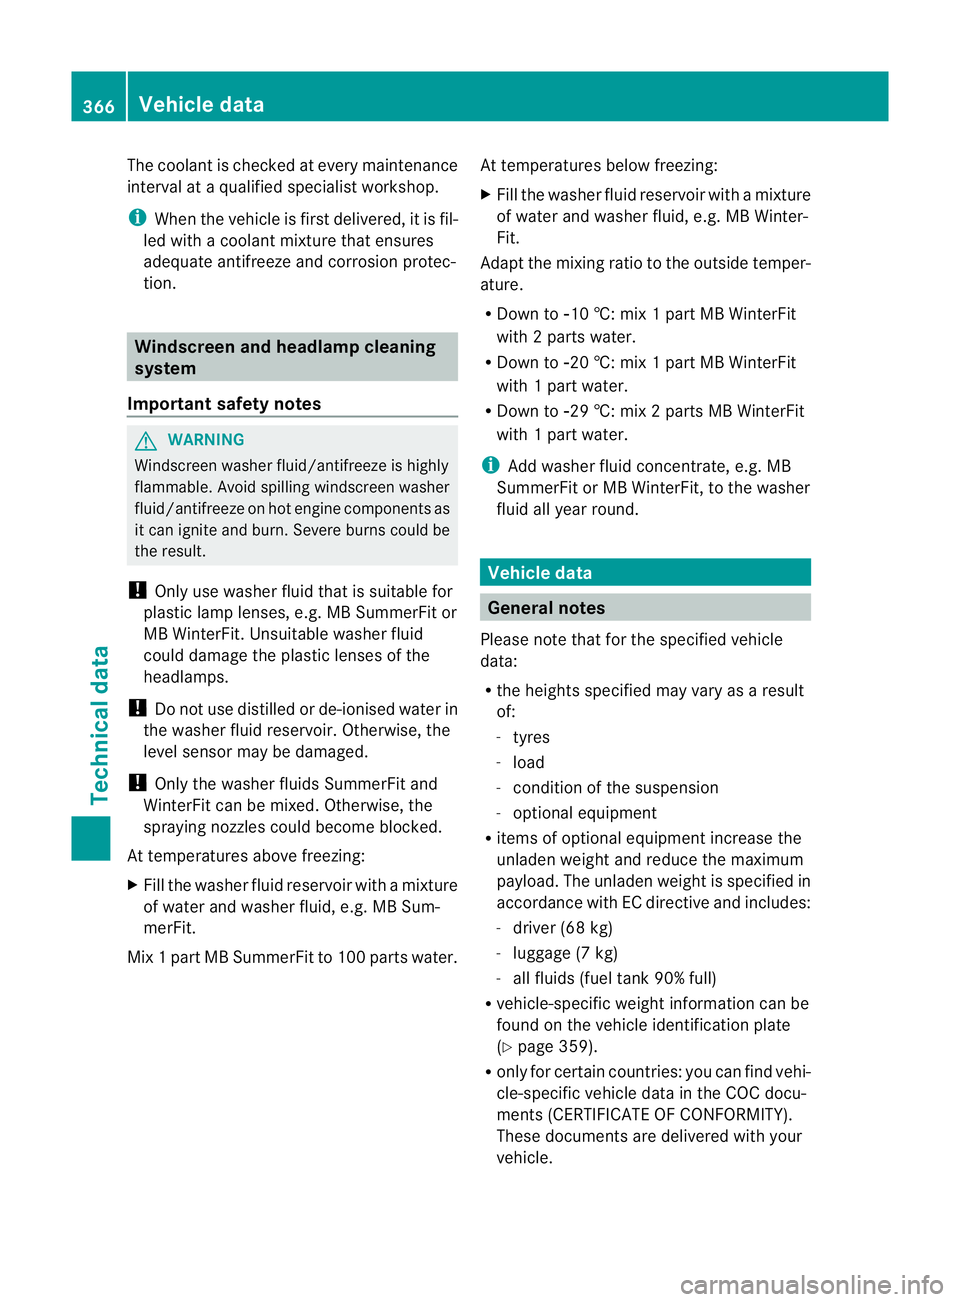
At temperatures above freezing:
X Fill the washer fluid reservoir with amixture
of water and washer fluid, e.g. MB Sum-
merFit.
Mix 1part MB SummerFit to 100 parts water. At temperatures below freezing:
X
Fill the washer fluid reservoir with amixture
of water and washer fluid, e.g. MB Winter-
Fit.
Adapt the mixing ratio to the outside temper-
ature.
R Down to Ò10 †: mix 1part MB WinterFit
with 2partsw ater.
R Down to Ò20 †: mix 1part MB WinterFit
wit h1p art water.
R Down to Ò29 †: mix 2partsMBW interFit
wit h1p art water.
i Addw ashe rfluid concentrate, e.g. MB
SummerFit or MB WinterFit, to the washer
fluid all year round. Vehicle data
General notes
Please not ethat for the specified vehicle
data:
R the height sspecified may vary as aresult
of:
- tyres
- load
- conditio nofthe suspension
- optional equipment
R items of optional equipment increase the
unladen weight and reduce the maximum
payload. The unladen weight is specified in
accordance with EC directive and includes:
- driver (68 kg)
- luggage (7 kg)
- all fluids (fuel tank 90% full)
R vehicle-specific weight information can be
found on the vehicle identification plate
(Y page 359).
R only for certain countries: you can find vehi-
cle-specific vehicle data in the COC docu-
ments( CERTIFICATE OF CONFORMITY).
These documents are delivered with your
vehicle. 366
Vehicle dataTechnical data