2012 MERCEDES-BENZ CLS COUPE torque
[x] Cancel search: torquePage 23 of 373
Reserv
efuel ................................... 267
Seat bel t........................................ 259
SRS ................................................ 266
Tyr ep ressure monitor ...................270
Warning triangle ................................ 310
Washer fluid Display message ............................ 256
Whee lboltt ightening torque ...........340
Whee lchock ...................................... 337
Wheels Changing/replacing .......................336
Changing awheel .......................... 336
Checking ........................................ 329
Cleaning ......................................... 303
Cleaning (warning) .........................337
Emergency spare wheel .................351
Fitting anew wheel ........................ 340
Fitting awheel ............................... 337
Important safety notes ..................328
Removing awheel .......................... 339
Storing ........................................... 337
Tightening torqu e........................... 340
Whee lsize/tyre size ...................... 341
Windowbag
Operation ........................................ .46
Windows
Cleaning ......................................... 304
see Side windows
Windscreen
Demisting ...................................... 130
Windscreen washe rfluid
see Windscreen washer system
Windscreen washer system
Notes ............................................. 366
Topping up ..................................... 299
Windscreen wipers
Problem (malfunction) ...................122
Replacing the wiper blades ............121
Switching on/off ........................... 121
Winte roperation
Important safety notes ..................330
Radiator cover ............................... 297
Slippery road surfaces ...................165
Snow chains .................................. 331
Winte rtyres
Limiting the spee d(on-board com-
puter) ............................................. 224
M+S tyres ...................................... 330Wiper blades
Cleaning ......................................... 304
Important safety notes ..................121
Replacing ....................................... 121
Wooden trim (cleaning instruc-
tions) .................................................. 306
Workshop see Qualified specialist workshop 20
Index
Page 69 of 373
If ESP
®
intervenes:
X Do not deactivate ESP ®
under any circum-
stances.
X When pulling away, only depres sthe accel-
erator pedalasf ar as is necessary.
X Adapt yourd riving style to suitt he prevail-
ing road and weather conditions.
i Only use wheels with the recommended
tyre sizes. Only then will ESP ®
function
properly.
ETS/4ETS (Electronic Traction System) Traction control is part of ESP
®
.
Traction control brakes the drive wheels indi-
vidually if they spin. This enables you to pull
away and accelerate on slippery surfaces, for
example if the road surface is slippery on one
side. On vehicles with 4MATIC, more drive
torque is also transferred to the wheel or
wheels with traction.
Traction control remains active if you deacti-
vate ESP ®
.
Deactivating/activating ESP ®
(except
AMG vehicles) G
WARNING
If you deactivate ESP ®
,E SP ®
no longer sta-
bilises the vehicle. There is an increased risk
of skidding and an accident.
Only deactivate ESP ®
in the situations descri-
bed in the following.
X To deactivate: (Ypage 219).
The å ESP®
OFF warning lamp in the
instrumentc luster lightsup.
X To activate: (Ypage 219).
The å ESP®
OFF warnin glamp in the
instrumen tcluster goes out.
ESP ®
is activated automatically when the
engine is started.
The ECO start/stop function switches the
engine off automatically if the vehicle stops moving. When pulling away again, the engine
start
sautomatically. ESP ®
remain sinits pre-
viously selected status. Example: if ESP ®
was
deactivated befor ethe engine was switched
off ,ESP ®
remain sdeactivated when the
engine is switched on again.
If ESP ®
is deactivated and one or mor ewheels
start to spin ,the ÷ ESP®
warnin glamp in
the instrumen tcluster flashes .Insuch situa-
tions, ESP ®
will no tstabilis ethe vehicle.
It ma ybeb esttod eactivate ESP ®
in the fol-
lowing situations:
R when using sno wchains
R in deep snow
R on sand or gravel
If yo udeactivate ESP ®
:
R ESP ®
no longe rimproves driving stability.
R traction control is still activated.
R ESP ®
still provides support when you
brake.
R engine torque is not limited and the drive
wheels are abletos pin. The spinning of the
wheels results in acutting action for better
traction.
Deactivating/activating ESP ®
(AMG
vehicles) Activating/deactivating SPORT handling
mode
G
WARNING
When SPORT handling mode is activated,
there is agreater risk of skidding and acci-
dents.
Only activate SPORT handling mode in the sit-
uations described in the following. 66
Driving safety systemsSafety
Page 70 of 373
X
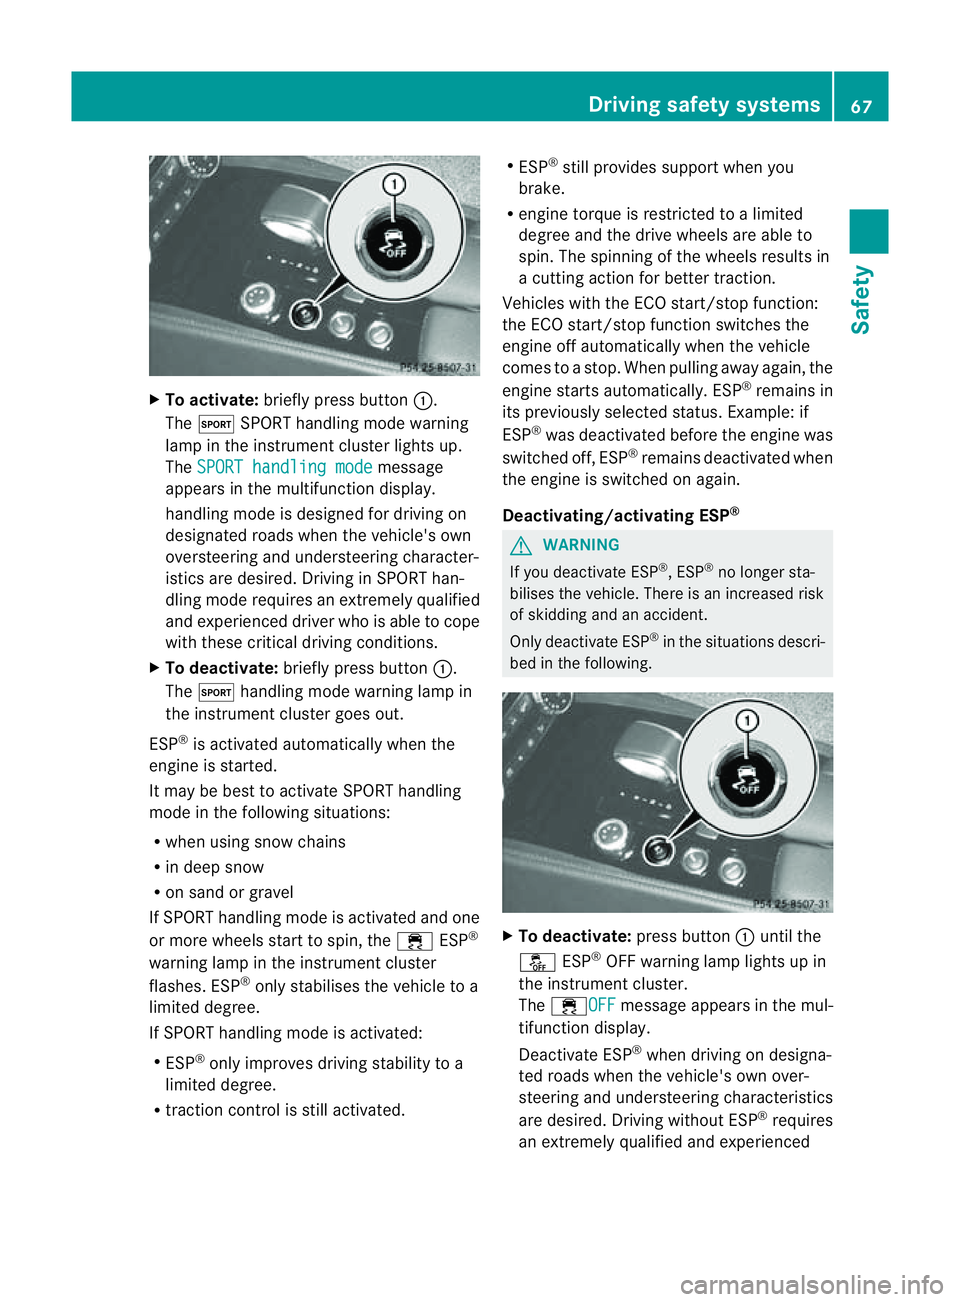
To activate: brieflypress button :.
The M SPORThandling mod ewarning
lamp in the instrument cluster lights up.
The SPORT handling mode message
appear sinthe multifunctio ndisplay.
handlin gmode is designed for drivin gon
designated roads when the vehicle's own
oversteerin gand understeerin gcharacter-
istics are desired. Driving in SPORT han-
dling mode requires an extremely qualified
and experienced driver who is able to cope
with these critical driving conditions.
X To deactivate: briefly press button :.
The M handling mode warning lamp in
the instrumentc luster goes out.
ESP ®
is activated automatically when the
engine is started.
It may be best to activat eSPORT handling
mode in the followin gsituations:
R when using sno wchains
R in deep snow
R on sand or gravel
If SPORT handlin gmode is activated and one
or mor ewheels start to spin ,the ÷ ESP®
warnin glamp in the instrumen tcluster
flashes .ESP ®
onl ystabilise sthe vehicl etoa
limite ddegree.
If SPOR Thandling mod eisactivated:
R ESP ®
onl yimprove sdriving stability to a
limite ddegree.
R traction control is stil lactivated. R
ESP ®
stil lprovides support when you
brake.
R engine torque is restricte dtoalimited
degree and the drive wheels are able to
spin. The spinnin gofthe wheels results in
ac utting action for better traction.
Vehicles with the ECO start/stop function:
the ECO start/stop function switches the
engine off automatically when the vehicle
comes to astop. When pulling away again, the
engine startsa utomatically. ESP ®
remains in
its previously selected status. Example: if
ESP ®
was deactivated before the engine was
switched off, ESP ®
remains deactivated when
the engine is switched on again.
Deactivating/activating ESP ® G
WARNING
If you deactivate ESP ®
,E SP ®
no longer sta-
bilises the vehicle. There is an increased risk
of skidding and an accident.
Only deactivate ESP ®
in the situations descri-
bed in the following. X
To deactivate: press button:until the
å ESP®
OFF warning lamp lights up in
the instrument cluster.
The ÷OFF message appears in the mul-
tifunction display.
Deactivate ESP ®
when driving on designa-
ted roads when the vehicle's own over-
steerin gand understeerin gcharacteristics
are desired. Drivin gwithout ESP ®
requires
an extremely qualified and experienced Driving safety systems
67Safety Z
Page 71 of 373
driver who is able to cope with these critical
drivin
gconditions.
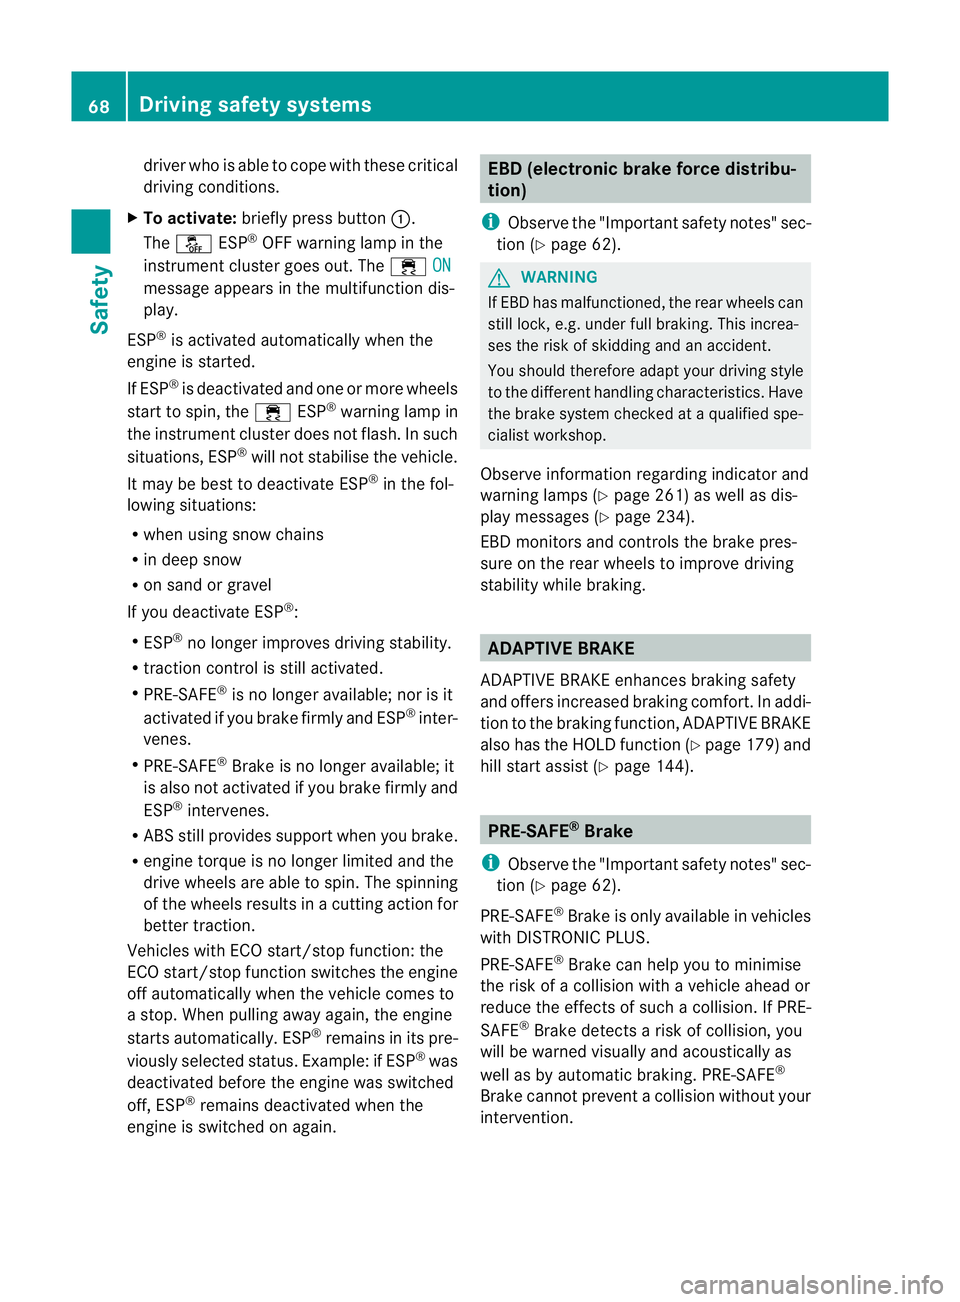
X To activate: briefly press button :.
The å ESP®
OFF warning lamp in the
instrument cluster goes out. The ÷ON message appears in the multifunction dis-
play.
ESP ®
is activated automatically when the
engin eisstarted.
If ESP ®
is deactivated and one or more wheels
start to spin, the ÷ESP®
warning lamp in
the instrument cluster does not flash. In such
situations, ESP ®
will not stabilise the vehicle.
It may be best to deactivate ESP ®
in the fol-
lowing situations:
R when using snow chains
R in deep snow
R on sand or gravel
If you deactivate ESP ®
:
R ESP ®
no longer improves drivin gstability.
R traction contro lisstill activated.
R PRE-SAFE ®
is no longer available; nor is it
activated if you brake firmly and ESP ®
inter-
venes.
R PRE-SAFE ®
Brak eisnol onger available; it
is also not activated if you brake firmly and
ESP ®
intervenes.
R ABSs tillp rovide ssuppo rt when yo ubrake.
R engine torque is no longe rlimited and the
drive wheels are able to spin .The spinning
of the wheels results in acuttin gaction for
better traction.
Vehicles with ECO start/stop function: the
ECO start/stop function switches the engine
off automatically when the vehicle comes to
as top. When pulling away again, the engine
starts automatically .ESP ®
remains in its pre-
viously selected status. Example :ifESP®
was
deactivate dbefore the engine wa sswitched
off, ESP ®
remains deactivate dwhent he
engine is switche donagain. EBD (electroni
cbrake forc edistribu-
tion)
i Observe the "Importan tsafet ynotes "sec-
tio n(Ypage 62). G
WARNING
If EB Dhas malfunctioned ,the rear wheels can
still lock, e.g .unde rfull braking .This increa-
ses the risk of skidding and an accident.
You should therefore adapt your driving style
to the different handling characteristics. Have
the brake system checked at aqualified spe-
cialist workshop.
Observe information regarding indicator and
warning lamps (Y page 261) as well as dis-
play messages (Y page 234).
EBD monitors and controls the brake pres-
sure on the rear wheels to improve driving
stability while braking. ADAPTIVE BRAKE
ADAPTIVE BRAKE enhances braking safety
and offers increased braking comfort.Ina ddi-
tion to the brakin gfunction ,ADAPTIVE BRAKE
also ha sthe HOLD functio n(Ypage 179 )and
hill start assist (Y page 144). PRE-SAFE
®
Brake
i Observ ethe "Important safety notes "sec-
tio n(Ypage 62).
PRE-SAFE ®
Brake is onl yavailable in vehicles
with DISTRONI CPLUS.
PRE-SAFE ®
Brake can hel pyou to minimise
the ris kofacollision with avehicle ahea dor
reduce the effects of such acollision. If PRE-
SAFE ®
Brake detects ariskofc ollision, you
will be warned visually and acoustically as
well as by automatic braking. PRE-SAFE ®
Brake cannot prevent acollision without your
intervention. 68
Driving safety systemsSafety
Page 343 of 373
X
Unscrew the uppermost wheel bolt com-
pletely.
X Screw centring pin :into the thread
instead of the wheel bolt.
X Unscrew the remaining wheel bolts fully.
X Remove the wheel.
Fitting anew wheel G
WARNING
Oiled or greased wheel bolt sordamaged
wheel bolts/hub threads can cause th ewheel
bolt stoc omeloose .Asa result, you could
lose awheel while driving. There is arisk of
accident.
Never oil or grease wheel bolts. In the event
of damage to the threads, contact aqualified
specialist workshop immediately.H ave the
damage dwheel bolt sorhub threads
replaced/renewed. Do no tcontinue driving. G
WARNING
If you tighten the wheel bolts or wheel nuts
when the vehicle is raised, the jack could tip
over. There is arisk of injury.
Only tighten the wheel bolts or wheel nuts
when the vehicle is on the ground.
Always pay attention to the instructions and
safety notices in "Changing awheel"
(Y page 336).
Only use wheel bolts that have been designed
for the wheel and the vehicle. For safety rea-
sons, Mercedes-Benz recommends that you
only use wheel bolts which have been
approved for Mercedes-Benz vehicles and the
respective wheel.
! AMG vehicle with ceramic brake
discs: during removal and repositionin gof
the wheel, the wheel rim can striket he
ceramic-brake disc and damage it. There-
fore, take precautions and have asecond
person assist you. Alternatively, you can
use asecond centring pin. Positioning
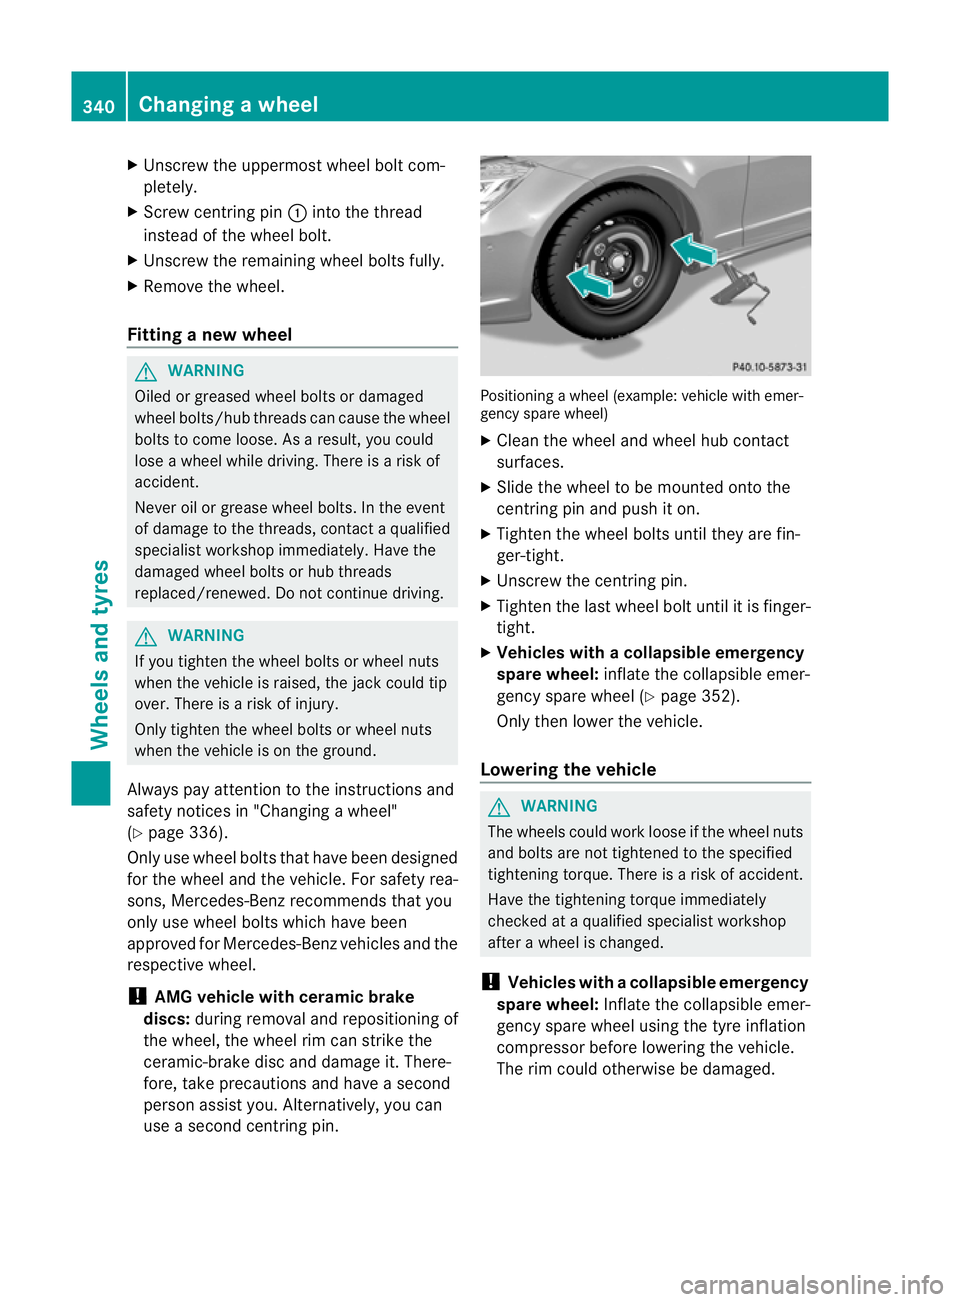
awheel (example: vehicle with emer-
gency spare wheel)
X Clean the wheel and wheel hub contact
surfaces.
X Slide the wheel to be mounted ontot he
centring pin and push it on.
X Tighten the wheel bolts until they are fin-
ger-tight.
X Unscrew the centring pin.
X Tighten the last wheel bolt until it is finger-
tight.
X Vehicles with acollapsible emergency
spare wheel: inflate thecollapsible emer-
gency spare wheel (Y page 352).
Only then lower th evehicle.
Lowering th evehicle G
WARNING
The wheels could work loose if th ewheel nuts
and bolt sare not tightene dtothe specified
tightening torque. There is arisk of accident.
Have the tightening torque immediately
checked at aqualified specialist workshop
after awheel is changed.
! Vehicles with acollapsible emergency
spare wheel: Inflatethe collapsible emer-
gency spare wheel usin gthe tyreinflation
compressor before lowering th evehicle.
The rim could otherwise be damaged. 340
Changing
awheelWheels and tyres
Page 344 of 373
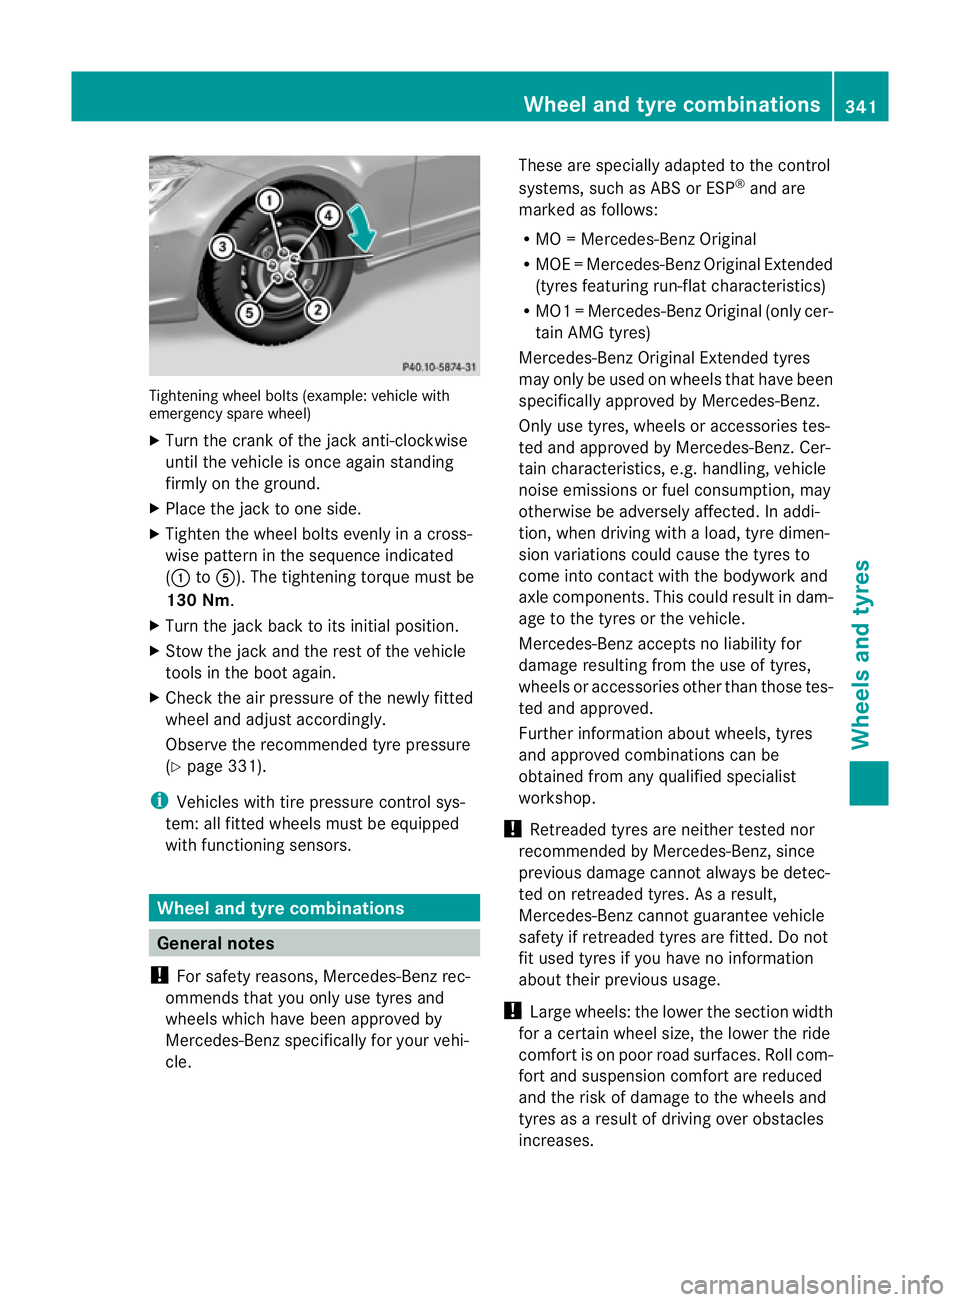
Tightenin
gwheel bolts (example: vehicle with
emergenc yspare wheel)
X Turn the crank of the jack anti-clockwise
until the vehicle is once again standing
firmly on the ground.
X Place the jack to one side.
X Tighten the wheel bolts evenly in across-
wise pattern in the sequence indicated
(: toA). The tightening torque must be
130 Nm.
X Turn the jack back to its initial position.
X Stow the jack and the rest of the vehicle
tools in the boot again.
X Check the air pressure of the newly fitted
wheel and adjust accordingly.
Observe the recommended tyre pressure
(Y page 331).
i Vehicles with tire pressure control sys-
tem: all fitted wheels must be equipped
with functioning sensors. Wheel and tyrec
ombinations General notes
! For safety reasons, Mercedes-Benz rec-
ommends that you only use tyres and
wheels which have been approved by
Mercedes-Benz specifically for your vehi-
cle. These are specially adapted to the control
systems, such as ABS or ESP
®
and are
marked as follows:
R MO =Mercedes-BenzO riginal
R MOE =Mercedes-Benz Original Extended
(tyres featuring run-flat characteristics)
R MO1 =Mercedes-BenzO riginal (only cer-
tain AMG tyres)
Mercedes-Benz Original Extended tyres
may only be usedonw heels that have been
specifically approved by Mercedes-Benz.
Only use tyres, wheels or accessories tes-
ted and approved by Mercedes-Benz. Cer-
tain characteristics, e.g. handling, vehicle
noise emissions or fuel consumption, may
otherwise be adversely affected. In addi-
tion, when driving with aload, tyre dimen-
sion variations could cause the tyres to
come into contact with the bodywork and
axle components.T his could result in dam-
age to the tyres or the vehicle.
Mercedes-Ben zaccepts no liability for
damag eresulting from the us eoftyres,
wheel soraccessorie sothe rthan those tes-
ted and approved.
Further information about wheels, tyres
and approved combinations can be
obtained from any qualified specialist
workshop.
! Retreaded tyres are neither tested nor
recommended by Mercedes-Benz, since
previous damage cannot always be detec-
ted on retreaded tyres. As aresult,
Mercedes-Ben zcannot guarante evehicle
safety if retreade dtyres are fitted. Do not
fit used tyres if you have no information
about their previous usage.
! Large wheels :the lower the section width
for acertain wheel size, the lower the ride
comfort is on poor road surfaces. Roll com-
fort and suspension comfort are reduced
and the risk of damage to the wheels and
tyres as aresult of driving over obstacles
increases. Wheel and tyrec
ombinations
341Wheels and tyres Z