2012 Lancia Voyager lights
[x] Cancel search: lightsPage 76 of 344

PARKING LIGHTS . . . . . . . . . . . . . . . . . . . . . 120
HEADLIGHTS . . . . . . . . . . . . . . . . . . . . . . . . 120
AUTOMATIC HEADLIGHTS (forversions/markets, where provided) . . . . . . . . 121
HEADLIGHTS ON WITH WIPERS (for versions/markets, where provided) . . . . . . . . 121
HEADLIGHT DELAY (for versions/markets, where provided) . . . . . . . . . . . . . . . . . . . . . . . 121
FRONT AND REAR FOG LIGHTS (for versions/markets, where provided) . . . . . . . . 122
BATTERY PROTECTION . . . . . . . . . . . . . . . . 122
MULTIFUNCTION LEVER . . . . . . . . . . . . . . . 122
TURN SIGNALS . . . . . . . . . . . . . . . . . . . . . . . 123
HIGH/LOW BEAM SWITCH . . . . . . . . . . . . . . 123
FLASH-TO-PASS . . . . . . . . . . . . . . . . . . . . . . 123
SMARTBEAM™ (for versions/markets, where provided) . . . . . . . . . . . . . . . . . . . . . . . 123
HEADLIGHT LEVELING SYSTEM (for versions/markets, where provided) . . . . . . . . 124
WINDSHIELD WIPERS AND WASHERS . . . . . . 124 MIST, FRONT WIPER AND WASHER . . . . . . 125
INTERMITTENT, LOW AND HIGH SPEEDWIPERS . . . . . . . . . . . . . . . . . . . . . . . . . . . . . 125
REAR WIPER AND WASHER . . . . . . . . . . . . . 125
RAIN SENSING WIPERS (for versions/ markets, where provided) . . . . . . . . . . . . . . . 125
70
Page 78 of 344

TURNING PARKVIEW® ON OR OFF —WITH NAVIGATION/MULTIMEDIA
RADIO . . . . . . . . . . . . . . . . . . . . . . . . . . . . . . 136
TURNING PARKVIEW® ON OR OFF — WITHOUT NAVIGATION/MULTIMEDIA
RADIO . . . . . . . . . . . . . . . . . . . . . . . . . . . . . . 136
OVERHEAD CONSOLES . . . . . . . . . . . . . . . . . . 136 FRONT OVERHEAD CONSOLE . . . . . . . . . . . 136
COURTESY/INTERIOR LIGHTING . . . . . . . . 137
SUNGLASS STORAGE (NON-SUNROOFONLY) . . . . . . . . . . . . . . . . . . . . . . . . . . . . . . 137
REAR COURTESY/READING LIGHTS (for versions/markets, where provided) . . . . . . . . 138
REAR OVERHEAD CONSOLES (for versions/markets, where provided) . . . . . . . . 138
POWER SUNROOF (for versions/markets, where provided) . . . . . . . . . . . . . . . . . . . . . . . . . 139
OPENING SUNROOF — EXPRESS . . . . . . . . . 139
OPENING THE SUNROOF — MANUAL MODE . . . . . . . . . . . . . . . . . . . . . . . . . . . . . . 139
CLOSING SUNROOF — EXPRESS . . . . . . . . . 139
CLOSING SUNROOF — MANUAL MODE . . . . 139
PINCH PROTECT FEATURE . . . . . . . . . . . . . 140
PINCH PROTECT OVERRIDE . . . . . . . . . . . . 140
VENTING SUNROOF — EXPRESS . . . . . . . . . 140
SUNSHADE OPERATION . . . . . . . . . . . . . . . . 140
WIND BUFFETING . . . . . . . . . . . . . . . . . . . . 140
72
Page 83 of 344

TILT MIRRORS IN
REVERSE (available with
memory seat only), (for
versions/markets, where
provided)
Tilt Mirrors in Reverse provides auto-
matic outside mirror positioning
which will aid the drivers view of the
ground rearward of the front doors.
The driver's outside mirror will move
slightly downward from the present
position when the vehicle is shifted
into REVERSE. The driver's outside
mirror will then return to the original
position when the vehicle is shifted
out of REVERSE position. Each
stored memory setting will have an
associated Tilt Mirrors in Reverse po-
sition.
NOTE:
The Tilt Mirrors in Reverse feature
is not enabled when delivered
from the factory. The Tilt Mirrors
in Reverse feature can be enabled
or disabled in the Electronic Ve-
hicle Information Center (EVIC).Refer to “Electronic Vehicle Infor-
mation Center (EVIC)/Customer-
Programmable Features” in “Un-
derstanding Your Instrument
Panel” for further information.
POWER FOLDING
MIRRORS (for
versions/markets, where
provided)
The switch for the power folding mir-
rors is located between the power mir-
ror switches L (left) and R (right).
Press the switch once and the mirrors
will fold in, pressing the switch a sec-
ond time will return the mirrors to the
normal driving position.
If the mirrors are in the folded posi-
tion, and vehicle speed is equal or
greater than 8 km/h, they will auto-
matically unfold.
ILLUMINATED VANITY
MIRRORS (for
versions/markets, where
provided)
An illuminated vanity mirror is lo-
cated on the sun visor. To use the
mirror, rotate the sun visor down and
swing the mirror cover upward. The
lights turn on automatically. Closing
the mirror cover turns off the lights.
Power Folding Mirror Switch
Illuminated Mirror
77
Page 85 of 344

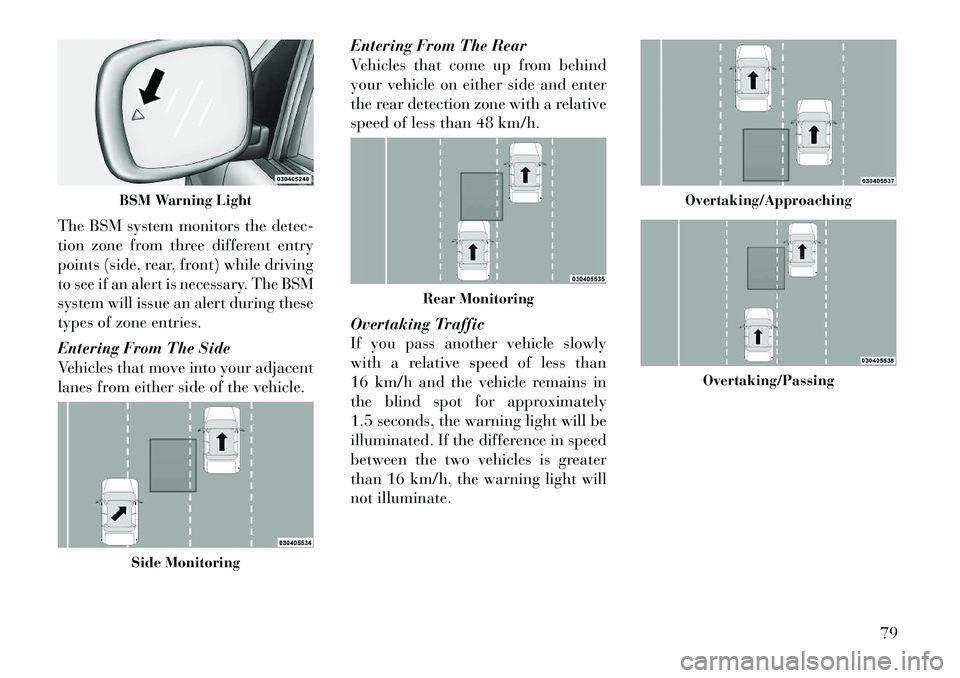
The BSM system monitors the detec-
tion zone from three different entry
points (side, rear, front) while driving
to see if an alert is necessary. The BSM
system will issue an alert during these
types of zone entries.
Entering From The Side
Vehicles that move into your adjacent
lanes from either side of the vehicle.Entering From The Rear
Vehicles that come up from behind
your vehicle on either side and enter
the rear detection zone with a relative
speed of less than 48 km/h.
Overtaking Traffic
If you pass another vehicle slowly
with a relative speed of less than
16 km/h and the vehicle remains in
the blind spot for approximately
1.5 seconds, the warning light will be
illuminated. If the difference in speed
between the two vehicles is greater
than 16 km/h, the warning light will
not illuminate.
BSM Warning LightSide Monitoring
Rear Monitoring
Overtaking/Approaching
Overtaking/Passing
79
Page 87 of 344

WARNING!
RCP is not a Back Up Aid system. It
is intended to be used to help a
driver detect an oncoming vehicle in
a parking lot situation. Drivers must
be careful when backing up, even
when using RCP. Always check care-
fully behind your vehicle, look be-
hind you, and be sure to check for
pedestrians, animals, other vehicles,
obstructions, and blind spots before
backing up. Failure to do so can
result in serious injury or death.
MODES OF OPERATION
Three selectable modes of operation
are available in the Electronic Vehicle
Information Center (EVIC). Refer to
"Electronic Vehicle Information Cen-
ter (EVIC)/Personal Settings
(Customer-Programmable Fea-
tures)” in “Understanding Your In-
strument Panel” for further informa-
tion. Blind Spot Alert
When operating in Blind Spot Alert
mode, the BSM system will provide a
visual alert in the appropriate side
view mirror based on a detected ob-
ject. However, when the system is op-
erating in RCP, the system will re-
spond with both visual and audible
alerts when a detected object is pres-
ent. Whenever an audible alert is re-
quested, the radio is muted.
Blind Spot Alert Lights/Chime
When operating in Blind Spot Alert
Lights/Chime mode, the BSM system
will provide a visual alert in the ap-
propriate side view mirror based on a
detected object. If the turn signal is
then activated, and it corresponds to
an alert present on that side of the
vehicle, an audible chime will also be
sounded. Whenever a turn signal and
detected object are present on the
same side at the same time, both the
visual and audio alerts will be issued.
In addition to the audible alert the
radio (if on) will also be muted.NOTE:
Whenever an audible alert is re-
quested by the BSM system, the
radio is also muted.
If the hazard flashers are on, the system will request the appro-
priate visual alert only.
When the system is in RCP, the
system shall respond with both vi-
sual and audible alerts when a de-
tected object is present. Whenever
an audible alert is requested, the
radio is also muted. Turn/hazard
signal status is ignored; the RCP
state always requests the chime.
Blind Spot Alert Off
When the BSM system is turned off
there will be no visual or audible
alerts from either the BSM or RCP
systems.
NOTE:
The BSM system will store the cur-
rent operating mode when the ve-
hicle is shut off. Each time the ve-
hicle is started the previously
stored mode will be recalled and
used.
81
Page 110 of 344

POWER LUMBAR (for
versions/markets, where
provided)
Vehicles equipped with power driver
or passenger seats may be also be
equipped with power lumbar. The
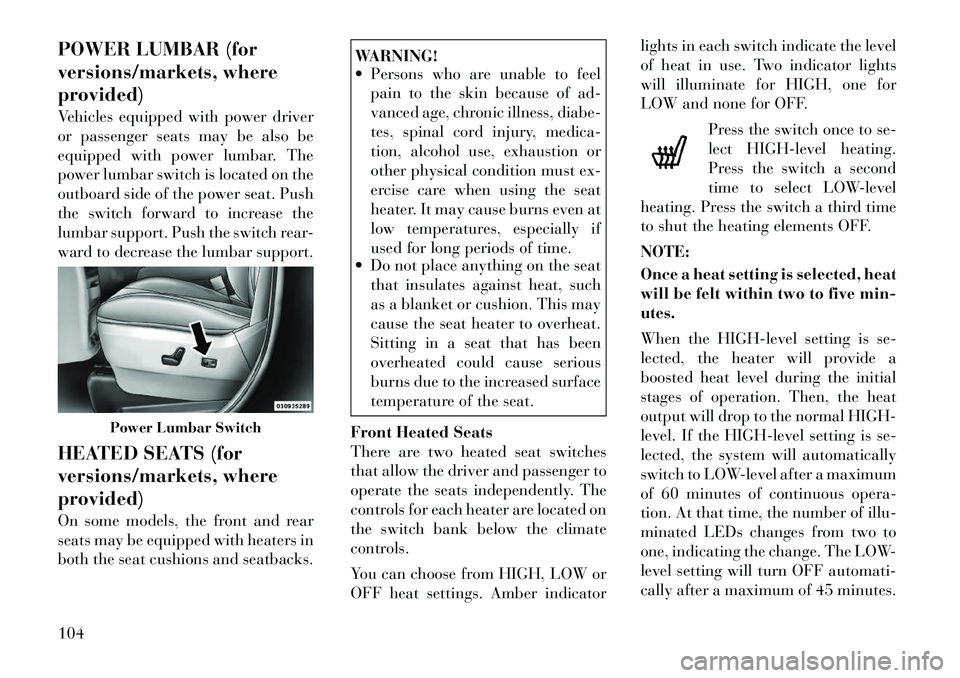
power lumbar switch is located on the
outboard side of the power seat. Push
the switch forward to increase the
lumbar support. Push the switch rear-
ward to decrease the lumbar support.
HEATED SEATS (for
versions/markets, where
provided)
On some models, the front and rear
seats may be equipped with heaters in
both the seat cushions and seatbacks.
WARNING!
Persons who are unable to feel pain to the skin because of ad-
vanced age, chronic illness, diabe-
tes, spinal cord injury, medica-
tion, alcohol use, exhaustion or
other physical condition must ex-
ercise care when using the seat
heater. It may cause burns even at
low temperatures, especially if
used for long periods of time.
Do not place anything on the seat
that insulates against heat, such
as a blanket or cushion. This may
cause the seat heater to overheat.
Sitting in a seat that has been
overheated could cause serious
burns due to the increased surface
temperature of the seat.
Front Heated Seats
There are two heated seat switches
that allow the driver and passenger to
operate the seats independently. The
controls for each heater are located on
the switch bank below the climate
controls.
You can choose from HIGH, LOW or
OFF heat settings. Amber indicator lights in each switch indicate the level
of heat in use. Two indicator lights
will illuminate for HIGH, one for
LOW and none for OFF.
Press the switch once to se-
lect HIGH-level heating.
Press the switch a second
time to select LOW-level
heating. Press the switch a third time
to shut the heating elements OFF.
NOTE:
Once a heat setting is selected, heat
will be felt within two to five min-
utes.
When the HIGH-level setting is se-
lected, the heater will provide a
boosted heat level during the initial
stages of operation. Then, the heat
output will drop to the normal HIGH-
level. If the HIGH-level setting is se-
lected, the system will automatically
switch to LOW-level after a maximum
of 60 minutes of continuous opera-
tion. At that time, the number of illu-
minated LEDs changes from two to
one, indicating the change. The LOW-
level setting will turn OFF automati-
cally after a maximum of 45 minutes.
Power Lumbar Switch
104
Page 111 of 344

Rear Heated Seats
On some models, the second row seats
are equipped with heaters. There are
two heated seat switches that allow
the second row passengers to operate
the seats independently. The heated
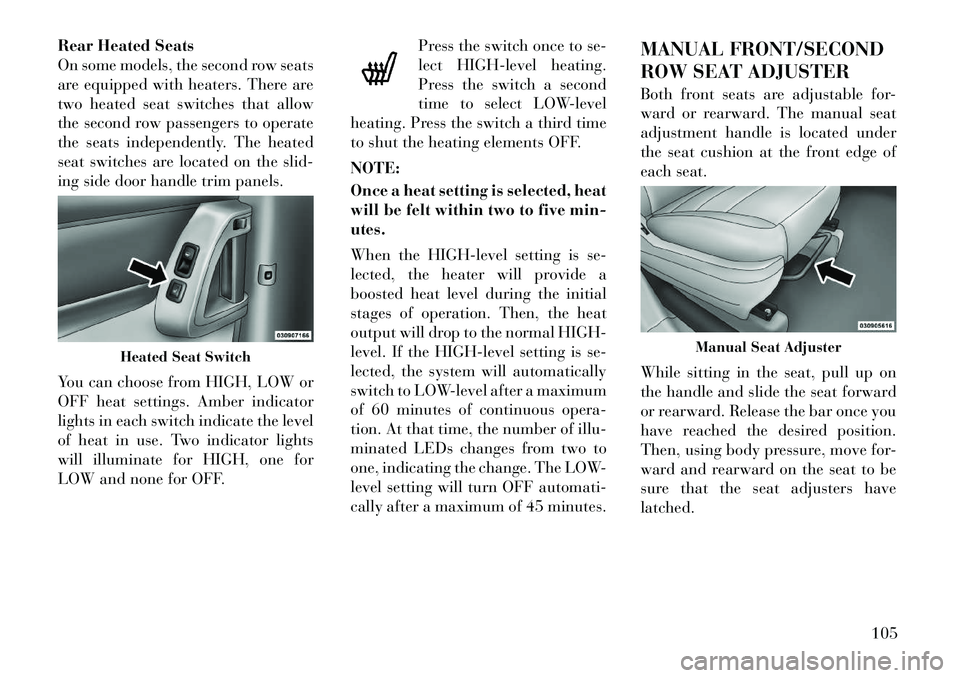
seat switches are located on the slid-
ing side door handle trim panels.
You can choose from HIGH, LOW or
OFF heat settings. Amber indicator
lights in each switch indicate the level
of heat in use. Two indicator lights
will illuminate for HIGH, one for
LOW and none for OFF.Press the switch once to se-
lect HIGH-level heating.
Press the switch a second
time to select LOW-level
heating. Press the switch a third time
to shut the heating elements OFF.
NOTE:
Once a heat setting is selected, heat
will be felt within two to five min-
utes.
When the HIGH-level setting is se-
lected, the heater will provide a
boosted heat level during the initial
stages of operation. Then, the heat
output will drop to the normal HIGH-
level. If the HIGH-level setting is se-
lected, the system will automatically
switch to LOW-level after a maximum
of 60 minutes of continuous opera-
tion. At that time, the number of illu-
minated LEDs changes from two to
one, indicating the change. The LOW-
level setting will turn OFF automati-
cally after a maximum of 45 minutes. MANUAL FRONT/SECOND
ROW SEAT ADJUSTER
Both front seats are adjustable for-
ward or rearward. The manual seat
adjustment handle is located under
the seat cushion at the front edge of
each seat.
While sitting in the seat, pull up on
the handle and slide the seat forward
or rearward. Release the bar once you
have reached the desired position.
Then, using body pressure, move for-
ward and rearward on the seat to be
sure that the seat adjusters have
latched.
Heated Seat Switch
Manual Seat Adjuster
105
Page 125 of 344

2. Move to the front of the vehicle and
look inside the center of the hood
opening. Locate, then push the safety
catch lever downward while raising
the hood at the same time.
Use the hood prop rod to secure the
hood in the open position.
CAUTION!
To prevent possible damage, do not
slam the hood to close it. Lower the
hood until it is open approximately
30 cm and then drop it. This should
secure both latches. Never drive
your vehicle unless the hood is fully
closed, with both latches engaged.WARNING!
Be sure the hood is fully latched
before driving your vehicle. If the
hood is not fully latched, it could
open when the vehicle is in motion
and block your vision. Failure to
follow this warning could result in
serious injury or death.
LIGHTS
All of the lights, except the Hazard
Warning lights, headlight high beams
and flash-to-pass, are controlled by
switches to the left of the steering
column on the instrument panel. INTERIOR LIGHTING
Interior lights are turned on when a
door or liftgate is opened, the Remote
Keyless Entry (RKE) transmitter is
activated, or when the dimmer con-
trol is moved to the extreme top.
The interior lights will automatically
turn off in approximately 10 minutes
for the first activation and 90 seconds
every activation thereafter until the
engine is started, if one of the follow-
ing occur:
A door, sliding door or the liftgate is
left open
Any overhead reading light is left on
Hood Release
Safety Catch Location
Headlight Switch With Halo Control Assembly
119