Page 115 of 429
�µ �µ
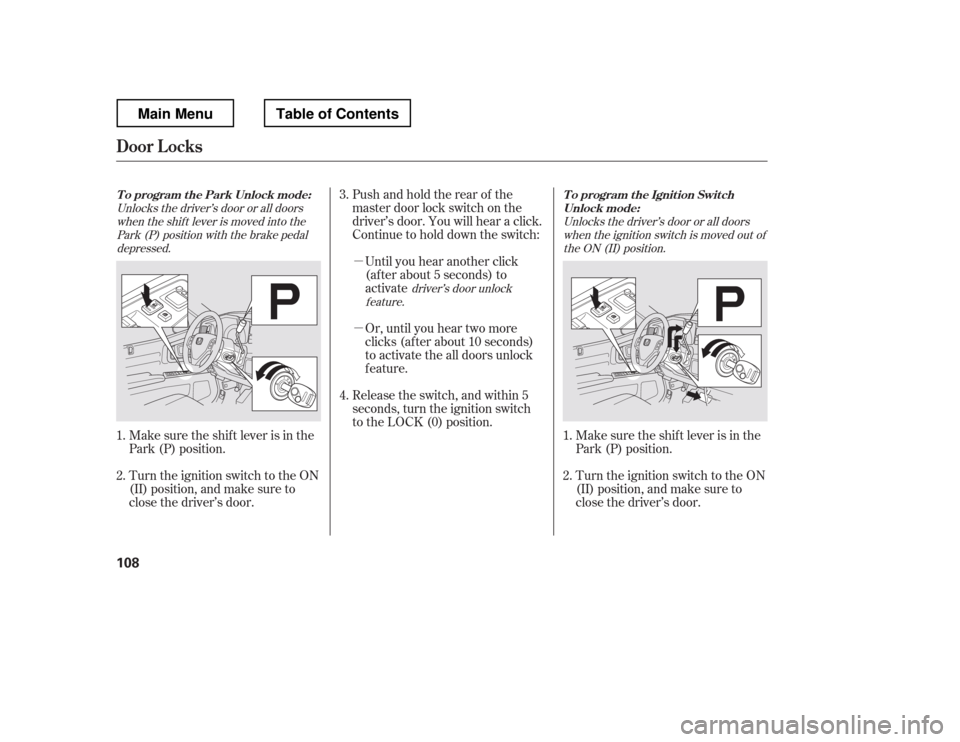
Pushandholdtherearof the
master door lock switch on the
driver
Page 116 of 429
�µ �µOr, until you hear two more
clicks (af ter about 10 seconds)
to activate the all doors unlock
feature.
Until you hear another click
(af ter about 5 seconds) to
activate the driver
Page 117 of 429
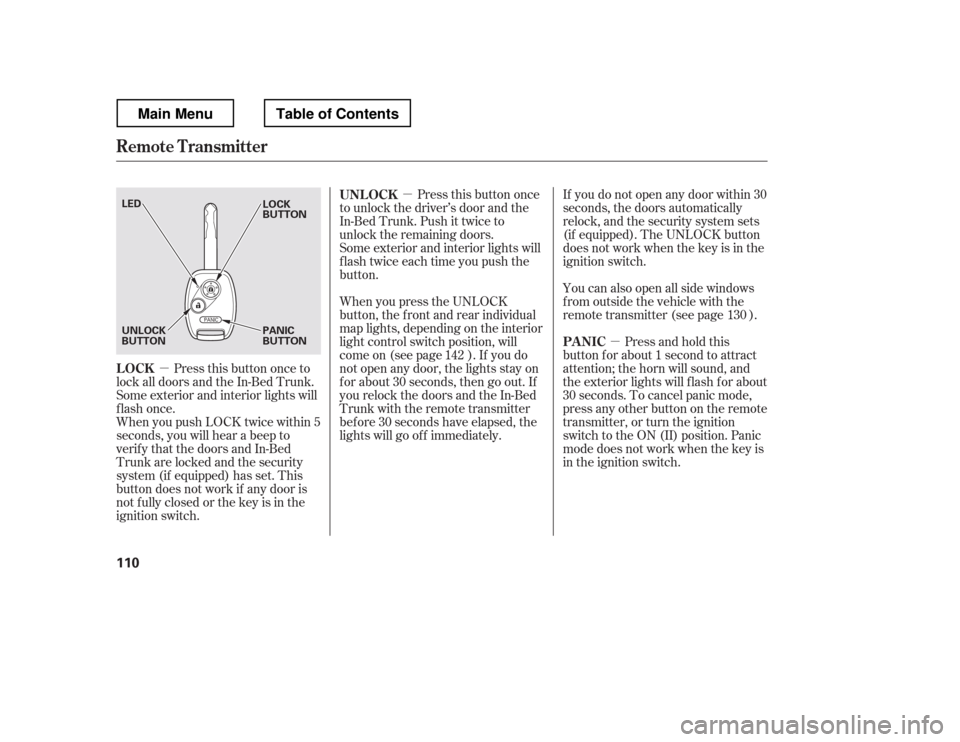
�µ
�µ �µ
Press this button once
to unlock the driver
Page 118 of 429
Avoid dropping or throwing the
transmitter.
Protect the transmitter from
extreme temperatures.
Do not immerse the transmitter in
any liquid.
If you lose a transmitter, the
replacement needs to be
reprogrammed by your dealer.To replace the battery:
Remove the screw at the base of
the transmitter with a small
Phillips-head screwdriver.
If it takes several pushes on the
button to lock or unlock the doors,
replace the battery as soon as
possible.
Battery type: CR1616
Be caref ul when removing
this screw as the head of the screw
can strip out.
1.
CONT INUED
Remote Transmitter Care Replacing the Transmitter
Battery
Remote Transmitter
Inst rument s and Cont rols
111
NOTE:
SCREW
Main MenuTable of Contents
Page 122 of 429
.
If you do not f asten the seat belt, you
f irst hear the seat belt re")
See page for information on
cargo loading and weight limits.
You can also store and lock items in
the In-Bed Trunk (see page ).
If you do not f asten the seat belt, you
f irst hear the seat belt reminder
alarm, then the tailgate reminder
beeper sounds.
The indicator does not monitor the
tailgate when it is dropped open.
Do not allow anyone to hang on the
swung open tailgate. This could
damage the tailgate.
Do not leave the tailgate swung open.
The tailgate may swing and shut
accidentally. This could cause
serious injuries.
Thebedlightscomeonwhenyou
swing open the tailgate. You can also
turn the bed lights on or off by
pushing the bed light switch on the
dashboard (see page ).
If the tailgate is swung open or not
closed tightly when the ignition
switch is in the ON (II) position, you
will hear six beeps and see the
indicator blinking. The indicator
stays on until you close the tailgate.
The beeper also sounds and the
indicator blinks when you move the
shif t lever out of the Park or neutral
position.
This indicator is in the door and
tailgate open monitor on the
instrument panel. It comes on when
the tailgate is swung open or it is not
completely closed. This indicator
worksevenif thekeyisnotinthe
ignition switch.
The tailgate open indicator appears
on the multi-information display (see
page ).
11
144
116
261
On models without navigation system
On models with navigation system
L oading Cargo
T ailgat e Open Indicat or
Dual-Action Tailgate
Inst rument s and Cont rols
115
Main MenuTable of Contents
Page 125 of 429
There are two cargo hooks f or
plastic grocery bags at the back of
the In-Bed Trunk. They are designed
to hold light items. Heavy objects
may damage the hooks.
To protect items in the In-Bed Trunk,
you can disable its release button by
turning off the main switch in the
glove box and locking the glove box
with the master key.
Even if the main switch is in the OFF
position, you can open the In-Bed
Trunk with the master key.
When you are f inished washing the
In-Bed Trunk, dry it with a sof t cloth,
and reinstall the drain plug.
Youcanwashtheinsideof the
In-Bed Trunk with a water and mild
detergent solution, and a sof t brush
or cloth.
To drain water from the In-Bed
Trunk, remove the drain plug by
turning it counterclockwise. Cargo Hooks
Washing the In-Bed T runk
In-Bed T runk Main Switch
In-Bed Trunk
118
DRAIN PLUG CARGO HOOKS
MAIN SWITCH
Main MenuTable of Contents
Page 127 of 429
Make sure to pull the lever upward
or downward to its f ull range.
Make all seat adjustments bef ore
you start driving.
To change the seat-back angle of the
f ront seat, pull up the lever on the
outside of the seat bottom.
Once a seat is adjusted correctly,
rock it back and f orth to make sure it
is locked in position. The height of your driver
Page 132 of 429
CONT INUED
For a head restraint system to work
properly:Do not hang any items on the head
restraints, or f rom the restraint
legs.
Do not place any object between
an occupant and the seat-back.
Install each restraint in its proper
location.
Only use genuine Honda
replacement head restraints. The lef t and right rear seat cushions
can be lifted up separately to make
room f or cargo.
To f old a rear seat cushion, pull up
the lever on the outside of the
cushion. The seat cushion pops up,
and the seat legs store underneath it.
Push the cushion firmly against the
seat-back to lock it in place.
Remove any items from the seat
beforeyoufolduptheseatcushion.
Folding the Rear Seats
Seats
Inst rument s and Cont rols
125
Main MenuTable of Contents