2012 GMC SIERRA 1500 steering
[x] Cancel search: steeringPage 352 of 556
Black plate (76,1)GMC Sierra Owner Manual - 2012 - CRC - 11/15/11
9-76 Driving and Operating
Backing Up
Hold the bottom of the steering
wheel with one hand. To move the
trailer to the left, move that hand to
the left. To move the trailer to the
right, move your hand to the right.
Always back up slowly and,
if possible, have someone
guide you.
Making Turns
Notice:Making very sharp turns
while trailering could cause the
trailer to come in contact with the
vehicle. The vehicle could be
damaged. Avoid making very
sharp turns while trailering.
When turning with a trailer, make
wider turns than normal. Do this
so the trailer will not strike soft
shoulders, curbs, road signs, trees,
or other objects. Avoid jerky or
sudden maneuvers. Signal well in
advance. If the trailer turn signal bulbs burn
out, the arrows on the instrument
panel will still flash for turns. It is
important to check occasionally to
be sure the trailer bulbs are still
working.
Driving on Grades
Reduce speed and shift to a
lower gear
beforestarting down a
long or steep downgrade. If the
transmission is not shifted down, the
brakes might get hot and no longer
work well.
Vehicles can tow in D (Drive). Shift
the transmission to a lower gear if
the transmission shifts too often
under heavy loads and/or hilly
conditions.
The Tow/Haul Mode may be used if
the transmission shifts too often.
See Tow/Haul Mode on page 9‑39.
When towing at high altitude on
steep uphill grades, consider the
following: Engine coolant will boil at
a lower temperature than at normal
altitudes. If the engine is turned off immediately after towing at high
altitude on steep uphill grades, the
vehicle may show signs similar to
engine overheating. To avoid this,
let the engine run while parked,
preferably on level ground, with the
automatic transmission in P (Park)
for a few minutes before turning the
engine off. If the overheat warning
comes on, see
Engine Overheating
on page 10‑22.
Parking on Hills
{WARNING
Parking the vehicle on a hill
with the trailer attached can be
dangerous. If something goes
wrong, the rig could start to move.
People can be injured, and both
the vehicle and the trailer can be
damaged. When possible, always
park the rig on a flat surface.
Page 374 of 556
Black plate (98,1)GMC Sierra Owner Manual - 2012 - CRC - 11/15/11
9-98 Driving and Operating
Electric Brake Control Wiring
Provisions
These wiring provisions are
included with the vehicle as part of
the trailer wiring package. These
provisions are for an electric brake
controller. The instrument panel
contains blunt cut wires behind the
steering column for the trailer brake
controller. The harness contains the
following wires:
.Dark Blue: Brake Signal to
Trailer Connector
.Red/Black: Battery
.Light Blue/White: Brake Switch
.White: Ground
The harness should be installed by
your dealer or a qualified service
center.
If the vehicle is equipped with an
Integrated Trailer Brake Control
(ITBC) System, the blunt cuts exist,
but are not connected further in the harness. If an aftermarket trailer
brake controller is installed, the
ITBC must be disconnected. Do not
power both ITBC and aftermarket
controllers to control the trailer
brakes at the same time.
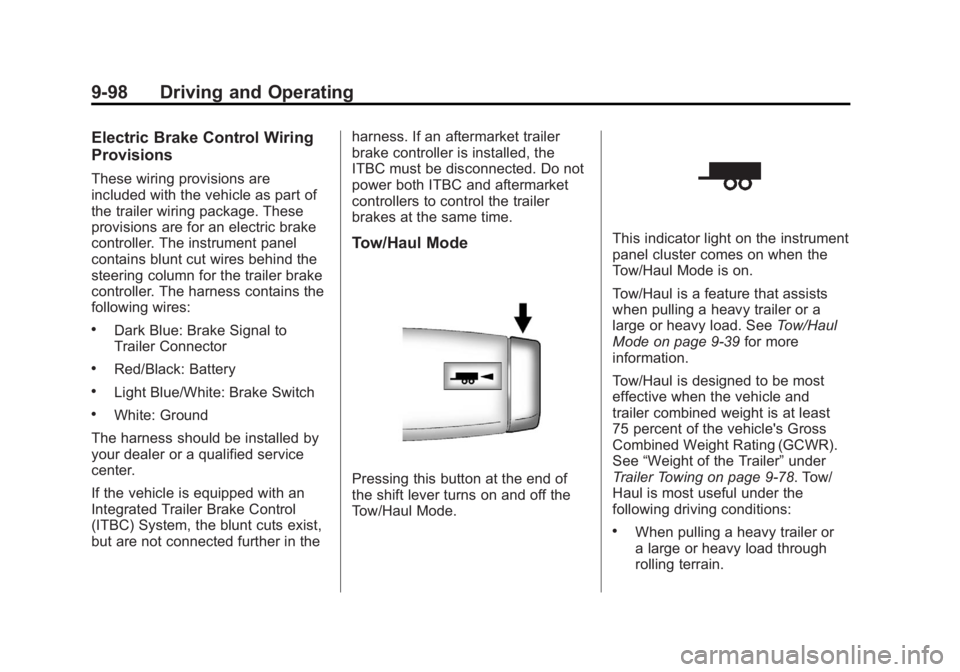
Tow/Haul Mode
Pressing this button at the end of
the shift lever turns on and off the
Tow/Haul Mode.
This indicator light on the instrument
panel cluster comes on when the
Tow/Haul Mode is on.
Tow/Haul is a feature that assists
when pulling a heavy trailer or a
large or heavy load. See
Tow/Haul
Mode on page 9‑39 for more
information.
Tow/Haul is designed to be most
effective when the vehicle and
trailer combined weight is at least
75 percent of the vehicle's Gross
Combined Weight Rating (GCWR).
See “Weight of the Trailer” under
Trailer Towing on page 9‑78. Tow/
Haul is most useful under the
following driving conditions:
.When pulling a heavy trailer or
a large or heavy load through
rolling terrain.
Page 377 of 556
Black plate (101,1)GMC Sierra Owner Manual - 2012 - CRC - 11/15/11
Driving and Operating 9-101
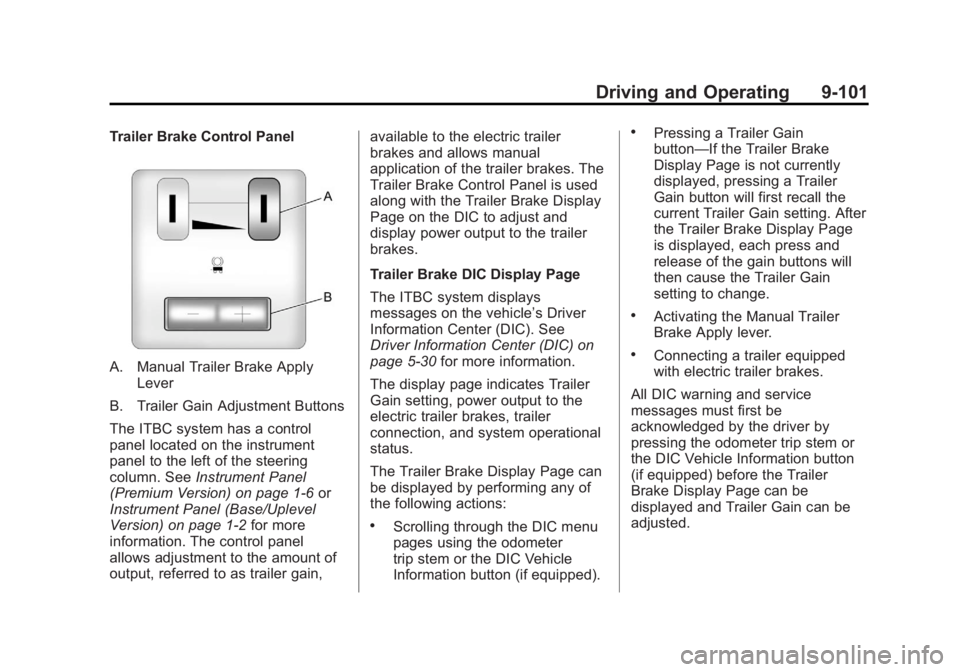
Trailer Brake Control Panel
A. Manual Trailer Brake ApplyLever
B. Trailer Gain Adjustment Buttons
The ITBC system has a control
panel located on the instrument
panel to the left of the steering
column. See Instrument Panel
(Premium Version) on page 1‑6 or
Instrument Panel (Base/Uplevel
Version) on page 1‑2 for more
information. The control panel
allows adjustment to the amount of
output, referred to as trailer gain, available to the electric trailer
brakes and allows manual
application of the trailer brakes. The
Trailer Brake Control Panel is used
along with the Trailer Brake Display
Page on the DIC to adjust and
display power output to the trailer
brakes.
Trailer Brake DIC Display Page
The ITBC system displays
messages on the vehicle’s Driver
Information Center (DIC). See
Driver Information Center (DIC) on
page 5‑30
for more information.
The display page indicates Trailer
Gain setting, power output to the
electric trailer brakes, trailer
connection, and system operational
status.
The Trailer Brake Display Page can
be displayed by performing any of
the following actions:
.Scrolling through the DIC menu
pages using the odometer
trip stem or the DIC Vehicle
Information button (if equipped).
.Pressing a Trailer Gain
button—If the Trailer Brake
Display Page is not currently
displayed, pressing a Trailer
Gain button will first recall the
current Trailer Gain setting. After
the Trailer Brake Display Page
is displayed, each press and
release of the gain buttons will
then cause the Trailer Gain
setting to change.
.Activating the Manual Trailer
Brake Apply lever.
.Connecting a trailer equipped
with electric trailer brakes.
All DIC warning and service
messages must first be
acknowledged by the driver by
pressing the odometer trip stem or
the DIC Vehicle Information button
(if equipped) before the Trailer
Brake Display Page can be
displayed and Trailer Gain can be
adjusted.
Page 387 of 556
Black plate (1,1)GMC Sierra Owner Manual - 2012 - CRC - 11/15/11
Vehicle Care 10-1
Vehicle Care
General Information
General Information . . . . . . . . . . 10-2
California Proposition65 Warning . . . . . . . . . . . . . . . . . 10-3
California Perchlorate Materials Requirements . . . . 10-3
Accessories and Modifications . . . . . . . . . . . . . . . 10-3
Vehicle Checks
Doing Your OwnService Work . . . . . . . . . . . . . . . 10-4
Hood . . . . . . . . . . . . . . . . . . . . . . . . 10-5
Engine Compartment Overview . . . . . . . . . . . . . . . . . . . 10-6
Engine Oil . . . . . . . . . . . . . . . . . . . 10-7
Engine Oil Life System . . . . . 10-10
Automatic Transmission Fluid (4-Speed Transmission) . . . 10-11
Automatic Transmission Fluid (6-Speed
Transmission) . . . . . . . . . . . . . 10-14
Engine Air Cleaner/Filter . . . . 10-17
Cooling System . . . . . . . . . . . . 10-18
Engine Coolant . . . . . . . . . . . . . 10-19
Engine Overheating . . . . . . . . 10-22 Overheated Engine
Protection
Operating Mode . . . . . . . . . . . 10-24
Engine Fan . . . . . . . . . . . . . . . . . 10-24
Power Steering Fluid . . . . . . . 10-25
Washer Fluid . . . . . . . . . . . . . . . 10-26
Brakes . . . . . . . . . . . . . . . . . . . . . 10-27
Brake Fluid . . . . . . . . . . . . . . . . . 10-28
Battery . . . . . . . . . . . . . . . . . . . . . 10-30
Four-Wheel Drive . . . . . . . . . . . 10-30
Front Axle . . . . . . . . . . . . . . . . . . 10-31
Rear Axle . . . . . . . . . . . . . . . . . . 10-32
Noise Control System . . . . . . 10-34
Starter Switch Check . . . . . . . 10-35
Automatic Transmission Shift Lock Control Function
Check . . . . . . . . . . . . . . . . . . . . . 10-35
Ignition Transmission Lock Check . . . . . . . . . . . . . . . . . . . . . 10-35
Park Brake and P (Park) Mechanism Check . . . . . . . . 10-36
Wiper Blade Replacement . . . . . . . . . . . . . . 10-36
Glass Replacement . . . . . . . . 10-37
Headlamp Aiming
Headlamp Aiming . . . . . . . . . . 10-37
Bulb Replacement
Bulb Replacement . . . . . . . . . . 10-39
Halogen Bulbs . . . . . . . . . . . . . . 10-39
Headlamps, Front Turn Signal, Sidemarker, and
Parking Lamps . . . . . . . . . . . . 10-39
Pick-Up Box Identification and Fender Marker
Lamps . . . . . . . . . . . . . . . . . . . . 10-40
Taillamps (Chassis Cab Models) . . . . . . . . . . . . . . . . . . . 10-40
Taillamps, Turn Signal, Stoplamps, and Back-Up
Lamps . . . . . . . . . . . . . . . . . . . . 10-41
Center High-Mounted Stoplamp (CHMSL) and
Cargo Lamp . . . . . . . . . . . . . . 10-42
License Plate Lamp . . . . . . . . 10-42
Replacement Bulbs . . . . . . . . . 10-43
Electrical System
Electrical System Overload . . . . . . . . . . . . . . . . . . 10-43
Fuses and Circuit Breakers . . . . . . . . . . . . . . . . . . 10-44
Engine Compartment Fuse Block . . . . . . . . . . . . . . . . . . . . . 10-44
Instrument Panel Fuse Block . . . . . . . . . . . . . . . . . . . . . 10-48
Page 391 of 556
Black plate (5,1)GMC Sierra Owner Manual - 2012 - CRC - 11/15/11
Vehicle Care 10-5
Hood
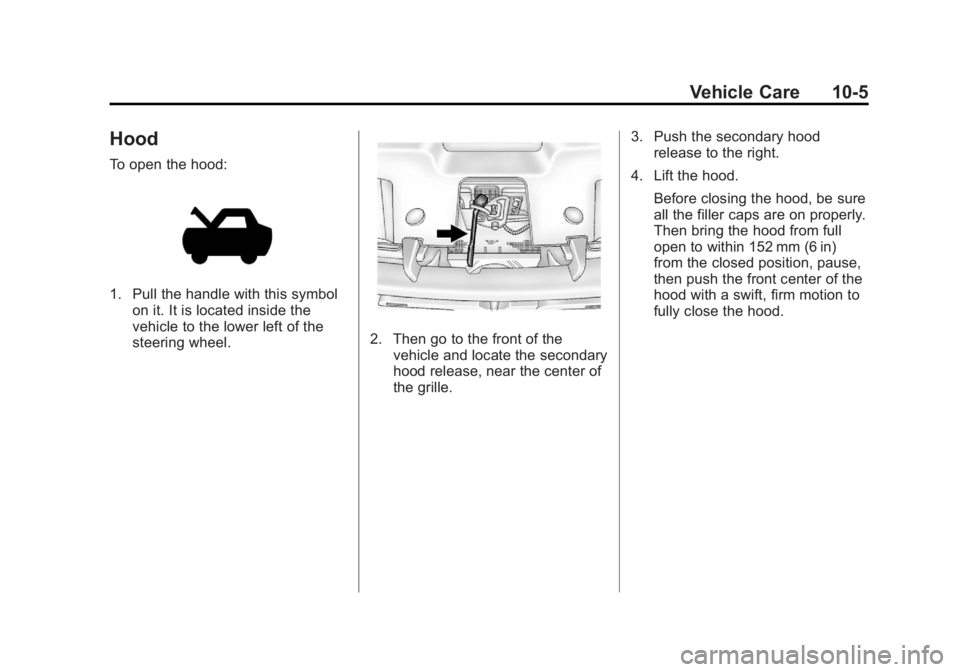
To open the hood:
1. Pull the handle with this symbolon it. It is located inside the
vehicle to the lower left of the
steering wheel.
2. Then go to the front of thevehicle and locate the secondary
hood release, near the center of
the grille. 3. Push the secondary hood
release to the right.
4. Lift the hood. Before closing the hood, be sure
all the filler caps are on properly.
Then bring the hood from full
open to within 152 mm (6 in)
from the closed position, pause,
then push the front center of the
hood with a swift, firm motion to
fully close the hood.
Page 393 of 556
Black plate (7,1)GMC Sierra Owner Manual - 2012 - CRC - 11/15/11
Vehicle Care 10-7
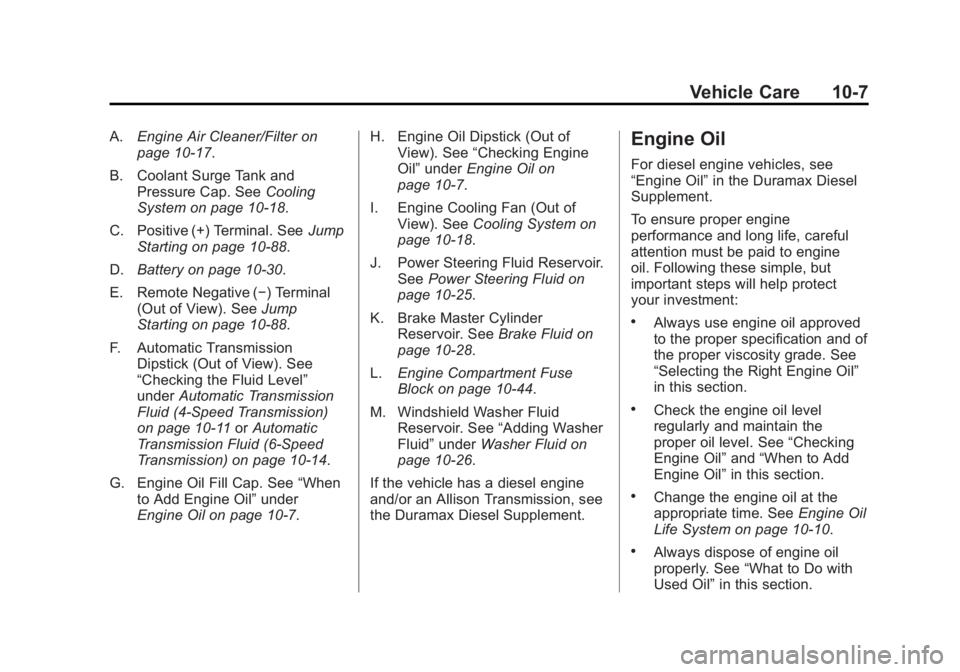
A.Engine Air Cleaner/Filter on
page 10‑17.
B. Coolant Surge Tank and Pressure Cap. See Cooling
System on page 10‑18.
C. Positive (+) Terminal. See Jump
Starting on page 10‑88.
D. Battery on page 10‑30.
E. Remote Negative (−) Terminal (Out of View). See Jump
Starting on page 10‑88.
F. Automatic Transmission Dipstick (Out of View). See
“Checking the Fluid Level”
under Automatic Transmission
Fluid (4-Speed Transmission)
on page 10‑11 orAutomatic
Transmission Fluid (6-Speed
Transmission) on page 10‑14.
G. Engine Oil Fill Cap. See “When
to Add Engine Oil” under
Engine Oil on page 10‑7. H. Engine Oil Dipstick (Out of
View). See “Checking Engine
Oil” under Engine Oil on
page 10‑7.
I. Engine Cooling Fan (Out of View). See Cooling System on
page 10‑18.
J. Power Steering Fluid Reservoir. See Power Steering Fluid on
page 10‑25.
K. Brake Master Cylinder Reservoir. See Brake Fluid on
page 10‑28.
L. Engine Compartment Fuse
Block on page 10‑44.
M. Windshield Washer Fluid Reservoir. See “Adding Washer
Fluid” under Washer Fluid on
page 10‑26.
If the vehicle has a diesel engine
and/or an Allison Transmission, see
the Duramax Diesel Supplement.Engine Oil
For diesel engine vehicles, see
“Engine Oil” in the Duramax Diesel
Supplement.
To ensure proper engine
performance and long life, careful
attention must be paid to engine
oil. Following these simple, but
important steps will help protect
your investment:
.Always use engine oil approved
to the proper specification and of
the proper viscosity grade. See
“Selecting the Right Engine Oil”
in this section.
.Check the engine oil level
regularly and maintain the
proper oil level. See “Checking
Engine Oil” and“When to Add
Engine Oil” in this section.
.Change the engine oil at the
appropriate time. See Engine Oil
Life System on page 10‑10.
.Always dispose of engine oil
properly. See “What to Do with
Used Oil” in this section.
Page 411 of 556
Black plate (25,1)GMC Sierra Owner Manual - 2012 - CRC - 11/15/11
Vehicle Care 10-25
loading, trailer towing, and/or high
outside temperatures, the fan speed
increases as the clutch more fully
engages, so an increase in fan
noise may be heard. This is normal
and should not be mistaken as the
transmission slipping or making
extra shifts. It is merely the cooling
system functioning properly. The fan
will slow down when additional
cooling is not required and the
clutch disengages.
This fan noise may also be heard
when starting the engine. It will go
away as the fan clutch partially
disengages.
If the vehicle has electric cooling
fans, the fans may be heard
spinning at low speed during most
everyday driving. The fans may
turn off if no cooling is required.
Under heavy vehicle loading, trailer
towing, high outside temperatures,
or operation of the air conditioning
system, the fans may change to
high speed and an increase in fan
noise may be heard. This is normal
and indicates that the coolingsystem is functioning properly. The
fans will change to low speed when
additional cooling is no longer
required.
Power Steering Fluid
See
Engine Compartment Overview
on page 10‑6 for reservoir location.
When to Check Power Steering
Fluid
It is not necessary to regularly
check power steering fluid unless
there is a leak suspected in the
system or an unusual noise is
heard. A fluid loss in this system
could indicate a problem. Have the
system inspected and repaired.
How to Check Power Steering
Fluid
Notice:Extremely small amounts
of contamination can cause
steering system damage and
cause it to not work properly. Do
not allow contaminants to contact
the fluid side of the reservoir cap/
dipstick or to enter the reservoir.
To check the power steering fluid:
1. Turn the key off and let the engine compartment cool down.
2. Wipe the cap and the top of the reservoir clean.
3. Unscrew the cap and wipe the dipstick with a clean rag.
4. Replace the cap and completely tighten it.
5. Remove the cap again and look at the fluid level on the dipstick.
The level should be at the FULL
COLD mark. If necessary, add only
enough fluid to bring the level up to
the mark.
Page 434 of 556
Black plate (48,1)GMC Sierra Owner Manual - 2012 - CRC - 11/15/11
10-48 Vehicle Care
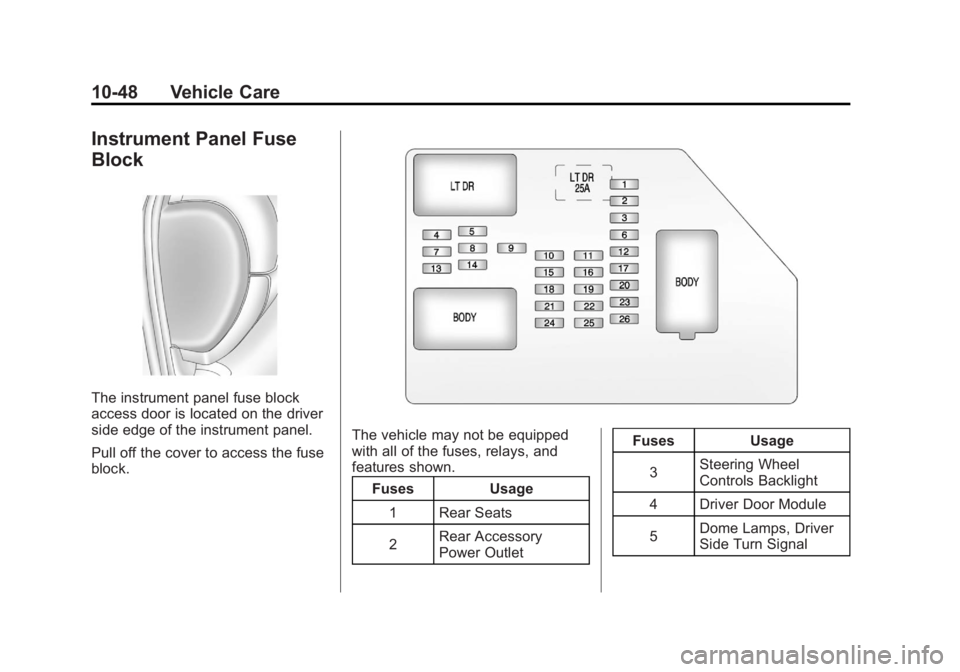
Instrument Panel Fuse
Block
The instrument panel fuse block
access door is located on the driver
side edge of the instrument panel.
Pull off the cover to access the fuse
block.
The vehicle may not be equipped
with all of the fuses, relays, and
features shown.Fuses Usage
1 Rear Seats
2 Rear Accessory
Power Outlet Fuses Usage
3 Steering Wheel
Controls Backlight
4 Driver Door Module
5 Dome Lamps, Driver
Side Turn Signal