2012 GMC SIERRA 1500 steering
[x] Cancel search: steeringPage 314 of 556
Black plate (38,1)GMC Sierra Owner Manual - 2012 - CRC - 11/15/11
9-38 Driving and Operating
1 (First):For the Hydra-Matic
4-Speed transmission this position
reduces vehicle speed even more
than 2 (Second) without using the
brakes. You can use it on very steep
hills, or in deep snow or mud. If the
shift lever is put in 1 (First) while the
vehicle is moving forward, the
transmission does not shift into first
gear until the vehicle is going slowly
enough.
For an Allison Transmission or
Hydra-Matic 6-Speed transmission,
this position reduces vehicle speed
without using the brakes. You can
use it for major/severe downgrades
and off-road driving where the
vehicle would otherwise accelerate
due to steepness of grade. When
you shift to 1 (First) it provides the
lowest gear appropriate to current
road speed and continues to
downshift as the vehicle slows,
eventually downshifting to
1 (First) gear. Notice:
Spinning the tires
or holding the vehicle in one
place on a hill using only the
accelerator pedal may damage
the transmission. The repair will
not be covered by the vehicle
warranty. If you are stuck, do not
spin the tires. When stopping on
a hill, use the brakes to hold the
vehicle in place.
Manual Mode
Range Selection Mode
(Allison®Transmission or
Hydra-Matic®6-Speed
Transmission)
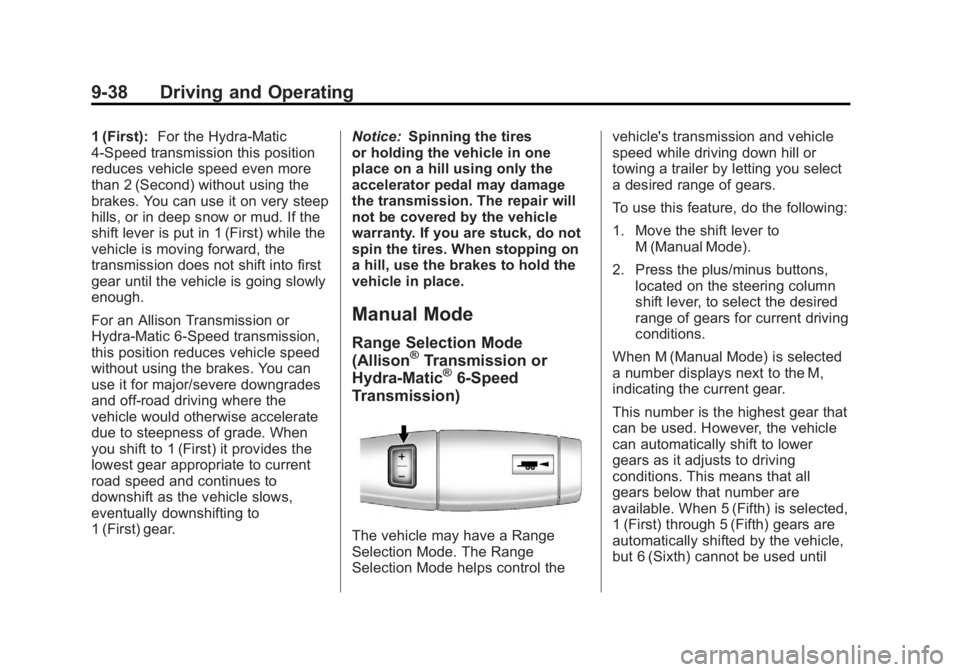
The vehicle may have a Range
Selection Mode. The Range
Selection Mode helps control the vehicle's transmission and vehicle
speed while driving down hill or
towing a trailer by letting you select
a desired range of gears.
To use this feature, do the following:
1. Move the shift lever to
M (Manual Mode).
2. Press the plus/minus buttons, located on the steering column
shift lever, to select the desired
range of gears for current driving
conditions.
When M (Manual Mode) is selected
a number displays next to the M,
indicating the current gear.
This number is the highest gear that
can be used. However, the vehicle
can automatically shift to lower
gears as it adjusts to driving
conditions. This means that all
gears below that number are
available. When 5 (Fifth) is selected,
1 (First) through 5 (Fifth) gears are
automatically shifted by the vehicle,
but 6 (Sixth) cannot be used until
Page 315 of 556
Black plate (39,1)GMC Sierra Owner Manual - 2012 - CRC - 11/15/11
Driving and Operating 9-39
the plus/minus button located on the
steering column lever is used to
change to the gear.
Grade Braking is not available when
Range Selection Mode is active.
SeeTow/Haul Mode on page 9‑39.
While using Range Selection Mode,
Cruise Control and the Tow/Haul
Mode can be used.
If the vehicle has an exhaust
brake, it can also be used, but will
not automatically downshift the
transmission. See Exhaust Brake in
the Duramax Diesel supplement.
Notice: Spinning the tires
or holding the vehicle in one
place on a hill using only the
accelerator pedal may damage
the transmission. The repair will
not be covered by the vehicle
warranty. If you are stuck, do not
spin the tires. When stopping on
a hill, use the brakes to hold the
vehicle in place.Low Traction Mode
If your vehicle has the Allison
Transmission, or the Hydra-Matic
6-Speed Automatic Transmission, it
has a Low Traction Mode that can
assist in vehicle acceleration when
road conditions are slippery, such
as with ice or snow. While the
vehicle is at a stop, select the
second gear range using Range
Selection Mode. This will limit
torque to the wheels after it detects
wheel slip, preventing the tires from
spinning.
Tow/Haul Mode
4-Speed Automatic Transmission
6-Speed Automatic Transmission
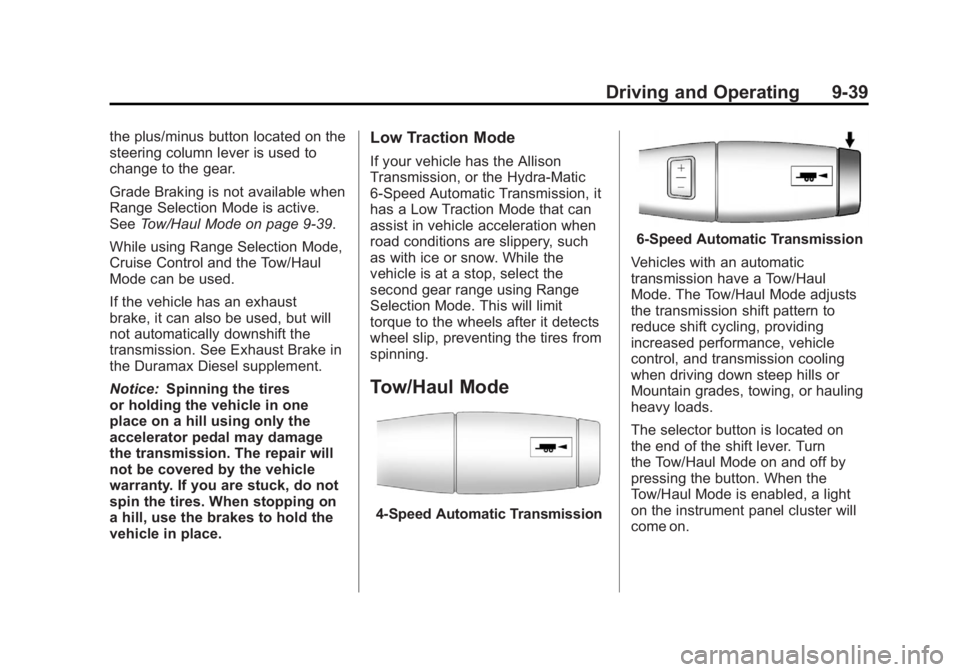
Vehicles with an automatic
transmission have a Tow/Haul
Mode. The Tow/Haul Mode adjusts
the transmission shift pattern to
reduce shift cycling, providing
increased performance, vehicle
control, and transmission cooling
when driving down steep hills or
Mountain grades, towing, or hauling
heavy loads.
The selector button is located on
the end of the shift lever. Turn
the Tow/Haul Mode on and off by
pressing the button. When the
Tow/Haul Mode is enabled, a light
on the instrument panel cluster will
come on.
Page 317 of 556
Black plate (41,1)GMC Sierra Owner Manual - 2012 - CRC - 11/15/11
Driving and Operating 9-41
While driving on clean dry pavement
and during tight turns, you may
experience vibration in the steering
system.
If the vehicle has StabiliTrak
®,
shifting into Four-Wheel Drive Low
will turn Traction Control and
StabiliTrak off. See StabiliTrak
®
System on page 9‑55.
Front Axle
The front axle engages and
disengages automatically when you
shift the transfer case. Some delay
for the axle to engage or disengage
is normal.
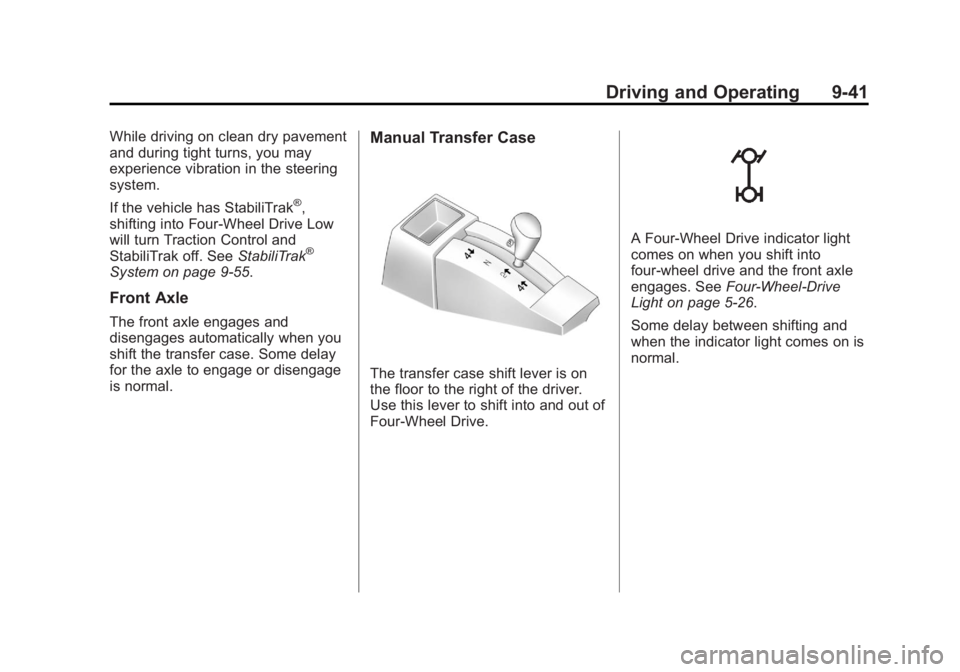
Manual Transfer Case
The transfer case shift lever is on
the floor to the right of the driver.
Use this lever to shift into and out of
Four-Wheel Drive.
A Four-Wheel Drive indicator light
comes on when you shift into
four-wheel drive and the front axle
engages. SeeFour-Wheel-Drive
Light on page 5‑26.
Some delay between shifting and
when the indicator light comes on is
normal.
Page 321 of 556
Black plate (45,1)GMC Sierra Owner Manual - 2012 - CRC - 11/15/11
Driving and Operating 9-45
Shift the transfer case in one
continuous motion into or out of the
N (Neutral) position.
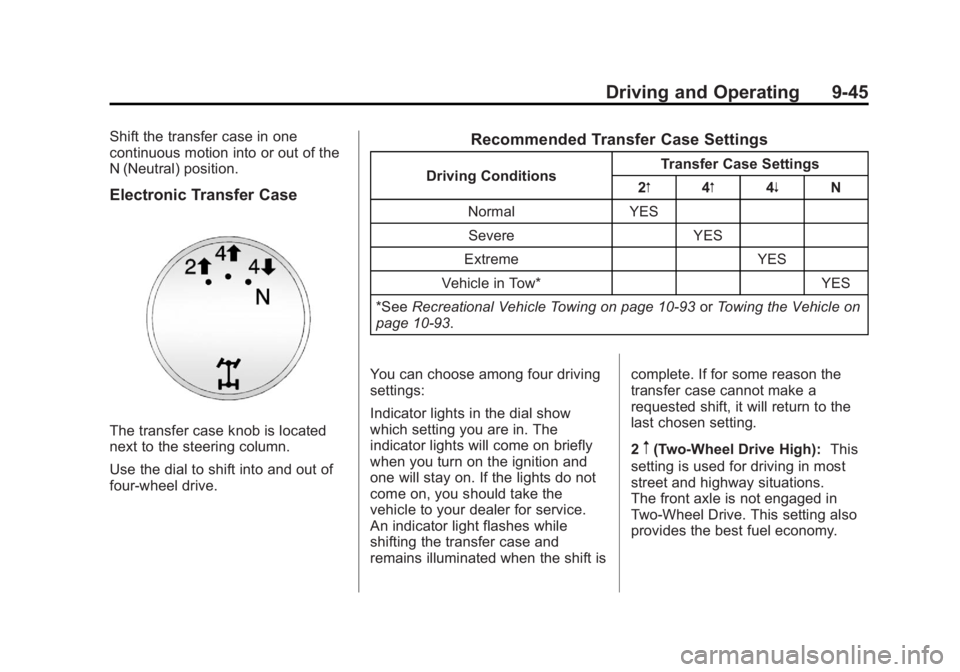
Electronic Transfer Case
The transfer case knob is located
next to the steering column.
Use the dial to shift into and out of
four-wheel drive.
Recommended Transfer Case Settings
Driving ConditionsTransfer Case Settings
2m 4m4n N
Normal YES Severe YES
Extreme YES
Vehicle in Tow* YES
*See Recreational Vehicle Towing on page 10‑93 orTowing the Vehicle on
page 10‑93.
You can choose among four driving
settings:
Indicator lights in the dial show
which setting you are in. The
indicator lights will come on briefly
when you turn on the ignition and
one will stay on. If the lights do not
come on, you should take the
vehicle to your dealer for service.
An indicator light flashes while
shifting the transfer case and
remains illuminated when the shift is complete. If for some reason the
transfer case cannot make a
requested shift, it will return to the
last chosen setting.
2
m(Two-Wheel Drive High):
This
setting is used for driving in most
street and highway situations.
The front axle is not engaged in
Two-Wheel Drive. This setting also
provides the best fuel economy.
Page 325 of 556
Black plate (49,1)GMC Sierra Owner Manual - 2012 - CRC - 11/15/11
Driving and Operating 9-49
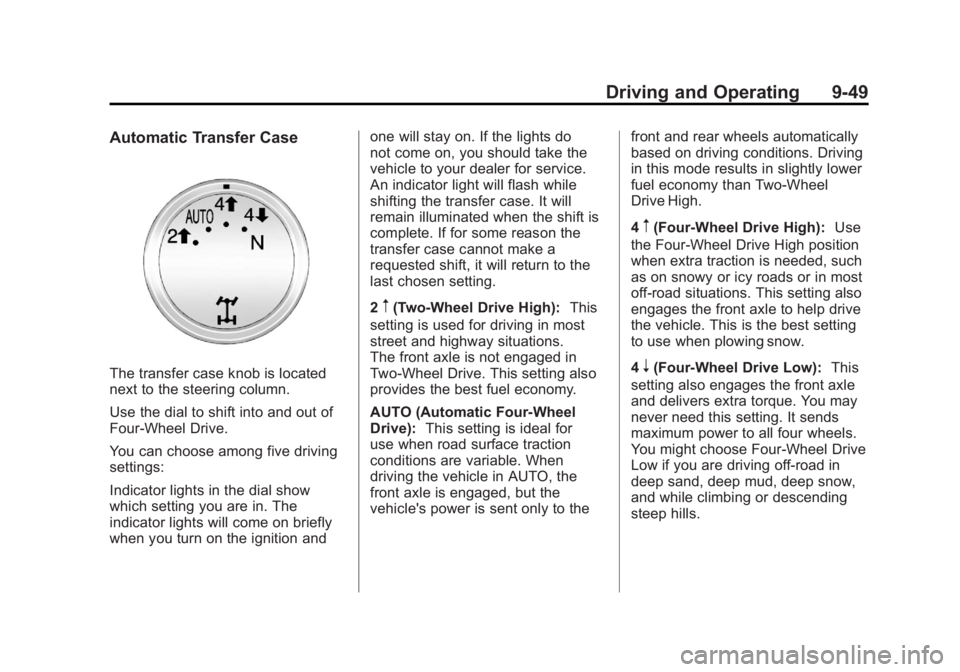
Automatic Transfer Case
The transfer case knob is located
next to the steering column.
Use the dial to shift into and out of
Four-Wheel Drive.
You can choose among five driving
settings:
Indicator lights in the dial show
which setting you are in. The
indicator lights will come on briefly
when you turn on the ignition andone will stay on. If the lights do
not come on, you should take the
vehicle to your dealer for service.
An indicator light will flash while
shifting the transfer case. It will
remain illuminated when the shift is
complete. If for some reason the
transfer case cannot make a
requested shift, it will return to the
last chosen setting.
2
m(Two-Wheel Drive High):
This
setting is used for driving in most
street and highway situations.
The front axle is not engaged in
Two-Wheel Drive. This setting also
provides the best fuel economy.
AUTO (Automatic Four-Wheel
Drive): This setting is ideal for
use when road surface traction
conditions are variable. When
driving the vehicle in AUTO, the
front axle is engaged, but the
vehicle's power is sent only to the front and rear wheels automatically
based on driving conditions. Driving
in this mode results in slightly lower
fuel economy than Two-Wheel
Drive High.
4
m(Four-Wheel Drive High):
Use
the Four-Wheel Drive High position
when extra traction is needed, such
as on snowy or icy roads or in most
off-road situations. This setting also
engages the front axle to help drive
the vehicle. This is the best setting
to use when plowing snow.
4
n(Four-Wheel Drive Low): This
setting also engages the front axle
and delivers extra torque. You may
never need this setting. It sends
maximum power to all four wheels.
You might choose Four-Wheel Drive
Low if you are driving off-road in
deep sand, deep mud, deep snow,
and while climbing or descending
steep hills.
Page 329 of 556
Black plate (53,1)GMC Sierra Owner Manual - 2012 - CRC - 11/15/11
Driving and Operating 9-53
Brakes
Antilock Brake
System (ABS)
This vehicle has the Antilock
Brake System (ABS), an advanced
electronic braking system that helps
prevent a braking skid.
When the engine is started and the
vehicle begins to drive away, ABS
checks itself. A momentary motor or
clicking noise might be heard while
this test is going on, and it might
even be noticed that the brake
pedal moves a little. This is normal.
If there is a problem with ABS, this
warning light stays on. SeeAntilock
Brake System (ABS) Warning Light
on page 5‑26. If driving safely on a wet road and it
becomes necessary to slam on the
brakes and continue braking to
avoid a sudden obstacle, a
computer senses that the wheels
are slowing down. If one of the
wheels is about to stop rolling, the
computer will separately work the
brakes at each wheel.
ABS can change the brake pressure
to each wheel, as required, faster
than any driver could. This can help
the driver steer around the obstacle
while braking hard.
As the brakes are applied, the
computer keeps receiving updates
on wheel speed and controls
braking pressure accordingly.
Remember: ABS does not change
the time needed to get a foot up to
the brake pedal or always decrease
stopping distance. If you get too
close to the vehicle in front of you,
there will not be enough time to
apply the brakes if that vehicle
suddenly slows or stops. Always
leave enough room up ahead to
stop, even with ABS.
Using ABS
Do not pump the brakes. Just hold
the brake pedal down firmly and let
ABS work. You might hear the ABS
pump or motor operating and feel
the brake pedal pulsate, but this is
normal.
Braking in Emergencies
ABS allows the driver to steer and
brake at the same time. In many
emergencies, steering can help
more than even the very best
braking.
Page 335 of 556
Black plate (59,1)GMC Sierra Owner Manual - 2012 - CRC - 11/15/11
Driving and Operating 9-59
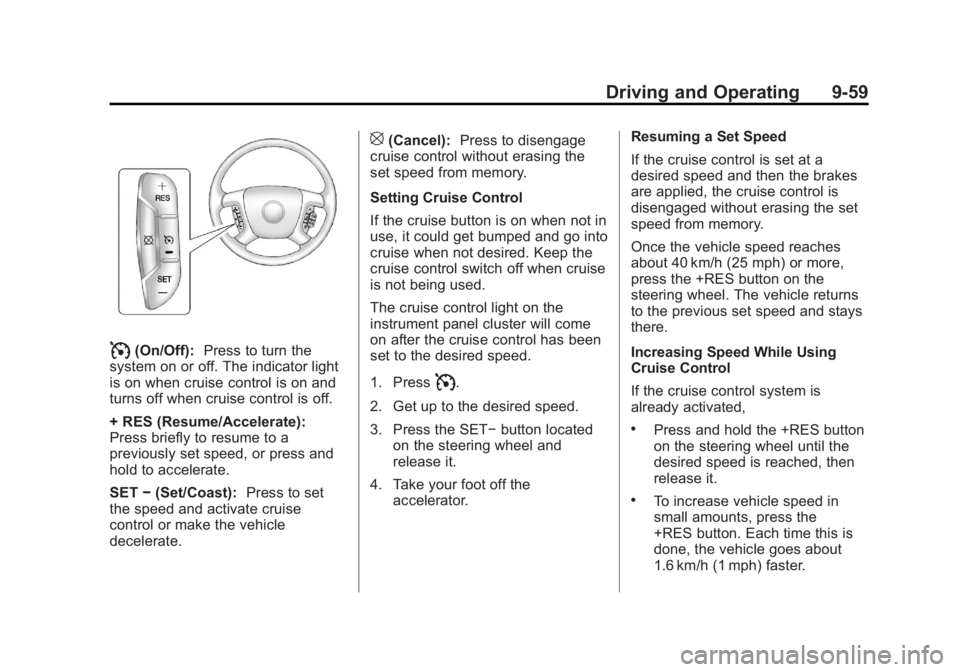
I(On/Off):Press to turn the
system on or off. The indicator light
is on when cruise control is on and
turns off when cruise control is off.
+ RES (Resume/Accelerate):
Press briefly to resume to a
previously set speed, or press and
hold to accelerate.
SET −(Set/Coast): Press to set
the speed and activate cruise
control or make the vehicle
decelerate.
[(Cancel): Press to disengage
cruise control without erasing the
set speed from memory.
Setting Cruise Control
If the cruise button is on when not in
use, it could get bumped and go into
cruise when not desired. Keep the
cruise control switch off when cruise
is not being used.
The cruise control light on the
instrument panel cluster will come
on after the cruise control has been
set to the desired speed.
1. Press
I.
2. Get up to the desired speed.
3. Press the SET− button located
on the steering wheel and
release it.
4. Take your foot off the accelerator. Resuming a Set Speed
If the cruise control is set at a
desired speed and then the brakes
are applied, the cruise control is
disengaged without erasing the set
speed from memory.
Once the vehicle speed reaches
about 40 km/h (25 mph) or more,
press the +RES button on the
steering wheel. The vehicle returns
to the previous set speed and stays
there.
Increasing Speed While Using
Cruise Control
If the cruise control system is
already activated,
.Press and hold the +RES button
on the steering wheel until the
desired speed is reached, then
release it.
.To increase vehicle speed in
small amounts, press the
+RES button. Each time this is
done, the vehicle goes about
1.6 km/h (1 mph) faster.
Page 336 of 556
Black plate (60,1)GMC Sierra Owner Manual - 2012 - CRC - 11/15/11
9-60 Driving and Operating
Reducing Speed While Using
Cruise Control
If the cruise control system is
already activated,
.Press and hold the SET–button
on the steering wheel until the
desired lower speed is reached,
then release it.
.To slow down in small amounts,
press the SET– button on the
steering wheel briefly. Each time
this is done, the vehicle goes
about 1.6 km/h (1 mph) slower.
Passing Another Vehicle While
Using Cruise Control
Use the accelerator pedal to
increase the vehicle speed. When
you take your foot off the pedal,
the vehicle will slow down to the
previous set cruise speed.
Using Cruise Control on Hills
How well the cruise control works
on hills depends on the vehicle
speed, the load, and the steepness
of the hills. When going up steep hills, pressing the accelerator pedal
may be necessary to maintain
vehicle speed.
While going downhill:
.Vehicles with a four speed
automatic transmission may
need to have the brakes applied
or the transmission shifted
to a lower gear to keep the
speed down.
.Vehicles with a six speed
automatic transmission have a
Cruise Grade Braking feature
that may automatically shift to a
lower gear to keep the speed
down. It may be necessary to
apply the brake or manually
shift the transmission to a lower
gear. The vehicle may shift to a
higher gear when grade braking
assistance is no longer required.
Cruise Grade Braking is not
available while in Range
Selection Mode. This feature is
active when the exhaust brake
is enabled (if equipped). See
"Range Selection Mode" under
Manual Mode on page 9‑38.
When the brakes are manually
applied the cruise control is
disengaged.
Ending Cruise Control
There are three ways to end cruise
control:.To disengage cruise control;
step lightly on the brake pedal.
.Press[on the steering wheel.
.To turn off the cruise control,
press
Ion the steering wheel.
Erasing Speed Memory
The cruise control set speed
is erased from memory by
pressing
Ior if the ignition is
turned off.