2012 GMC SIERRA 1500 phone
[x] Cancel search: phonePage 1 of 556

Black plate (1,1)GMC Sierra Owner Manual - 2012 - CRC - 11/15/11
2012 GMC Sierra Owner ManualM
In Brief. . . . . . . . . . . . . . . . . . . . . . . . 1-1
Instrument Panel . . . . . . . . . . . . . . 1-2
Initial Drive Information . . . . . . . . 1-8
Vehicle Features . . . . . . . . . . . . . 1-27
Performance and Maintenance . . . . . . . . . . . . . . . . 1-35
Keys, Doors, and Windows . . . . . . . . . . . . . . . . . . . . 2-1
Keys and Locks . . . . . . . . . . . . . . . 2-2
Doors . . . . . . . . . . . . . . . . . . . . . . . . . . 2-9
Vehicle Security . . . . . . . . . . . . . . 2-11
Exterior Mirrors . . . . . . . . . . . . . . . 2-14
Interior Mirrors . . . . . . . . . . . . . . . . 2-18
Windows . . . . . . . . . . . . . . . . . . . . . 2-19
Roof . . . . . . . . . . . . . . . . . . . . . . . . . . 2-22
Seats and Restraints . . . . . . . . . 3-1
Head Restraints . . . . . . . . . . . . . . . 3-2
Front Seats . . . . . . . . . . . . . . . . . . . . 3-3
Rear Seats . . . . . . . . . . . . . . . . . . . 3-10 Safety Belts . . . . . . . . . . . . . . . . . . 3-12
Airbag System . . . . . . . . . . . . . . . . 3-21
Child Restraints . . . . . . . . . . . . . . 3-39
Storage . . . . . . . . . . . . . . . . . . . . . . . 4-1
Storage Compartments . . . . . . . . 4-1
Instruments and Controls . . . . 5-1
Controls . . . . . . . . . . . . . . . . . . . . . . . 5-2
Warning Lights, Gauges, and
Indicators . . . . . . . . . . . . . . . . . . . 5-11
Information Displays . . . . . . . . . . 5-30
Vehicle Messages . . . . . . . . . . . . 5-39
Vehicle Personalization . . . . . . . 5-48
Universal Remote System . . . . 5-56
Lighting . . . . . . . . . . . . . . . . . . . . . . . 6-1
Exterior Lighting . . . . . . . . . . . . . . . 6-1
Interior Lighting . . . . . . . . . . . . . . . . 6-7
Lighting Features . . . . . . . . . . . . . . 6-9 Infotainment System
. . . . . . . . . 7-1
Introduction . . . . . . . . . . . . . . . . . . . . 7-1
Radio . . . . . . . . . . . . . . . . . . . . . . . . . . 7-9
Audio Players . . . . . . . . . . . . . . . . 7-15
Rear Seat Infotainment . . . . . . . 7-37
Phone . . . . . . . . . . . . . . . . . . . . . . . . 7-48
Trademarks and License Agreements . . . . . . . . . . . . . . . . . 7-55
Climate Controls . . . . . . . . . . . . . 8-1
Climate Control Systems . . . . . . 8-1
Air Vents . . . . . . . . . . . . . . . . . . . . . 8-10
Driving and Operating . . . . . . . . 9-1
Driving Information . . . . . . . . . . . . . 9-2
Starting and Operating . . . . . . . 9-25
Engine Exhaust . . . . . . . . . . . . . . 9-33
Automatic Transmission . . . . . . 9-35
Drive Systems . . . . . . . . . . . . . . . . 9-40
Brakes . . . . . . . . . . . . . . . . . . . . . . . 9-53
Page 35 of 556
Black plate (29,1)GMC Sierra Owner Manual - 2012 - CRC - 11/15/11
In Brief 1-29
Bluetooth®
For vehicles with a Bluetooth
system, it allows users with a
Bluetooth‐enabled cell phone to
make and receive hands-free calls
using the vehicle’s audio system
and controls.
The Bluetooth‐enabled cell phone
must be paired with the Bluetooth
system before it can be used in the
vehicle. Not all phones will support
all functions. For more information,
visit www.gm.com/bluetooth.
For more information, see Bluetooth
on page 7‑48.
Steering Wheel Controls
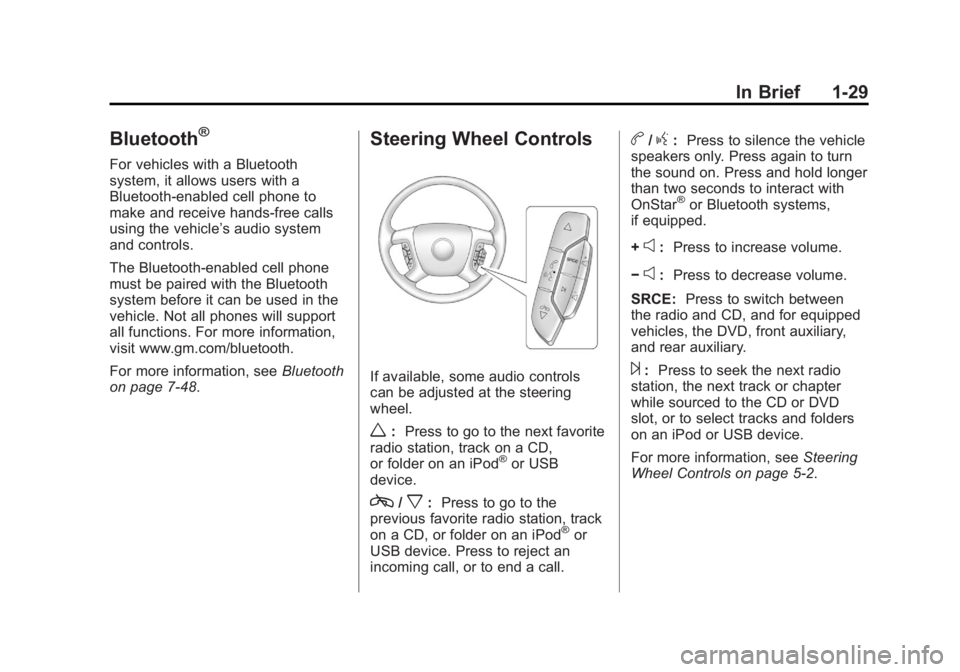
If available, some audio controls
can be adjusted at the steering
wheel.
w: Press to go to the next favorite
radio station, track on a CD,
or folder on an iPod
®or USB
device.
c/x: Press to go to the
previous favorite radio station, track
on a CD, or folder on an iPod
®or
USB device. Press to reject an
incoming call, or to end a call.
b/g: Press to silence the vehicle
speakers only. Press again to turn
the sound on. Press and hold longer
than two seconds to interact with
OnStar
®or Bluetooth systems,
if equipped.
+
e: Press to increase volume.
−
e: Press to decrease volume.
SRCE: Press to switch between
the radio and CD, and for equipped
vehicles, the DVD, front auxiliary,
and rear auxiliary.
¨: Press to seek the next radio
station, the next track or chapter
while sourced to the CD or DVD
slot, or to select tracks and folders
on an iPod or USB device.
For more information, see Steering
Wheel Controls on page 5‑2.
Page 38 of 556
Black plate (32,1)GMC Sierra Owner Manual - 2012 - CRC - 11/15/11
1-32 In Brief
Keep the sensors on the vehicle's
rear bumper clean to ensure proper
operation.
SeeUltrasonic Parking Assist on
page 9‑61.
Power Outlets
Accessory power outlets can be
used to plug in electrical equipment,
such as a cell phone, MP3
player, etc.
The vehicle may have two
accessory power outlets located
below the climate control system,
or may have one accessory power
outlet and one cigarette lighter. The
cigarette lighter is designed to fit
only in the receptacle closest to the
driver.
There may be another accessory
power outlet in the rear cargo area.
If the vehicle has a floor console,
there is an accessory power outlet
inside the storage bin and one on
the rear of the floor console. The accessory power outlets are
powered, even when the ignition is
in LOCK/OFF. Continuing to use
power outlets while the ignition is in
LOCK/OFF may cause the vehicle's
battery to run down.
See
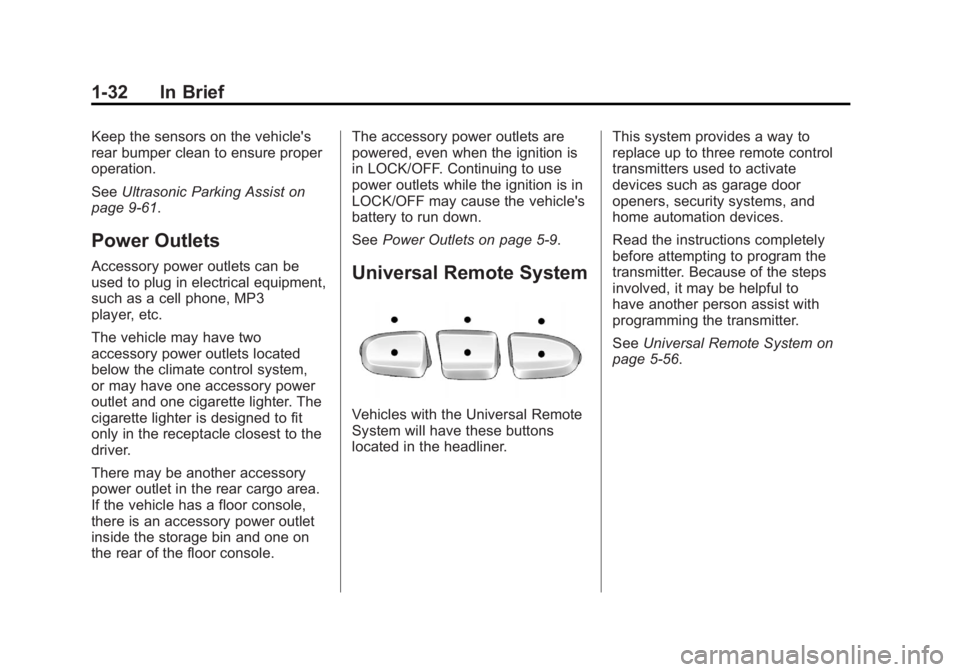
Power Outlets on page 5‑9.Universal Remote System
Vehicles with the Universal Remote
System will have these buttons
located in the headliner. This system provides a way to
replace up to three remote control
transmitters used to activate
devices such as garage door
openers, security systems, and
home automation devices.
Read the instructions completely
before attempting to program the
transmitter. Because of the steps
involved, it may be helpful to
have another person assist with
programming the transmitter.
See
Universal Remote System on
page 5‑56.
Page 105 of 556
Black plate (37,1)GMC Sierra Owner Manual - 2012 - CRC - 11/15/11
Seats and Restraints 3-37
WARNING (Continued)
proper service procedures, and
make sure the person performing
work for you is qualified to do so.
Adding Equipment to the
Airbag-Equipped Vehicle
Q: Is there anything I might addto or change about the vehicle
that could keep the airbags
from working properly?
A: Yes. If you add things that
change your vehicle's frame,
bumper system, height, front end
or side sheet metal, they may
keep the airbag system from
working properly. Changing or
moving any parts of the front
seats, safety belts, the airbag
sensing and diagnostic module,
steering wheel, instrument
panel, roof-rail airbag modules,
ceiling headliner or pillar garnish
trim, overhead console, front sensors, side impact sensors,
or airbag wiring can affect the
operation of the airbag system.
In addition, the vehicle may have
a passenger sensing system
for the right front passenger's
position, which includes sensors
that are part of the passenger's
seat. The passenger sensing
system may not operate properly
if the original seat trim is
replaced with non-GM covers,
upholstery or trim, or with
GM covers, upholstery or
trim designed for a different
vehicle. Any object, such as an
aftermarket seat heater or a
comfort enhancing pad or
device, installed under or on top
of the seat fabric, could also
interfere with the operation of
the passenger sensing system.
This could either prevent proper
deployment of the passenger
airbag(s) or prevent the
passenger sensing system
from properly turning off the
passenger airbag(s). See
Passenger Sensing System on
page 3‑32.
If you have any questions
about this, you should contact
Customer Assistance before you
modify your vehicle. The phone
numbers and addresses for
Customer Assistance are in
Step Two of the Customer
Satisfaction Procedure in
this manual. See
Customer
Satisfaction Procedure (U.S.
and Canada) on page 13‑1 or
Customer Satisfaction
Procedure (Mexico) on
page 13‑3.
If the vehicle has rollover
roof-rail airbags, see Different
Size Tires and Wheels on
page 10‑70 for additional
important information.
Page 106 of 556
Black plate (38,1)GMC Sierra Owner Manual - 2012 - CRC - 11/15/11
3-38 Seats and Restraints
Q: What if I added a snow plow?Will it keep the airbags from
working properly?
A: We have designed our airbag
systems to work properly under
a wide range of conditions,
including snow plowing with
vehicles that have the optional
Snow Plow Prep Package
(RPO VYU). But do not change
or defeat the snow plow's
“tripping mechanism.” If you do,
it can damage your snow plow
and your vehicle, and it may
cause an airbag inflation.
Q: Because I have a disability, I have to get my vehicle
modified. How can I find out
whether this will affect my
airbag system?
A: If you have questions, call
Customer Assistance. The
phone numbers and addresses
for Customer Assistance are
in Step Two of the Customer
Satisfaction Procedure in
this manual. See Customer Satisfaction Procedure (U.S.
and Canada) on page 13‑3
or
Customer Satisfaction
Procedure (Mexico) on
page 13‑3.
In addition, your dealer and the
service manual have information
about the location of the airbag
sensors, sensing and diagnostic
module and airbag wiring.
Airbag System Check
The airbag system does not need
regularly scheduled maintenance or
replacement. Make sure the airbag
readiness light is working. See
Airbag Readiness Light on
page 5‑18.
Notice: If an airbag covering is
damaged, opened, or broken, the
airbag may not work properly. Do
not open or break the airbag
coverings. If there are any
opened or broken airbag covers,
have the airbag covering and/or
airbag module replaced. For
the location of the airbags, see Where Are the Airbags? on
page 3‑23. See your dealer for
service.
Replacing Airbag System
Parts after a Crash
{WARNING
A crash can damage the
airbag systems in the vehicle.
A damaged airbag system
may not work properly and
may not protect you and your
passenger(s) in a crash, resulting
in serious injury or even death.
To help make sure the airbag
systems are working properly
after a crash, have them
inspected and any necessary
replacements made as soon as
possible.
Page 144 of 556
Black plate (6,1)GMC Sierra Owner Manual - 2012 - CRC - 11/15/11
5-6 Instruments and Controls
Press the vehicle information
button until PRESS
VTO
CHANGE COMPASS ZONE
displays. Or, if the vehicle does
not have DIC buttons, press the
trip odometer reset stem until
CHANGE COMPASS ZONE
displays.
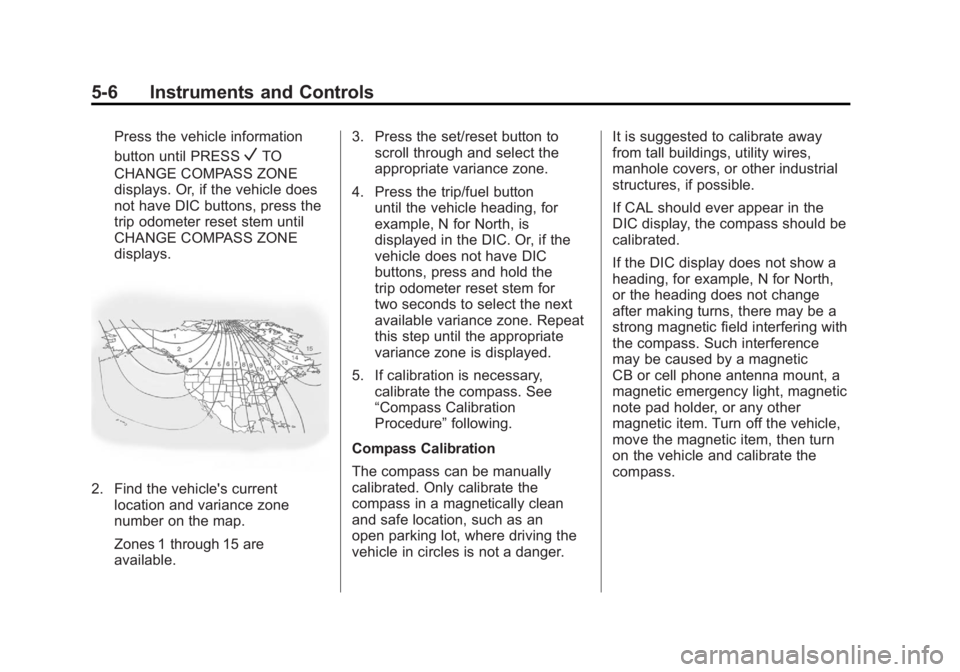
2. Find the vehicle's current location and variance zone
number on the map.
Zones 1 through 15 are
available. 3. Press the set/reset button to
scroll through and select the
appropriate variance zone.
4. Press the trip/fuel button until the vehicle heading, for
example, N for North, is
displayed in the DIC. Or, if the
vehicle does not have DIC
buttons, press and hold the
trip odometer reset stem for
two seconds to select the next
available variance zone. Repeat
this step until the appropriate
variance zone is displayed.
5. If calibration is necessary, calibrate the compass. See
“Compass Calibration
Procedure” following.
Compass Calibration
The compass can be manually
calibrated. Only calibrate the
compass in a magnetically clean
and safe location, such as an
open parking lot, where driving the
vehicle in circles is not a danger. It is suggested to calibrate away
from tall buildings, utility wires,
manhole covers, or other industrial
structures, if possible.
If CAL should ever appear in the
DIC display, the compass should be
calibrated.
If the DIC display does not show a
heading, for example, N for North,
or the heading does not change
after making turns, there may be a
strong magnetic field interfering with
the compass. Such interference
may be caused by a magnetic
CB or cell phone antenna mount, a
magnetic emergency light, magnetic
note pad holder, or any other
magnetic item. Turn off the vehicle,
move the magnetic item, then turn
on the vehicle and calibrate the
compass.
Page 147 of 556
Black plate (9,1)GMC Sierra Owner Manual - 2012 - CRC - 11/15/11
Instruments and Controls 5-9
2. Press the MENU button andthen the softkey under the
Htab
to display HR, MIN, MM, DD,
YYYY (hour, minute, month, day,
and year).
3. Press the softkey located under any one of the tabs to change
that setting.
4. To increase the time or date, do one of the following:
.Press the softkey below the
selected tab.
.Press the¨SEEK button.
.Press the\FWD button.
.Turn thefknob clockwise.
5. To decrease the time or date, do one of the following:
.Press the©SEEK button.
.Press thesREV button.
.Turn thefknob
counterclockwise. To change the time default setting
from 12 hour to 24 hour or to change
the date default setting from month/
day to day/month:
1. Press the MENU button
and then the softkey under
the
Htab.
2. Press the softkey located below the forward arrow tab. 12H, 24H,
the date MM/DD (month and
day), and DD/MM (day and
month) displays.
3. Press the softkey located below the desired option.
4. Press the MENU button again to apply the desired option, or let
the screen time out.
Power Outlets
Accessory power outlets can
be used to plug in electrical
equipment, such as a cell phone,
MP3 player, etc.
The vehicle may have two
accessory power outlets located
below the climate control system,
or may have one accessory power
outlet and one cigarette lighter. The
cigarette lighter is designed to fit
only in the receptacle closest to the
driver.
There may be another accessory
power outlet in the rear cargo area.
If the vehicle has a floor console,
there is an accessory power outlet
inside the storage bin and one on
the rear of the floor console.
Remove the cover to access and
replace when not in use.
Page 148 of 556
Black plate (10,1)GMC Sierra Owner Manual - 2012 - CRC - 11/15/11
5-10 Instruments and Controls
The accessory power outlets are
powered, even when the ignition is
in LOCK/OFF. Continuing to use
power outlets while the ignition is in
LOCK/OFF may cause the vehicle's
battery to run down.
{WARNING
Power is always supplied to the
outlets. Do not leave electrical
equipment plugged in when the
vehicle is not in use because the
vehicle could catch fire and cause
injury or death.
Notice: Leaving electrical
equipment plugged in for an
extended period of time while
the vehicle is off will drain the
battery. Always unplug electrical
equipment when not in use and
do not plug in equipment that
exceeds the maximum 20 ampere
rating. Certain power accessory plugs may
not be compatible to the accessory
power outlet and could overload
vehicle or adapter fuses. If a
problem is experienced, see your
dealer.
When adding electrical equipment,
be sure to follow the proper
installation instructions included
with the equipment. See
Add-On
Electrical Equipment on page 9‑105.
Notice: Hanging heavy
equipment from the power outlet
can cause damage not covered
by the vehicle warranty. The
power outlets are designed for
accessory power plugs only, such
as cell phone charge cords.
Cigarette Lighter
To use the cigarette lighter, push it
in all the way, and let go. When it is
ready for use, the lighter pops
back out.
Notice: Holding a cigarette lighter
in while it is heating does not let
the lighter back away from the
heating element when it is hot.
Damage from overheating can
occur to the lighter or heating
element, or a fuse could be
blown. Do not hold a cigarette
lighter in while it is heating.