2012 GMC SIERRA 1500 maintenance reset
[x] Cancel search: maintenance resetPage 41 of 556
Black plate (35,1)GMC Sierra Owner Manual - 2012 - CRC - 11/15/11
In Brief 1-35
Performance and
Maintenance
StabiliTrak®System
If equipped, the vehicle has a
traction control system that limits
wheel spin and the StabiliTrak
system that assists with directional
control of the vehicle in difficult
driving conditions. Both systems
turn on automatically every time the
vehicle is started.
.To turn off traction control, press
and release
gon the instrument
panel. The appropriate DIC
message displays. See Ride
Control System Messages on
page 5‑44.
.To turn off both traction control
and StabiliTrak, press and
hold
guntilgilluminates and
the appropriate DIC message
displays. See Ride Control
System Messages on page 5‑44.
.Press and releasegagain to
turn on both systems.
For more information, see
StabiliTrak
®System on page 9‑55.
Tire Pressure Monitor
This vehicle may have a Tire
Pressure Monitor System (TPMS).
The TPMS warning light alerts you
to a significant loss in pressure of
one of the vehicle's tires. If the
warning light comes on, stop as
soon as possible and inflate the
tires to the recommended pressure
shown on the Tire and Loading
Information label. See Vehicle Load
Limits on page 9‑16. The warning
light will remain on until the tire
pressure is corrected. During cooler conditions, the low tire
pressure warning light may appear
when the vehicle is first started and
then turn off. This may be an early
indicator that the tire pressures are
getting low and the tires need to be
inflated to the proper pressure.
The TPMS does not replace normal
monthly tire maintenance. It is the
driver
’s responsibility to maintain
correct tire pressures.
See Tire Pressure Monitor System
on page 10‑60.
Engine Oil Life System
The engine oil life system calculates
engine oil life based on vehicle use
and, on most vehicles, displays a
DIC message when it is necessary
to change the engine oil and filter.
The oil life system should be reset
to 100% only following an oil
change.
Page 42 of 556
Black plate (36,1)GMC Sierra Owner Manual - 2012 - CRC - 11/15/11
1-36 In Brief
Resetting the Oil Life System
To reset the Engine Oil Life System
on most vehicles:
1. Display OIL LIFE REMAININGon the DIC. If the vehicle does
not have DIC buttons, the
vehicle must be in P (Park) to
access this display.
2. Press and hold the SET/RESET button on the DIC, or the trip
odometer reset stem if the
vehicle does not have DIC
buttons, for more than
five seconds. The oil life will
change to 100%.
On all vehicles, the Engine Oil Life
System can be reset as follows:
1. Turn the ignition to ON/RUN with the engine off.
2. Fully press the accelerator pedal slowly three times within
five seconds.
3. Display OIL LIFE REMAINING on the DIC. If the display shows
100%, the system is reset. See
Engine Oil Life System on
page 10‑10.
Fuel E85 (85% Ethanol)
Vehicles that have a FlexFuel badge
and a yellow fuel cap can use either
unleaded gasoline or ethanol fuel
containing up to 85% ethanol (E85).
See Fuel E85 (85% Ethanol) on
page 9‑71. For all other vehicles,
use only the unleaded gasoline
described under Recommended
Fuel on page 9‑68.
Driving for Better Fuel
Economy
Driving habits can affect fuel
mileage. Here are some driving
tips to get the best fuel economy
possible.
.Avoid fast starts and accelerate
smoothly.
.Brake gradually and avoid
abrupt stops.
.Avoid idling the engine for long
periods of time.
.When road and weather
conditions are appropriate, use
cruise control.
.Always follow posted speed
limits or drive more slowly when
conditions require.
.Keep vehicle tires properly
inflated.
.Combine several trips into a
single trip.
.Replace the vehicle's tires with
the same TPC Spec number
molded into the tire's sidewall
near the size.
.Follow recommended scheduled
maintenance.
Roadside Assistance
Program
U.S.: 1-888-881-3302
TTY Users (U.S.): 1-888-889-2438
Canada: 1-800-268-6800
Mexico: 01-800-466-0801
Page 172 of 556
Black plate (34,1)GMC Sierra Owner Manual - 2012 - CRC - 11/15/11
5-34 Instruments and Controls
Vehicle Information Menu
Items (with DIC Buttons)
T(Vehicle Information):Press
this button to scroll through the
following menu items:
Oil Life
Press the vehicle information
button until OIL LIFE REMAINING
displays. This display shows an
estimate of the oil's remaining useful
life. If you see 99% OIL LIFE
REMAINING on the display, that
means 99% of the current oil life
remains. The engine oil life system
will alert you to change the oil on a
schedule consistent with your
driving conditions.
When the remaining oil life is low,
the CHANGE ENGINE OIL SOON
message will appear on the display.
See “CHANGE ENGINE OIL SOON”
under Engine Oil Messages on
page 5‑42. You should change the
oil as soon as you can. See Engine
Oil on page 10‑7. In addition to the
engine oil life system monitoring the
oil life, additional maintenance is recommended in the Maintenance
Schedule in this manual. See
Maintenance Schedule on
page 11‑3
for more information.
Remember, you must reset the OIL
LIFE display after each oil change.
It will not reset itself. Also, be
careful not to reset the OIL LIFE
display accidentally at any time
other than when the oil has just
been changed. It cannot be reset
accurately until the next oil change.
To reset the engine oil life system,
see Engine Oil Life System on
page 10‑10.
Units
Press the vehicle information button
until UNITS displays. This display
allows you to select between metric
or English units of measurement.
Once in this display, press the set/
reset button to select between
METRIC or ENGLISH units. All of
the vehicle information will then
be displayed in the unit of
measurement selected. Tire Pressure
If the vehicle has the Tire Pressure
Monitor System (TPMS), the
pressure for each tire can be viewed
in the DIC. The tire pressure will be
shown in either kilopascals (kPa) or
pounds per square inch (psi). Press
the vehicle information button
until the DIC displays FRONT
TIRES kPa (PSI) LEFT ##
RIGHT ##. Press the vehicle
information button again until the
DIC displays REAR TIRES kPa
(PSI) LEFT ## RIGHT ##.
If a low tire pressure condition is
detected by the system while
driving, a message advising you to
add pressure in a specific tire will
appear in the display. See
Tire
Pressure on page 10‑58 andTire
Messages on page 5‑45 for more
information.
If the tire pressure display shows
dashes instead of a value, there
may be a problem with the vehicle.
If this consistently occurs, see your
dealer for service.
Page 176 of 556
Black plate (38,1)GMC Sierra Owner Manual - 2012 - CRC - 11/15/11
5-38 Instruments and Controls
Trailer Gain and Output
On vehicles with the Integrated
Trailer Brake Control (ITBC) system,
the trailer brake display appears in
the DIC. Press the trip odometer
reset stem until TRAILER GAIN and
OUTPUT display.
TRAILER GAIN shows the trailer
gain setting. This setting can be
adjusted from 0.0 to 10.0 with either
a trailer connected or disconnected.
OUTPUT shows the power output to
the trailer any time a trailer with
electric brakes is connected. Output
is displayed in 0 to 10 bars. Dashes
may appear in the OUTPUT display.
To adjust trailer gain see“Integrated
Trailer Brake Control System” under
Towing Equipment on page 9‑94 for
more information.
Speedometer
The speedometer shows how fast
the vehicle is moving in either
kilometers per hour (km/h) or miles
per hour (mph). The speedometer
cannot be reset. Battery
This display shows the current
battery voltage. If the voltage is in
the normal range, the value will
display. For example, the display
may read BATTERY 13 VOLTS.
Your vehicle's charging system
regulates voltage based on the state
of the battery. The battery voltage
may fluctuate when viewing this
information on the DIC. This is
normal.
Oil Pressure
This display shows the oil pressure
in either kilopascals (kPa) or pounds
per square inch (psi).
Compass Zone Setting
This display allows for setting the
compass zone. See
Compass on
page 5‑5 for more information.
Compass Recalibration
This display allows for calibrating
the compass. See Compass on
page 5‑5 for more information. Oil Life
To access this display, the vehicle
must be in P (Park). Press the trip
odometer reset stem until OIL LIFE
REMAINING displays. This display
shows an estimate of the oil's
remaining useful life. If you see
99% OIL LIFE REMAINING on the
display, that means 99% of the
current oil life remains. The engine
oil life system will alert you to
change the oil on a schedule
consistent with your driving
conditions.
When the remaining oil life is low,
the CHANGE ENGINE OIL SOON
message will appear on the display.
See
“CHANGE ENGINE OIL SOON”
under Engine Oil Messages on
page 5‑42. You should change the
oil as soon as you can. See Engine
Oil on page 10‑7. In addition to the
engine oil life system monitoring the
oil life, additional maintenance is
recommended in the Maintenance
Schedule in this manual. See
Maintenance Schedule on
page 11‑3 for more information.
Page 180 of 556
Black plate (42,1)GMC Sierra Owner Manual - 2012 - CRC - 11/15/11
5-42 Instruments and Controls
SeeOverheated Engine Protection
Operating Mode on page 10‑24 for
information on driving to a safe
place in an emergency.
ENGINE OVERHEATED STOP
ENGINE
This message displays and a
chime may sound if the engine
cooling system reaches unsafe
temperatures for operation. Stop
and turn off the vehicle as soon as
it is safe to do so to avoid severe
damage. This message clears when
the engine has cooled to a safe
operating temperature.
Engine Oil Messages
CHANGE ENGINE OIL SOON
This message displays when the
engine oil needs to be changed.
When you change the engine oil, be
sure to reset the CHANGE ENGINE
OIL SOON message. See Engine
Oil Life System on page 10‑10 for
information on how to reset the
message. See Engine Oil on page 10‑7
andMaintenance
Schedule on page 11‑3 for more
information.
ENGINE OIL HOT IDLE
ENGINE
This message displays when the
engine oil becomes hotter than the
normal operating temperature. Stop
and allow the vehicle to idle until it
cools down. See Engine Coolant
Temperature Gauge on page 5‑16.
OIL PRESSURE LOW STOP
ENGINE
Notice: If you drive the vehicle
while the engine oil pressure is
low, severe engine damage may
occur. If a low oil pressure
warning appears on the Driver
Information Center (DIC), stop the
vehicle as soon as possible. Do
not drive the vehicle until the
cause of the low oil pressure is
corrected. See Engine Oil on
page 10‑7 for more information. This message displays if low oil
pressure levels occur. Stop the
vehicle as soon as safely possible
and do not operate it until the cause
of the low oil pressure has been
corrected. Check the oil as soon
as possible and have the vehicle
serviced by your dealer. See
Engine
Oil on page 10‑7.
Engine Power Messages
ENGINE POWER IS REDUCED
This message displays and a chime
may sound when the cooling system
temperature gets too hot and the
engine further enters the engine
coolant protection mode. See
Engine Overheating on page 10‑22
for more information.
This message also displays when
the vehicle's engine power is
reduced. Reduced engine power
can affect the vehicle's ability to
accelerate. If this message is
on, but there is no reduction in
performance, proceed to your
destination. The performance may
Page 397 of 556
Black plate (11,1)GMC Sierra Owner Manual - 2012 - CRC - 11/15/11
Vehicle Care 10-11
On all vehicles, the Engine Oil Life
System can be reset as follows:
1. Turn the ignition to ON/RUN withthe engine off.
2. Fully press the accelerator pedal slowly three times within
five seconds.
3. Display the OIL LIFE REMAINING on the DIC.
If the display shows 100%, the
system is reset. See Driver
Information Center (DIC) on
page 5‑30.
If the vehicle has a CHANGE
ENGINE OIL SOON message and it
comes back on when the vehicle
is started and/or the OIL LIFE
REMAINING is near 0%, the engine
oil life system has not been reset.
Repeat the procedure.Automatic Transmission
Fluid (4-Speed
Transmission)
When to Check and Change
Automatic Transmission Fluid
A good time to check the automatic
transmission fluid level is when the
engine oil is changed.
Change the fluid and filter at the
intervals listed in Maintenance
Schedule on page 11‑3 and be
sure to use the transmission fluid
listed in Recommended Fluids and
Lubricants on page 11‑12.
How to Check Automatic
Transmission Fluid
Because this operation can be a
little difficult, it may be best to have
this done at the dealer service
department.
If not taken to the dealer, be sure to
follow all the instructions here or a
false reading on the dipstick could
result. Notice:
Too much or too
little fluid can damage the
transmission. Too much can
mean that some of the fluid could
come out and fall on hot engine
parts or exhaust system parts,
starting a fire. Too little fluid
could cause the transmission
to overheat. Be sure to get an
accurate reading if checking the
transmission fluid.
Wait at least 30 minutes before
checking the transmission fluid level
if you have been driving:
.When outside temperatures are
above 32°C (90°F).
.At high speed for quite a while.
.In heavy traffic —especially in
hot weather.
.While pulling a trailer.
To get the right reading, the fluid
should be at normal operating
temperature, which is 82°C to 93°C
(180°F to 200°F).
Page 400 of 556
Black plate (14,1)GMC Sierra Owner Manual - 2012 - CRC - 11/15/11
10-14 Vehicle Care
Automatic Transmission
Fluid (6-Speed
Transmission)
When to Check and Change
Automatic Transmission Fluid
It is usually not necessary to check
the transmission fluid level. The
only reason for fluid loss is a
transmission leak or overheated
transmission. If a small leak is
suspected, then use the following
checking procedures to check the
fluid level. However, if there is a
large leak, then it may be necessary
to have the vehicle towed to a
dealer service department and have
it repaired before driving the vehicle
further.
Notice:Use of the incorrect
automatic transmission fluid
may damage the vehicle, and the
damages may not be covered by
the vehicle warranty. Always use
the automatic transmission fluid
listed in Recommended Fluids
and Lubricants on page 11‑12. Change the fluid and filter at the
scheduled maintenance intervals
listed in
Maintenance Schedule on
page 11‑3. Be sure to use the
transmission fluid listed in
Recommended Fluids and
Lubricants on page 11‑12.How to Check Automatic
Transmission Fluid
Notice: Too much or too
little fluid can damage the
transmission. Too much can
mean that some of the fluid could
come out and fall on hot engine
parts or exhaust system parts,
starting a fire. Too little fluid
could cause the transmission
to overheat. Be sure to get an
accurate reading if checking the
transmission fluid. Before checking the fluid level,
prepare the vehicle as follows:
1. Start the engine and park the
vehicle on a level surface. Keep
the engine running.
2. Apply the parking brake and place the shift lever in P (Park).
3. With your foot on the brake pedal, move the shift lever
through each gear range,
pausing for about three seconds
in each range. Then, move the
shift lever back to P (Park).
4. Allow the engine to idle (500 –800 rpm) for at least
1 minute. Slowly release the
brake pedal.
5. Keep the engine running and press the Trip/Fuel button or
trip odometer reset stem until
TRANS TEMP (Transmission
Temperature) displays on the
Driver Information Center (DIC).
Page 423 of 556
Black plate (37,1)GMC Sierra Owner Manual - 2012 - CRC - 11/15/11
Vehicle Care 10-37
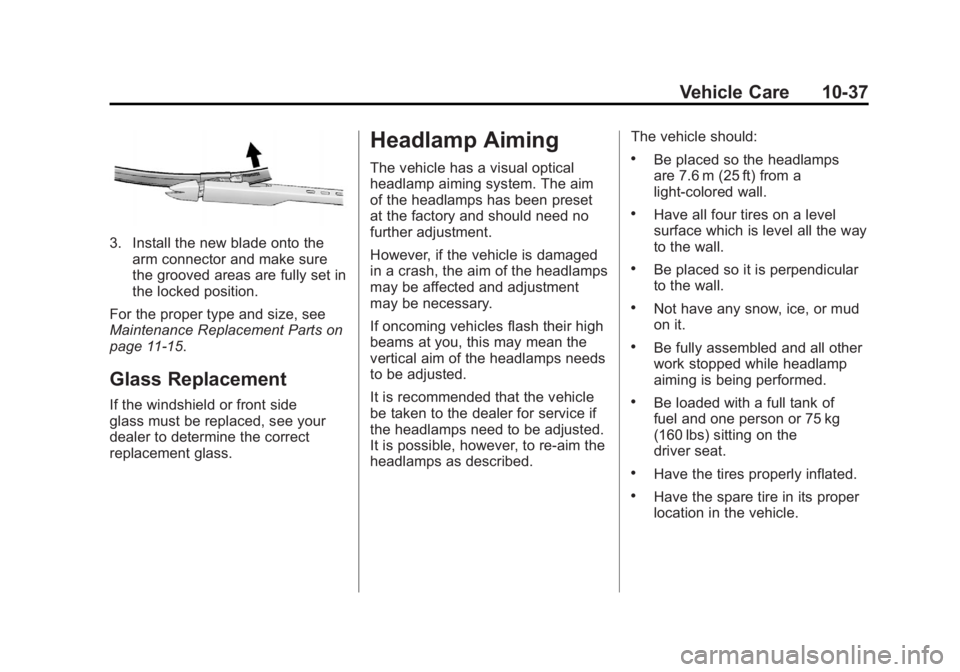
3. Install the new blade onto thearm connector and make sure
the grooved areas are fully set in
the locked position.
For the proper type and size, see
Maintenance Replacement Parts on
page 11‑15.
Glass Replacement
If the windshield or front side
glass must be replaced, see your
dealer to determine the correct
replacement glass.
Headlamp Aiming
The vehicle has a visual optical
headlamp aiming system. The aim
of the headlamps has been preset
at the factory and should need no
further adjustment.
However, if the vehicle is damaged
in a crash, the aim of the headlamps
may be affected and adjustment
may be necessary.
If oncoming vehicles flash their high
beams at you, this may mean the
vertical aim of the headlamps needs
to be adjusted.
It is recommended that the vehicle
be taken to the dealer for service if
the headlamps need to be adjusted.
It is possible, however, to re-aim the
headlamps as described. The vehicle should:.Be placed so the headlamps
are 7.6 m (25 ft) from a
light‐colored wall.
.Have all four tires on a level
surface which is level all the way
to the wall.
.Be placed so it is perpendicular
to the wall.
.Not have any snow, ice, or mud
on it.
.Be fully assembled and all other
work stopped while headlamp
aiming is being performed.
.Be loaded with a full tank of
fuel and one person or 75 kg
(160 lbs) sitting on the
driver seat.
.Have the tires properly inflated.
.Have the spare tire in its proper
location in the vehicle.