2011 Peugeot Partner Owner's Manual - RHD (UK, Australia)
-
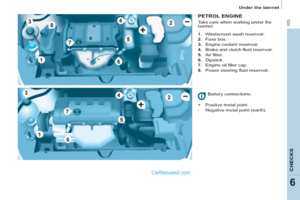
 1
1 -
 2
2 -
 3
3 -
 4
4 -
 5
5 -
 6
6 -
 7
7 -
 8
8 -
 9
9 -
 10
10 -
 11
11 -
 12
12 -
 13
13 -
 14
14 -
 15
15 -
 16
16 -
 17
17 -
 18
18 -
 19
19 -
 20
20 -
 21
21 -
 22
22 -
 23
23 -
 24
24 -
 25
25 -
 26
26 -
 27
27 -
 28
28 -
 29
29 -
 30
30 -
 31
31 -
 32
32 -
 33
33 -
 34
34 -
 35
35 -
 36
36 -
 37
37 -
 38
38 -
 39
39 -
 40
40 -
 41
41 -
 42
42 -
 43
43 -
 44
44 -
 45
45 -
 46
46 -
 47
47 -
 48
48 -
 49
49 -
 50
50 -
 51
51 -
 52
52 -
 53
53 -
 54
54 -
 55
55 -
 56
56 -
 57
57 -
 58
58 -
 59
59 -
 60
60 -
 61
61 -
 62
62 -
 63
63 -
 64
64 -
 65
65 -
 66
66 -
 67
67 -
 68
68 -
 69
69 -
 70
70 -
 71
71 -
 72
72 -
 73
73 -
 74
74 -
 75
75 -
 76
76 -
 77
77 -
 78
78 -
 79
79 -
 80
80 -
 81
81 -
 82
82 -
 83
83 -
 84
84 -
 85
85 -
 86
86 -
 87
87 -
 88
88 -
 89
89 -
 90
90 -
 91
91 -
 92
92 -
 93
93 -
 94
94 -
 95
95 -
 96
96 -
 97
97 -
 98
98 -
 99
99 -
 100
100 -
 101
101 -
 102
102 -
 103
103 -
 104
104 -
 105
105 -
 106
106 -
 107
107 -
 108
108 -
 109
109 -
 110
110 -
 111
111 -
 112
112 -
 113
113 -
 114
114 -
 115
115 -
 116
116 -
 117
117 -
 118
118 -
 119
119 -
 120
120 -
 121
121 -
 122
122 -
 123
123 -
 124
124 -
 125
125 -
 126
126 -
 127
127 -
 128
128 -
 129
129 -
 130
130 -
 131
131 -
 132
132 -
 133
133 -
 134
134 -
 135
135 -
 136
136 -
 137
137 -
 138
138 -
 139
139 -
 140
140 -
 141
141 -
 142
142 -
 143
143 -
 144
144 -
 145
145 -
 146
146 -
 147
147 -
 148
148 -
 149
149 -
 150
150 -
 151
151 -
 152
152 -
 153
153 -
 154
154 -
 155
155 -
 156
156 -
 157
157 -
 158
158 -
 159
159 -
 160
160 -
 161
161 -
 162
162 -
 163
163 -
 164
164 -
 165
165 -
 166
166 -
 167
167 -
 168
168 -
 169
169 -
 170
170 -
 171
171 -
 172
172 -
 173
173 -
 174
174 -
 175
175 -
 176
176 -
 177
177 -
 178
178 -
 179
179 -
 180
180 -
 181
181 -
 182
182 -
 183
183 -
 184
184 -
 185
185 -
 186
186 -
 187
187 -
 188
188 -
 189
189 -
 190
190 -
 191
191 -
 192
192 -
 193
193 -
 194
194 -
 195
195 -
 196
196 -
 197
197 -
 198
198 -
 199
199
 111
QUICK HEL
P
7
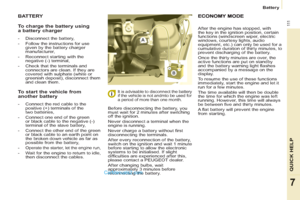
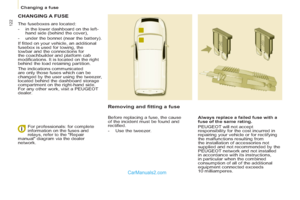
BATTERY
Before disconnecting the battery, you
must wait for 2 minutes after switching
off the ignition.
Never disconnect a terminal when the
engine is running.
Never cha")
 11 2
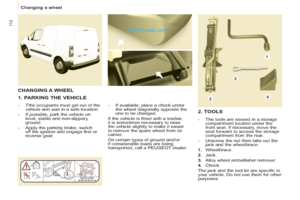
Changing a wheel
1. PARKING THE VEHICLE
- Tthe occupants must get out of the
vehicle and wait in a safe location.
- If possible, park the vehicle on
level, stable")
 11 3
QUICK HEL
P
7
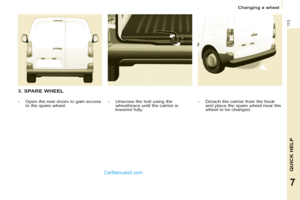
Changing a wheel
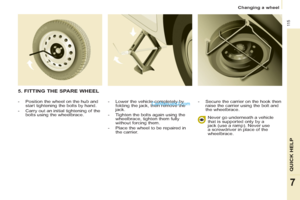
3. SPARE WHEEL
- Detach the carrier from the hook
and place the spare wheel near the
wheel to be changed.
- Unscrew the bolt using the
wh")
 11 4
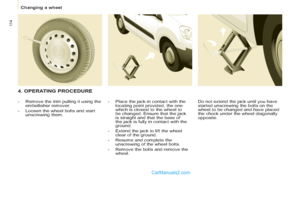
4. OPERATING PROCEDURE
- Place the jack in contact with the
locating point provided, the one
which is closest to the wheel to
be changed. Ensure that the jack
is straight and that")
 11 5
QUICK HEL
P
7
Changing a wheel
- Lower the vehicle completely by
folding the jack, then remove the
jack.
- Tighten the bolts again using the
wheelbrace, tighten them fully
wit")
 11 6
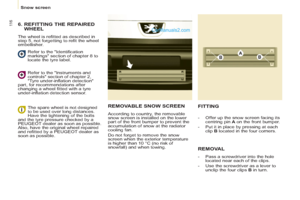
Snow screen
REMOVABLE SNOW SCREEN
According to country, the removable
snow screen is installed on the lower
part of the front bumper to prevent the
accumulation of snow at the radiator")
 11 7
QUICK HEL
P
7
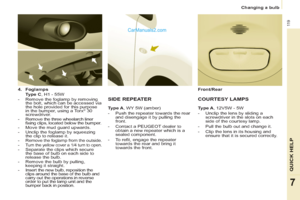
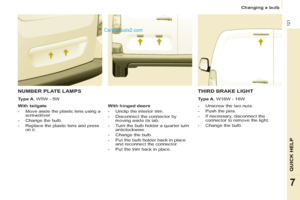
Changing a bulb
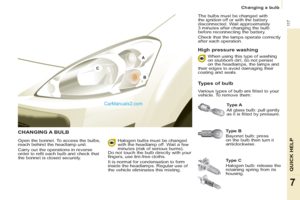
CHANGING A BULB
Type B
Bayonet bulb: press
on the bulb then turn it
anticlockwise.
Type A
All glass bulb: pull gently
as it is fi tted by p")
 11 8
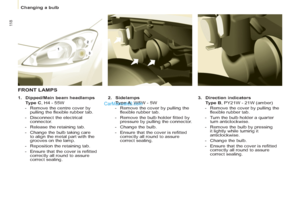
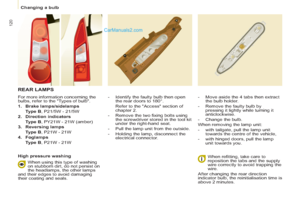
Changing a bulb
3.
Direction indicators
Type B
, PY21W - 21W (amber)
- Remove the cover by pulling the
fl exible rubber tab.
- Turn the bulb holder a qu")