2011 NISSAN TIIDA brake fluid
[x] Cancel search: brake fluidPage 954 of 3787
![NISSAN TIIDA 2011 Service Repair Manual TROUBLE DIAGNOSISBRC-65
< SERVICE INFORMATION > [VDC/TCS/ABS]
C
D
E
G H
I
J
K L
M A
B
BRC
N
O P
× : Applicable
–: Not applicable
ACTIVE TEST
CAUTION:
• Do not perform active test while driving v](/manual-img/5/57396/w960_57396-953.png "NISSAN TIIDA 2011 Service Repair Manual TROUBLE DIAGNOSISBRC-65
< SERVICE INFORMATION > [VDC/TCS/ABS]
C
D
E
G H
I
J
K L
M A
B
BRC
N
O P
× : Applicable
–: Not applicable
ACTIVE TEST
CAUTION:
• Do not perform active test while driving v")
TROUBLE DIAGNOSISBRC-65
< SERVICE INFORMATION > [VDC/TCS/ABS]
C
D
E
G H
I
J
K L
M A
B
BRC
N
O P
× : Applicable
–: Not applicable
ACTIVE TEST
CAUTION:
• Do not perform active test while driving vehicle.
• Make sure to completely bleed air from brake system.
• The active test cannot be performed with the AB S warning lamp, VDC indicator lamp, SLIP indicator
lamp or brake warning lamp on.
• ABS warning lamp, VDC OFF indicator lamp, SLIP indicator lamp and brake warning lamp are on
during active test.
NOTE:
• When active test is performed while depressing the pedal, the pedal depression amount will change. This is
normal. (Only solenoid valve and ABS motor)
• “TEST IS STOPPED” is displayed 10 seconds after operation start.
• After “TEST IS STOPPED” is displayed, to perform test again, touch BACK.
Test Item
SOLENOID VALVE• When performing an active test of the ABS function, select “MAIN SIGNALS” for each test item.
• For ABS solenoid valve, touch “Up”, “Keep”, and “Dow n” on the display screen. For ABS solenoid valve
(ACT), touch “Up”, “ACT UP ”, “ACT KEEP” and confirm that solenoid valves operate as shown in the table
below.
VDC FAIL SIG
(On/Off) ——
×VDC fail signal (On/Off) status is displayed.
CRANKING SIG
(On/Off) ——
×Cranking condition (On/Off) status is displayed.
FLUID LEV SW
(On/Off) ×
— ×Brake fluid level switch (On/Off) status is dis-
played.
PARK BRAKE SW
(On/Off) ×
— ×Parking brake switch (On/Off) status is displayed.
USV[FL-RR]
(On/Off) ——
×Primary side USV solenoid valve (On/Off) status is
displayed.
USV[FR-RL]
(On/Off) ——
×Secondary side USV solenoid valve (On/Off) sta-
tus is displayed.
HSV[FL-RR]
(On/Off) ——
×Primary side HSV solenoid valve (On/Off) status is
displayed.
HSV[FR-RL]
(On/Off) ——
×Secondary side HSV solenoid valve (On/Off) sta-
tus is displayed.
V/R OUTPUT
(On/Off) ——
×Valve relay operation signal (On/Off) status is dis-
played.
M/R OUTPUT
(On/Off) ——
×Motor relay operation signal (On/Off) status is dis-
played.
ENGINE RPM
(rpm) ×
— ×Engine speed judged by CAN communication sig-
nal is displayed.
Operation ABS solenoid va
lve ABS solenoid valve (ACT)
Up Keep Down Up ACT UP ACT KEEP
FR RH SOL FR RH IN SOL Off On On — —
—
FR RH OUT SOL Off Off On* — — —
USV [FR-RL] Off Off On* — — —
HSV [FR-RL] Off Off On* — — —
Revision: May 2010 2011 Versa
Page 965 of 3787
![NISSAN TIIDA 2011 Service Repair Manual BRC-76
< SERVICE INFORMATION >[VDC/TCS/ABS]
TROUBLE DIAGNOSIS FOR
SELF-DIAGNOSTIC ITEMS
OK or NG
OK >> Check the battery for loose terminals, low voltage, etc. Repair as necessary.
NG >> Repair the c](/manual-img/5/57396/w960_57396-964.png "NISSAN TIIDA 2011 Service Repair Manual BRC-76
< SERVICE INFORMATION >[VDC/TCS/ABS]
TROUBLE DIAGNOSIS FOR
SELF-DIAGNOSTIC ITEMS
OK or NG
OK >> Check the battery for loose terminals, low voltage, etc. Repair as necessary.
NG >> Repair the c")
BRC-76
< SERVICE INFORMATION >[VDC/TCS/ABS]
TROUBLE DIAGNOSIS FOR
SELF-DIAGNOSTIC ITEMS
OK or NG
OK >> Check the battery for loose terminals, low voltage, etc. Repair as necessary.
NG >> Repair the circuit.
Brake Fluid Level Switch System InspectionINFOID:0000000005928493
INSPECTION PROCEDURE
1.SELF-DIAGNOSIS RESULT CHECK
1. Check the brake reservoir tank fluid level. If the level is low, add brake fluid.
2. Erase the self-diagnosis results and check the self-diagnosis results.
Is the above displayed in the self-diagnosis display items?
YES >> GO TO 2.
NO >> Inspection End.
2.CONNECTOR INSPECTION
1. Disconnect the ABS actuator and electric unit (cont rol unit) and brake fluid level switch connectors.
2. Check the terminals for deformati on, disconnection, looseness or damage.
OK or NG
OK >> GO TO 3.
NG >> Repair or replace as necessary.
3.CHECK BRAKE FLUID LEVEL SWITCH
1. Turn ignition switch OFF.
2. Check continuity between brake fluid level switch terminals 1 and 2.
Is the inspection result normal?
YES >> GO TO 4
NO >> Replace brake fluid level switch.
4.CHECK BRAKE FLUID LEVEL SWITCH HARNESS
1. Disconnect combination meter connector.
2. Check continuity between combination meter connector M24 (A) terminal 25 and brake fluid level switch connector E40 (B) termi-
nal 1.
3. Check continuity between combination meter connector M24 (A) terminal 25 and ground.
Is the inspection result normal?
Power supply 2
—Battery voltage (Approx. 12V)
3
Ground 1
Continuity should exist.
4
Self-diagnosis results
BR FLUID LEVEL LOW
Brake fluid level switch terminals ConditionContinuity
1— 2 Brake fluid reservoir full No
Brake fluid reservoir empty Yes
AWFIA0621ZZ
25 - 1 : Continuity should exist.
25 - Ground : Continuity should not exist.
AWFIA0622ZZ
Revision: May 2010 2011 Versa
Page 966 of 3787
![NISSAN TIIDA 2011 Service Repair Manual TROUBLE DIAGNOSIS FOR SELF-DIAGNOSTIC ITEMS
BRC-77
< SERVICE INFORMATION > [VDC/TCS/ABS]
C
D
E
G H
I
J
K L
M A
B
BRC
N
O P
YES >> GO TO 5
NO >> Repair or replace malfunctioning components.
5.CHECK BRA](/manual-img/5/57396/w960_57396-965.png "NISSAN TIIDA 2011 Service Repair Manual TROUBLE DIAGNOSIS FOR SELF-DIAGNOSTIC ITEMS
BRC-77
< SERVICE INFORMATION > [VDC/TCS/ABS]
C
D
E
G H
I
J
K L
M A
B
BRC
N
O P
YES >> GO TO 5
NO >> Repair or replace malfunctioning components.
5.CHECK BRA")
TROUBLE DIAGNOSIS FOR SELF-DIAGNOSTIC ITEMS
BRC-77
< SERVICE INFORMATION > [VDC/TCS/ABS]
C
D
E
G H
I
J
K L
M A
B
BRC
N
O P
YES >> GO TO 5
NO >> Repair or replace malfunctioning components.
5.CHECK BRAKE FLUID LEVE L SWITCH GROUND CIRCUIT
Check continuity between brake fluid level switch connector E40 (B)
terminal 2 and ground.
Is the inspection result normal?
YES >> Inspection End.
NO >> • Repair or replace malfunctioning components. • Perform the self-diagnosis, and make sure that the
result shows ″NO DTC IS DETECTED ″.
Pressure Sensor System InspectionINFOID:0000000005928494
INSPECTION PROCEDURE
1.SELF-DIAGNOSIS RESULT CHECK
Check the self-diagnosis results.
Is the above displayed in the self-diagnosis display items?
YES >> GO TO 2.
NO >> Inspection End.
2.CONNECTOR INSPECTION
1. Turn ignition switch OFF.
2. Disconnect ABS actuator and elec tric unit (control unit) connector and stop lamp switch connector.
3. Check terminals for deformation, disconnection, looseness and damage. If any malfunction is found, repair or replace terminals.
4. Reconnect connectors securely.
5. Start engine.
6. Pump brake pedal carefully several times, and perform self-diagnosis.
Is the inspection result normal?
YES >> GO TO 3
NO >> Poor connection of connector terminal. Repair or replace connector.
3.CHECK STOP LAMP SWITCH 2 - Ground : Continuity should exist.
AWFIA0623ZZ
Self-diagnosis results
PRESS SEN CIRCUIT
Revision: May 2010 2011 Versa
Page 967 of 3787
![NISSAN TIIDA 2011 Service Repair Manual BRC-78
< SERVICE INFORMATION >[VDC/TCS/ABS]
TROUBLE DIAGNOSIS FOR
SELF-DIAGNOSTIC ITEMS
1. Turn ignition switch OFF.
2. Disconnect stop lamp switch connector.
3. Check continuity between stop lamp sw](/manual-img/5/57396/w960_57396-966.png "NISSAN TIIDA 2011 Service Repair Manual BRC-78
< SERVICE INFORMATION >[VDC/TCS/ABS]
TROUBLE DIAGNOSIS FOR
SELF-DIAGNOSTIC ITEMS
1. Turn ignition switch OFF.
2. Disconnect stop lamp switch connector.
3. Check continuity between stop lamp sw")
BRC-78
< SERVICE INFORMATION >[VDC/TCS/ABS]
TROUBLE DIAGNOSIS FOR
SELF-DIAGNOSTIC ITEMS
1. Turn ignition switch OFF.
2. Disconnect stop lamp switch connector.
3. Check continuity between stop lamp switch (A) (without M/T) or
(B) (with M/T) terminals 1 and 2.
Is the inspection result normal?
YES >> GO TO 4
NO >> Replace stop lamp switch.
4.CHECK STOP LAMP SWITCH CIRCUIT
1. Disconnect ABS actuator and elec tric unit (control unit) connec-
tor.
2. Connect stop lamp switch connector.
3. Check voltage between ABS actuator and electric unit (control
unit) connector E33 terminal 20 and ground.
Is the inspection result normal?
YES >> GO TO 5
NO >> Repair or replace malfunctioning components.
5.CHECK DATA MONITOR
On “DATA MONITOR”, select “PRESS SENS OR” and check the brake fluid pressure.
Is the inspection result normal?
YES >> Replace ABS actuator and electric unit (control unit). Refer to BRC-89, "Removal and Installa-
tion".
NO >> Inspection End.
Transmission Range Switch System InspectionINFOID:0000000005928495
INSPECTION PROCEDURE
1.SELF-DIAGNOSIS RESULT CHECK
Stop lamp switch terminals ConditionContinuity
1 − 2 Brake pedal depressed
Yes
Brake pedal released No
AWFIA0609ZZ
ABS actuator and elec-
tric unit (control unit) Ground Condition Vol tag e
(Approx.)
Connector Terminal
E33 20 — Brake pedal depressed Battery voltage
Brake pedal released 0V
ALFIA0016ZZ
Condition PRESS SENSOR
(DATA MONITOR)
With ignition switch turned ON and brake pedal released. Approx. 0 bar
With ignition switch turned ON and brake pedal depressed. − 40 to 300 bar
Revision: May 2010 2011 Versa
Page 968 of 3787
![NISSAN TIIDA 2011 Service Repair Manual TROUBLE DIAGNOSIS FOR SELF-DIAGNOSTIC ITEMS
BRC-79
< SERVICE INFORMATION > [VDC/TCS/ABS]
C
D
E
G H
I
J
K L
M A
B
BRC
N
O P
Check the self-diagnosis results.
Is the above displayed in the self-diagnosi](/manual-img/5/57396/w960_57396-967.png "NISSAN TIIDA 2011 Service Repair Manual TROUBLE DIAGNOSIS FOR SELF-DIAGNOSTIC ITEMS
BRC-79
< SERVICE INFORMATION > [VDC/TCS/ABS]
C
D
E
G H
I
J
K L
M A
B
BRC
N
O P
Check the self-diagnosis results.
Is the above displayed in the self-diagnosi")
TROUBLE DIAGNOSIS FOR SELF-DIAGNOSTIC ITEMS
BRC-79
< SERVICE INFORMATION > [VDC/TCS/ABS]
C
D
E
G H
I
J
K L
M A
B
BRC
N
O P
Check the self-diagnosis results.
Is the above displayed in the self-diagnosis display items?
YES >> GO TO 2.
NO >> Inspection End.
2.CONNECTOR INSPECTION
1. Disconnect the ABS actuator and el ectric unit (control unit) and brake fluid level switch connectors.
2. Check the terminals for deformation, disconnection, looseness or damage.
OK or NG
OK >> GO TO 3.
NG >> Repair or replace as necessary.
3.CHECK TRANSMISSION RANGE SWITCH
Perform transmission range switch inspection. Refer to AT-94, "
Component Inspection" (with A/T) or CVT-65,
"Component Inspection" (with CVT).
Is the inspection result normal?
YES >> Replace ABS actuator and electr ic unit (control unit). Refer to BRC-89, "Removal and Installa-
tion".
NO >> Repair or replace malfunctioning components.
CAN Communication System InspectionINFOID:0000000005928496
INSPECTION PROCEDURE
1.SELF-DIAGNOSIS RESULT CHECK
Check the self-diagnosis results.
Is the above displayed in the self-diagnosis display items?
YES >> GO TO 2.
NO >> Inspection End.
2.CHECK CONNECTOR
1. Disconnect the ABS actuator and electric unit (control unit) connector, and check the terminals for defor- mation, disconnection, looseness, and so on. If there is a malfunction, repair or replace the terminals.
2. Reconnect connector to perform self-diagnosis. Refer to BRC-60, "
CONSULT-III Function (ABS)".
Is
“CAN COMM CIRCUIT” displayed in the self-diagnosis display items?
YES >> Refer to LAN-17, "Trouble Diagnosis Flow Chart".
NO >> Connector terminal connection is loose, damaged, open, or shorted.
Component InspectionINFOID:0000000005928497
VDC OFF SWITCH
Self-diagnosis results
PNP POS SIG
Self-diagnosis results
ST ANG SEN COM CIR CAN COMM CIRCUIT
Revision: May 2010 2011 Versa
Page 970 of 3787
![NISSAN TIIDA 2011 Service Repair Manual TROUBLE DIAGNOSES FOR SYMPTOMSBRC-81
< SERVICE INFORMATION > [VDC/TCS/ABS]
C
D
E
G H
I
J
K L
M A
B
BRC
N
O P
TROUBLE DIAGNOSES FOR SYMPTOMS
ABS Works FrequentlyINFOID:0000000005928498
1.CHECK WARNING](/manual-img/5/57396/w960_57396-969.png "NISSAN TIIDA 2011 Service Repair Manual TROUBLE DIAGNOSES FOR SYMPTOMSBRC-81
< SERVICE INFORMATION > [VDC/TCS/ABS]
C
D
E
G H
I
J
K L
M A
B
BRC
N
O P
TROUBLE DIAGNOSES FOR SYMPTOMS
ABS Works FrequentlyINFOID:0000000005928498
1.CHECK WARNING")
TROUBLE DIAGNOSES FOR SYMPTOMSBRC-81
< SERVICE INFORMATION > [VDC/TCS/ABS]
C
D
E
G H
I
J
K L
M A
B
BRC
N
O P
TROUBLE DIAGNOSES FOR SYMPTOMS
ABS Works FrequentlyINFOID:0000000005928498
1.CHECK WARNING LAMP ACTIVATION
Make sure warning lamp remains off while driving.
OK or NG
OK >> GO TO 2.
NG >> Carry out self-diagnosis. Refer to BRC-60, "
CONSULT-III Function (ABS)".
2.CHECK WHEEL SENSORS
Check the following.
• Wheel sensor mounting for looseness
• Wheel sensors for physical damage
• Wheel sensor connectors for terminal damage or loose connections
OK or NG
OK >> GO TO 3.
NG >> Repair as necessary.
3.CHECK WHEEL BEARINGS
Check wheel bearing axial end play. Refer to FA X - 6 , "
On-Vehicle Inspection and Service" or RAX-6, "On-Vehi-
cle Inspection and Service".
OK or NG
OK >> GO TO 4.
NG >> Repair as necessary.
4.CHECK BRAKE FLUID PRESSURE
Check brake fluid pressure distribution.
Refer to BR-9, "
On Board Inspection".
Is brake fluid pressure distribution normal?
YES >> Inspection End.
NO >> Perform Basic Inspection. Refer to BRC-56, "
Basic Inspection".
Unexpected Pedal ActionINFOID:0000000005928499
1.CHECK WARNING LAMP ACTIVATION
Make sure warning lamp remains off while driving.
OK or NG
OK >> GO TO 2.
NG >> Carry out self-diagnosis. Refer to BRC-60, "
CONSULT-III Function (ABS)".
2.CHECK BRAKE PEDAL STROKE
Check brake pedal stroke.
Is pedal stroke excessive?
YES >> Perform Basic Inspection. Refer to BRC-56, "Basic
Inspection".
NO >> GO TO 3.
SBR540A
Revision: May 2010 2011 Versa
Page 984 of 3787
PRECAUTIONSCL-3
< SERVICE INFORMATION >
DE
F
G H
I
J
K L
M A
B
CL
N
O P
5. When the repair work is completed, return the ignition switch to the ″LOCK ″ position before connecting
the battery cables. (At this time, the steering lock mechanism will engage.)
6. Perform a self-diagnosis check of al l control units using CONSULT-III.
Precaution for Procedure without Cowl Top CoverINFOID:0000000005928989
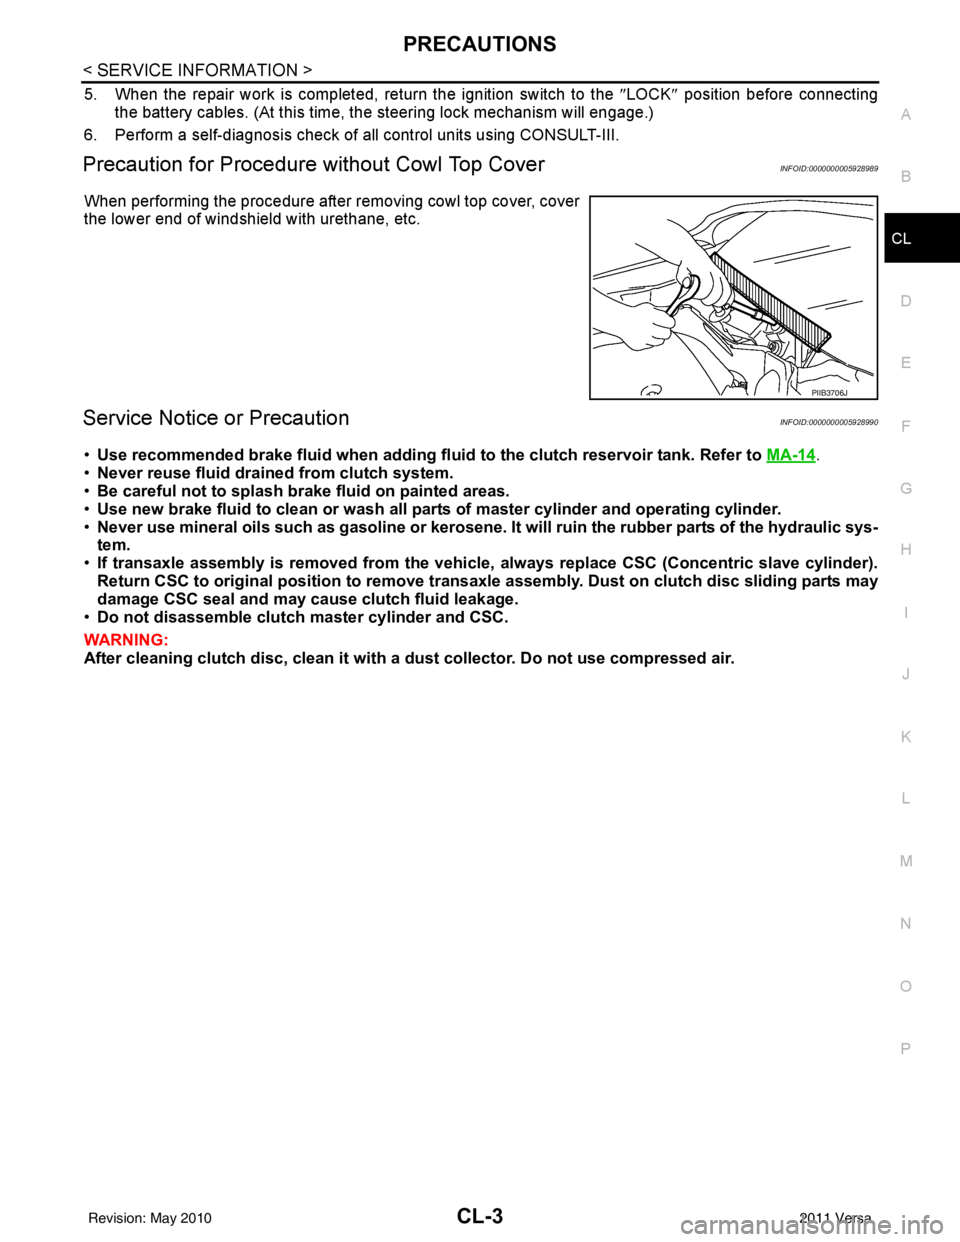
When performing the procedure after removing cowl top cover, cover
the lower end of windshield with urethane, etc.
Service Notice or PrecautionINFOID:0000000005928990
•Use recommended brake fluid when adding fluid to the clutch reservoir tank. Refer to MA-14.
• Never reuse fluid drained from clutch system.
• Be careful not to splash brake fluid on painted areas.
• Use new brake fluid to clean or wash all part s of master cylinder and operating cylinder.
• Never use mineral oils such as gasoline or kerosene. It will ruin the rubber parts of the hydraulic sys-
tem.
• If transaxle assembly is removed from the vehicle, always replace CSC (Con centric slave cylinder).
Return CSC to original position to remove transaxle assembly. Dust on clutch disc sliding parts may
damage CSC seal and may cause clutch fluid leakage.
• Do not disassemble clutch master cylinder and CSC.
WARNING:
After cleaning clutch disc, cl ean it with a dust collector. Do not use compressed air.
PIIB3706J
Revision: May 2010 2011 Versa
Page 1042 of 3787
![NISSAN TIIDA 2011 Service Repair Manual CO-42
< SERVICE INFORMATION >[MR18DE]
RADIATOR
• Warm up engine thoroughly to make sure there is no leakage of fuel, exhaust gas, or any oils/fluids including
engine oil and engine coolant.
• Blee](/manual-img/5/57396/w960_57396-1041.png "NISSAN TIIDA 2011 Service Repair Manual CO-42
< SERVICE INFORMATION >[MR18DE]
RADIATOR
• Warm up engine thoroughly to make sure there is no leakage of fuel, exhaust gas, or any oils/fluids including
engine oil and engine coolant.
• Blee")
CO-42
< SERVICE INFORMATION >[MR18DE]
RADIATOR
• Warm up engine thoroughly to make sure there is no leakage of fuel, exhaust gas, or any oils/fluids including
engine oil and engine coolant.
• Bleed air from passages in lines and hoses, such as in cooling system.
• After cooling down engine, again check oil/fluid levels including engine oil and engine coolant. Refill to spec-
ified level, if necessary.
• Summary of the inspection items:
*Power steering fluid, brake fluid, etc. Item
Before starting engine Engine runningAfter engine stopped
Engine coolant LevelLeakage Level
Engine oil LevelLeakage Level
Transmission/
transaxle fluid A/T and CVT Models
LeakageLevel/Leakage Leakage
M/T Models Level/Leakage LeakageLevel/Leakage
Other oils and fluids* LevelLeakage Level
Fuel LeakageLeakage Leakage
Exhaust gas —Leakage —
Revision: May 2010 2011 Versa